IContents
I
© 2009 XT Racing
Table of Contents
Part I GPX Pro 1
................................................................................................................................... 11 Circuit Racing Mode
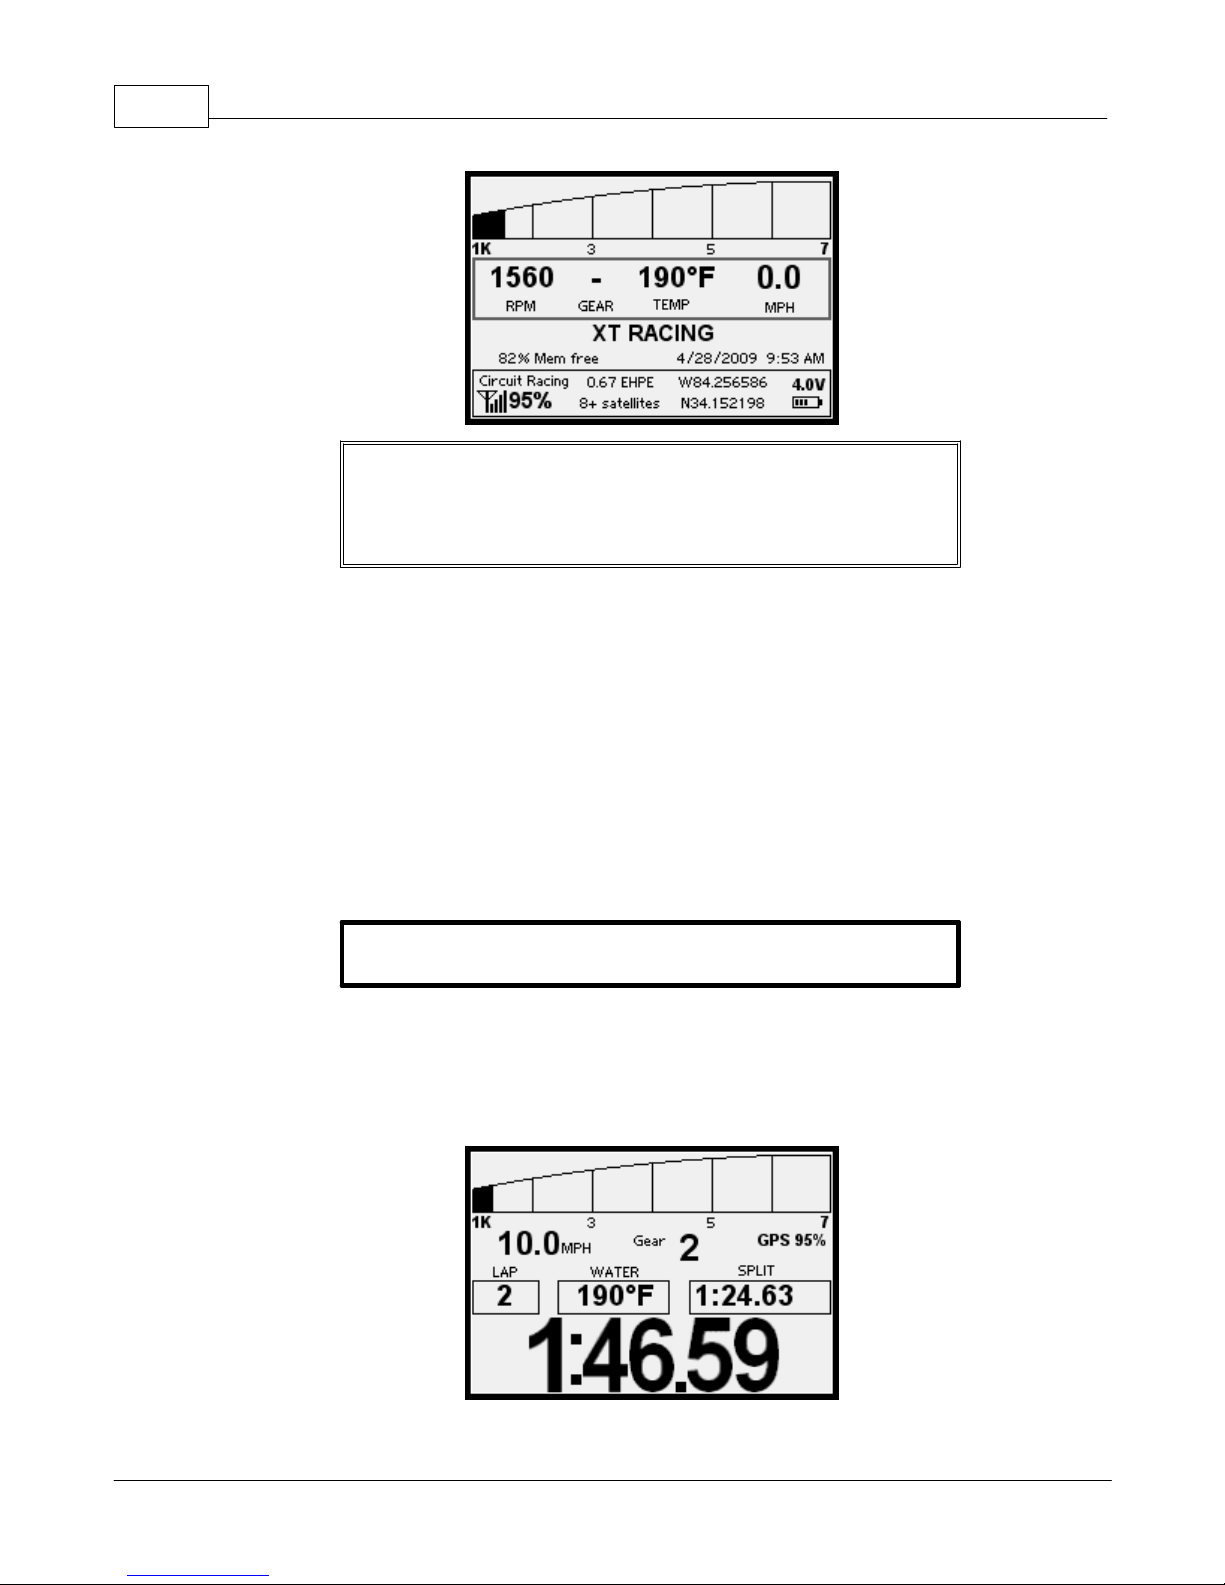
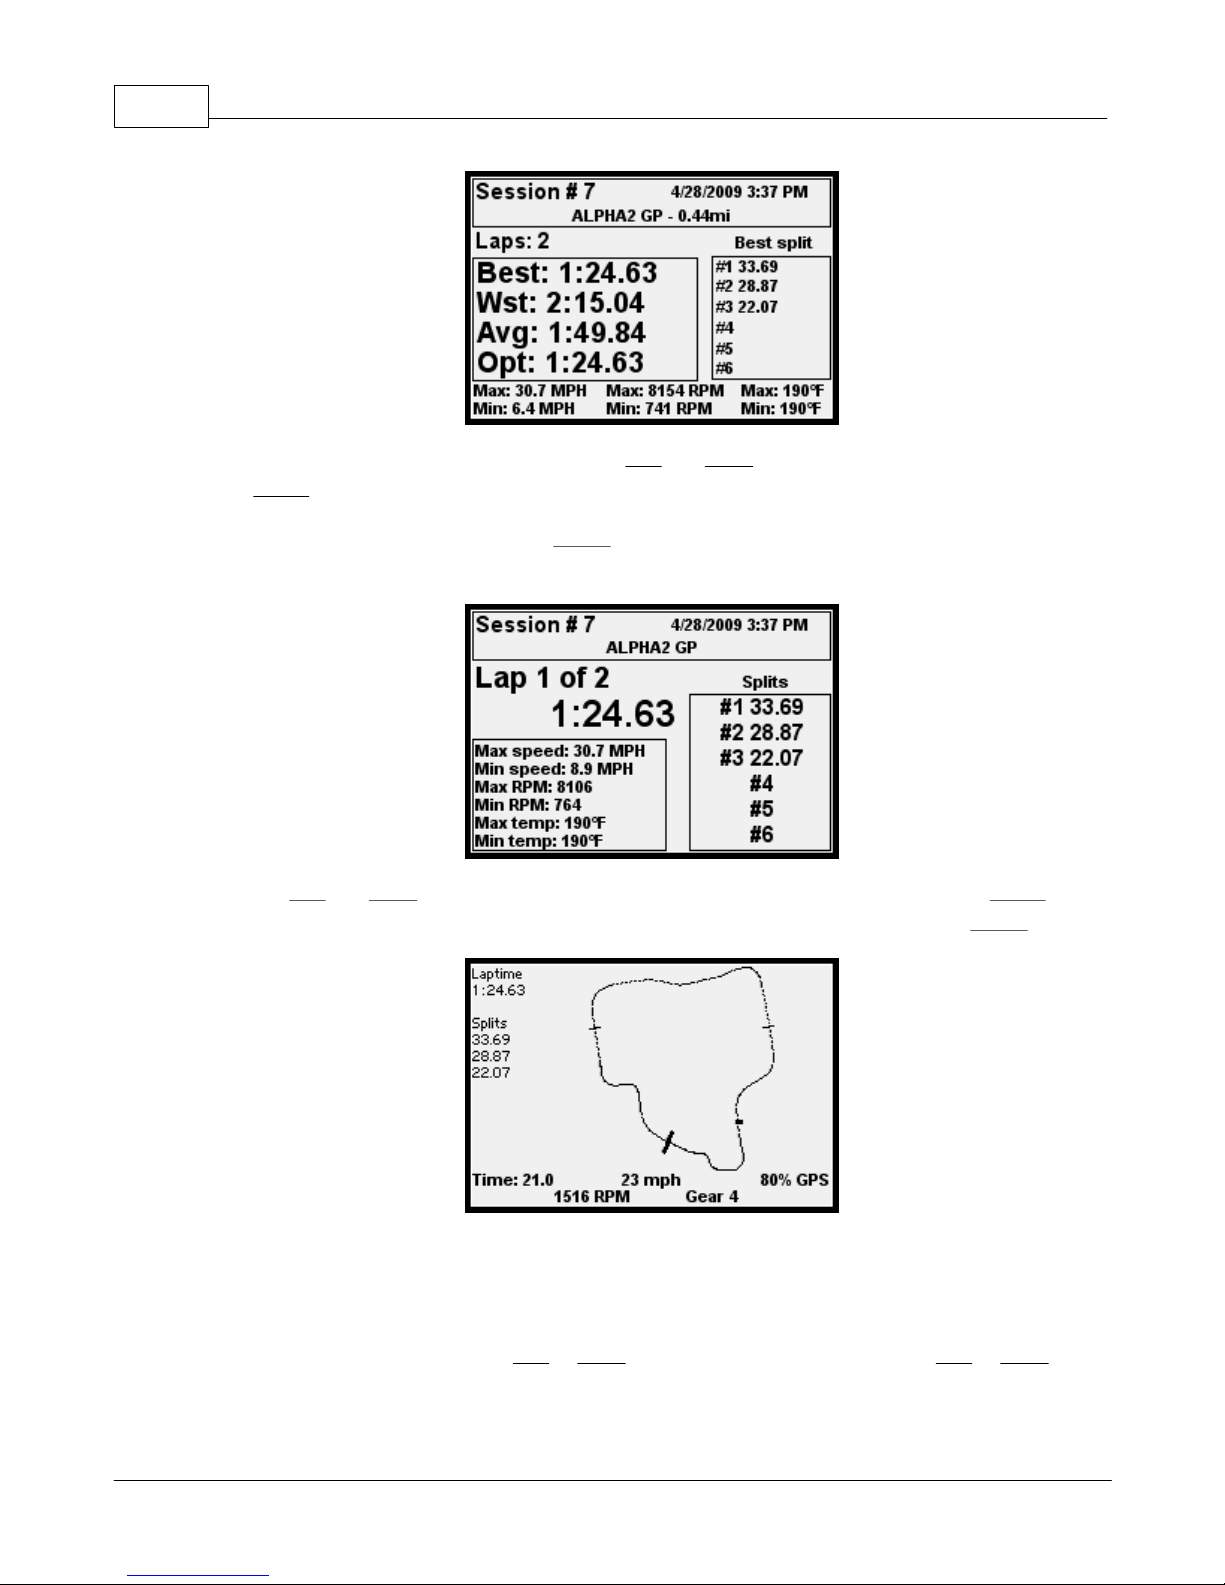
.......................................................................................................................................................... 1Basic Operation
.......................................................................................................................................................... 5More Details
.......................................................................................................................................................... 7Menus
................................................................................................................................... 112 Point-to-Point Racing Mode
.......................................................................................................................................................... 11Basic Operation
.......................................................................................................................................................... 13More Details
.......................................................................................................................................................... 15Menus
................................................................................................................................... 193 Drag Racing Mode
.......................................................................................................................................................... 20Basic Operation
.......................................................................................................................................................... 21More Details
.......................................................................................................................................................... 22Menus
................................................................................................................................... 264 Instrument Cluster Mode
................................................................................................................................... 265 Menu System and Navigation
................................................................................................................................... 276 Switching Racing Modes
................................................................................................................................... 277 Data Acquisition (DAQ)
.......................................................................................................................................................... 27Basic Information
......................................................................................................................................................... 31Installing Cables
......................................................................................................................................................... 31Wiring with Scotchlok Connectors
.......................................................................................................................................................... 32Basic DAQ Setup
.......................................................................................................................................................... 34Typical Inputs
......................................................................................................................................................... 34RPM
......................................................................................................................................................... 36Throttle Position
......................................................................................................................................................... 36Temperature
......................................................................................................................................................... 38Gear
......................................................................................................................................................... 40Acceleration
......................................................................................................................................................... 41Wheel Speed
......................................................................................................................................................... 41Suspension
......................................................................................................................................................... 42Sw itch Input
.......................................................................................................................................................... 43Generic Types of Inputs
......................................................................................................................................................... 430-100%
......................................................................................................................................................... 43Zero-based
......................................................................................................................................................... 44Temperature
......................................................................................................................................................... 44Raw
......................................................................................................................................................... 44Sw itch
.......................................................................................................................................................... 44Alarms
.......................................................................................................................................................... 44General DAQ Notes
................................................................................................................................... 458 Time and Distance Meters
................................................................................................................................... 469 Miscellaneous Information
.......................................................................................................................................................... 46Tach LCD display and LED/Shift lights
.......................................................................................................................................................... 47Session Number IDs
.......................................................................................................................................................... 48Normal / Reverse LCD Display
.......................................................................................................................................................... 48Backlight
.......................................................................................................................................................... 49Mounting
.......................................................................................................................................................... 49Time and Time Zones