2 3
Table of Contents
Table of Contents
If you have any questions concerning this product, please contact the following.
Email:
[email protected] (*
when
inquiring
via
email
,
please
state
your
addr
ess,
name,
telephone
number
,
and
the
name
of
your
product.)
Materials used in this set
Main unit (white): ABS Stylus handle (white): PE Screws: Iron Stylus: Stainless steel
* When you no longer have a use for this device, dispose of it in a manner that is in keeping with the laws of your local government.
If you experience any irregularities or breakdown of your device, turn the power off
immediately.
If any water or other foreign substance enters the interior of the device, turn the
power off immediately.
Remove the batteries after each use and keep the device out of reach of children.
Do not attempt to disassemble or modify the original device.
* We are not responsible for any damages incurred as a result of attempts to
disassemble or modify the device.
Due to a risk of fire, electrical shock, and damage to the device, do not use near
water (ie. the bath or shower, under rainy weather, etc.)
Do not use this device with wet hands.
Do not put any water or foreign substances into the device.
Do not place any objects that contain liquids on top of the device.
Do not play the device at a loud volume for extended periods of time. Continuing
to use the device at loud volumes may cause deafness. If you experience a decline
in your hearing ability or a buzzing in your ears, contact a physician.
Do not expose the device to direct sunlight or use the device near a heating unit or
anywhere with high temperatures.
Do not use or store the device where there is a lot of dust.
Do not use the device if it has been damaged.
This device requires 3 AAA alkaline batteries. Using the batteries incorrectly may result
in the risk of heat generation, rupture, and leakage. Please note the following.
Do not attempt to take apart a battery.
Do not attempt to short-circuit the batteries.
Do not use chargeable NiCad batteries, NiOx batteries, or nickel batteries.
Short -circuiting the batteries increases the risk of melted parts and fire.
In the unlikely event that leaked fluids from the battery come in contact with
your eye, wash the eye immediately with large amounts of water, and contact a
physician. In cases where the fluid has come in contact with your skin or clothes,
wash immediately.
Do not attempt to charge or disassemble the batteries. Rupture and leakage of
batteries may result in fires and/or injuries.
Do not apply heat to the batteries or expose them to flames.
Do not use a combination of used and new batteries.
Keep batteries out of reach of small children. In the unlikely event that a battery is
swallowed, contact a physician immediately.
Remove the batteries after using the device. When kept in the device for long
periods of time, the batteries may leak, resulting in the risk of fire and the staining
of surrounding objects.
Insert the batteries in the correct + and - (plus and minus) positions.
Warnings Please read the following carefully before using this device.
The history of talking computers
The singing computer. This concept is older than
you might think. The story takes us back to 1961.
The earliest example of this concept in action is
when Bell Labs’IBM7094 sang the pop standard,
“Daisy Bell.”This episode was the inspiration for a
scene in the 1968 science-fiction film 2001: Space
Odyssey, where the computer HAL9000 sings this
song while it is being deactivated.
The earliest example of a device that brought
electronically synthesized voices to regular
households is the gadget “Speak & Spell,” released
in 1978. This device was a toy made for
educational purposes, on which the user tried to
type the correct spelling of a word spoken by the
device. As it was originally designed as a toy, there
were limits on production costs, as well as limits on
the synthetic vocal technology of the day. Thus,
the sound quality was not exactly top notch.
As we entered the 1980s, the age of personal
computers marked its beginning as computers
became more compact. In the early days of 8-bit
personal computers, builds like the Apple II and
the PC-6001mkIISR were equipped with speech
synthesis LSI on extension boards or on the main
units themselves. By programming them with
languages such as BASIC, it was possible to make
them sing. Later on, various kinds of “talking
computer” software were introduced into the
market, such as Macintosh’s MacinTalk function,
and Windows’ SAPI. Various electronic devices,
such as vending machines, were manufactured
with built-in speech synthesis LSI, and the sound
quality and functions of this technology made
leaps and bounds.
Today, music that utilizes Vocaloid (the
synthesized singing technology developed by
Yamaha) is sweeping the music charts. Television
programs and video distribution websites use this
technology for narration, and even waste collection
trucks use it to make announcements. Synthesized
voices have become a regular part of our daily life.
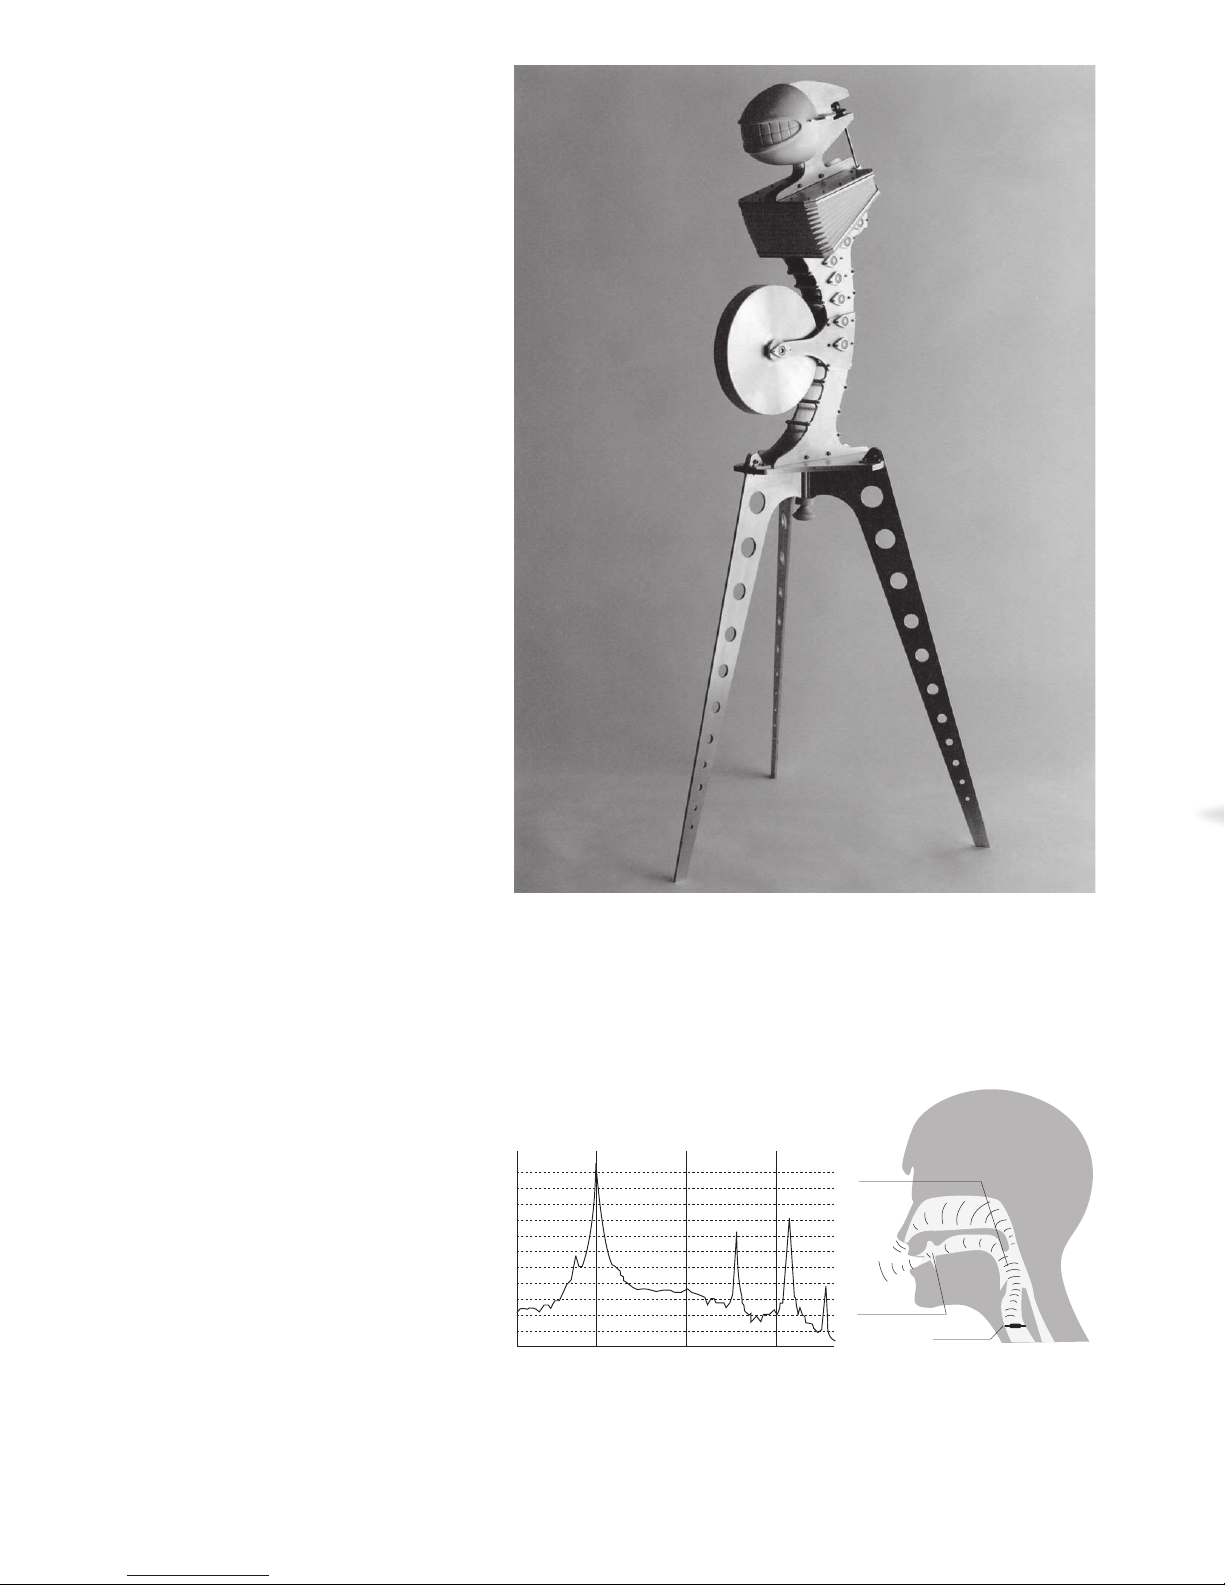
Formant synthesis and
concatenative synthesis
Attempts to synthesize voices using machines
date back hundreds of years, and undocumented
attempts may date back even further. In 18th
century Austria, an article was published about a
machine that used bellows to produce vowels and
consonants.
Most of the “talking computers” that were
developed in later years were in direct keeping
A history of synthesized singing························································································ 3
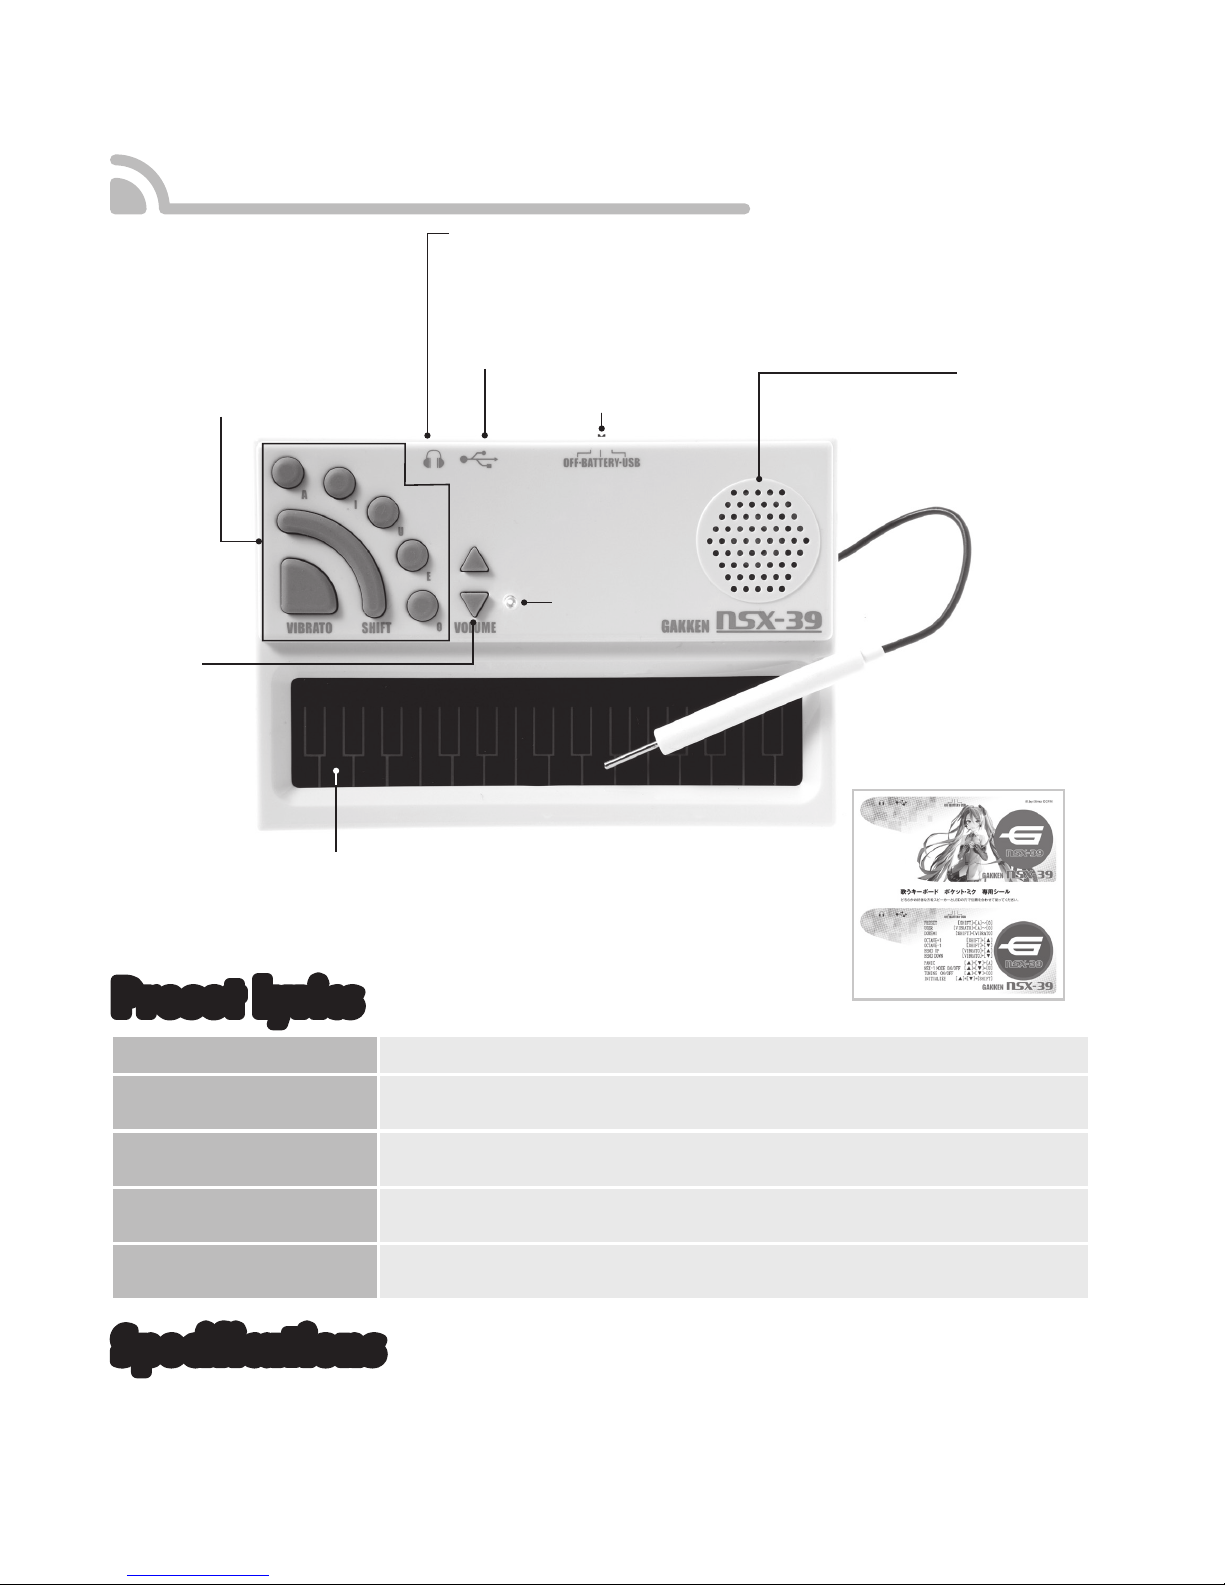
How to use your Pocket Miku ····························································································· 6
The parts of your device
Step by step basics
1. Turn the power on ···································································································· 7
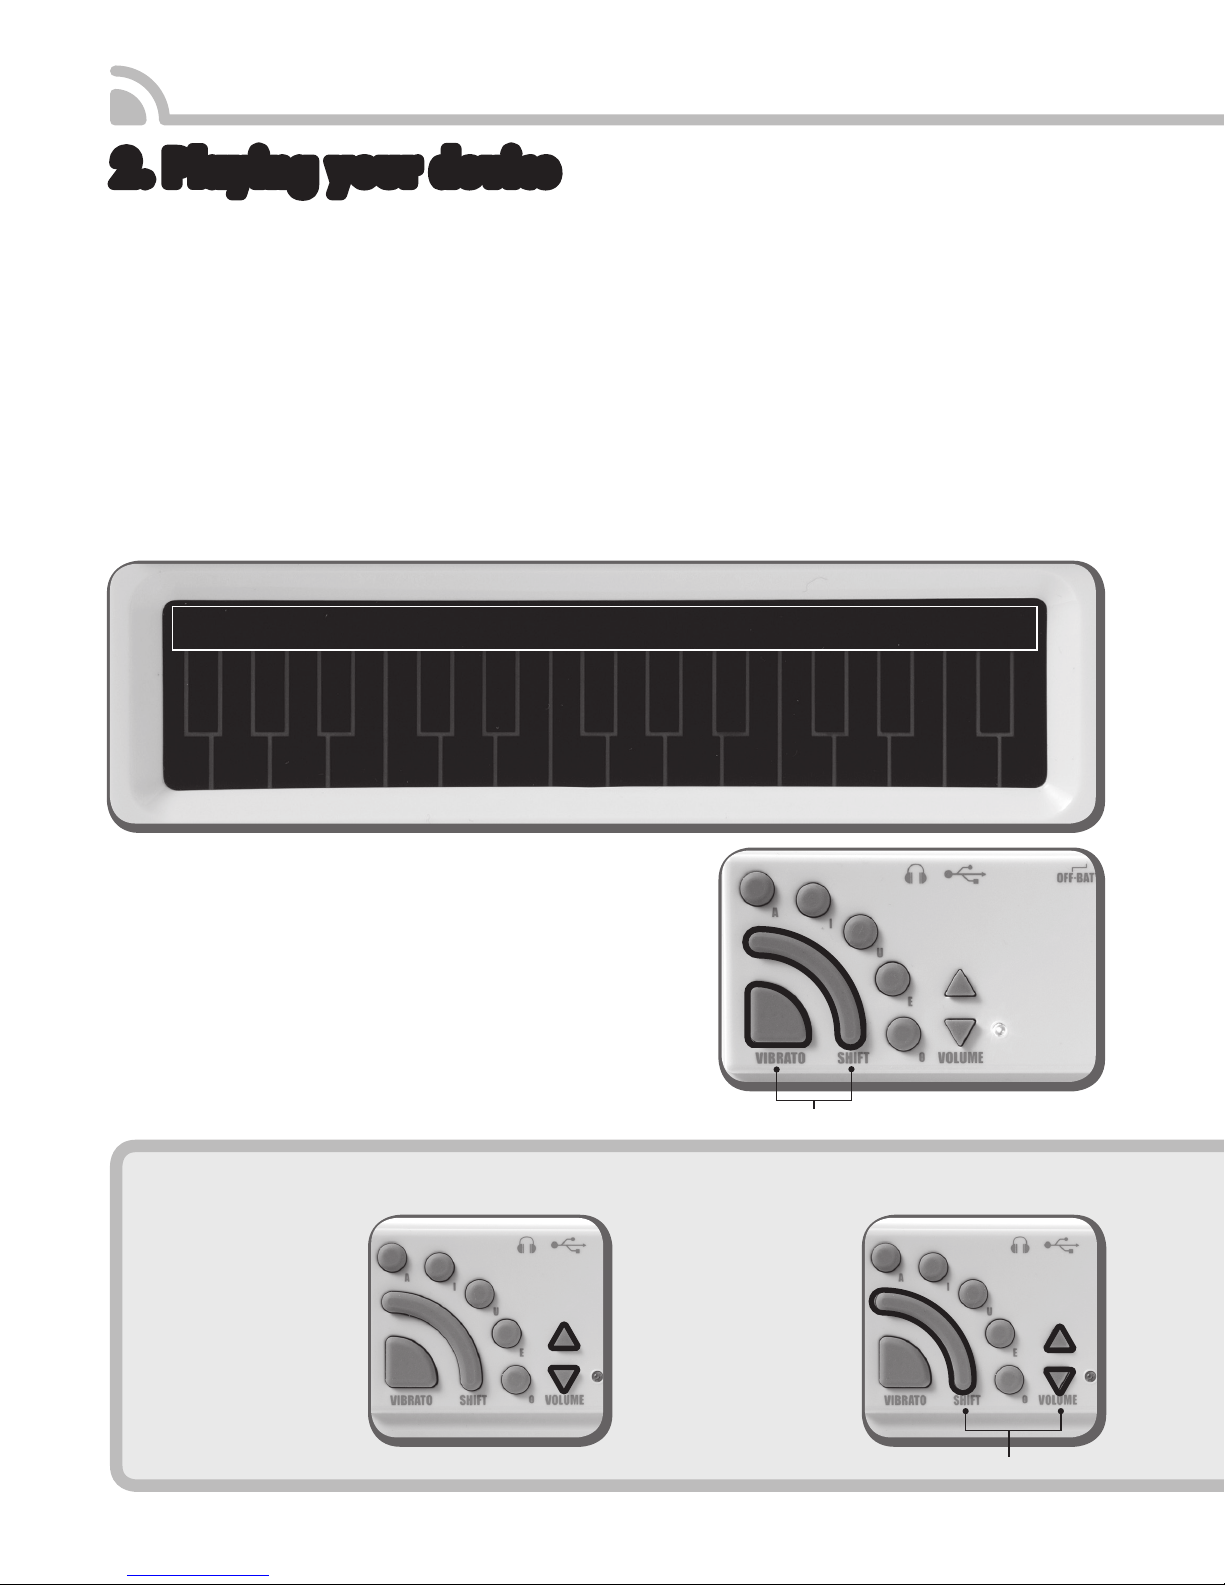
2. Playing your device ·································································································· 8
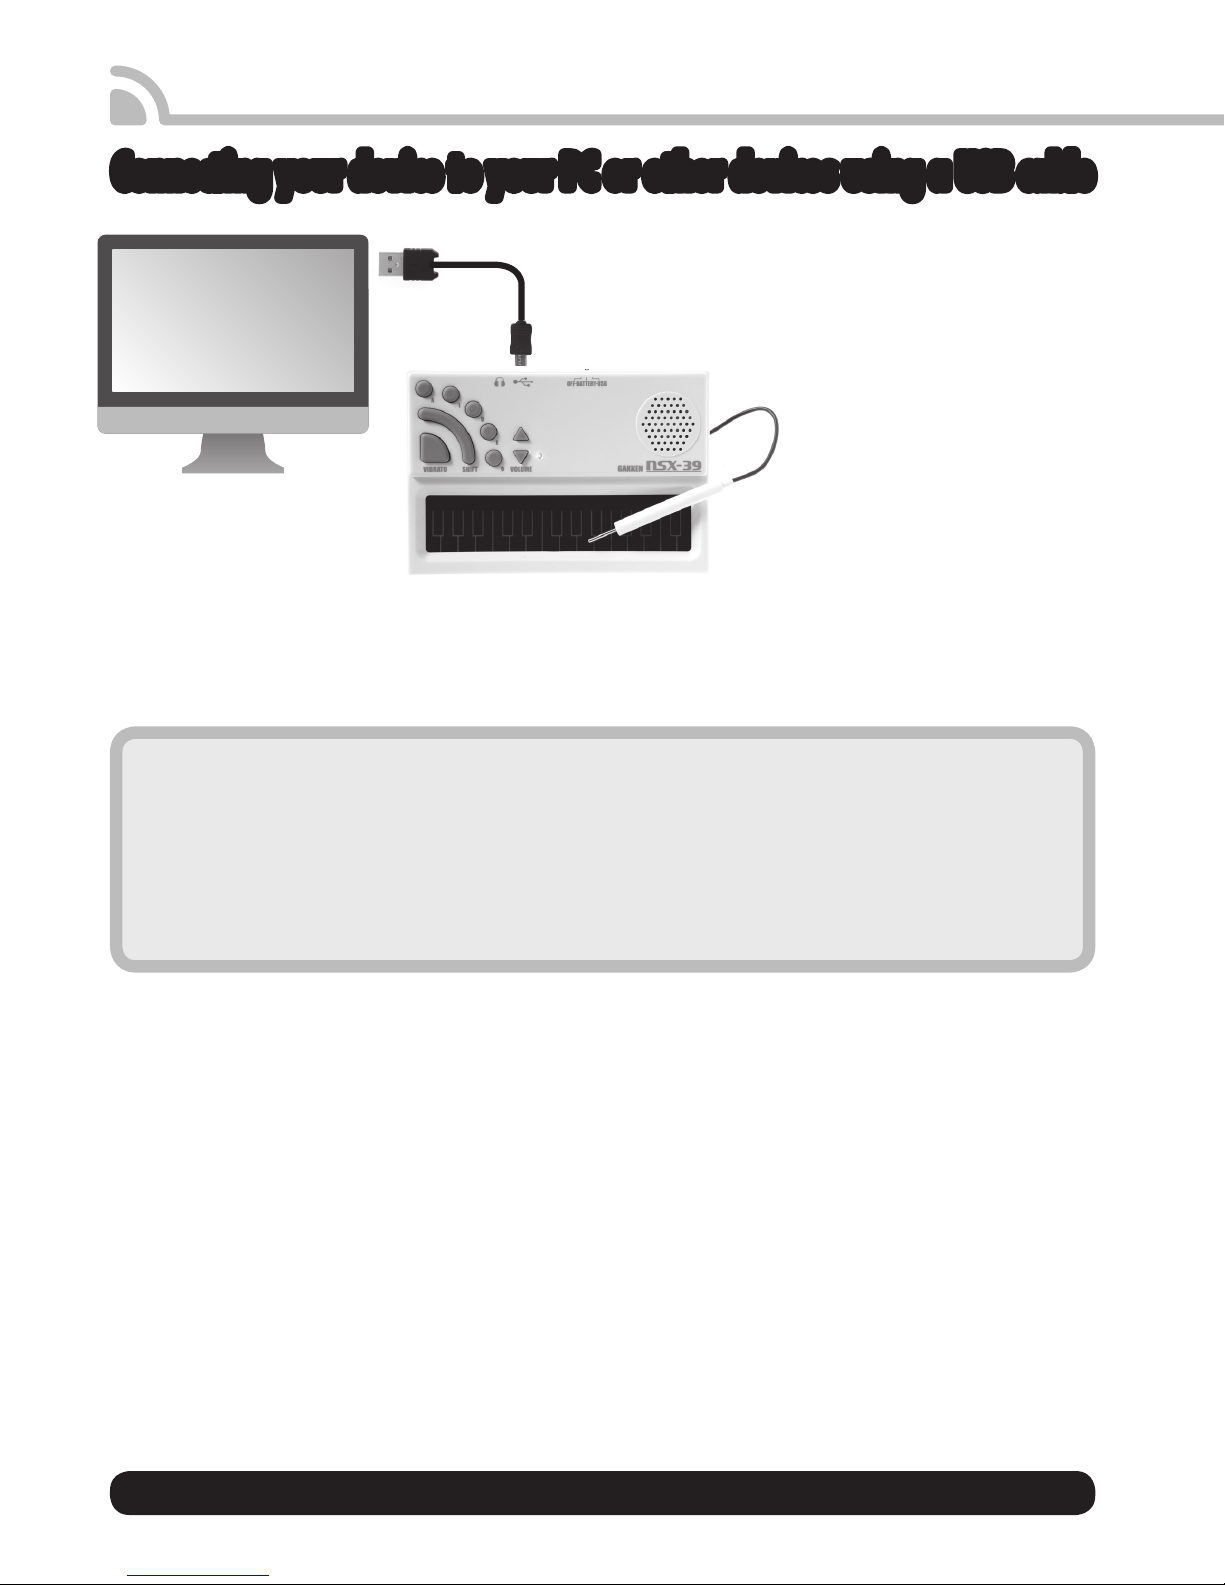
Intermediate users: Controlling Pocket Miku using external devices ···········10
Troubleshooting ···············································································································12
Advanced users: GM sound generation, eects, and customizing
the buttons on your device ··························································································14
Guidelines for using this product····················································································15
Pocket Miku default character table ··············································································16
A history of
synthesized
singing
IBM7094
Bell Labs’IBM7094 was a computer called a mainframe, a massive machine embedded with
transistors. It was used for space exploration and ballistic missile early warning systems.
Speak & Spell
Originally designed as a toy for
educational purposes, the Speak &
Spell still retains popularity as a
“gadget instrument” with its unique
robot-like sound.
The iPhone’s Siri
Smart phones, such as the iPhone,
are considered to be one of the
devices we are most familiar
with today. They also incorporate
synthesized voice technology.