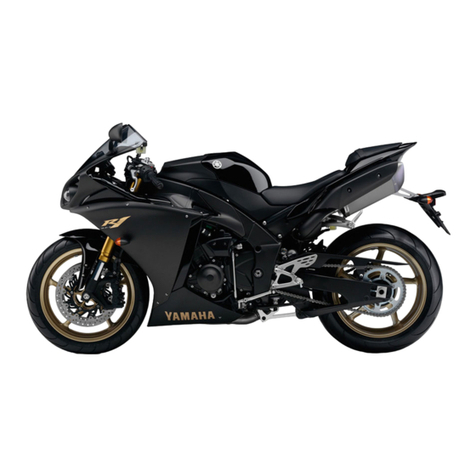
Yamaha YZF-R1 2022 User manual


Introduction
•This manual is intended for persons with knowledge and experience of motorcycles. Please
refer to the YZF-R1 service manual, which shall be published from YAMAHA MOTOR CO.
LTD., for information on part assembly and maintenance.
•The design of the YZF-R1 racing kit is based on YZF-R1, according to FIM racing rules, but
that does not mean the kit conforms to all competitions. When used in races, riders must
mount the YZF-R1 racing kit at their own discretion after checking the rules of competition
issued by the sponsor.
About Warranty
•Please understand that these parts are not covered by warranty.
•The Manufacturer does not take any responsibility for problems caused by these parts.
Request
•These kit parts are intended exclusively for racing purposes. You are strictly requested not
to use them on public roads.
•are subject to change without notice for improvement.
Parts List Symbols
•The star mark (*) means that the part is included in the kit set and is a genuine Yamaha
part. Therefore, you can easily purchase the part at any Yamaha part dealer when
necessary.
•The circle mark (°) means that although the part is included in the kit set it can also be
purchased individually.
Symbol Marks
Particularly important information is distinguished in this manual by the following notations.
This is the safety alert symbol. It is used to alert you to potential
personal injury hazards. Obey all safety messages that follow this
symbol to avoid possible injury or death.
A WARNING indicates a hazardous situation which, if not avoided, could
result in death or serious injury.
A NOTICE indicates special precautions that must be taken to avoid
damage to the vehicle or other property.
A TIP provides key information to make procedures easier or clearer.
NOTICE
TIP

1 ................................................................................. 1
2 Kit Parts ........................................................................................................ 2
2-1 Installing Electrical Parts ..............................................................................2
1. ECU Set (B3L-8591A-72/B3L-8591A-A0) ...........................................................2
2. Cable Interface (2CR-8533A-70) ........................................................................4
3. Wire Harness Set (B3L-F2590-70) .....................................................................6
4. Wire, Sub-Lead (2KS-82509-70) ........................................................................7
5. Headlight Harness Set (BX4-F4350-71) ........................................................... 18
6. Repair set ........................................................................................................ 19
7. CCU COMP. (2KS-85800-72) ..........................................................................21
2-2 Installing Engine Parts ................................................................................26
8. Maintenance Set (B3L-MAINT-70) ....................................................................26
9. Spark Plug Set (14B-R465B-70) ......................................................................27
10. Sylinder Head Gasket ......................................................................................28
11. Piston Set (2CR-116A0-71) ...............................................................................29
12. Connecting Rod Set (2CR-1165B-70) ...............................................................29
13. Crankshaft (B3L-11400-70) ...............................................................................29
14. High-lift Camshafts for SBK ............................................................................. 31
15. Cam Sprocket for SBK (B3L-12176-70) ............................................................ 31
16. Cam Sprocket ASSY. for SST(B3L-12177-70) ...................................................34
17. Valve Spring Set (2CR-A2110-72) ....................................................................37
18. Air Funnel Set (B3L-1440B-80) ........................................................................38
19. AIS-plug Set (2CR-A4890-70) ..........................................................................40
20. Clutch Spring Spacer(B3L-16332-70) ............................................................... 41
21. Cluch boss set (B3L-16370-70) ........................................................................42
22. Transmission Gear ...........................................................................................43
23. Mission Maintenance Set (2CR-A7000-70) ......................................................46
24. Drive Sprockets ................................................................................................49
25. Sprocket Nut Set (2CR-A7463-70) ...................................................................50
26. Strainer Cover Set (2CR-13400-71) .................................................................. 51
27. Strainer Cover Set (B3L-13400-70) ..................................................................56
2-3 Installing Chassis Parts ..............................................................................62
28. Spring Rear Shock ...........................................................................................62
29. Spring Front Fork .............................................................................................63
30. Seat Cushion (13S-24713-70) ...........................................................................65
31. Front Spare Wheel ASS’Y (2CR-25100-70) .....................................................66
32. Rear Spare Wheel ASS’Y (B3L-25300-70) ......................................................67
33. Rear Sprocket ..................................................................................................68
34. Front Caliper Piston set (B3L-25809-70) ..........................................................68
35. Tube Guide (B3L-26243-70) .............................................................................69
3 Tightening Torque List .............................................................................. 70
Tightening the Cylinder Head ...................................................................................83
Installing the Crankcase ...........................................................................................84
Procedure to tighten the aluminum bolts ..................................................................85
When replacing aluminum bolts with iron bolts.........................................................86
Procedure to install the engine .................................................................................87
Procedure to install the pivot shaft peripheral parts .................................................88
4 Headlight Cord Wiring Diagram ............................................................... 89
5 YZF-R1 Wiring Diagram ............................................................................ 90
CONTENTS

– 1 –
1
Spec SBK/JSB SST STD
Displacement 998cm3998cm3998cm3
Bore/Stroke 79.0 × 50.9 mm 79.0 × 50.9 mm 79.0 × 50.9 mm
Maximum engine speed
(limiter controlled speed)
14750 rpm 14750 rpm 14500 rpm
Compression ratio
(recommended value)
13.0 – 13.4 13.0 13.0
Valve timing (event angle) INT 105° 108° *106° 108°
EXT 109° 110° *109° 110°
Clearance between valve
and piston (minimum)
INT 0.95 mm 0.95mm –
EXT 1.90 mm 1.95mm –
Valve (tappet) clearance INT 0.09 – 0.17 mm 0.09 – 0.17 mm 0.09 – 0.17 mm
EXT 0.18 – 0.23 mm 0.18 – 0.23 mm 0.18 – 0.23 mm
Squish recommended value INT 0.65 – 0.75 mm 0.65 – 0.75 mm 0.65 – 0.75 mm
EXT 0.95 – 1.05 mm 0.95 – 1.05 mm 0.95 – 1.05 mm
* Recommended value when it can be changed.
R1 EN0102 2022Rev

– 2 –
2
2-1
Parts List
No. PART No. PART NAME Q'TY REMARKS
1 B3L-8591A-72 ECU SET for SBK 1
2 B3L-2818Y-73 CD 1
YMS SOFT & MANUAL
•Use of this set and a wire harness included in the kit enables regulation (or setting) of fuel
injection and ignition timing, etc.
•For details as to how to regulate (or set) fuel injection and ignition timings, etc., and the
method of writing the base data, refer to the FI matching system manual in the CD-ROM
that comes with the set.
Web https://www.akrapovic.com/en/intro?returnUrl=%2F
1. ECU Set (B3L-8591A-72/B3L-8591A-A0)
No. PART No. PART NAME Q'TY REMARKS
1 B3L-8591A-A0 ECU SET for SST 1
2 B3L-2818Y-73 CD 1
YMS SOFT & MANUAL
ECU of this set.
The base data for SST is for standard engine.
Both for SBK and SST, the mode can be switched between Sprint and EWC by inserting
and removing the 2-pole coupler of the kit harness.
When the coupler is connected, the mode is for EWC.
When the coupler is disconnected, the mode is for sprint.
When shipped, the coupler is connected.
for SBK
for SST
R1 EN0102 2022Rev

– 3 –
The set of the camshaft, cam sprocket, valve spring, ECU and air funnel must be used in the
following combination.
NOTICE
Using in other combinations may possibly damage the engine.
Be
sure
to
use
in
the
combination
as stated above.
MODEL SHAFT CAM 1
INT
SHAFT CAM 2
EXT
CAM
SPROCKET
VALVE SPRING
SET
AIR FUNNEL
SET ECU SET WIRE HARNESS
SET
METER(REPAIR
SET)
2015
2CR-12170-70 2CR-12180-70
B3L-12176-70
2CR-A2110-70
2CR-A2110-71
2CR-A2110-72
MGC-191114-00
2CR-8591A-70
2CR-F2590-70
R1:2CR-83500-00
R1M:2KS-83500-00
2016
2CR-1440B-70 2CR-8591A-71
2CR-8591A-72
2017
2018
2019
2CR-12170-70 2CR-12180-70
B3L-12176-70 2CR-A2110-71
2CR-A2110-72 2CR-1440B-70 BX4-8591A-70
BX4-8591A-71 BX4-F2590-70
R1:BX4-83500-30
R1M:2KS-83500-60
2020
2021
2022
B3L-12170-
70 B3L-12180-70 B3L-12176-70
Use with original
valve springs of
YZF-R1.
BX4-12113-00
BX4-12114-00
BX4-12123-00
BX4-12124-00
B3L-1440B-70 B3L-8591A-71 B3L-F2590-70
R1:B3L-83500-00
R1M:B4S-83500-00
2020
2021
2022
for SST
Use with
original
cam shaft of
YZF-R1.
B3L-12170-00
Use with
original
cam shaft of
YZF-R1.
B3L-12180-00
Use with
original
cam sprocket
of
YZF-R1.
Use with original
valve springs of
YZF-R1.
BX4-12113-00
BX4-12114-00
BX4-12123-00
BX4-12124-00
Use with
original
air funnel of
YZF-R1.
B3L-1440B-01
B3L-8591A-A0
2020
2021
2022
for SST
Use with
original
cam shaft of
YZF-R1.
B3L-12170-00
Use with
original
cam shaft of
YZF-R1.
B3L-12180-00
B3L-12177-70
Use with original
valve springs of
YZF-R1.
BX4-12113-00
BX4-12114-00
BX4-12123-00
BX4-12124-00
Use with
original
air funnel of
YZF-R1.
B3L-1440B-01
B3L-8591A-A0
2020
2021
2022
for SBK
B3L-12170-
80 B3L-12180-80 B3L-12176-70 2CR-A2110-72 B3L-1440B-80 B3L-8591A-72
R1 EN0102 2022Rev

– 4 –
Parts List
No. PART No. PART NAME Q'TY REMARKS
1 2CR-8533A-70 CABLE, INTERFACE 1 USB
2
2CR-N81CD-71-1
CD 1 USB driver
Windows 10 supported
•This cable connects the kit wire harness
to the personal computer on which YEC FI
Matching System (YMS) is installed.
•Please see the YMS manual for instructions
on how to use YMS.
•When connecting the cable to the PC
for the first time, it is necessary to install
the USB driver. Refer to the USB Driver
Installation Manual provided on the CD for
details on how to install the USB driver.
Self-Diagnosis Functions
The ECU is equipped with a self-diagnostic
function in order to ensure that the fuel
injection system is operating normally. If this
function detects a malfunction in the system,
it immediately operates the engine under
substitute characteristics and illuminates the
engine trouble warning light to alert the rider
that a malfunction has occurred in the system.
Once a malfunction has been detected, a fault
code is stored in the memory of the ECU.
To check the following codes, connect an OBD
tool (commercially available) to the vehicle using
the genuine Yamaha part "90890-03249 OBD/
GST LEADWIRE KIT".
For details,refer to the STD service manual
published by Yamaha Motor Co.,Ltd.
You can purchase "90890-03249 OBD/GST
LEADWIRE KIT" at any Yamaha part dealer.
R1EN12102019Rev
R1 EN2911 2019Rev

– 5 –
DTC CODE
C0520 Multi-axis Acceleration Sensor Module "A"
C1000 Steering Damper Solenoid Control Circuit
P0030 HO2S Heater Control Circuit Bank 1 Sensor 1
P0050 HO2S Heater Control Circuit Bank 2 Sensor 1
P00D1 HO2S Heater Control Circuit Range/Performance Bank
1 Sensor 1
P00D3 HO2S Heater Control Circuit Range/Performance Bank
2 Sensor 1
P0069 Manifold Absolute Pressure - Barometric Pressure
Correlation
P0105 Manifold Absolute Pressure/Barometric Pressure Sensor
Circuit
P0106 Manifold Absolute Pressure/Barometric Pressure Sensor
Circuit Range/Performance
P0107 Manifold Absolute Pressure/Barometric Pressure Sensor
Circuit Low
P0108 Manifold Absolute Pressure/Barometric Pressure Sensor
Circuit High
P0110
Intake Air Temperature Sensor 1 Circuit Bank 1
P0111 Intake Air Temperature Sensor 1 Circuit Range/
Performance Bank 1
P0112
Intake Air Temperature Sensor 1 Circuit Low Bank 1
P0113
Intake Air Temperature Sensor 1 Circuit High Bank 1
P0115 Engine Coolant Temperature Sensor 1 Circuit
P0116 Engine Coolant Temperature Sensor 1 Circuit Range/
Performance
P0117 Engine Coolant Temperature Sensor 1 Circuit Low
P0118 Engine Coolant Temperature Sensor 1 Circuit High
P0122 Throttle/Pedal Position Sensor/Switch "A" Circuit Low
P0123 Throttle/Pedal Position Sensor/Switch "A" Circuit High
P0132 O2 Sensor Circuit High Voltage Bank 1 Sensor 1
P0133 O2 Sensor Circuit Slow Response Bank 1 Sensor 1
P0134 O2 Sensor Circuit No Activity Detected Bank 1 Sensor 1
P0152 O2 Sensor Circuit High Voltage Bank 2 Sensor 1
P0153 O2 Sensor Circuit Slow Response Bank 1 Sensor 1
P0154 O2 Sensor Circuit No Activity Detected Bank 1 Sensor 1
P0201 Cylinder 1 Injector "A" Circuit
P0202 Cylinder 2 Injector "A" Circuit
P0203 Cylinder 3 Injector "A" Circuit
P0204 Cylinder 4 Injector "A" Circuit
P0222 Throttle/Pedal Position Sensor/Switch "B" Circuit Low
P0223 Throttle/Pedal Position Sensor/Switch "B" Circuit High
P0300
P0301
P0302
P0303
P0304
P0335
Crankshaft Position Sensor "A" Circuit
P0340 Camshaft Position Sensor "A" Circuit Bank 1 or Single
Sensor
P0342 Camshaft Position Sensor "A" Circuit Low Bank 1 or
Single Sensor
P0343 Camshaft Position Sensor "A" Circuit High Bank 1 or
Single Sensor
P0351 Ignition Coil "A" Primary Control Circuit/Open
P0352 Ignition Coil "B" Primary Control Circuit/Open
P0353 Ignition Coil "C" Primary Control Circuit/Open
P0354 Ignition Coil "D" Primary Control Circuit/Open
DTC CODE
P0475 Exhaust Pressure Control Valve "A"
P0476 Exhaust Pressure Control Valve "A" Range/Performance
P0480 Fan 1 Control Circuit
P048B Exhaust Pressure Control Valve "A" Position Sensor/
Switch Circuit
P048C Exhaust Pressure Control Valve "A" Position Sensor/
Switch Circuit Range/Perfomance
P048D Exhaust Pressure Control Valve "A" Position Sensor/
Switch Circuit Low
P048E Exhaust Pressure Control Valve "A" Position Sensor/
Switch Circuit High
P0500
Vehicle Speed Sensor "A" Circuit
P0560 System Voltage
P0563 System Voltage High
P0601
Internal Control Module Memory Checksum Error
P0606 Control Module Processor
P062F
Internal Control Module EEPROM Error
P0638
Throttle Actuator Control Range/Performance Bank 1
P0657
Actuator Supply Voltage "A" Circuit/Open
P0914
Gear Shift Position Circuit
P0915
Gear Shift Position Circuit Range/Performance
P0916
Gear Shift Position Circuit Low
P0917
Gear Shift Position Circuit High
P1400 Secondary Air Induction System Control Solenoid Circuit
P1500 VSS - NGS - CES Correlation
P1600 Lean Angle Sensor Circuit / Open
P1601 Side Stand Switch Circuit
P1602
P1806 Shift Sensor "A" Circuit Low
P1807 Shift Pedal Position "A" Circuit High
P2122 Throttle/Pedal Position Sensor/Switch "D" Circuit Low
P2123 Throttle/Pedal Position Sensor/Switch "D" Circuit High
P2127 Throttle/Pedal Position Sensor/Switch "E" Circuit Low
P2128 Throttle/Pedal Position Sensor/Switch "E" Circuit High
P2135 Throttle/Pedal Position Sensor/Switch "A"/"B" Voltage
Correlation
P2138 Throttle/Pedal Position Sensor/Switch "D"/"E" Voltage
Correlation
P2158 Vehicle Speed Sensor "B" Circuit
P2195 O2 Sensor Signal Biased/Stuck Lean Bank 1 Sensor 1
P2197 O2 Sensor Signal Biased/Stuck Lean Bank 2 Sensor 1
P21CF Cylinder 1 injector "B" circuit/open
P21D0 Cylinder 2 injector "B" circuit/open
P21D1 Cylinder 3 injector "B" circuit/open
P21D2 Cylinder 4 injector "B" circuit/open
P2228 Barometric Pressure Sensor "A" Circuit Low
P2229 Barometric Pressure Sensor "A" Circuit High
U0125 Lost Communication With Multi-axis Acceleration
Sensor Module
U0155 Lost Communication With Instrument Panel Cluster
(IPC) Control Module
– 6 –
Parts List
This wire harness is weight-saved by doing
away with connecting wires for lights.
NOTICE
This wire harness will not function unless
it is combined with the kit's ECU.
No.
PART No.
PART NAME
Q'TY
REMARKS
1 B3L-82590-70
WIRE HARNESS ASSY. 1
2 B3L-82386-70
WIRE,SUB-LEAD for TH INJECTOR
1
3 B3L-82318-70
WIRE,SUB-LEAD for AC
INJECTOR 1
4 B3L-82309-70
WIRE,SUB-LEAD for IG. COIL 1
5 2CR-8231Y-70
WIRE,LEAD for FUEL PUMP 1
6 B3L-83553-70
WIRE,LEAD for METER 1
7B3L-2128A-70
BRKT., REGULATOR 1 1 For REC./REG.
*
8 92017-06020
BOLT,BUTTON HEAD 2
*
9 90201-07081
WASHER,PLAIN 2
*
10 95607-06200
NUT,U FLANGE 2
11 B3L-2331W-70
BRKT.,UPPER 1 For ECU
12 B3L-2331X-70
BRKT.,UNDER 1 For ECU
*
13 90338-06018
PLUG 4
*
14 90111-06116
BOLT,HEX. SOCKET BUTTON 1 M6×16mm
*
15 90111-06140
BOLT, HEX.SOCKET BUTTON 1 M6×20mm
*
16 95817-06010
BOLT,FLG. 2
17 B3L-2830X-70
BRKT.,CONTROL UNIT 1 For Hydraulic unit assy.
*
18 90110-06163
BOLT,HEX. SOCKET HEAD 1
*
19 92017-06010
BOLT,BUTTON HEAD 2
*
20 5GF-83976-00
SW., HANDLE 1 1 TAIL LIGHT SW.
R1 EN2911 2019Rev

– 7 –
NOTICE
•Do not remove the AC generator but
leave it to function. Use on the battery
alone will make the machine unable to
run in a short time.
•Be sure to connect the Hydraulic unit
assy. to the wire harness. The ABS
does not function when using the KIT
ECU, but every electronic control does
not work without the connection.
•Do not disassemble the Hydraulic unit
assy.
TIP
used, removing its coupler will pose no
problem.
No. PART No. PART NAME Q'TY REMARKS
21 2KS-82509-70 WIRE, SUB-LEAD 1 SCU
4. WIRE, SUB-LEAD(2KS-82509-70)
Parts List
This wire harness is for mounting the KIT
harness to a vehicle with the Electric racing
suspension (ERS) function.
NOTICE
•
time, use YMS to perform writing of
the base map.
•Remove the coupler of the main switch
before starting assembling work.
R1 EN2911 2019Rev

– 8 –
Installing Wire Harness:
1. Remove the STD wire harness from the chassis.
2. Remove the side cover bracket(left) from the vehicle.
3. Install the PLUG
13
to the BRKT.,UNDER
12
.
4. Install the BRKT.,UNDER
12
using the
BOLT,HEX.SOCKER BUTTON
14
and
15
to
the frame.
5. Install the ECU and BRKT.,UPPER
11
using
theBOLT,FLG
16
to the BRKT.,UNDER
12
.
R1 EN2911 2019Rev

– 9 –
6. Remove the Hydraulic unit and EXUP servo
motor from the vehicle.
Install the Hydr aulic unit using the
B O L T , B U T T O N H E A D
19
t o t h e
BRKT.,CONTROL UNIT
17
.
7. Install the BRKT.,CONTROL UNIT
17
using the STD Bolt and collar,BOLT,HEX.
SOCKET HEAD
18
to the vehicle.
R1 EN2911 2019Rev

– 10 –
10. Inst all the rec tifier/regulator to the
BRKT.,REGULATOR 1
7 using the NUT,U
FLANGE
10
.
8. Remove from the chassis the STD
rectifier/regulator that is installed on the
right side of the radiator.
9.
In s t al l t h e BR K T., R EGUL ATO R 1
7
using the BOLT.,BUTTON HEAD 8 and
WASHER,PLAIN 9 to the vehicle.
R1 EN2911 2019Rev

– 11 –
FR.WHEEL SENSOR
PRESSURE SENSOR(Pa)
PRESSURE SENSOR(Pb)
AIR TEMP SENSOR
VI MOTOR
THROTTLE MOTOR
WATER TEMP SENSOR
CAM SENSOR
IG COIL
E-SD SOLENOID
MAIN SW
HANDLE
SW LH&RH
METER
AC INJECTOR
TH INJECTOR
REC/REGU
FUEL PUMP
PC I/F
SELECT SW
LIGHT SW
NEUTRAL SW ABS ECU
OBD
CCU
IMU
FUSE BOX
RR WHEEL SENSOR
BTRY MINUS
TAIL LIGHT
POWER SUPPLY
RELAY ASSY
STARTER RELAY
MAIN FUSE
BTRY PLUS
EG EARTH
GP SENSOR
OIL SW
SHIFT SENSOR
TPS
ACM
CRANK SHAFT
SENSOR
ECU
POWER SUPPLY
SCU
11. Install the wire harness of the kit as the
diagram.
indicate the names of parts
to be connected.
R1 EN2911 2019Rev
*
*

– 12 –
METER
MAIN SW
AC INJECTOR 2
AC INJECTOR 1
AC INJECTOR 3
AC INJECTOR 4
indicate the names of parts to be
connected.
R1 EN2911 2019Rev

– 13 –
CAM SENSOR
IG COIL 4
FR WHEEL
SENSOR
PRESSUER
SENSOR(Pa)
TH INJECTOR 4
TH INJECTOR 3
TH INJECTOR 2
TH INJECTOR 1
PRESSUER
SENSOR(Pb)
THROTTLE MOTOR
WATER TEMP
SENSOR
STD SUB-LEAD
for WATER TEMP SENSOR
SELECT SW
AC INJECTOR
B3L-82309-70
PC I/F
FUEL PUMP
2CR-8231Y-70
NEUTRAL SW
LIGHT SW
REC/REGU
VI MOTOR
AIR TEMP
SENSOR
IG COIL 3
IG COIL 1
IG COIL 2 B3L-82386-70 indicate the names of parts to be connected.
R1 EN2911 2019Rev

– 14 –
The name and function of each switch
<Left>
<Right>
R1 EN0102 2022Rev

– 15 –
YRC : Yamaha Ride Control
Yamaha
Ride
Control
is
a
system
that
controls the engine output based on data
received from the sensors and IMU.
The functio ns listed below represent
individual YRC items which can be turned on/
conditions.
For details on the settings, see “MENU” in
the Owner’s Manual.
* The
meter
MENU
screen
cannot
be
displayed if “T.TRIP” is selected when the
battery or meter is reconnected.
IMU : Inertial Measurement Unit
PWR : Power Delivery Mode
TCS : Spin control system
SCS : Slide control system
LCS : Launch control system
QSS : Quick shift system
LIF : Lift control system
ERS : Electric racing suspension by ÖHLINS
(available only with 2KS)
EBM : Engine brake managment system
IMU : Inertial Measurement Unit
IMU is 6-axis inertial measurement unit.
It consists of three gyro sensors (angular
sensors) that measure a: machine pitch,
b: roll, and c: yaw, and three G-sensors
(accelerometer) that measure acceleration in
the forward-backward, up-down and right-left
directions. YRC controls the engine output
based on data received from those sensors.
PWR : Power Delivery Mode
The power mode selection system consists of
valve opening depending on the degree of
throttle opening, thus providing the rider with
and the riding environment.
TIP
If the installation position or angle of the
inertial measurement unit is changed,
YRC does not function properly because
measurements are not available.
TCS : Spin control system
The spin control system helps maintain
traction when accelerating. If sensors detect
that the rear wheel is
starting to slip (uncontrolled spinning), the
spin control system assists by regulating
engine power as needed until traction is
restored.
This system supports the SCS to contribute
to a smoother ride.
If TCS is set to “OFF”, SCS, LCS, QSS and
LIF are also set to OFF automatically.

– 16 –
SCS : Slide control system
The slide control system controls engine
power output when a sideward slide is
detected in the rear wheel.
It adjusts output to an optimum level based
on data from the IMU, thus helping the rider
focus on riding without distraction.
This system supports the TCS to contribute
to a smoother ride.
LCS : Launch control system
The launch control system helps ensure
smooth and swift starts.
The LCS maintains an optimum level of
engine output in conjunction with input from
the TCS and LIF systems even with the
throttle fully open.
This allows the rider to concentrate on clutch
engagement and vehicle control to reduce
stress during starts.
LCS works in conjunction with TCS and LIF
systems.
If TCS is set to “OFF”, LIF is also set to OFF
automatically.
QSS Quick shift system
The quick shift system allows for clutch lever-
less, electronically-assisted shifting.
When the sensor on the shift rod detects the
appropriate motion in the shift pedal, engine
power output is momentarily adjusted to allow
for the gear change to occur.
LIF : Lift control system
The lift control system reducing wheel lift rate
during extreme acceleration, such as during
starts or out-of-corner acceleration.
When front-wheel lift is detected by the IMU,
engine output is adjusted to the optimum
level to compensate for it and thus assist the
rider’s vehicle control.
ERS : Electronic racing suspension
The Ohlins electronic racing suspension takes
data from the IMU and the suspension control
unit (SCU) makes integrated adjustments of
both the front and rear suspension’s damping
force based on running conditions.
EBM : Engine brake management system
The engine brake management system
reduces engine torque when decelerating.
The fuel injection, ignition timing, and
electronic throttle valve are electronically
adjusted by the ECU. There are 3 settings
to suit the track, riding conditions, or your
personal preference.
R1 EN0102 2022Rev

– 17 –
About the front and rear wheel speed sensor
Do not remove the speed sensors installed at
the front and rear wheels because they are
used for regulating YRC controls.
•If you change the front and rear wheels
to non-standard parts, manufacture and
attach a rotor and sensor referring to the
diagram below.
•If you change the front fork/rear brake
bracket to a non-standard part too, create
a mount for the sensor assembly and
attach the front and rear wheel sensors
referring to the diagram below.
*1. When manufacturing a rotor and sensor,
use a steel type material with magnetic
properties.
*2. Make the angle of attachment in the
rotation direction of the rotor of the sensor
assembly the same as the angle indicated
in the diagram below.
*3. If you change the rotor sensor or sensor
assembly attachment bracket to a non-
standard part, there is a possibility of
malfunction due to vibration or noise even
if the part is attached properly.
Other Yamaha Motorcycle manuals

Yamaha
Yamaha Tenere 700 User manual

Yamaha
Yamaha 2005 BT1100 Manual

Yamaha
Yamaha RAPTOR 90 2020 User manual

Yamaha
Yamaha Star 2009 User manual

Yamaha
Yamaha XJ6N User manual

Yamaha
Yamaha YZF R1 User manual

Yamaha
Yamaha YZ450F(Y) 2009 Application guide

Yamaha
Yamaha 2009 YW125Y User manual

Yamaha
Yamaha XSR125 2021 User manual

Yamaha
Yamaha Diversion 900 User manual

Yamaha
Yamaha XP500 User manual

Yamaha
Yamaha MT 10 User manual

Yamaha
Yamaha XS1100SH User manual

Yamaha
Yamaha 1994 YZ250/LC Application guide

Yamaha
Yamaha XT1200Z(Z) 2010 User manual

Yamaha
Yamaha WR250F(P) Application guide

Yamaha
Yamaha RD250 User manual

Yamaha
Yamaha MT-07A User manual

Yamaha
Yamaha TT-R125(R) 2002 Application guide

Yamaha
Yamaha YFM250X 2002 Manual