manuals.online logo
Brands
  1. Home
  2. •
  3. Brands
  4. •
  5. Yamaha
  6. •
  7. Receiver
  8. •
  9. Yamaha HTR-2067 Quick start guide

Yamaha HTR-2067 Quick start guide

AV Receiver/Receptor AV
Easy Setup Guide/Guía de conguración sencilla
English
Español
This document explains how to set up a 5.1-channel system and play back surround sound from a BD/DVD on
the unit.
For more information about this product, refer to the Owner’s Manual included on the supplied CD-ROM.
The latest Owner’s Manual can be downloaded from the following website.
http://download.yamaha.com/
Este documento explica cómo configurar un sistema de 5.1 canales y reproducir sonido surround desde un
BD/DVD de la unidad.
Para obtener más información sobre este producto, consulte el Manual de Instrucciones que se incluye en el
CD-ROM suministrado.
Puede descargar el Manual de Instrucciones más reciente en el siguiente sitio Web.
http://download.yamaha.com/
© 2014 Yamaha Corporation Printed in China ZK39120-1 RGLH
HDMI HDMI
HDMI
HDMI
HDMI HDMI
HDMI
HDMI HDMI
1 2 3 4
1 2 3 4
5
4
21
3
9
1
2
1 Accesorios empleados con este
documento
1 Mando a distancia
2 Pilas (AAA, R03, UM-4) (x2)
Se requieren los siguientes cables (no suministrados) para
crear el sistema descrito en este documento.
• Cables de altavoz (x6)
• Cables HDMI (x3)
2 Colocación de los altavoces
Configure los altavoces en la sala utilizando el diagrama como
referencia.
1 Altavoz delantero (Izq.)
2 Altavoz delantero (Der.)
3 Altavoz central
4 Altavoz surround (Izq.)
5 Altavoz surround (Der.)
9 Altavoz de subgraves
3 Conexión de los altavoces/altavoz
de subgraves
• Antes de conectar los altavoces, desconecte el cable de
alimentación de la unidad de la toma de corriente alterna.
• Asegúrese de que los hilos del núcleo del cable del altavoz
no se tocan entre sí o de que no entran en contacto con las
partes metálicas de la unidad.
Esto puede dañar la unidad o los altavoces. Si se produce
un cortocircuito en los cables de los altavoces, aparecerá
“Check SP Wires” en el visor delantero cuando se enciende
la unidad.
• El subwoofer equipado con un amplificador integrado
también puede conectarse a esta unidad. Para más
información, consulte el Manual de instrucciones.
4 Conexión de dispositivos externos
5 Conexión del cable de
alimentación a una toma de CA
Antes de conectar el cable de alimentación (sólo modelos
generales)
Ajuste la posición del conmutador de VOLTAGE SELECTOR
(traducción en su idioma) según su tensión local.
Las tensiones son 110–120/220–240V CA, 50/60 Hz.
1 Accessories used with this
document
1 Remote control
2 Batteries (AAA, R03, UM-4) (x2)
The following cables (not supplied) are required to build the
system described in this document.
• Speaker cables (x6)
• HDMI cables (x3)
2 Placing speakers
Set up the speakers in the room using the diagram as a
reference.
1 Front speaker (L)
2 Front speaker (R)
3 Center speaker
4 Surround speaker (L)
5 Surround speaker (R)
9 Subwoofer
3 Connecting speakers/subwoofer
• Before connecting the speakers, remove the unit’s power
cable from the AC wall outlet.
• Ensure that the core wires of the speaker cable do not touch
one another or come into contact with the unit’s metal parts.
Doing so may damage the unit or the speakers. If the speaker
cables short circuit, “Check SP Wires” will appear on the front
display when the unit is turned on.
• The subwoofer equipped with built-in amplifier can also be
connected to this unit. For more information, refer to the
Owner’s Manual.
4 Connecting external devices
5 Connecting the power cable to an
AC wall outlet
Before connecting the power cable (General model only)
Set the switch position of VOLTAGE SELECTOR according to
your local voltage.
Voltages are AC 110–120/220–240 V, 50/60 Hz.
EspañolEnglish
Subwoofer
Altavoz de subgraves
9
Surround speaker (R)
Altavoz surround (Der.)
5
Surround speaker (L)
Altavoz surround (Izq.)
4Center speaker
Altavoz central
3
Front speaker (R)
Altavoz delantero (Der.)
2
Front speaker (L)
Altavoz delantero (Izq.)
1
To an AC wall outlet
A una toma de CA
TV
Televisor
HDMI input
Entrada HDMI
HDMI output
Salida HDMI
HDMI output
Salida HDMI
BD/DVD player
Reproductor BD/DVD
Satellite/cable set top box
Reproductor digital multimedia por cable/satélite
3
4
5
VOLTAGE SELECTOR
(General model only)
(Sólo modelos generales)
The unit
La unidad
10° to 30°
Entre 10° y 30°
10° to 30°
Entre 10° y 30°
10 mm (3/8”)
10 mm
10 mm (3/8”)
10 mm
EspañolEnglish
7 7
Now let’s play back a BD/DVD.
We recommend playing back multichannel audio (5.1-channel or more) to feel surround sound produced by the unit.
Ahora vamos a reproducir un BD/DVD.
Le recomendamos que reproduzca audio de varios canales (5.1 canales o más) para sentir el sonido surround producido por la unidad.
Playing back a BD/DVD Reproducción de un BD/DVD
1 Turn on the BD/DVD player.
2 Press HDMI 1 to select “HDMI 1” as the input
source.
MUTE
ENHANCER
STEREO
TUNED
SLEEP
OUT
ECO
CHARGE
ADAPTIVE DRC
VIRTUAL
HDMI1
VOL.
3 Start playback on the BD/DVD player.
4 Press STRAIGHT repeatedly to select
“STRAIGHT”.
MUTE
ENHANCER
STEREO
TUNED
SLEEP
OUT
ECO
CHARGE
ADAPTIVE DRC
VIRTUAL
STRAIGHT
VOL.
When “STRAIGHT” (straight decode) is enabled, each speaker
produces each channel audio signal directly (without sound
field processing).
5 Press VOLUME to adjust the volume.
MUTE
ENHANCER
STEREO
TUNED
SLEEP
OUT
ECO
CHARGE
ADAPTIVE DRC
VIRTUAL
Volume -30.0dB
VOL.
This completes the basic setup procedure.
When surround sound is not heard, or no sound is output from a
specific speaker, see “Troubleshooting” in the Owner’s Manual.
1 Encienda el reproductor BD/DVD.
2 Pulse HDMI 1 para seleccionar “HDMI 1” como
fuente de entrada.
MUTE
ENHANCER
STEREO
TUNED
SLEEP
OUT
ECO
CHARGE
ADAPTIVE DRC
VIRTUAL
HDMI1
VOL.
3 Inicie la reproducción en el reproductor BD/
DVD.
4 Pulse varias veces STRAIGHT para
seleccionar “STRAIGHT”.
MUTE
ENHANCER
STEREO
TUNED
SLEEP
OUT
ECO
CHARGE
ADAPTIVE DRC
VIRTUAL
STRAIGHT
VOL.
Cuando está activado el modo “STRAIGHT” (decodificación
directa), cada altavoz produce directamente la señal de audio
de cada canal (sin procesamiento de campo sonoro).
5 Pulse VOLUME para ajustar el volumen.
MUTE
ENHANCER
STEREO
TUNED
SLEEP
OUT
ECO
CHARGE
ADAPTIVE DRC
VIRTUAL
Volume -30.0dB
VOL.
Esto completa el procedimiento de configuración básica.
Cuando no se oye el sonido surround o un determinado altavoz no
emite sonido, consulte “Resolución de problemas” en el Manual de
Instrucciones.
6 6
Configure the speaker settings of the unit to create an optimum surround sound field. Configure los ajustes de los altavoces de la unidad para crear un campo de sonido envolvente óptimo.
Configuring the speaker settings Configuración de los ajustes de los altavoces
1 Press RECEIVER (z) to turn on the unit.
2 Turn on the TV and switch the TV input to
display video from the unit (HDMI OUT jack).
3 Press SETUP.
4 Check that “Speaker Setup” appears on the
front display and press ENTER.
MUTE
ENHANCER
STEREO
TUNED
SLEEP
OUT
ECO
CHARGE
ADAPTIVE DRC
VIRTUAL
Speaker Setup
VOL.
Speaker settings are also available with the menu displayed on
the TV.
5 Congure the output characteristics of the
speakers.
1 Check that “Config” appears and press ENTER.
MUTE
ENHANCER
STEREO
TUNED
SLEEP
OUT
ECO
CHARGE
ADAPTIVE DRC
VIRTUAL
Config
VOL.
2 Use the cursor keys (q/w) to select an item and
cursor keys (e/r) to select a setting.
MUTE
ENHANCER
STEREO
TUNED
SLEEP
OUT
ECO
CHARGE
ADAPTIVE DRC
VIRTUAL
Subwoofer..Use
VOL.
3 When setting is complete, press RETURN.
Setting items
Item Function Settings
Subwoofer
Selects
whether or not
a subwoofer is
connected.
Use, None
Front Selects the size of
front speakers. Small, Large
Center
Selects whether
or not a center
speaker is
connected and its
size.
Small, Large,
None
Sur. LR
Selects whether
or not surround
speakers are
connected and
their sizes.
Small, Large,
None
• Default settings are underlined.
• When configuring the speaker size, select “Large” if the
woofer diameter of your speaker is 16 cm or larger or “Small”
if it is smaller than 16 cm.
• See “Configuration” in the Owner’s Manual for information on
settings other than those included in the table above.
6 To exit from the menu, press SETUP.
The speaker settings are complete.
1 Pulse RECEIVER (z) para encender la unidad.
2 Encienda el TV y cambie la entrada de TV para
que se muestre el vídeo de la unidad (toma
HDMI OUT).
3 Pulse SETUP.
4 Compruebe que “Speaker Setup” aparezca en
la pantalla frontal y pulse ENTER.
MUTE
ENHANCER
STEREO
TUNED
SLEEP
OUT
ECO
CHARGE
ADAPTIVE DRC
VIRTUAL
Speaker Setup
VOL.
Los ajustes de los altavoces también están disponibles con el
menú mostrado en el televisor.
5 Congure las características de salida de los
altavoces.
1 Compruebe que aparezca “Config” y pulse ENTER.
MUTE
ENHANCER
STEREO
TUNED
SLEEP
OUT
ECO
CHARGE
ADAPTIVE DRC
VIRTUAL
Config
VOL.
2 Utilice las teclas del cursor (q/w) para seleccionar
un elemento y las teclas del cursor (e/r) para
seleccionar un ajuste.
MUTE
ENHANCER
STEREO
TUNED
SLEEP
OUT
ECO
CHARGE
ADAPTIVE DRC
VIRTUAL
Subwoofer..Use
VOL.
3 Una vez finalizada la configuración, pulse RETURN.
Elementos de conguración
Elemento Función Ajustes
Subwoofer
Selecciona si
se conecta o no
un altavoz de
subgraves.
Use, None
Front
Selecciona
el tamaño de
los altavoces
delanteros.
Small, Large
Center
Selecciona si se
conecta o no un
altavoz central y
su tamaño.
Small, Large,
None
Sur. LR
Selecciona si
se conectan o
no altavoces
surround y su
tamaño.
Small, Large,
None
• Los ajustes predeterminados aparecen subrayados.
• Cuando configure el tamaño de los altavoces, seleccione
“Large” si el diámetro del woofer del altavoz es de 16 cm o
mayor, o “Small” si es menor de 16 cm.
• Vea “Configuración” en el Manual de instrucciones para
obtener información sobre los ajustes distintos a los que se
incluyen en la tabla anterior.
6 Para salir del menú, pulse SETUP.
La configuración de los altavoces ha finalizado.
TRANSMIT
RECEIVER
SLEEP
HDMI
AUDIO
1 2 3
4
4 5
1 2 3
FM
MEMORY
PRESET
TUNING
TUNER
SOUND
INFO
MOVIE MUSIC
SUR. DECODE
ENHANCER STRAIGHTBASS
SCENE
RETURN
VOLUME
BD
DVD TV
CD
RADIO
DISPLAY
ENTER
SETUP OPTION
TOP
MENU
POP-UP
MENU
MUTE
MODE
SETUP
RECEIVER z
Cursor keys
ENTER
RETURN
TRANSMIT
RECEIVER
SLEEP
HDMI
AUDIO
1 2 3
4
4 5
1 2 3
FM
MEMORY
PRESET
TUNING
TUNER
SOUND
INFO
MOVIE MUSIC
SUR. DECODE
ENHANCER STRAIGHTBASS
SCENE
RETURN
VOLUME
BD
DVD TV
CD
RADIO
DISPLAY
ENTER
SETUP OPTION
TOP
MENU
POP-UP
MENU
MUTE
MODE
SETUP
RECEIVER z
Teclas de cursor
ENTER
RETURN
HDMI 1
STRAIGHT
VOLUME
TRANSMIT
RECEIVER
SLEEP
HDMI
AUDIO
1 2 3
4
4 5
1 2 3
FM
MEMORY
PRESET
TUNING
TUNER
SOUND
INFO
MOVIE MUSIC
SUR. DECODE
ENHANCER STRAIGHTBASS
SCENE
RETURN
VOLUME
BD
DVD TV
CD
RADIO
DISPLAY
ENTER
SETUP OPTION
TOP
MENU
POP-UP
MENU
MUTE
MODE
HDMI 1
STRAIGHT
VOLUME
TRANSMIT
RECEIVER
SLEEP
HDMI
AUDIO
1 2 3
4
4 5
1 2 3
FM
MEMORY
PRESET
TUNING
TUNER
SOUND
INFO
MOVIE MUSIC
SUR. DECODE
ENHANCER STRAIGHTBASS
SCENE
RETURN
VOLUME
BD
DVD TV
CD
RADIO
DISPLAY
ENTER
SETUP OPTION
TOP
MENU
POP-UP
MENU
MUTE
MODE

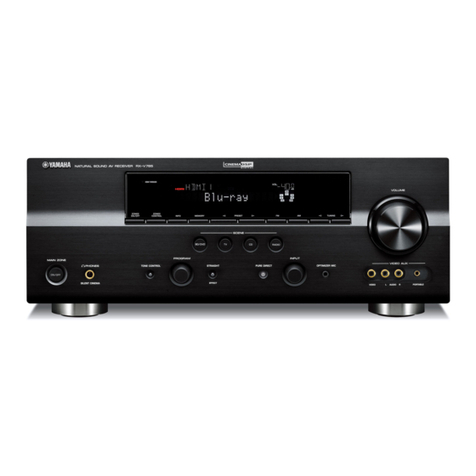
Other manuals for HTR-2067

2

Other Yamaha Receiver manuals

Yamaha HTR-5540 User manual

Yamaha

Yamaha HTR-5540 User manual

Yamaha RX-V1700 User manual

Yamaha

Yamaha RX-V1700 User manual

Yamaha RX-V385 User manual

Yamaha

Yamaha RX-V385 User manual

Yamaha HTR-4063 User manual

Yamaha

Yamaha HTR-4063 User manual

Yamaha RX-V2600 User manual

Yamaha

Yamaha RX-V2600 User manual

Yamaha RX-V595a User manual

Yamaha

Yamaha RX-V595a User manual

Yamaha R-N602 User manual

Yamaha

Yamaha R-N602 User manual

Yamaha RX-V100D User manual

Yamaha

Yamaha RX-V100D User manual

Yamaha HTR-5940 User manual

Yamaha

Yamaha HTR-5940 User manual

Yamaha RX V3900 - AV Network Receiver Use and care manual

Yamaha

Yamaha RX V3900 - AV Network Receiver Use and care manual

Yamaha RX-V661 User manual

Yamaha

Yamaha RX-V661 User manual

Yamaha RX-V577 User manual

Yamaha

Yamaha RX-V577 User manual

Yamaha RX-A 3070 User manual

Yamaha

Yamaha RX-A 3070 User manual

Yamaha RX-V496 User manual

Yamaha

Yamaha RX-V496 User manual

Yamaha RX-900U User manual

Yamaha

Yamaha RX-900U User manual

Yamaha RX-A3030 Quick start guide

Yamaha

Yamaha RX-A3030 Quick start guide

Yamaha RX-V1900 User manual

Yamaha

Yamaha RX-V1900 User manual

Yamaha RX-A3000 User manual

Yamaha

Yamaha RX-A3000 User manual

Yamaha HTR-4065 User manual

Yamaha

Yamaha HTR-4065 User manual

Yamaha RX-SL100RDS User manual

Yamaha

Yamaha RX-SL100RDS User manual

Yamaha RX-V2067 User manual

Yamaha

Yamaha RX-V2067 User manual

Yamaha RX-A1070 User manual

Yamaha

Yamaha RX-A1070 User manual

Yamaha RX-V630RDS, DSP-AX630SE User manual

Yamaha

Yamaha RX-V630RDS, DSP-AX630SE User manual

Yamaha HTR-5140 User manual

Yamaha

Yamaha HTR-5140 User manual

Popular Receiver manuals by other brands

Becker Centronic VarioControl VC220 Assembly and operating instructions

Becker

Becker Centronic VarioControl VC220 Assembly and operating instructions

Micron MR005 quick start guide

Micron

Micron MR005 quick start guide

Sony XAV-AX8000 operating instructions

Sony

Sony XAV-AX8000 operating instructions

ELEKTROBOCK WS301 quick start guide

ELEKTROBOCK

ELEKTROBOCK WS301 quick start guide

THOMSON CS1200VD - PART 1 Safety information

THOMSON

THOMSON CS1200VD - PART 1 Safety information

Onkyo TXSR705 - 7.1 Channel Home Theater Receiver instruction manual

Onkyo

Onkyo TXSR705 - 7.1 Channel Home Theater Receiver instruction manual

DEVA Broadcast DB7001 Maintenance and operation instruction manual

DEVA Broadcast

DEVA Broadcast DB7001 Maintenance and operation instruction manual

HP 3702B Service manual

HP

HP 3702B Service manual

Onkyo TX-SR313 instruction manual

Onkyo

Onkyo TX-SR313 instruction manual

JVC RX-D412B instructions

JVC

JVC RX-D412B instructions

Onkyo TX-NR1030 Advanced manual

Onkyo

Onkyo TX-NR1030 Advanced manual

National Radio NC-140 instruction manual

National Radio

National Radio NC-140 instruction manual

TKH Siqura VBS 2020 RX-3 user manual

TKH

TKH Siqura VBS 2020 RX-3 user manual

Boss Audio Systems ELITE BV765B owner's manual

Boss Audio Systems

Boss Audio Systems ELITE BV765B owner's manual

Vivotek RX7101 user manual

Vivotek

Vivotek RX7101 user manual

Somogyi Elektronic SAL VB P1000 instruction manual

Somogyi Elektronic

Somogyi Elektronic SAL VB P1000 instruction manual

Strong SRT 4120 manual

Strong

Strong SRT 4120 manual

Harman Kardon AVR 745 Service manual

Harman Kardon

Harman Kardon AVR 745 Service manual

manuals.online logo
manuals.online logoBrands
  • About & Mission
  • Contact us
  • Privacy Policy
  • Terms and Conditions

Copyright 2025 Manuals.Online. All Rights Reserved.