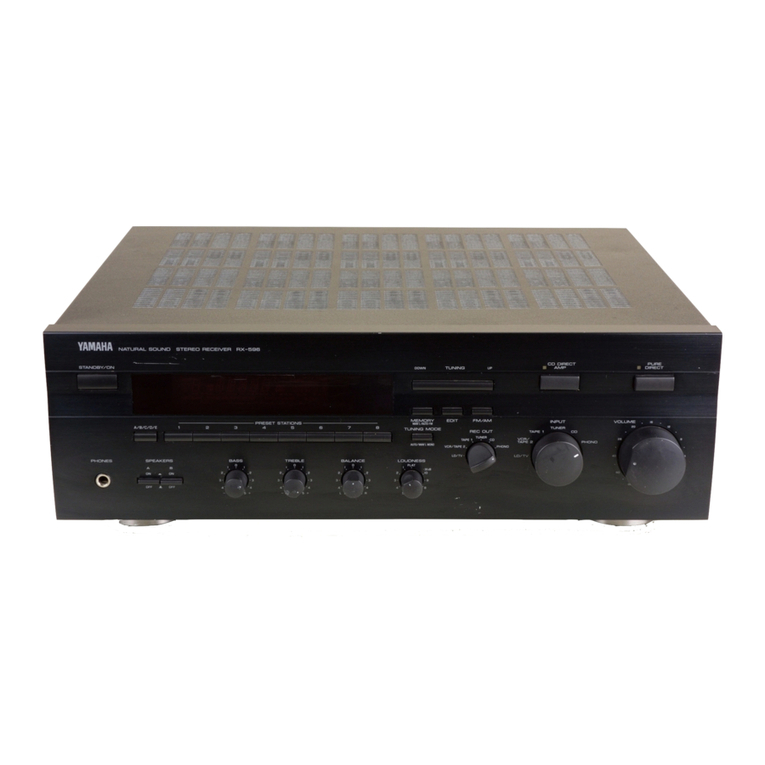
manuals.online logo
Brands
  1. Home
  2. •
  3. Brands
  4. •
  5. Yamaha
  6. •
  7. Stereo Receiver
  8. •
  9. Yamaha CX-A5000 Instruction manual

Yamaha CX-A5000 Instruction manual

© 2013 Yamaha Corporation Printed in Malaysia ZH84170
By a combination of “AV Pre-Amplifier CX-A5000” and “Power Amplifier MX-A5000”, you can build a home theater system in a variety of ways. This guide
explains three representative connection manners for example. Please place the speakers in your room by using the following diagram as a reference.
• This guide explains connection examples only. For information on each terminal or required switch settings, refer to the instruction manual for each device.
• Before making connections, remove the power cable of each device.
Durch Kombination des „AV Vorverstärkers CX-A5000“ mit dem „Endstufe MX-A5000“ können Sie ein Heimkinosystem in vielen Varianten realisieren. Diese
Anleitung beschreibt beispielhaft drei typische Anschlussarten. Stellen Sie bitte die Lautsprecher in Ihrem Raum auf, indem Sie sich an der folgenden
Abbildung orientieren.
• Diese Anleitung beschreibt nur Anschlussbeispiele. Informationen zu den einzelnen Anschlüssen oder erforderlichen Schaltereinstellungen lesen Sie die Bedienungsanleitung der
betreffenden Geräte.
• Bevor Sie Verbindungen herstellen, entfernen Sie bitte die Netzkabel aller beteiligten Geräte.
Используя комбинации “AV предусилитель CX-A5000” и “Усилитель Mощности MX-A5000”, вы можете собрать разнообразные схемы домашнего
кинотеатра. В этом руководстве в качестве примера представлено три способа подключения. Установите колонки в помещении, используя в
качестве руководства следующий рисунок.
• В этом руководстве представлен один пример подключения. Для получения информации по каждому разъему или требуемым настройкам переключателя, обратитесь
к инструкции по эксплуатации каждого устройства.
• Перед подключением, отключите силовой кабель каждого устройства.
Ideal speaker layout / Ideale Lautsprecheranordnung / Идеальное расположение колонок
Connection Example / Anschlussbeispiel / Пример подключения
English
Deutsch
Русский
English
Deutsch
Русский
E
12
3
4
6
T Y
5
R
7
12 12
10°-30°10°-30°
1Front (L) / Front (L) / Фронт (Л)
2Front (R) / Front (R) / Фронт (П)
3Center / Center / Центр
4Surround (L) / Surround (L) / Тыл (Л)
5Surround (R) / Surround (R) / Тыл (П)
6Surround back (L) / Hintere Surround (L) / Центр. тылы (Л)
7Surround back (R) / Hintere Surround (R) / Центр. тылы (П)
EFront presence (L) / Front Präsenz (L) / Фронт присут. (Л)
RFront presence (R) / Front Präsenz (R) / Фронт присут. (П)
TRear presence (L) / Hintere Präsenz (L) / Тыл присут. (Л)
YRear presence (R) / Hintere Präsenz (R) / Тыл присут. (П)
Subwoofer (1) / Subwoofer (1) / Сабвуфер 1
Subwoofer (2) / Subwoofer (2) / Сабвуфер 2
Zone2 Zone3
Main zone / Hauptzone / Основная зона
a
Home theater system with maximum channels (11.2-ch)
Heimkinosystem mit maximaler Kanalanzahl (11.2-Kanal)
SСистема домашнего кинотеатра с максимальными каналами (11,2-кан.)
This system enables you to enjoy the highest peak of CINEMA DSP -
an 11.2-channel 3-dimensional sound field.
Mit diesem System können Sie die höchste Vollendung von CINEMA DSP
genießen – ein dreidimensionales 11.2-Kanal-Schallfeld.
Эта система позволяет получить максимальное удовольствие от
технологии CINEMA DSP, создающей 11,2-канальное объемное
звуковое поле.
123
4567
ERTY
(CX-A5000)
(MX-A5000)
English
Deutsch
Русский
• Set the BAL/UNBAL switch and CH. SELECTOR for each channel (on the rear of MX-A5000) as illustrated above.
• Stellen Sie die Schalter BAL/UNBAL und CH. SELECTOR der einzelnen Kanäle (an der Rückseite des MX-A5000) so ein wie oben abgebildet.
• Установите переключатель BAL/UNBAL и CH. SELECTOR для каждого канала (на задней панели MX-A5000) как показано выше.
BAL.BAL.
BAL.BAL.
BAL.BAL.BAL.BAL.
BAL. BAL. BAL.
AC IN
RR
SPEAKERS
TRIGGER
INPUT
+12V
IN
THROUGH
OUT
UNBAL.
AUTO POWER
STANDBY
IMPEDANCE
SELECTOR
SELECTEUR
D’IMPEDANCE
OUT
OFF
ON
CH.6
CH.5
CH.5
CH.4
CH.3
CH.2
B
CH.2
A
CH.1
L
SPEAKERS
CH.6
CH.5
CH.4
CH.3
CH.2
B
CH.2
A
12V 0.1A
R
UNBAL.
CH.2
UNBAL.
CH.1
L
UNBAL.
CH.2
L
UNBAL.
CH.5
R
UNBAL.
CH.6
CH. SELECTOR
CH.5
R
UNBAL.
CH.3
CH. SELECTOR
CH.2
R
UNBAL.
CH.4
CH. SELECTOR
CH.1
L
UNBAL.
CH.4
CH. SELECTOR
CH.1
L
UNBAL.
CH.3
CH. SELECTOR
CH.2
L
UNBAL.
CH.6
CH. SELECTOR
CH.5CH.6 CH.3 CH.4 CH.4 CH.3 CH.6
TRIGGER
+12V
IN
Y
5
7
R
2
3
T
4
6
E
1
XLR
XLR
XLR
XLR
XLR
XLR
XLR XLR
XLR
XLR
XLR
XLR
XLR
XLR
XLR
XLR
XLR
XLR
XLR
XLR
XLR
XLR
(CX-A5000)
(MX-A5000)
GF
CX_MX-A5000_flyer.fm Page 1 Wednesday, May 8, 2013 10:04 AM
b
5-ch bi-amp system
5-Kanal-Bi-Amping-System
5-канальная система с двухканальным усилением
This system enables you to enjoy more high-quality sounds by making bi-amp
connections for all the 5-ch speakers (fig. A). For the center channel, you can
also use three center speakers instead of bi-amp connections (fig. B).
Mit diesem System können Sie einen hochwertigeren Sound erreichen, indem
Sie die Lautsprecher aller 5 Kanäle als Bi-Amping-Verbindung anschließen
(Abb. A). Für den Center-Kanal können Sie anstelle einer Bi-Amping-
Verbindung auch drei Center-Lautsprecher verwenden (Abb. B).
Для получения максимального удовольствия от звука высочайшего
качества подключите двухканальный усилитель ко всем пяти колонкам
(рис. А). К центральному каналу вместо двухканального усилителя
можно подключить три центральные колонки (рис. В).
1245
(bi-amp)
(
Bi-Amping
)
(
двухканальное усиление
)
3
(bi-amp / 3 speakers)
(Bi-Amping / 3 Lautsprecher)
(
двухканальное усиление / 3 колонки
)
(CX-A5000)
(MX-A5000)
(A)
(B)
English
Deutsch
Русский
• Set the BAL/UNBAL switch and CH. SELECTOR for each channel (on the rear of MX-A5000) as illustrated above.
• Stellen Sie die Schalter BAL/UNBAL und CH. SELECTOR der einzelnen Kanäle (an der Rückseite des MX-A5000) so ein wie oben abgebildet.
• Установите переключатель BAL/UNBAL и CH. SELECTOR для каждого канала (на задней панели MX-A5000) как показано выше.
• To make a bi-amp connection for the center speaker (3), use any two of CH.1, CH.4 (L), and CH.4 (R) speaker terminals.
• Um für den Center-Lautsprecher eine Bi-Amping-Verbindung herzustellen (3), verwenden Sie jeweils zwei der Lautsprecheranschlüsse CH.1, CH.4 (L) und CH.4 (R).
• Чтобы получить двухканальное усиление центральной колонки (3), используйте любые два разъема: CH.1, CH.4 (L) и CH.4 (R).
BAL.BAL.
BAL.BAL.
BAL.BAL.BAL.BAL.
BAL. BAL. BAL.
AC IN
RR
SPEAKERS
TRIGGER
INPUT
+12V
IN
THROUGH
OUT
UNBAL.
AUTO POWER
STANDBY
IMPEDANCE
SELECTOR
SELECTEUR
D’IMPEDANCE
OUT
OFF
ON
CH.6
CH.5
CH.5
CH.4
CH.3
CH.2
B
CH.2
A
CH.1
L
SPEAKERS
CH.6
CH.5
CH.4
CH.3
CH.2
B
CH.2
A
12V 0.1A
R
UNBAL.
CH.2
UNBAL.
CH.1
L
UNBAL.
CH.2
L
UNBAL.
CH.5
R
UNBAL.
CH.6
CH. SELECTOR
CH.5
R
UNBAL.
CH.3
CH. SELECTOR
CH.2
R
UNBAL.
CH.4
CH. SELECTOR
CH.1
L
UNBAL.
CH.4
CH. SELECTOR
CH.1
L
UNBAL.
CH.3
CH. SELECTOR
CH.2
L
UNBAL.
CH.6
CH. SELECTOR
CH.5CH.6 CH.3 CH.4 CH.4 CH.3 CH.6
TRIGGER
+12V
IN
5
3
2
3
4
3
1
XLR
XLR
XLR
XLR
XLR
XLR
XLR
XLR
XLR
XLR
(CX-A5000)
(MX-A5000)
c
5-ch main zone plus two 2-ch zones
5-Kanal-Hauptzone plus zwei 2-Kanal-Zonen
5-канальная основная зона и две 2-канальные зоны
This system enables you to enjoy 5-ch surround sounds in the main zone
and stereo sounds in the other zones (Zone2 and Zone3). As necessary,
you can use two pairs of front speakers for Zone2 or Zone3.
Mit diesem System können Sie 5-Kanal-Surround-Sound in der Hauptzone
und Stereo-Sound in den anderen Zonen hören (Zone2 und Zone3). Sie
können zwei Paar Frontlautsprecher für Zone2 oder Zone3 verwenden.
Система позволяет получить отличный 5-канальный объемный звук
в основной зоне и стереозвук в остальных зонах (Zone2 и Zone3).
При необходимости можно использовать две пары фронтальных
колонок для зон Zone2 или Zone3.
12345
12
(2 pairs)
(2 Paare)
(2 пары)
12
Zone2 Zone3
(CX-A5000)
(MX-A5000)
English
Deutsch
Русский
• Set the BAL/UNBAL switch and CH. SELECTOR for each channel (on the rear of MX-A5000) as illustrated above.
• Stellen Sie die Schalter BAL/UNBAL und CH. SELECTOR der einzelnen Kanäle (an der Rückseite des MX-A5000) so ein wie oben abgebildet.
• Установите переключатель BAL/UNBAL и CH. SELECTOR для каждого канала (на задней панели MX-A5000) как показано выше.
BAL.BAL.
BAL.BAL.
BAL.BAL.BAL.BAL.
BAL. BAL. BAL.
AC IN
RR
SPEAKERS
TRIGGER
INPUT
+12V
IN
THROUGH
OUT
UNBAL.
AUTO POWER
STANDBY
IMPEDANCE
SELECTOR
SELECTEUR
D’IMPEDANCE
OUT
OFF
ON
CH.6
CH.5
CH.5
CH.4
CH.3
CH.2
B
CH.2
A
CH.1
L
SPEAKERS
CH.6
CH.5
CH.4
CH.3
CH.2
B
CH.2
A
12V 0.1A
R
UNBAL.
CH.2
UNBAL.
CH.1
L
UNBAL.
CH.2
L
UNBAL.
CH.5
R
UNBAL.
CH.6
CH. SELECTOR
CH.5
R
UNBAL.
CH.3
CH. SELECTOR
CH.2
R
UNBAL.
CH.4
CH. SELECTOR
CH.1
L
UNBAL.
CH.4
CH. SELECTOR
CH.1
L
UNBAL.
CH.3
CH. SELECTOR
CH.2
L
UNBAL.
CH.6
CH. SELECTOR
CH.5CH.6 CH.3 CH.4 CH.4 CH.3 CH.6
TRIGGER
+12V
IN
2
2
5
2
2
3
1
1
4
1
1
Zone2
Zone3
Zone3
Zone2
L
L
R
R
L
L
R
R
XLR
XLR
XLR
XLR
XLR
XLR
XLR
XLR
XLR
XLR
(CX-A5000)
(MX-A5000)
CX_MX-A5000_flyer.fm Page 2 Wednesday, May 8, 2013 10:04 AM
Other manuals for CX-A5000

3

This manual suits for next models

1

Other Yamaha Stereo Receiver manuals

Yamaha CR-600 User manual

Yamaha

Yamaha CR-600 User manual

Yamaha CR-800 User manual

Yamaha

Yamaha CR-800 User manual

Yamaha RX-300 User manual

Yamaha

Yamaha RX-300 User manual

Yamaha RX-V390 User manual

Yamaha

Yamaha RX-V390 User manual

Yamaha RX-V4ABL User manual

Yamaha

Yamaha RX-V4ABL User manual

Yamaha YHT-5950U User manual

Yamaha

Yamaha YHT-5950U User manual

Yamaha R-7 User manual

Yamaha

Yamaha R-7 User manual

Yamaha RX-596 User manual

Yamaha

Yamaha RX-596 User manual

Yamaha RX-797 User manual

Yamaha

Yamaha RX-797 User manual

Yamaha TR-5630RDS User manual

Yamaha

Yamaha TR-5630RDS User manual

Yamaha RX-530 User manual

Yamaha

Yamaha RX-530 User manual

Yamaha HTR5540OM User manual

Yamaha

Yamaha HTR5540OM User manual

Yamaha RX-V850 User manual

Yamaha

Yamaha RX-V850 User manual

Yamaha R-10 User manual

Yamaha

Yamaha R-10 User manual

Yamaha R-2000 User manual

Yamaha

Yamaha R-2000 User manual

Yamaha RX-V480 User manual

Yamaha

Yamaha RX-V480 User manual

Yamaha RX-830 User manual

Yamaha

Yamaha RX-830 User manual

Yamaha RX-595 User manual

Yamaha

Yamaha RX-595 User manual

Yamaha RX-730 User manual

Yamaha

Yamaha RX-730 User manual

Yamaha RX-V3085 User manual

Yamaha

Yamaha RX-V3085 User manual

Yamaha RX-V485 User manual

Yamaha

Yamaha RX-V485 User manual

Yamaha AVENTAGE RXA780BL User manual

Yamaha

Yamaha AVENTAGE RXA780BL User manual

Yamaha CR-3020 User manual

Yamaha

Yamaha CR-3020 User manual

Yamaha RX-830 User manual

Yamaha

Yamaha RX-830 User manual

Popular Stereo Receiver manuals by other brands

Denon DRA-625R operating instructions

Denon

Denon DRA-625R operating instructions

Pioneer AVH-Z3200DAB installation manual

Pioneer

Pioneer AVH-Z3200DAB installation manual

Marantz NR1403 Specifications

Marantz

Marantz NR1403 Specifications

Pioneer VH-Z5000DAB instruction manual

Pioneer

Pioneer VH-Z5000DAB instruction manual

Sony DRC-BT30 operating instructions

Sony

Sony DRC-BT30 operating instructions

Sony STR-GX6ESII operating instructions

Sony

Sony STR-GX6ESII operating instructions

Denon AVR-2307CI Specifications

Denon

Denon AVR-2307CI Specifications

Marantz NR1506 /U1B Service manual

Marantz

Marantz NR1506 /U1B Service manual

Marantz SR4003 Mode d'emploi

Marantz

Marantz SR4003 Mode d'emploi

Sony STR-D565 Service manual

Sony

Sony STR-D565 Service manual

AEG SR 4352 CD/MP3 instruction manual

AEG

AEG SR 4352 CD/MP3 instruction manual

Pioneer AVH-X5600BT quick start guide

Pioneer

Pioneer AVH-X5600BT quick start guide

Onkyo TX-8130 instruction manual

Onkyo

Onkyo TX-8130 instruction manual

Sony STR-LV700R Service manual

Sony

Sony STR-LV700R Service manual

Rotel RX-1000 owner's manual

Rotel

Rotel RX-1000 owner's manual

Magnadyne LS4500W owner's manual

Magnadyne

Magnadyne LS4500W owner's manual

Denon AVR-3313CI user manual

Denon

Denon AVR-3313CI user manual

Denon AVR-S750H quick start guide

Denon

Denon AVR-S750H quick start guide

manuals.online logo
manuals.online logoBrands
  • About & Mission
  • Contact us
  • Privacy Policy
  • Terms and Conditions

Copyright 2025 Manuals.Online. All Rights Reserved.