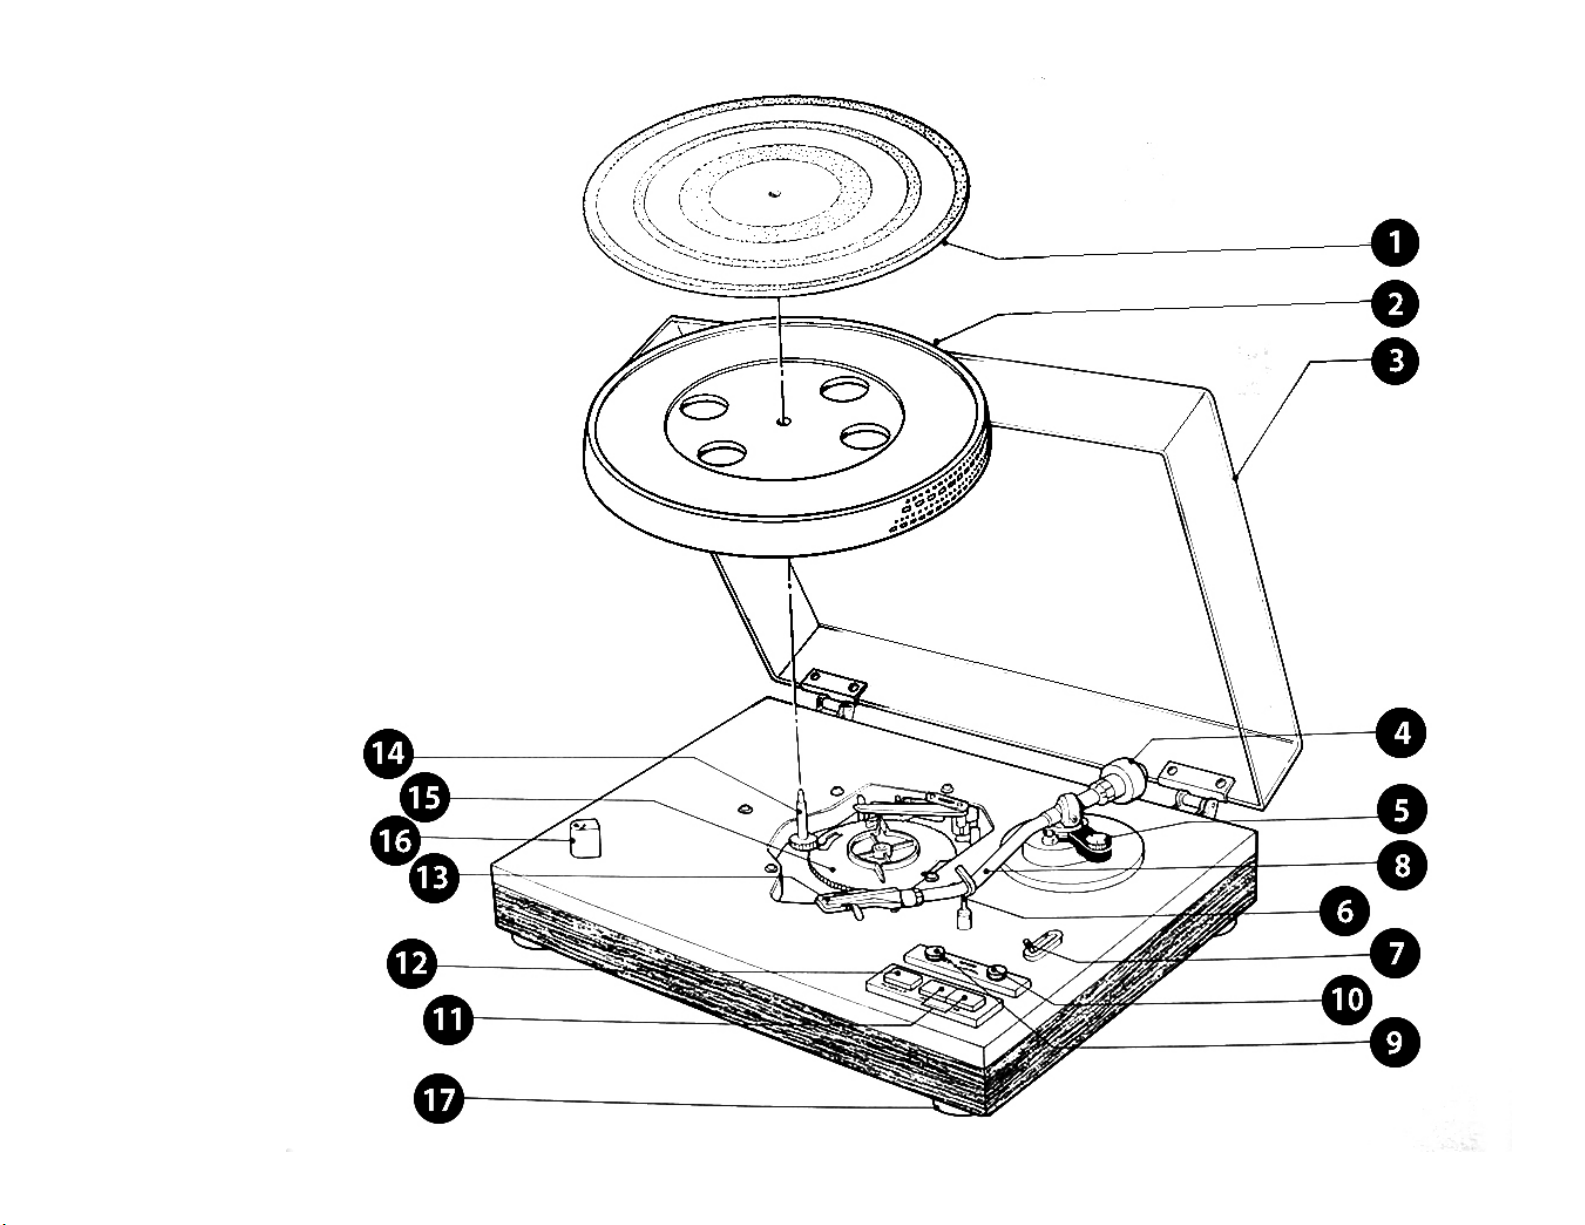
Rubber Mat
Specially designed to give the ideal support for records,
damping their resonance and so improving overall bass
response.
Turntable Platter
Die-cast aluminum, this has been specially dynam-
ically balanced for optimum flywheel smoothing
effect, giving steady, even rotation.
Detachable Dust Cover
The beautiful transparent acrylic dust cover is
fully detachable by free-setting hinges for maxi-
mum accessibility.
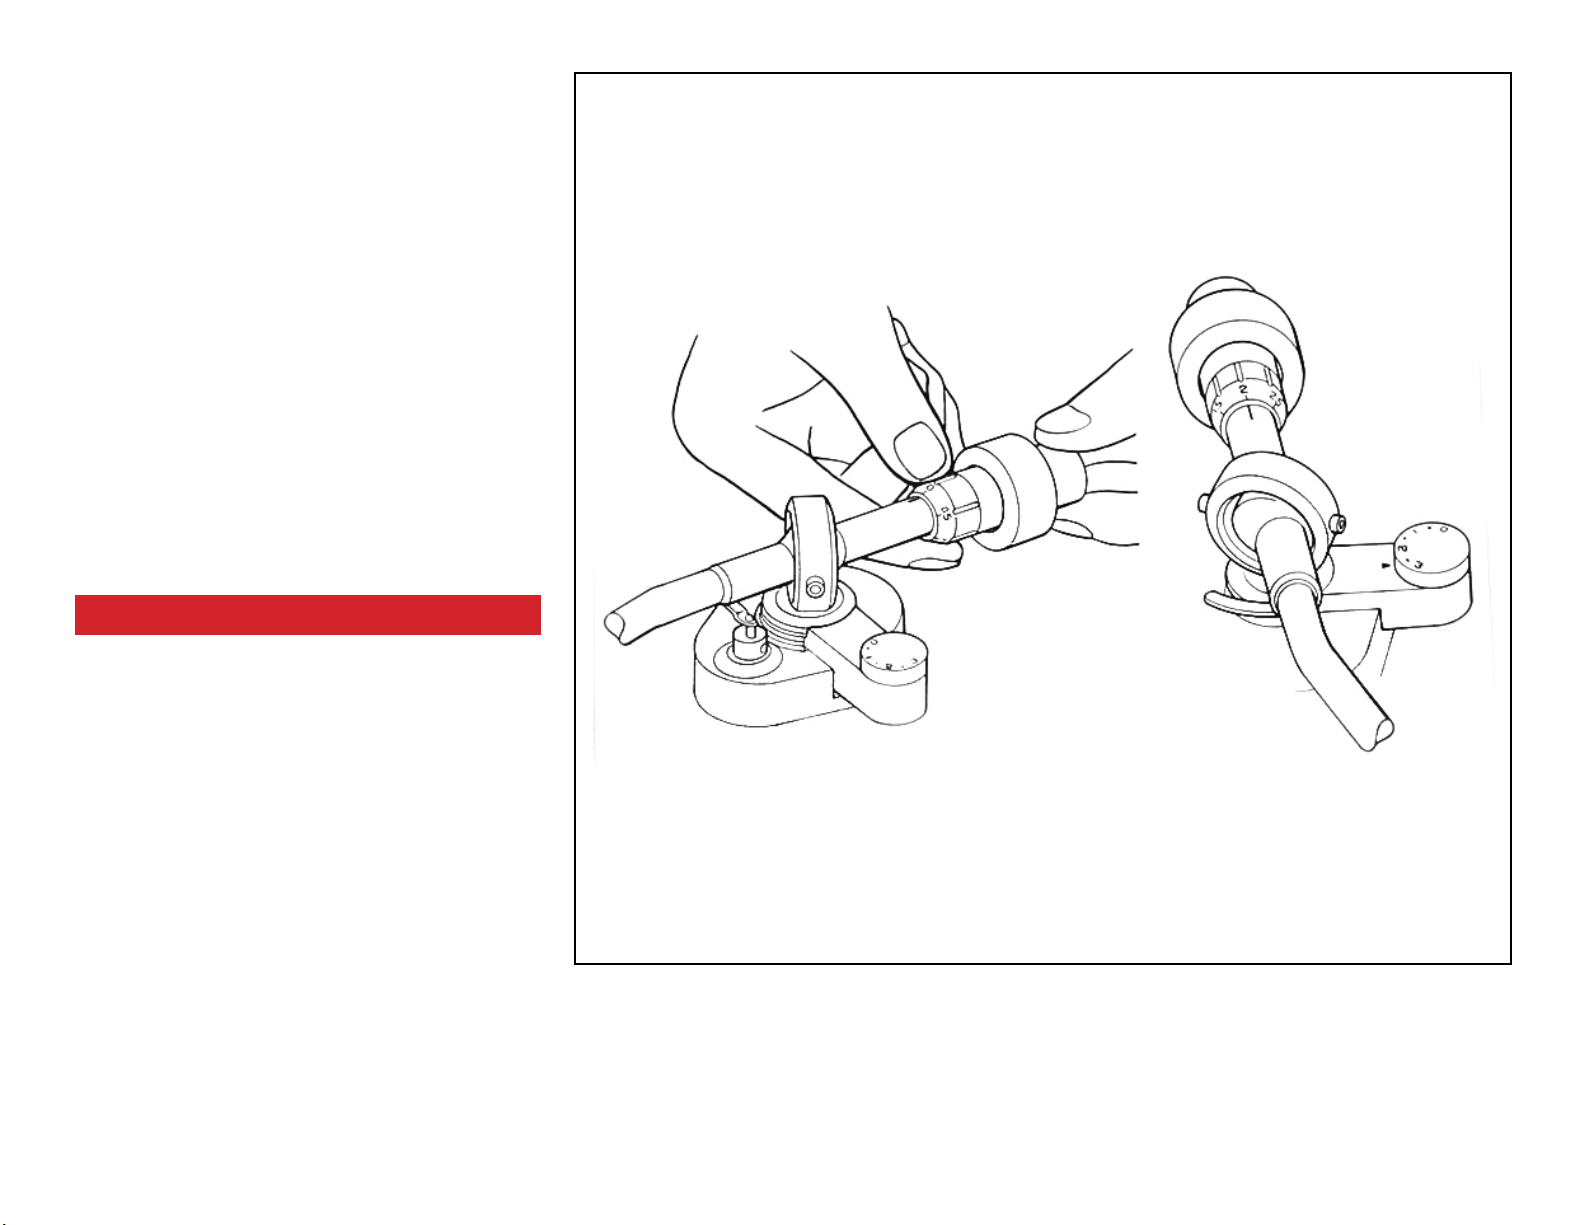
Counterweight Assembly
The whole counterweight assembly rotates to give
easy selection and clear indication of accurate
stylus tracking force settings. The assembly con-
sists of long weight with indicating dial and ring
weight.
Anti-Skating Inside
Force Canceler
This simple dial-setting anti-skating device ensures
middle-of-the-groove tracking.
Arm Rest
This provides a positive rest for the tonearm after auto-
return at the end of a record, and between records.
Cueing Lever (Arm Lifter)
With this lever you can gently lift the cartridge from the
record - and lower it back just as gently - without fear of
jarring the delicate stylus or damaging precious records.
Tonearm
The advanced S-type static balance arm used in the
YP-D6 features special bearings and unusually high
sensitivity in both horizontal and vertical directions,
for top performance with all types of cartridges.
Fine Speed Adjustment Control
(45 rpm)
This gives approximately ±3% adjustment in the speed of
turntable rotation at 45 rpm. It does not affect the setting
at 33-1/3 rpm.
Fine Speed Adjustment Control
(33-1/3 rpm)
This is the corresponding control for 33-1/3
rpm speed, and is also quite independent.
Speed Selector Push-Buttons
Just press the appropriate button for immediate selection
of the desited speed.
PLAY/CUT Push-Button
With the cartridge poised above the lead-in groove, a
touch to this button will start record audition. Another
touch at any point during the playing a record, and
NAMES AND FUNCTIONS OF THE PARTS
audition will be automatically terminated, returning the
tonearm to its original position.
Headshell
With gold-plated contacts for ultra-low contact resis-
tance (enemy of top quality phone reproduction), this
superior headshell accepts virtually all cartridge types.
Center Shaft (and Motor)
In the YP-D6 the central shaft is integral with the motor,
which rotates at the actual speed of the the turntable
platter, reducing vibration and eliminating the need for
intermediate mechanisms.
Auto Return Mechanism
Simple and reliable, this mechanism safely and gently
returns the tonearm to its rest at the end of the record,or
when the record is rejected.
Stroboscopic Speed Indicator
Housing
The YP-D6 features accurate indication of the turntable
speed by stroboscopic illumination of the engraved skirt
of the turntable platter.
Acoustic Damper Feet
These large feet insulate the YP-D6 from vibrations, and
help to eliminate “howling” (acoustic feedback from
speakers).
12
11
1
2
3
4
5
6
7
8
9
10
13
14
15
16
17
4