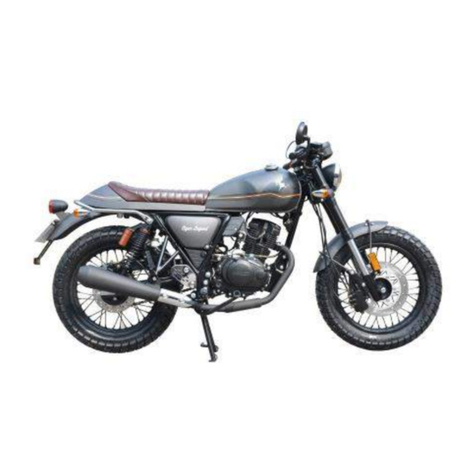
Yingang YG125-24 User manual

YG125-24 instructions (BM125)
Preparation: Review:
Sign: Check:
Standardization:
Approval:

- 1 -
Preface
Thank you for purchasing our motorcycle. Thank you very much.
This car has the advantages of gas consumption, low noise, advanced structure and beautiful
appearance.
This manual introduces the basic operation and maintenance method of this car. Please read it
carefully.Proper use, maintenance and maintenance can effectively protect the driving safety, reduce
the motorcycle failure, and maintain the best performance of the motorcycle.
Our company will be willing to provide more technical advice and after-sales service for you.
Our company reserves the right to constantly improve and improve our products.
This instruction manual contains the default of the introduction of basic configuration, because
the factory time, user requirements and design improvements, the actual vehicle may have some
differences, contents in this specification and any inconvenience this may cause, please you
understanding.
This manual is one of the necessary accessories of this car. When it is sold to others, it should be
attached with the car.
The copyright of this manual shall be copyrighted by the company and shall not be reproduced
without written consent of the company.

- 2 -
Directory
Motorcycle safety driving----------------------------------------------------------------------------------------------3
Safe driving rules--------------------------------------------------------------------------------------------------------3
Protection measures----------------------------------------------------------------------------------------------------3
A modified guidelines--------------------------------------------------------------------------------------------------3
Loading and accessories-----------------------------------------------------------------------------------------------3
Wheel tyre----------------------------------------------------------------------------------------------------------------4
Number of motorcycle-------------------------------------------------------------------------------------------------5
Parts location-------------------------------------------------------------------------------------------------------------6
Instrument and indicator light--------------------------------------------------------------------------------------7
Fuel oil and lubricating oil-------------------------------------------------------------------------------------------9
Operational guidelines for school official cites use------------------------------------------------------------10
Engine starting----------------------------------------------------------------------------------------------------------11
Engine running---------------------------------------------------------------------------------------------------------12
Motorbike---------------------------------------------------------------------------------------------------------------13
Brake use----------------------------------------------------------------------------------------------------------------14
Maintenance and maintenance------------------------------------------------------------------------------------15
Spark plug selection and replacement.---------------------------------------------------------------------------16
Cleaning and assembly of air filter---------------------------------------------------------------------------------16
Check and adjust valve clearance----------------------------------------------------------------------------------17
Check and adjust the throttle operation-------------------------------------------------------------------------18
Drive chain inspection, adjustment and lubrication-----------------------------------------------------------19
Inspection of hydraulic disc brake before and after-----------------------------------------------------------20
The rear wheel disassembling--------------------------------------------------------------------------------------21
Battery maintenance-------------------------------------------------------------------------------------------------22
Replacement of insurance inserts---------------------------------------------------------------------------------22
rake light switch adjustment----------------------------------------------------------------------------------------23
Periodic table-----------------------------------------------------------------------------------------------------------33
Storage of vehicles-----------------------------------------------------------------------------------------------------25
Main technical parameters------------------------------------------------------------------------------------------26
Schematic circuit diagram-------------------------------------------------------------------------------------------26
Instructions for use of emission control devices---------------------------------------------------------------27

- 3 -
Motorcycle safety driving
Warning: drive motorcycle, pay attention to driving safety.
Only after you understand the safety requirements can you drive.
Safe driving rules
1. Check before driving, so as not to damage parts and prevent accidents.
2. Inexperienced drivers are the most vulnerable.In accordance with the provisions of the road
traffic safety law, "driving a motor vehicle shall obtain a motor vehicle driving license according to law
", so a motorcycle must be held behind a motor vehicle driving license to drive a motorcycle.Never
lend your car to someone who doesn't drive or have a license.
3. Car and motorcycle crash, because the car driver did not "see" motorcycle to come.To avoid an
accident, be sure to use the following advice to fully expose yourself:
Wear bright clothes;
Do not get too close to other vehicles or drive into other vehicles.
4. Abide by national and local traffic regulations and regulations:
Motorcycle accident caused by excessive speed, must obey the speed limit, not exceeding safe
speed.
When turning or changing the road, you must first call the signal and turn on the turn signal.
5. Pay extra attention to safety when you ride in the parking lot at the intersection.When riding a
bike, please take two hands to relax and step on the pedal.
6. When riding a bike, please take two hands to relax and step on the pedal.
Protection measures
1. In order to ensure personal safety, wear helmet, protective mask, dustproof glasses,
gloves and other protective equipment during driving.
2. During the driving period, the exhaust system will become hot. In order to avoid contact
with burns, people should wear long boots or clothing that can cover the legs.
3. The driver and the rider shall not wear loose clothing so as not to trip the handle, pedal or
wheel, and cause accidental injury.
A modified guidelines
warning: If the motorcycle is modified, the original may not conform to traffic regulations or
endanger the safety of driving.Therefore, we must strictly abide by the relevant laws and
regulations of the state and local regulations, and we must not alter our cars without
authorization.
Loading and accessories
Warning: In case of accidents, special care must be taken in carrying or attaching accessories.The
increase of accessories and carrying capacity will reduce the stability and performance of the
motorcycle and affect safe driving.Please bear in mind that the installation of non-brand
attachments, improper loading, driving on bad roads or adverse weather conditions may lead to
adverse consequences.

- 4 -
loading
1. Keep the weight of luggage low and close to the center of gravity of the motorcycle.
To reduce the "unbalanced" phenomenon by carrying the average load on both sides,
If the center of gravity is far away from the center of the motorcycle, it will affect the driving
balance.
2. Adjust the tire pressure and rear shock absorber according to the loading and driving
conditions.
3. For smooth driving, the carrier and accessories must be firmly fixed.
Check the stability of the cargo.
4. Do not load the object into the steering hand, front fork and fender, otherwise the driving
will be unstable or the steering will not be flexible.
The attachment
The attachment is specially designed and has been tested.Since the company is not likely to
make parts for other manufacturers outside our company.You are responsible for the improper
selection, installation, and use of the attachments to the company.Please follow the above
"loading"Guidelines, should not be overloaded, and do the following:
1. Carefully check the attachment, so that it can not obstruct the driving sight, change the
clearance and stability Angle of the ground, and limit the movement of suspension and steering
mechanism.
Obstructing control operations, etc.
2. Please do not install the attachment that can produce large air resistance, such as the
windshield of driving, so that the driving is not stable.Please do not install less.A reduction device
for the cooling air flow of a small engine.
3. Do not install electrical equipment at will, so as to cause the power consumption of
motorcycle to overload and fuse, causing loss of light signal in driving.Indicating danger such as
signal.
4. The design of this car is not suitable for hanging side car (straddle) or trailer.If the
installation of trailer, cross - vehicle, will cause serious damage to the control mechanism.
Tire
The correct tire pressure will maintain the best driving stability of the motorcycle, and it will be
comfortable and durable.
Project Technical parameters
Tire pressure Front wheel :(225 + 10) kPa. Rear wheel: (22 5 + 10) kPa.
Tire size Front wheel: 110/70-17. Rear wheel: 130/70-17.
If any damage is found, please contact the dealer or maintenance station.
Warning: incorrect tire pressure can cause abnormal tread wear, leading to safety accidents.
Insufficient air pressure can cause the tire to slip or break away from the rim.
Extremely worn tyres are extremely dangerous.
When the tread pattern in the central part of the tyre will reach the minimum of the table
column, please replace the tyre;Replacement: please contact the dealer or maintenance station.

- 5 -
Warning: to ensure smooth and safe driving of
motorcycles, proper wheel balancing is
necessary.
Do not remove or replace any wheel balancing device. If you need to balance the wheel, please
contact with the dealer or maintenance station. After the tire is repaired or replaced, wheel
balance should be adjusted.
Number of motorcycle
Vehicle identification code and engine number used for motorcycle
registration.
Vehicle identification code (VIN) product label.
The vehicle identification code (VIN) is engraved on the right side of the
frame, and the locomotive turns to the left to see (see figure 1).
Products signs
The product sign is riveted to the left of the frame riser, and
the locomotive turns to the right to see (see figure 2).
Engine no.
The engine model and factory number are printed in the bottom of the
left crankcase of the engine (as shown in figure 3).
Parts location
The position of the operating system.
①Rear view mirror
②Left composite switch parts.
③tachometer
④Speed/odometer.
⑤Front brake handle
⑥Ignition lock
⑦Switch components
⑧The throttle handle
Minimum tread depth.
Front wheel :2.0mm Rear wheel:4.5mm
VIN code
FIG. 1
Products signs
FIG. 2
Engine no.
FIG. 3

- 6 -
① Vehicle identification code.
② Engine number
③ Shift pedal
① The right rear pedal
② Before the right foot pedal
③ The rear brake pedal
④ Side stand
⑤ The front left foot pedal
⑥ The left rear pedal

- 7 -
Instrument and indicator light
The instrument is above the headlight.
①Turn left to indicator light: turn left turn to turn on the light, this lamp flicker instruction.
②Far light refers to the light: when the high beam is opened, the light is on.
③Speed table: indicates the instantaneous speed of the crankshaft.
④Speed indicator: indicates the speed of a
vehicle in the blink of an eye.
⑤The mileage indicator: the total mileage of
the "TRIP" vehicle, according to the mileage of
the "CLR" vehicle, the long press can reset the
distance to zero.
⑥Turn right turn indicator light: when turn
right turn lamp, this light is on.
⑦oil volume indicator: the current fuel oil
storage is shown.
⑧Low oil level warning lamp: when the oil
level is low, this light is on.
⑨i Gear display: displays the current engine position.
ii The (reset) button is adjusted (reset), and the "TRIP" shows the length of t2 keys can be
switched to the kilometer display or the mile display.
i Block indicator light: when the gear is in neutral, this light is on.
⑩Time adjustment button :(MODE) press the button to adjust the local time display of the
instrument display: display the current time.
Ignition switch (power combination switch)
Ignition switch ① is located in the middle of the tank cover.
OFF: the vehicle power is disconnected, the indicator light is not
on, and the engine cannot start.
Keys can be taken out.
ON : the vehicle power is connected, the gear indicator light is ON,
the engine can start.The key cannot be taken out.
The direction of the lock
Turn the key to the left, then turn the key to the "OFF"
position and rotate counterclockwise until "PUSH" and take out
the key.If you want to open the lock, just turn the key clockwise.
Warning: the ignition switch must be in the "OFF" or "PUSH"
position to ensure the safety of the vehicle and prevent the battery
from running.
Fuel meter
The oil gauge② shows the fuel oil in the tank, which is about
12 liters in total when the seven grids are all displayed.When the oil
quantity indicates that the fuel will run out, please fill it up as soon
as possible.

- 8 -
The tachometer goes into the dashed area
Note:
· even if the engine has been worn, normal use should not be used to display the tachometer in
the 6 g area①.
· when throttling the accelerator, please pay special attention to it.
The tachometer should not be displayed in the 7 g area.
The display area indicates that the engine has reached the
maximum speed limit, which will shorten the service life of the
engine at this speed.
Left composite switch parts.
②Turn on the light switch.③Horn button④ Front light switch.⑤ Remote indicator light
switch.
[turn light switch]
Turn on the light switch②has three positions.To turn left, turn
the switch to the "←" position, the front and back of the left turn
on the light;When turning to the right, turn the switch to the "→"
position, the front of the right side and the rear turn light.Press the
switch to turn the light on and off, the switch back to the middle
position.
[headlight switch]
When you need to close the light, switch the headlight switch
④to the " " position;When far away, open to " " position.
[horn button]
When you need to honk the horn, press the horn button ③.
Fuel oil and lubricating oil
Fuel tank and fuel
Fuel tank cover opening method:
1. Remove dust cover from the fuel tank①.
2. Insert ignition switch key②.
3. Turn the key clockwise.
4. The fuel tank cover automatically leaves the

- 9 -
Fuel pump
The fuel pump ①is located at the bottom of the tank, and the
fuel pump in the fuel tank is delivered to the nozzle with the fuel
filter.The fuel pump side is connected with the high pressure
pipe③,Tighten the screw on the clamp ②screw when installing.
Note: when the fuel pump is installed, the inner side should be clean,
and no particles can be found, which may block the oil supply system
of the fuel pump.
Engine oil
Lubricating oil is an important factor affecting engine performance and life. Gasoline engine

- 10 -
oil must be selected according to the regulations, and no ordinary oil, gear oil, vegetable oil and
so on can be used instead.
The engine is filled with sg10w-40 gasoline engine oil.In order
to change the lubricating oil of other specifications, the viscosity
should be selected according to the different regions and
temperature changes.When replacing the lubricating oil, please
replace the original lubricating oil in the crankcase. After cleaning
with the washing kerosene, add the new lubricating oil according to
the regulation.
Operational guidelines for school official cites use
Check before driving.
Before driving, you must make a comprehensive inspection of the car, and carry out a key
inspection on the parts that affect the safe driving.Please check at least the following items (if
you need to adjust and repair, please refer to the instructions in this manual for adjustment and
maintenance) :
Check engine lubricating oil level ——add lubricating oil as required, and check for oil
leakage.
Check fuel tank level ——add fuel to the tank as needed and check for oil leakage.
Check front and rear brake —— before and after the action of the rear brake, the free
travel is too large or too hour should be adjusted.
Check the air pressure and wear and tear of the tyres before and after the inspection.
Check the throttle control— — check the action of the throttle handle, control the
connection of the cable and the free travel of the handle, adjust or replace when necessary.
Check battery —— check battery power and charge when necessary.
Check the lighting and signal —— check the headlights, taillights, turn signals, brake lights
and speakers.
Check the drive chain ——check the tension and lubrication of the chain.
If serious wear or damage should be replaced.
Check steering mechanism——check for flexibility and stability of steering control.
Check the robustness of front, rear axle, front fork and other parts.
Note:
the user should check the closeness and safety of the fuel path and never allow the
leakage of fuel.
If the pipeline lock ring is loose, if it should be firmly installed, the pipeline will be old and
cracked, and if it is old and cracked, it should be replaced.
the electrical parts from the ignition coil to the spark plug should be connected reliably so
as not to cause a fire accident.
Engine starting

- 11 -
1. Insert the key into the ignition switch and switch to " " position.
2. Use the variable speed pedal to transfer the transmission to the neutral, the neutral indicator
light should be on, or the transmission should be placed in any gear
position, the left hand grips the clutch handle, and the clutch begins to
work.
3. The switch is in the open position " ".
[electric starting]
Press the brake lever on the right foot or the right hand to hold the brake handle and press the
power start button " " and turn the throttle handle properly to start the engine.
Warning: the time of pressing the start button should not exceed 3 seconds, otherwise the
battery will overdischarge.
the interval time of each start should not be less than 5 seconds. If the starting time is
not successful, the starting mode of the foot or the reason of the analysis should be changed.
when the engine is successful, release the start button immediately.
do not press the start button when the engine is running.
Start button
when the battery voltage is too low, the engine should not be started by electric starting.
Warning: exhaust contains harmful gases such as carbon monoxide. Avoid starting engines in
closed garages or narrow Spaces.
Engine running
New cars must be grinded to ensure normal operation in the future.
Start button
Flameout switch

- 12 -
The mileage of new cars is 1000km.Since the engine is brand new, the initial 1000km is very
important for the performance and service life of the engine.During the grinding period, the
throttle should be avoided, and the speed of the engine should be selected strictly. The
maximum speed must not exceed 6500r/ min (see engine tachometer).
1. When driving (0-150)km, the throttle should be avoided to open up to 1/4 of the
maximum opening amount.
After each driving (0. 5 ~ 1)h, the engine should be stopped to cool for 10min.
Change the speed and gear of the vehicle in due time. Do not drive in a fixed throttle
position or gear.
2. (150 ~ 500)km running-in should be avoided if the throttle is turned on to open more than
1/2 of the maximum opening.
Full throttle operation is strictly prohibited: the speed and gear of the vehicle should be
changed in due time to drive the vehicle in a fixed throttle position or gear.
It is strictly forbidden to operate at low level.
3. When driving (500 ~ 1000)km, the throttle should be avoided to open more than 3/4 of
the maximum opening.
The speed and gear of the car should be changed in time to avoid speeding and full throttle
operation.
Note: after 1000km, make sure to replace the engine oil and clean the air filter.
It should be maintained at the request of the periodic table to ensure that the motorcycle is in
optimum condition and has good performance, and prolong the service life of the engine.
If any engine failure occurs during the grinding, please consult with the dealer or repair station
immediately.
motorbike
1. Turn on the ignition switch and start the car Shift diagram
Here is theillustration :(" "movement
direction" "foot movementdirection)
1: first gear N: gap
2: second gear 3: third gear
4: fourth gear 5: fifth
Back to the block

- 13 -
with the brake pedal (the engine must be preheated when the engine is cold).
2. Slowly twist the throttle hand to increase the engine speed to ensure the smooth start of
the vehicle.
3. When the car is moving, use the method of twisting the throttle to control the speed.
4. When the vehicle reaches a smooth running state, the engine speed should be reduced,
and the variable speed pedal should be stepped on, so that the transmission can be put into the
second gear.The other gear of the transmission can be changed in the same way.
5. When you need to stop, loosen the throttle and slow down the speed of the car.
Note:
1. Start with low gear.When the throttle is not released, it is strictly forbidden to change
gears, otherwise it will cause damage to the engine, transmission chain and other parts.The front
brake and the rear brake should be operated in a coordinated manner, so that the brake of the
wheel is not too tight, or the braking effect will be reduced, and the operation of the vehicle will
be difficult to control.
2. The engine change mode shall prevail in kind.
Brake use
1. When it is necessary to reduce the speed, it is usually necessary to gradually use the front and
rear brakes.
2. In case of emergency braking, the accelerator should be returned to the accelerator, and the
front and rear brakes should be used simultaneously.
Braking instructions:
if the brake or rear brake is used separately, it will not achieve better braking effect;The
emergency brake will cause the front wheel or rear wheel to suddenly stop and make the
motorcycle difficult to control, so emergency braking should be avoided.
In the block

- 14 -
Before turning, you should turn off the throttle and use the brake to slow down.Otherwise,
turning off the accelerator or emergency brake at the moment of the turn can cause skidding,
making the vehicle difficult to control.
when driving on a wet or loose ground, you should pay attention to smooth operation. Sudden
acceleration, emergency braking and sharp turn may cause the car to lose control.
when the slope is lower, it should be moved to a lower gear;Braking with engine
resistance.This can avoid long - term continuous use of brake, make the brake hot, reduce the
braking effect.
parking
1. After the motorcycle stops, the transmission should be changed into neutral.
Switch the ignition switch to (close) and pull out the key.
2. Park the motorcycle with side support.
3. Lock the head lock to prevent theft.
4. If equipped with burglar alarm, it should be in "alarm state of alarm".
Check the sensitivity of burglar alarm.
Note: the ground must be flat and firm to avoid tipping over.
Maintenance and maintenance
Lubricating oil inspection, replacement and cleaning of strainer.
Inspection of lubricating oil level
Check the oil level before driving every day.
The back of the right crankcase cover is provided with oil ruler
① the oil gauge line is engraved on the oil gauge.The oil level must
be between the oil ruler ② lower③ two marks.
1. Place the motorcycle on the plain, the body is upright, and the
oil ruler is turned out.

- 15 -
Insert the oil gauge into the lubricating oil (cannot be rotated) and take out the view.
2. Add the qualified lubricating oil as appropriate, add the highest scale (on-line), do not add
more.
3. Screw into the oil ruler to check for oil leakage.
Note: the engine running time oil is insufficient, can cause damage to the machine;Excessive oil
can cause engine heating and fuel consumption.
Replace lubricating oil with oil filter and oil filter cleaning
Oil is used when the engine is still hot.
1. Screw down the oil ruler①.
2. Empty the oil container under the engine, And unscrew the Oil cap
bolt④ under the engine.
3. Start the ignition switch button to completely empty the residual
oil.
4. Remove the oil drain cover bolt and pour into the cleaning solvent.
5. Install the oil drain cover bolts and ensure that the seals are well
sealed.
6, injection about 1 liter recommendation grade engine oil, with oil scale, starting the engine, idle
quick turn off for a few more minutes, stay a few minutes later, check the oil, if necessary, to add
lubricating oil or blow off lubricating oil.
Note: areas with serious dust should increase the number of oil changes more than normal.
Spark plug selection and replacement
Compliant spark plugs: C9EH.
1. Remove the spark plug cap and remove the spark plug
with the special socket wrench in the tool bag.Use a wire
brush to remove carbon and dirt from spark plugs.
2. Check whether the spark plug electrode has loss, and
whether there is ablation on the side electrode.If the spark
plug loss or the insulator has a crack or fall off, the spark plug
should be replaced.
3. Check the electrode gap with the thickness gauge and
Spark plug gap

- 16 -
adjust it to (0.6 ~ 0.7)mm.And check whether the spark plug gasket is good.
4. When installing the spark plug, to prevent the screw thread, you must first twist the spark
plug in place with your hand, and then screw the spark plug with a socket wrench.
Cleaning and assembly of air filter
The air filter should be cleaned at least once after the vehicle has travelled 1000km.
If your vehicle is in a dusty area, you should clean the air cleaner.
This car air filter is foam filter element.
1. Take the seat pad ①, and then remove the right lid ②.
2. Remove 3 fastening screws to remove the air
filter and cover ③.
Remove the air cleaner ④.
3. After cleaning the filter cartridge with washing oil,
let dry.
(recommended oil sg10w-40)
4. Immerse all the filter elements in clean
lubricating oil (recommend oil QE 15w-40).
After taking out, extrude extra oil, with no drop of
oil.
5. The assembly shall be carried out in the reverse
order.
Warning:
When the filter core is clogged with dust or added too much oil, the motorcycle fuel
consumption will be greatly increased and the power performance will be reduced.
The gasoline and low flammable solvent are highly flammable substances and cannot be used
for cleaning the filter.
Check and adjust valve clearance.
When the valve clearance is too large, there will be noise.
When the valve clearance is too small or there is no gap, it will
obstruct the valve closing, causing the valve to abate and make
the engine less power.Therefore, valve clearance must be
checked regularly.
The inspection and adjustment of valve clearance should be carried out in the cold state of
the engine. The inspection and adjustment method is as follows:
1. Remove the ignition timing hole cover, left cover center hole
cover and two valve covers.
2. Turn the rotor of the magnetic motor counterclockwise, and
Tag TIIF

- 17 -
mark the② "T" to a straight line with the cut line on the ignition timing hole cover.Touch the
rocker arm with the finger to find out that the piston is at the end of the compression stroke.If
the rocker arm is fastened, the rotor of the magnetic motor must be rotated 360 degrees
counterclockwise and the mark is aligned again.
3. Insert the thickness gauge between the adjusting screw ① and the top of the valve rod
to check the gap between the two valves.Standard valve clearance: tag Ⅱ
inlet valve: (0.04 ~ 0.04) mm exhaust valves: (0.04 ~ 0.04) mm
4. If adjustment is needed, loosen the lock adjusting nut③, and turn the
adjustment pile to①. Until the thickness gauge is inserted, there is slight
resistance, and after adjusting, tighten the control stack.After the adjustment,
check the valve clearance again.Then cover the ignition timing hole cover and the center hole
cover on the left side.
Check and adjust the throttle operation.
1. Check the throttle handle from full open to full closed position.
2. Check whether the throttle control line between the throttle and throttle is good, and if it is
broken, stuck or improperly, it should be replaced or re-run.
3. Check the throttle handle freely.
Standard free travel (2 ~ 6) mm handle rotation.
(the adjustment method of free travel is to loosen the fixed nut ① on
the throttle cable and the fixed nut ③on the throttle cable, and then
adjust the fixed nut②on the throttle cable.)
Clutch adjustment
1. began to play a role in front of the clutch handle tip standard free

- 18 -
stroke (10 ~ 20) mm, if you want to make an adjustment, please unscrew the crankcase on clutch
control positioning plate ④inverse direction ⑥, loosen the lock nut and adjust the adjusting
nut ⑤ according to chronological direction, will reduce in the clutch handle free trip;
Press the reverse direction, the free stroke increases, and the final clearance adjustment is
completed and the lock nut ⑥, ⑦.
2.Adjust the adjuster ⑦and lock nut ⑧on the left handle and adjust it in the same way.
Drive chain inspection, adjustment and lubrication
Drive chain inspection and adjustment
Check the tensioning of the drive chain as follows. If the chain is short
of oil, add lubricating oil:
1. Move the chain under the hand and allow the mobile range to be
about (10 ~ 20)mm.
2. Turn the back wheel to check the reliability of the chain.
If a section of the chain is not flexible, add a proper amount of lubricant
to it.
3. Check the wear of the sprocket. If the chain or sprocket wear is serious, complete the
replacement in time.
Do not use the new chain with the worn down old sprockets,
which will speed up the wear of the chain.
The chain adjustment
Chain tensioning diagram

- 19 -
When adjustment is needed, ① should loosen the rear axle nut and adjust the regulator
nut②to ensure that the adjustment amount of the regulator on the left and right sides ③ the
same.
Until the chain has the appropriate swing and tension, then tighten the rear axle nut.When the
tensioning of the drive chain is adjusted, the rear brake should be adjusted accordingly to achieve
the optimum condition.
Drive the lubrication of the chain.
Use of lubricating oil SG 10W-40.
When the chain is too dirty, it should be removed and thoroughly cleaned and lubricated as
follows:
1. Remove the left back cover and chain box of the engine, and
remove the chain lock clamp, disconnect the chain and remove it.
2. Remove all dirt and dirt and air dry in clean washing oil.
3. Put the chain back to the chain wheel after the lubrication chain,
install the chain lock clamp properly (ensure that the closed end of
the lock clamp is in the normal direction of the wheel).
4. Adjust the tightness of the chain and the state of the rear brake, and put the chain box and the
back cover back in place.
Note: when installing the chain lock clip, the opening should be opposite to the normal motion of
the chain.
Inspection of hydraulic disc brake before and after.
1. The front brake handle should have a certain correct stroke and
stable.
2. Check the liquid level in the brake oil cup ①: place the car in a flat
place, and place the top of the brake oil cup horizontally by turning the
handle.
When the liquid level is below the mark, the brake oil should be filled.
3. Check whether the brake system has oil leakage (brake oil hose and
oil cup should not have cracks).
4. Check the wear condition of brake disc ③.
Replace when the brake disc is worn to the ultimate thickness.
The brake oil hose and brake disc are marked with wear limit thickness ④. The wear limit
thickness of this brake disc is 3mm.
Chain clamp
Table of contents
Other Yingang Motorcycle manuals