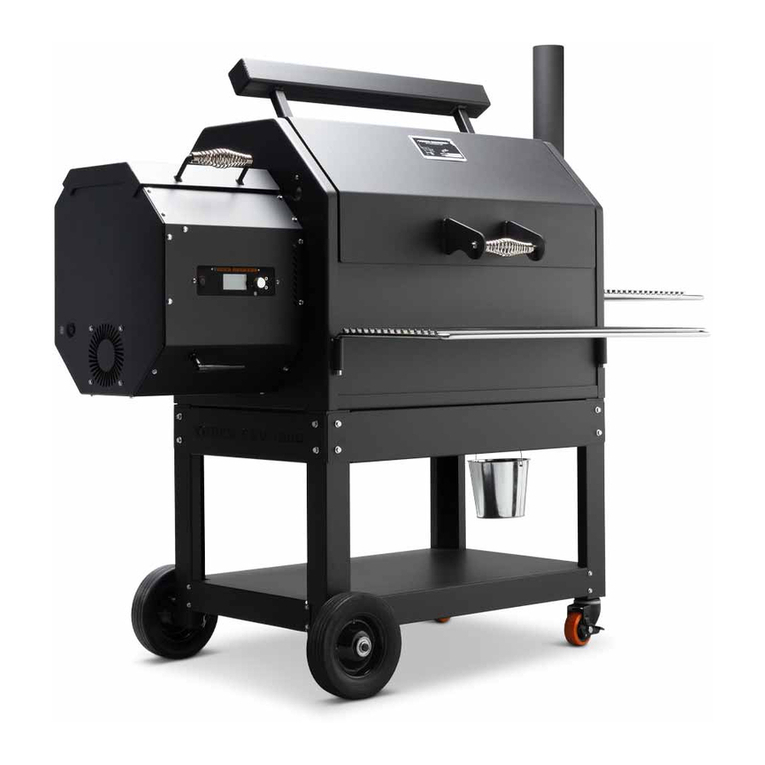
Yoder Smokers YS S Series User manual

OPERATION MANUAL

2

3

4
YODERSMOKERS.COM
Dangers, Warnings & Cautions................................................................................................................................6
Burning-in Your New Grill..........................................................................................................................................8
ACS Controller Overview.........................................................................................................................................10
Cooking Styles & Set-ups........................................................................................................................................14
Pre-Grill Checklist......................................................................................................................................................16
Operating the Grill.....................................................................................................................................................18
Fireboard App...........................................................................................................................................................20
Routine Maintenance...............................................................................................................................................34
Troubleshooting Bluetooth Connection.............................................................................................................36
Troubleshooting WiFi Connection........................................................................................................................37
Troubleshooting Ignition.........................................................................................................................................38
Manually Igniting the Grill.......................................................................................................................................39
FAQ’s............................................................................................................................................................................40
Troubleshooting.........................................................................................................................................................41
Diagnostics.................................................................................................................................................................42
Temperature Test......................................................................................................................................................44
ACS Controller Temperature Oset.....................................................................................................................46
Index of Grill Components......................................................................................................................................55
Warranty......................................................................................................................................................................66
CONTENTS

5
COOKING GRATES
2-PC HEAT DIFFUSER
HOPPER
ACS CONTROLLER
THERMOCOUPLE
IGNITER
BURN GRATE
FIRE POT
VARIABLE
DISPLACEMENT
DAMPER

6
DANGERS, WARNINGS, AND CAUTIONS
PLEASE READ THIS ENTIRE MANUAL BEFORE USING YOUR NEW YODER SMOKERS S-SERIES PELLET GRILL.
Failure to follow the instructions in this manual could result in property damage, bodily injury, or even death.
Contact your local fire ocials about restrictions and installation inspection requirements in your area if you
have questions on the positioning of your grill. As with any grill, gases such as carbon monoxide are formed.
Harmful in concentrated quantities, carbon monoxide can lead to death. ONLY USE THIS GRILL in an outdoor,
open-air environment where the carbon monoxide can naturally dissipate and not harm you.
WARNING!
Safety guidelines to prevent this colorless, odorless gas from poisoning you, your family, your pets, or others:
DANGER!
FOR USERS IN NORTH AMERICA:
DANGER!
FOR ALL PRODUCT USERS:
• Know the symptoms of carbon monoxide
poisoning: headache, dizziness, weakness,
nausea, vomiting, sleepiness, and confusion.
Carbon monoxide reduces the blood’s ability to
carry oxygen. Low blood oxygen levels can result
in loss of consciousness and death.
• See a doctor if you or others develop any cold
or flu-like symptoms. Carbon monoxide poisoning,
which can easily be mistaken for a cold or flu, is
often detected too late.
• Alcohol consumption and drug use increase the
eects of carbon monoxide poisoning.
• An electrical supply with GFCI protection is
required. To prevent and protect against any
shock hazard, locate a safely grounded 3-prong
GFCI receptacle in reach of the power cord.
• Outdoor extension cords can be used if they
are surface marked with the sux letter “W” and
with a tag stating “Suitable for use with outdoor
appliances".
FOR USERS OUTSIDE NORTH AMERICA:
• Plug into an appropriate earthed outlet.
• Do not remove earth prong or modify plug in.
• Do not use an adapter or extension cord.
• Carbon monoxide is especially toxic to mother
and child during pregnancy, infants, the elderly,
smokers, and people with blood or circulatory
system problems, such as anemia or heart disease.
• Only use your grill outdoors on a safe,
noncombustible surface and distanced from any
flammable materials or liquids.
• Do not use gasoline, charcoal lighter fluid, or
flammable liquids to ignite or maintain the fire in
the grill. Keep all such liquids well away from this
appliance when in use.
• Hazardous voltage is present, which can shock,
burn, or cause death. Disconnect the power cord
before servicing the grill unless otherwise noted
in this Owner’s Manual.
• Never store flammable liquids near the grill.
• Never use gasoline or lighter fluid to manually
light your grill.
• Never use your grill in the rain or around any
source of water.
• Do not use the grill for anything other than its
intended use.
• Should a grease fire occur, push the power
button and immediately unplug the grill to stop the
fans. Shut the lid until the fire is out.
///////////////////////////////////////////////////////////////////////////////////////////////////////////////////////////////////////////////////////////////////////////////////////////
///////////////////////////////////////////////////////////////////////////////////////////////////////////////////////////////////////////////////////////////////////////////////////////

7
DANGERS, WARNINGS, AND CAUTIONS
Many parts of the grill will become intensely hot
during operation. Please use caution to avoid burns
both during operation and afterwards while the grill
is still hot.
• Never leave the grill unattended with young
children present.
• Never move the grill during operation.
• Always allow the grill to cool before moving.
• Assemble and operate this grill ONLY per
the instructions in the Assembly Guide and the
Owner’s Manual.
• The grill is intended for outdoor use only.
• Never use heating fuel pellets in the grill, due to
potential hazardous contaminants and additives
that may be present.
• Always store pellets in dry location. Pellets
exposed to moisture will not burn properly and
aect the proper operation of the grill. If wet pellets
are left in the hopper, they lock up the auger.
• Keep the grill clean per this manual.
• Do not modify or use accessories not specified
for use with this grill.
• If your previous cooks have produced large
quantities of flammable grease, it is highly
recommended that the grease be cleaned
from the grill before cooking on it again.
• Keep the grill unplugged while not in use.
• After a period of non-use, the hopper, auger,
and firepot must be inspected for obstruction.
• When operating this grill, maintain a MINIMUM
distance of 18 inches (46 cm) between the grill and
any walls or combustible surfaces. See diagram
below.
• When operating the grill under overhead
combustibles or covered patios, a MINIMUM of
40 inches (102 cm) is required.
• The smoker must be level front to back, but it is
not required to be level from left to right as long
as the drip bucket end of the cooker is the lowest
point — otherwise problems with grease running
towards the burn pot could result in a grease fire.
WARNING!
Burn Hazard:
WARNING!
Air Contaminant Hazard:
CAUTION!
Best Practices:
WARNING!
Fire Hazard:
18in. (46cm)
18in. (46cm)
18in. (46cm)
PROPOSITION 65 STATEMENT
WARNING: Combustion byproducts
near this cooker include carbon monoxide,
a chemical known to the
State of California to cause birth defects
or other reproductive harm.

8
BURNING-IN THE GRILL
01. COOKING CHAMBER
02. grates & shelves
03. POSITIONING THE GRILL
Install the burn grate inside the firebox (FIG 1) making sure it rests securely against the back wall with the
igniter tube passing through the grate. Next, install the heat diuser plate (FIG 2) into the cook chamber. Pull
the variable displacement damper (FIG 3) all the way out. Finally, secure the smokestack with the thumb screw.
Place the cooking grates inside the cooking chamber (FIG 4), then slide the second (upper) cooking shelf into
place (FIG 5). The welded brackets on the second cooking shelf should slide onto the rail first. Next, attach the
exterior front and side shelves onto the cooker (FIG 6).
Using the side shelf to assist in moving, position the cooker a minimum of 18 inches away from walls, deck rails,
or any other combustible surface. Ensure the cooker is level from front to back. However, the cooker does not
have to be perfectly level from left to right as long as the end with the drip bucket (opposite the hopper) is
the lowest point — otherwise problems with grease running towards the burn pot could result in a grease fire.
FIG 1 FIG 2 FIG 3
FIRE BOX
VARIABLE DISPLACEMENT
DAMPER
BURN GRATE
FIG 4 FIG 5 FIG 6
BURNING-IN THE GRILL

9
BURNING-IN THE GRILL
04. PELLETS & POWER
05. THE “BURN-IN”
06. shutdown
Before cooking for the first time, “burn-in” the grill to rid it of any foreign matter. First, fill the hopper (FIG 7)
with pellets, and put a handful of pellets into the burn grate (FIG 1). Next, connect the power cord between the
receptacle on the back of the hopper (FIG 8) and a GFCI-protected wall outlet (FIG 9). Then close both lids.
Press the Power button (FIG 10) to initiate the startup. Once the display shows the menu, press the small black
button next to “Start” (FIG 11) to initiate the pellet auger feed system. When the display reads 350°F (FIG 12),
open the lid and coat the grates with vegetable oil. Close the lid and allow the grill to “burn-in” for 45 minutes.
After 45 minutes at 350°F, press the Power button to begin the shutdown process. The display will flash
“SHUTDOWN” and the fans will continue to run until the fire is burned clean. Once the process is complete,
the fan and display will turn o. Finally, after the cooking grates have cooled completely, wipe them down with
cotton towel to ensure any remaining foreign matter is removed. NOW IT’S READY AND SAFE TO COOK!
FIG 8 FIG 9FIG 7
FIG 11
350°F350°F
350°F
FIG 12FIG 10
BURNING-IN THE GRILL (CONT.)

10
POWER
BUTTON
SELECTION
BUTTONS
LCD DISPLAY
SCREEN
ROTARY
SELECTOR
INDICATOR
LIGHT
TEMPERATURE
PROBE JACKS
POWER BUTTON – Powers the grill on and o.
SELECTION BUTTONS – These buttons are used to make selections throughout the menu.
LCD DISPLAY SCREEN – Displays all content.
ROTARY SELECTOR – Allows you to navigate the menu by rotating the knob and also allows you
to make selections or switch between options by pressing in on the knob.
INDICATOR LIGHT – Lit when power to the unit is on, and when the cooker is in shutdown mode.
TEMPERATURE PROBE JACKS – Plug in your temperature probes to be able to view food
temperature on the display screen and on your mobile device via the app.
start
menu
prime
START – Press to initiate cooking functions
MENU – Press to access programs and settings
PRIME – Press to manually operate the auger
ACS CONTROLLER OVERVIEW
ACS CONTROLLER LAYOUT
START-UP DISPLAY

11
ACS CONTROLLER OVERVIEW
350°F
175 50
52
°F
350°F
OPERATING MODE
INDICATOR
COOKER
TEMPERATURE PROBE/CHANNEL 2
TEMPERATURE
SET TEMPERATURE
175°FPROBE/CHANNEL 1
TEMPERATURE
TEMPERATURE – Displays the current temperature of the cooker at the center of the main cooking
surface. Upon startup, the display will flash “HEAT UP” until the internal temperature of the unit
reaches 125°F. At that point, the controller will display the temperature of the main cooking surface.
OPERATING MODE INDICATOR – Indicates the current mode the cooker is operating in.
SET TEMPERATURE – Displays the selected set temperature. To adjust the temperature set
point, turn the dial on the rotary selector knob clockwise to increase it or counter-clockwise to
decrease it. The rotary selector adjusts in 5° increments. You can press in on the rotary selector
to switch to 25° increments.
PROBE CHANNELS – Display the temperature reading(s) from the probes when inserted into the
appropriate jack. If no probes are connected, the screen will not display temperature in this area.
Heat-Up Mode – An upward pointing, blinking arrow indicates
the cooker is increasing the temperature.
Maintenance Mode – A diamond indicates the cooker is in maintenance mode
and is operating to maintain the set temperature.
Cool Down Mode – A downward pointing, blinking arrow indicates
the cooker is decreasing the temperature.
HOME SCREEN DISPLAY

12
This menu allows access to options that are available during a cook. To access the menu, press any
of the three selection buttons while at the home view screen. The menu will appear and allow for a
selection to be made for three seconds before returning to the home view. The currently selected
view will appear at the top of the screen. The “Pit & Probes” view is the default display option,
however there are five total display options of which can be chosen by pressing the VIEW selection
button on the control panel.
ACS CONTROLLER OVERVIEW
PIT & PROBES
PROBE 1
PROGRAM
PIT
PROBE 2
SELECTION MENU DISPLAY

13
MAIN MENU DISPLAY
ACS CONTROLLER OVERVIEW
TIME COOK PROGRAM – The time cook function is used to run the cooker for a set amount of time
at a specified temperature.
TEMP COOK PROGRAM – The temp cook program is used to run the cooker at a specified
temperature until either Probe 1 or Probe 2 (user specified) hits the desired temperature.
CUSTOM PROGRAMS – The custom program feature allows the user to create and save a program
with as many as nine steps for the cook to follow. This function is beneficial when there is a specific
method you follow when cooking a certain type of meat or a particular recipe.
WIFI – Displays the current WiFi connection settings.
SETTINGS – Allows access to additional settings, such as temperature selection between Fahrenheit
& Celsius or calibration of the thermocouple while the cooker is running. There is a test function that
can be initiated before starting the cooker. The test function allows each mechanical component of
the hopper assembly to be tested.
ABOUT – Displays the current controller program information.
The main menu is accessible in either the start-up menu or in the in-cook selection menu. This
menu allows the user to access their dierent programs, settings, and general information about
their cooker. Navigate the available selections in the main menu by using the rotary selector knob.
You can turn the knob clockwise or counter-clockwise to change your selection and press inward
on the knob to make a selection.

14
When the cooker is set up traditionally (diuser plate installed), the heat up time is 20 to 30 minutes.
When the cooker is set up for direct grilling (diuser plate out), the heat up time is about 15 minutes.
It is also important to note that when the cooker is set up “direct”, the temperature at the center of
the grate is hotter than the reported temperature. How much hotter depends on the set point. At
350°F on the display, the grate center is approximately 425°F. At 475°F on the display, grate center is
approximately 625°F. The dierence is caused by the reduction of airflow to the thermocouple when
the direct grates are installed. This is true with the diuser in or out.
Finally, precise temperature management is not important when you are direct or indirect grilling and
are opening the grill frequently. Simply find a set temperature that works well for the type of food you
are grilling. For instance, burgers or brats do well at a 350° F set point when indirect grilling.
COOKING STYLES + SETUPS
TIMES, TEMPS, AND HELPFUL TIPS
YOU SHOULD KNOW...
The YS640S is fitted with a variable displacement damper for managing heat distribution while
cooking with the heat diuser plate in place. With the damper pushed in about five inches, the
cooking grate surface will cook evenly, creating an ideal environment for slow cooking. For grilling,
the damper should be pulled completely open toward the right side of the grill. (See diagram below)
BAKING AND SMOKING WITH THE ADJUSTABLE
VARIABLE DISPLACEMENT DAMPER
DAMPER POSITION FOR EVEN HEAT
FIREBOX
DAMPER
POSITION
HANDLE
HEAT DISTRIBUTED THROUGHOUT
(TOP VIEW)

15
COOKING STYLES + SETUPS
THE VERSATILITY OF YOUR GRILL IN
4 UNIQUE COOKING SETUPS
SMOKING
Temps from 175 to 275°F with diuser plate installed, with access door in place, and standard round
bar cooking grates in place. In this setup, the variable displacement damper is generally pushed in
five inches from the right hand side of the grill to create an even temperature across the grates.
(See diagram on opposite page for damper position)
BAKING
Temps from 350 to 400°F with diuser plate installed, with access door in place, and standard round
bar cooking grates in place. In this setup, the variable displacement damper is generally pushed in
five inches from the right hand side of the grill to create an even temperature across the grates.
(See diagram on opposite page for damper position.
DIRECT GRILLING
Temps from 350 to 600°F using optional GrillGrate® cooking grates for direct grilling with searing
capability. In this setup, remove the heat diuser plate, set the variable displacement damper to the
full-open position, and install the optional GrillGrate® cooking grates on the left side of the cooker.
The optional GrillGrate® Grilling Kit consists of three custom-made aluminum panels which replace
two standard cooking grates. (See diagram below)
INDIRECT GRILLING
Temps from 275 to 350°F for moderate temperature grilling such as wings or chicken breasts. In this
setup, keep the heat diuser plate in place, remove the heat diuser access door, set the variable
displacement damper to the full-open position, and install the optional GrillGrate® cooking grates on
the left side of the cooker. (See diagram below)
DIRECT GRILLING GRATES 8” COOKING GRATES

16
1. Open the cooking chamber door and remove the cooking grates.
2. Remove the access door from the heat diuser plate. (FIG 13)
3. Remove the burn grate from the firebox (FIG 14). Inspect and clean thoroughly. Make certain that
the combustion holes in the burn grate and the igniter tube in the firebox are free of debris or ash
build up. Visually inspect the air way between the combustion fan and the firebox to be certain that
it is free and clear of ash and debris (a shop vacuum works well for ash and debris removal).
4. While inspecting the firebox assembly, confirm that the igniter assembly, tube and igniter rod are
free of ash or other debris. Periodically inspect the igniter tube to ensure it is tightly secured by
grabbing the tube and turning it clockwise.
5. Re-install the burn grate (FIG 15). Begin by resting the right hand side of the burn grate on the
fire box and then pressing down on the left hand side of the burn grate until fully seated. When the
burn grate is properly seated it rests firmly on the right hand side of the firebox and fits close to the
hopper wall. Finally, ensure the igniter assembly is centered in the respective hole in the burn grate.
6. Re-install the access door.
7. Re-install the cooking grates and second shelf.
8. Remove, inspect, and clean the grease bucket as needed.
9. Open the hopper lid and inspect for any foreign materials, as well as inspect the condition of
pellets left over from previous cooks to ensure they’ve not been damaged by humidity.
pre-grill checklist
YODER SMOKERS RECOMMENDED
PRE-GRILL CHECKLIST
you
should
know
If you’ve been smoking cuts of meat with higher fat content or larger quantities of meat or
pork, you will want to remove the entire heat diuser plate and inspect the bottom of the
cooking chamber for grease build up. Excess grease in the grill can cause a fire that can be
dangerous and dicult to extinguish. To remove build up of grease in the cooking chamber,
use a plastic putty knife to scrape it up and discard. Take extra care along the seams of the
chamber so as to not damage the silicon seal.

17
FIG 13
FIG 15
FIG 14
pre-grill checklist

18
OPERATING THE GRILL
Start-up Procedure
SHUTDOWN PROCEDURE
1. Plug the female end of the power cord into the receptacle on the pellet hopper. Next, plug the
male end into a 120 volt, 15 amp GFCI-protected outlet. If an extension cord is required, see caution
notes on page 6 of this manual.
2. Load the hopper with food grade pellets. DO NOT use heating grade pellets.
3. Adjust the variable displacement damper to wide open (pulled outward until it stops).
4. Push the power button. This starts the combustion air fan and illuminates the LED power light.
5. Press the START button on the control panel to activate the auger feed system. This will prime the
burn grate with pellets for the fire. At 30 seconds, the igniter is powered on; within 2 minutes, the
heat from the igniter and the combustion air from the fans will have a small smoldering fire started.
6. Set your desired cooking temperature by adjusting the rotary selector knob. If you do not adjust the
temperature, it will automatically heat to the default temperature set point of 350°F. The temperature
can be adjusted at any time during the cook.
7. Once the temperature reaches the set point, typically 30 minutes, place your food on the grates.
1. When finished cooking, push the power button. The screen will begin flashing “Powering O”.
2. Allow the combustion cooling fan to continue running until the fire is burned clean. The fan will
continue to run until the cooker temperature reaches 125° F or 18 minutes, whichever occurs first.
3. When the cooling procedure is complete, the fan and power LED will turn o, and the controller
will power down. At this point, it is safe to unplug the cooker from its power source.
DO NOT UNPLUG UNTIL THE LED POWER LIGHT IS OFF.
RECOMMENDED PROCEDURE FOR
OPERATING THE GRILL
you
should
know
Once the start cycle has been activated, an “up arrow” will appear on the display panel next
to the set temperature indicating “heat up” mode. Once the grate temperature reaches 110°F,
the actual grate temperature will then be displayed. When the target temperature range is
attained, a diamond will be displayed next to the set temp to indicate “Maintenance Mode”.

19
REIGNITION FEATURE
350°F350°F
350°F

20
FIREBOARD APP
App Install + Account Creation
The very first thing you’ll need to do is download the free FireBoard app onto your smartphone or
tablet. From your mobile device, please visit https://apps.yodersmokers.com to obtain download
links for iOS or Android platforms.
After installing and opening the FireBoard app, you’ll be presented with a login screen (FIG 16).
If you don’t already have a FireBoard account, you’ll need to create one. Tap on “Create Account”,
fill in the fields (FIG 17), and tap “Register.”
Once registered and logged in, you should be located on the settings screen (FIG 18), ready to pair
your cooker’s embedded FireBoard with the app. If your app isn’t already on the settings screen, tap
the gear icon in the bottom right hand corner of the screen to navigate to the settings screen.
FIG 16 FIG 17 FIG 18
This manual suits for next models
1
Table of contents
Other Yoder Smokers Smoker manuals
Popular Smoker manuals by other brands

oklahoma joes
oklahoma joes 11201716 Product guide

New braunfel
New braunfel 9201508 Product guide

Char-Broil
Char-Broil 14202002-A1 Guide

Winston
Winston PS3145 owner's guide

Masterbuilt
Masterbuilt 20060516 Assembly, care & use manual warning & safety information

Weber
Weber Smokey Mountain Cooker series manual