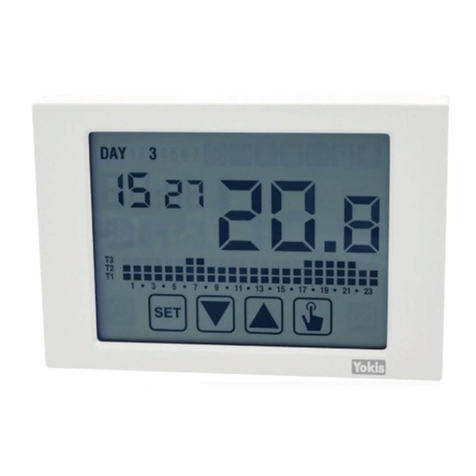
Yokis Thermarp User manual

THERMOSTAT NUMÉRIQUE AVEC CONNEXION DIRECTE OU RADIO
TERMOSTATO DIGITALE A COLLEGAMENTO DIRETTO O RADIO
DIGITAL THERMOSTAT WITH DIRECT OR WIRELESS CONNECTION
TERMOSTATO DIGITAL DE CONEXIÓN DIRECTA O RADIO
DIGITALER THERMOSTAT MIT DIREKT- ODER FUNKVERBINDUNG
DIGITALE THERMOSTAAT MET DIRECTE OF RADIOSIGNAALBEDIENING
DIGITAL TERMOSTAT MED DIREKTE FORBINDELSE ELLER RADIO
GUIDE DE DÉMARRAGE RAPIDE
GUIDA RAPIDA ALL’INSTALLAZIONE
QUICK INSTALLATION GUIDE
GUÍA RÁPIDA DE INSTALACIÓN
SCHNELLANLEITUNG ZUR INSTALLATION
SNELGIDS BIJ DE INSTALLATIE
HURTIG INSTALLATIONSGUIDE
THERMARP
Réf. / Cod. 5454489

P14
DS1054-055A
USING THE DEVICE
INSTALLATION
HOW TO START THE THERMOSTAT
The YOKIS THERMARP thermostat runs on
batteries (2 x 1.5 V AAA / LR03 type batteries).
1. Open the rear compartment of the thermostat timer
to insert the batteries, checking the polarity indicated
on the battery compartment.
2. After the batteries have been inserted correctly,
the thermostat will display the following screen after about 20 seconds.
3. Do not connect the thermostat to the base until the previous screen is displayed.
Couple rst the teeth on the top side.
No programming or changes can be made to the set parameters until the device
is properly attached to the wall base.
4. The clock must be set (by entering time and date) after the thermostat is powered.
The thermostat requires the time and date to be entered in order to operate
correctly.
5. Hold button pressed for 3 seconds until the clock icon starts ashing. Press
button to access the time and date conguration.
+
+
--
To use and congure the THERMARP thermostat, down-
load the instruction manual by scanning the following
QR Code with the camera of your smartphone or tablet.
GB

DS1054-055A P15
6. Use buttons and to increase and decrease the values. Press button to conrm
and move on to the next parameter. In order: seconds / minutes / hour / year / month / day.
7. Once all parameters have been set, hold button pressed for 3 seconds to exit the
clock synchronisation menu.
PREREQUISITES
The THERMARP thermostat can be used to control a boiler or a 230V solenoid valve
directly via its internal relay or via the relay of a wireless receiver: MTR2000ERP(X) or
MTR2000MRP(X).
NO
C
max 5A 250 V~
NC
NA C
Wires with cross-section area of 0.5 mm2or larger must comply with IEC 60332-1-2;
wires with cross section area smaller than 0.5 mm2must comply with IEC 60332-2-2.
In the case of a wireless receiver, before pairing the thermostat and the wireless receiver,
the MTR2000ERP(X) or MTR2000MRP(X) receiver must be wired and powered.
Direct wiring

P16
DS1054-055A
Wiring via MTR2000ERP(X) Wiring via MTR2000MRP(X)
230V ~
NL
C1
N
C2
BP
L
(*)
123
456
(*)
Pairing the wireless receiver to the thermostat
▶On the THERMARP thermostat, open the thermostat conguration menu by holding the
button pressed for 3 seconds until the CLOCK icon starts ashing.
▶Use the arrows and to move through the various items of the conguration
menu until the RF WIRELESS menu is displayed. Tap on the “Validate” icon .
A B
Always make sure that the MTR module is congured with the default values.
(*) Warning! Where it is necessary to guarantee galvanic insulation to the boiler, it is
essential to interpose the REL1C accessory (See diagram SD542-6054 in the product
data sheet of the MTR2000).

DS1054-055A P17
▶While the message “rec E5” ashes for 30 seconds, briey press in the “Connect” hole
on the receiver module with a sharp, properly insulated tool.
▶The THERMARP thermostat will briey display the
PASS message if the pairing was successful.
▶The THERMARP thermostat is now correctly paired
with the receiver and controls the receiver to adjust
the boiler or solenoid valve to 230V according to the
set temperature values.
Important: The THERMARP thermostat may
not be able to communicate with the receiver
if it is out of range. The message Err. 17 will
appear on the display in this case.
See the “How to extend the range” paragraph.
HOW TO EXTEND THE RANGE
All YOKIS wireless receivers also serve as signal repeaters. By adding one or more mod-
ules, you can signicantly extend the wireless range by creating a wireless bus between
the various modules on the system.
Led
Connect
1 press
▶In the RF WIRELESS menu, use buttons and to navigate the menu and open
the rec E5 pairing submenu on the display. Then tap on the “Validate” icon .

P18
DS1054-055A
1) Create the wireless bus
▶Press the Connect button on module A once (the LED on module A will start ashing),
then press the Connect button on module B once (the connection between A and B is
established and the 2 modules stop ashing).
The two presses must occur within a maximum time of 30 seconds.
▶Repeat the same operation on modules B and C and so on, for all the others.
2) Pair the THERMARP thermostat with the module that controls the boiler
▶After creating the wireless bus, temporarily move the thermostat to near the module
that controls the boiler. Pair the THERMARP thermostat with the module that controls
the boiler, following the steps described above.
3) Set the access point on the wireless bus
▶Place the thermostat in its nal position.
▶Return to the Wireless menu of the THERMARP thermostat.
▶Use the buttons and to navigate the conguration menu to the AP E7 “Bus
Access Point” submenu, then tap the “Conrm” icon .
▶Once the mode has been validated, the message
AP E7 starts ashing to conrm that the
THERMARP thermostat is in “Bus access point”
pairing mode. Press the “Connect” button of
the module closest to the THERMARP
thermostat once to establish the connection.
The PASS message appears briey to conrm the connection.
Led
Connect
Led
Connect
Led
Connect
ABC
1 press 1 press
ETC.
Led
Connect

DS1054-055A P19
TECHNICAL INFORMATION
Power supply: 2 alkaline batteries, 1.5 V (type AAA / LR03)
Production dimensions: 125x85x26 mm
Frequency: 2.4 GHz
Working temperature range: from 0°C to +50 °C
Relative humidity 20% - 90% without condensation
BATTERIES
WARNING: There is a risk of explosion if batteries are replaced with incorrect types of
batteries. Dispose of used batteries correctly according to instructions.
SIMPLIFIED EU DECLARATION OF CONFORMITY
Hereby, Yokis S.a.s., declares that the radio equipment types:
THERMARP Digital thermostat with direct or wireless connection (item number 5454489)
are in compliance with Directive 2014/53/EU.
The full text of the EU declaration of conformity is available at the following internet
address: www.Yokis.com
INSTALLATION PRECAUTIONS
The following instructions must be observed when installing the product:
1) The product must be installed by a qualied professional, scrupulously respecting the
wiring diagram.
2) Do not power or connect the product if any of its parts are damaged.
3) After installation, the inaccessibility of the connection terminals without special
equipment must be guaranteed.
4) Do not use the product for purposes other than those specied.
5) In case of malfunction, do not attempt to repair the product, but contact Technical
Support at the numbers: Customer Service: +39 011.23.39.810 - Export Dept. Phone:
+39 011.24.00.250/256 - Fax +39 011.24.00.296
6) The product can be used in a category 3 and grade 2 pollution measurement environment.
7) If the boiler has a low-voltage remote activation command, an accessory type REL1C
must be used before the MTR2000ERP (X).
DIRECTIVE 2012/19/EU OF THE EUROPEAN PARLIAMENT AND OF THE
COUNCIL of 4 July 2012 on waste electrical and electronic equipment (WEEE)
The symbol of the crossed-out wheeled bin on the product or on its packaging
indicates that this product must not be disposed of with your other household waste.
Instead, it is your responsibility to dispose of your waste equipment by handing it over
to a designated collection point for the recycling of waste electrical and electronic equipment.
The separate collection and recycling of your waste equipment at the time of disposal will help
to conserve natural resources and ensure that it is recycled in a manner that protects human
health and the environment. For more information about where you can drop o your waste
equipment for recycling, please contact your local city oce, your household waste disposal
service or the shop where you purchased the product.
.
Other manuals for Thermarp
1
This manual suits for next models
1
Table of contents
Other Yokis Thermostat manuals