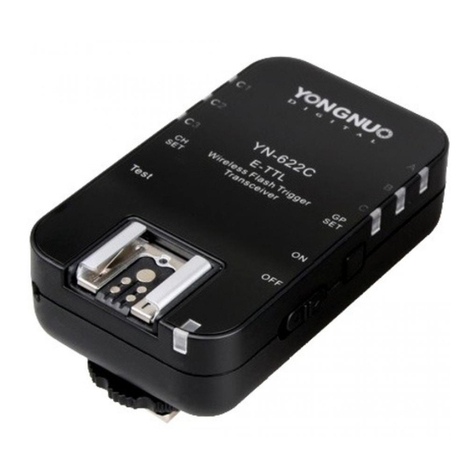
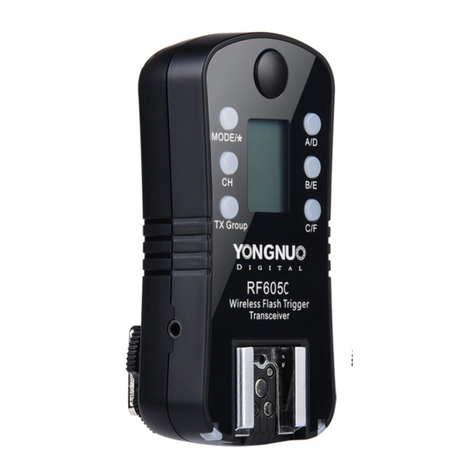
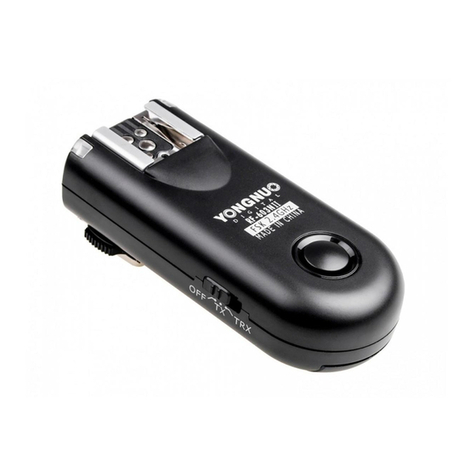
Yongnuo TOYUG YN-622C User manual

The Other YN-622C User Guide v.4.09
11/12/2014 Page 1 of 64
“TOYUG”
The Other YN-622C User Guide
YONGNUO YN-622C FLASH CONTROLLER/ TRIGGER SYSTEM
FOR CANON DSLR CAMERAS
Version 4.09
© Clive D Bolton, 11 December 2014
Tauranga, New Zealand

The Other YN-622C User Guide v.4.09
11/12/2014 Page 2 of 64
Declaration of Interest
The author has no association with the manufacturer other than as a paying customer. Some
additional samples were received; my thanks to Yongnuo. Testing equipment included EOS 50D,
7D and 6D; Speedlites 580EX II, 430EX II and 550EX; Yongnuo YN-568EX flash, YN-622C and
YN-622C-TX triggers.
Copyright
This document is copyright C D Bolton 2012 - 2014 and all moral rights are asserted. It may be
shared and quoted freely, but not altered. Many thanks to those who provided information
incorporated in it, especially Phil Weston for editorial input. All registered trademarks in this user
guide are the property of their respective owners. Specifications and functions may change without
notice.

The Other YN-622C User Guide v.4.09
11/12/2014 Page 3 of 64
PREFACE
Update – July, 2014
YongNuo released the YN-622C-TX on 28 June 2014. This unit provides a more convenient
control interface, and a better Groups mode than the 622C’s Mix Mode. The YN622C-TX is a self-
contained controller for the YN622C receivers. It removes the need to use the camera’s External
Flash menus for most functions.
Version 4 of TOYUG represents a complete re-organisation, and in many parts a re-write of earlier
versions.
In the 21 months since its first release, the YN-622C has shown good reliability and great
versatility. There have been firmware and hardware updates to improve performance and
compatibility, and to add extensions. My original conclusion still stands.
When YongNuo Photographic released the YN-622C in 2012, it seems that they had more in mind
than just the one transceiver (radio in and out) unit. The possibilities have been further expanded
by subsequent developments seen in Canon’s “RT” technologies, as seen in the 5DIII camera and
600EX-RT flash. The YN-622C-TX makes use of some of these features.
Just announced is a studio flash (monobloc) with E-TTL capabilities via a built-in hot-foot for
connecting a YN-622C remote. Rated at 300WS, It will integrate fully with the YN-622C system. It
even has a port for firmware updates by the user! Power supply requirements presently exclude
USA, Canada and Japan: 182-265v AC, 50Hz.
Also, YongNuo have added the ability of the new C-TX to receive commands from the YN-560-TX
(dedicated controller for the Manual-only YN-560-III flash). The C-TX will then use a “Proxy mode”
to forward the commands from the 560-TX to remote 622Cs with mounted Manual or E-TTL
flashes.
Part I of this Guide provides the core facts about the original YN622C transceiver and the YN622C-
TX Controller, as confirmed by independent testing where possible. Putting them to use is
described in Parts II and III. The final Useful Stuff section contains additional helpful information.
Footnote – December, 2014
The world moves on, but the time comes when we do not: I do not have access to cameras from
2012, with their newer protocols, so this guide is becoming dated. My thanks to all the competent
and fluent forum contributors, past and future!

The Other YN-622C User Guide v.4.09
11/12/2014 Page 4 of 64
Original - August, 2012
(Slightly edited to remove out-dated material)
What we know gets in the way of what we could know.
I have used Canon’s External Flash menus for 5 years, appreciating being able to control remote
flashes from the camera. Well, sort of. Canon has been using an optical pulse “wireless” command
system for off-camera flashes, which works within a limited set of conditions.
Pixel released their King triggers to remove this limit, but their development was truncated.
However, kudos to Pixel for pioneering this category of trigger/controller.
Now we have the Yongnuo YN-622C which seems to fulfil the promise of a full implementation of
Canon flash technologies over a radio link. It seems that Yongnuo has not only achieved this
objective, but has added a wide range of triggering and photographer-friendly capabilities.
The YN-622C is a transceiver type radio device designed to go between a camera and one or
more off-camera flashes, to provide:
•E-TTL, FEC & HSS off-camera triggering
•Radio control of off-camera flashes from camera’s External Flash menus
•General-purpose triggering
The YN-622C is a tool for both automatic E-TTL flash exposure and Manual power levels. Each
method has its place, and photographers who understand the technologies can get predictable
results.
One part of Canon’s E-TTL is often misunderstood – Ratios. It is more than setting an FEC or EV
adjustment on two flash groups. That still leaves distance, height, angle, relative powers, uneven
ambient etc that can make a substantial difference. Canon’s ratio evaluates the actual contribution
to the image of each group of flashes, and sets the level accordingly. It is much more accurate
than the EV method. The YN-622C implements the genuine Canon technology in the camera.
Drawbacks:
•The YN-622C does not provide for firmware updates by the user.
•Canon Wireless Master/Slave is not available, being replaced by the 622C procedures.
•The transceiver buttons are hard to find by touch, and are sensitive to accidental changes.
•Canon’s original External Flash menus are inconvenient and access is slow.
•Only flashes in group C can be disabled remotely (Canon problem).
•Cannot by itself act as a shutter release.
It is not a significant list.
An examination of the case and internal components reveals a high-quality assembly. The case
appears firm. I anticipate a good life expectancy.
Because the YN-622C is designed primarily to implement Canon technologies, a thorough
knowledge of both camera and flash manuals is helpful. Each camera model has its own
variations.
My verdict: versatile, complex, well-made, suitable for many jobs, and low-priced. Buy it.
The Other YN-622C User Guide v.4.09
11/12/2014 Page 5 of 64
CONTENTS
Introduction .............................. 2-7
Declaration of Interest
Copyright
Prefaces .....................................3-4
Update – June 2014
Original – August 2012
Contents.....................................5-7
Terms and Definitions .................8
Part I – The 622C System....... 9-14
622C Flash Controller/Remote .10-11
Functions, Specifications
622C-TX Flash Controller..........12-14
Functions, Specifications
Compatibility ..............................15-18
About Compatibility
Camera Compatibility
Type A – Camera menu Control
Type B – Flash button Control
Type C – Sync Only
Flash Compatibility
Class 1 – Remote ETTL and Manual
Class 2 – Remote ETTL, Local Manual
Class 3 – Remote ETTL, No Manual
Class 4 – No E-TTL, Sync Only
Class 5 – Studio flashes
Getting Started...........................19-23
1. Prepare the Camera
2. Prepare the Units
3. Reset/Clear to Factory Defaults
4. Check the Firmware, and Versions
5. Instal a 622C or C-TX
6. Configure Transmitter or Controller
7. Mount Flash on a Remote 622C
8. Prepare the 622C Receiver
9. Prepare Flash
10. On-TX Flash
11. Testing the Lighting Setup
12. First Shots
Part II – 622C Transceiver.....25-33
Transmitter Remote/Mix Modes ....26
Setting the Mode
Camera Remote Mode
On-Flash Mix Mode
E-TTL Mode ................................27-28
Type A cameras
Type B cameras
Ratios
Flash Exposure Compensation FEC
Flash Exposure Lock FEL
Flash Exposure Bracketing FEB
Manual Mode ...................................28
Remote Manual Levels
All Flashes (Global setting)
Multiple Receiver Groups
On-flash Manual Levels
Multi (Stroboscopic) Mode.............29
Shutter Sync Modes .......................29
First Curtain
Second Curtain
Fast-Shutter Sync
Hi-Speed Sync (HSS)
Super Sync (SS)
Simple Trigger
Camera Features.............................30
Ambient-only Shot
High-speed Continuous Shooting
Live View
Modelling Light
Flash Features............................30-31
Flash zoom / coverage
Zoom Lock
Zoom and Remote Control
Zoom and Mix Control
LCD Display
Pilot Indicator
Continued…

The Other YN-622C User Guide v.4.09
11/12/2014 Page 6 of 64
Part II – 622C continued
Transceiver Features.................31-33
Saving the Settings
AF-Assist Beam
Autofocus Assist
Setting Confirmation
Sleep Wakeup
Channel Indicators
Transceiver Status Indicator
Power Up / Initialise
Standby / Remote – Mix
Communicating
Low battery indicator
Group Indicators
Receiver Group
Test Firing Group
Camera Firing Group
Part III – C-TX Controller.......35-44
C-TX Control Modes .......................36
Remote Control
Local Control
Base Trigger
Fuji Cameras
C-TX Interface.............................37-38
The Buttons
Restore Factory Defaults
The LCD Display
Indicators
Status indicator
Battery Charge indicator
Access and Visibility
Exposure Modes ........................39-41
Selecting a Group’s settings
Set Exposure mode
E-TTL Mode
Set Group FEC
Set Global FEC
Using Flash Exposure Lock
Enable Ratio and Back Lighting
Enable FEB
Manual Mode
Set Group Manual Output
Multi Mode
Enable Multi
Shutter Sync Modes .......................41
Set Sync Mode
Camera Features.............................42
Camera External Flash Menus
Enable Remote Shutter Release
Flash Features.................................42
Set Group Zoom
C-TX Controller Features ..........43-46
Update C-TX Firmware
Set Channel
Test communications and flashes
Set Super Sync Timing
Using Super Sync
Enable AF-Assist Beam
Enable use on non-Canon cameras
Enable Remote Manual pre-2007
Enable Free Mask cutout

The Other YN-622C User Guide v.4.09
11/12/2014 Page 7 of 64
Useful Stuff ........................... 47-63
Canon External Flash Menus....48-50
2007 style menus
2012 style menus
Lighting Scenarios ....................51-54
E-TTL Ratio
Manual Levels
Augmented Ambient
Basic
Remotely Adjusting Augmenting Flash
Remotely Turning Off Augmenting
Using Class 4 Flashes as Augmenting
Manual Control of 4 Zones
Two-Shooter Setup
Class 5 Studio Flashes with Cybersync
Suggestions ...............................55-56
Batteries
Battery Orientation
Camera’s Custom/My Menu
Hybrid Mode
Light Meter Technique
Mixing with Other Triggers
Wireless Mode Setting
Umbrella/Light Stand Mount
Trouble Shooting .......................57-58
Aperture not displayed
Cold Temperatures
Erratic Behaviour
External Flash Menu
E-TTL Over/Under Exposure
E-TTL Automatic Adjustments
Fails to Power On
Firing Groups
Flash Not Firing
Flash Emits Pre-flash
Flash Zoom cannot be set
Full-power Flash
Gap between Pre-flash and Main Flash
Half Shutter
On-TX Flash Not Firing
Unable to Set Channels 5-7
Servicing.....................................59-62
AF-Assist Beam
Hot-Foot
Solder Joints
Opening the Case
Case Repair
What’s Inside the Cases?
Other Resources.............................63
Sorry – no Index, but use Ctl-F to search

The Other YN-622C User Guide v.4.09
11/12/2014 Page 8 of 64
TERMS AND DEFINITIONS
The Devices
622C: An abbreviation for a YN-622C transceiver.
C-TX: An abbreviation for a YN-622C-TX controller. It does not refer to the YN560-TX
Hot-shoe, Hot-foot, Cold-shoe: The hot-shoe is the accessory fitting on top of camera and each
transceiver. The hot-foot has contacts and goes into a hot-shoe, e.g. bottom of a flash or
transceiver. A cold-shoe holds a hot-foot without making contact with the pins.
Wireless: This term logically includes radio, sound and light transmission communication links.
Canon uses “Wireless” for their light-pulse code communications from camera/Master flash to an
off-camera slave flash. The 622C cannot send or read light-pulse codes, using radio instead.
Roles
Transmitter (TX): A YN-622C transceiver (first released in August 2012) mounted on the camera’s
hot-shoe in the role of controller for remote units. (The transmitter will still act as a Remote to
another transceiver transmitting on the same channel.)
Remote Receiver (RX): A YN-622C transceiver (first released in August 2012) in the role of a
receiver with a remote flash connected by hot-shoe or PC-sync cable.
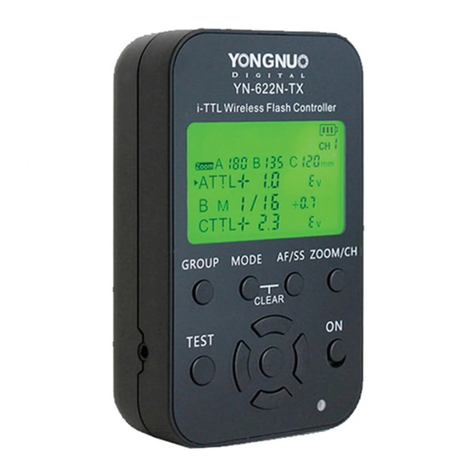
Controller (C-TX): A YN-622C-TX controller (released in June 2014) mounted on the camera’s
hot-shoe provides full settings capability in place of the camera menus.
On-TX flash: A hot-shoe flash mounted on the Transmitter. It has some special features.
(The C-TX Controller does not have a hot-shoe to mount a flash.)
Modes and Scope
Remote Mode (622C only): Remote control of flashes from the camera.
Mix Mode (622C only): Mixed remote and local (on-flash) control of flashes.
Global: Applying to all groups (A plus B plus C).
Local: Applying to the local device, such as a setting by hand on a flash.
Synchronising Flash with Shutter
Sync: Synchronous firing of flash when the camera’s shutter gives the command.
X-Sync: A camera’s fastest shutter speed when both curtains are fully open to a flash.
High Speed Sync (HSS): A method of extending flash emission to provide light during shutter
speeds faster than x-sync. It involves starting the emission before the curtains are fully open.
Super Sync (SS): YongNuo’s technique for using studio flashes/heads at a shutter speed faster
than the camera’s x-sync.

The Other YN-622C User Guide v.4.09
11/12/2014 Part 1 – The System Page 9 of 64
PART I – THE 622C SYSTEM

The Other YN-622C User Guide v.4.09
11/12/2014 Part 1 – The System Page 10 of 64
622C Flash Controller/Remote
Control by Camera
622C Functions
Simple to Complex setups
•The minimum setup is two (2x) 622Cs, one on camera as a transmitter, and one under a
flash as remote receiver. Any practical number of 622C remotes can be added.
•Lights can be at any angle to the camera, but walls may reduce range.
•Will also sync with most studio flash lighting.
Controller/Trigger Modes
•Full Remote – uses Canon 5-pin hotshoe and camera's built-in External Flash menu.
•Mixed E-TTL and On-Flash Manual – uses Manual settings locally on flash, and the
camera’s remote. E-TTL, FEC, FEB, etc.
•Either mode can have a flash on the camera’s transmitter for ETTL or Manual output levels,
but not as “Master”.
•Basic Trigger – Uses single-pin hotshoe (non-Canon cameras). An adapter may be
needed.
Flash Modes
•E-TTL II, including Flash Exposure Compensation (FEC), Flash Exposure Bracketing
(FEB), Flash Exposure Lock (FEL), Group Ratios A:B.
•Manual output levels, including Manual Group (ALL / A:B / A:B:C).
•Multi (stroboscopic).
Sync Modes
•1
st
Curtain Sync (1CS); shutter speed up to camera’s x-sync.
•2nd Curtain Sync (2CS), including using HSS with camera’s Wireless mode disabled.
•High Speed Sync (“HSS”, “FP”). Max. Sync: 1/8000s, depending on camera and flash.
•Super Sync for some non-HSS flashes. The timing of the advanced sync is not adjustable.
Max. Sync Speed: 1/8000s, depending on camera.
•The PC-sync port can output any of these syncs to trigger a studio flash.
•Single-contact camera and single-contact flash sync at max. 1/250s.
Extras
•Reset to Factory defaults [CH+GP].
•Focus Assist Lamp.
•Remote flash zooming (Auto, Manual, local Zoom lock).
•Test-firing of flashes.
•Flash-awaking function, with capable flashes.
•Modelling Flash.
•Live View triggering.
•High-speed continuous shooting triggering, depending on output limits of flash.
•Power supply uses common AA (= LR6, MN1500) alkaline or NIMH batteries.

The Other YN-622C User Guide v.4.09
11/12/2014 Part 1 – The System Page 11 of 64
622C Specifications
Standard Pack
•2 x Transceivers, default mode Remote/Receiver, auto-switching to Transmitter when
required. (Some resellers may offer single or multiple units.)
•Quick Start Guide; User Manual
Transceiver Measurements
•90 x 53 x 25mm (39mm incl. hot-foot).
•78gm without batteries
Electrical
•Each unit requires 2x AA batteries (1.5v Alkaline or 1.2v NiMH) – not supplied.
•Standby time: 60 hours.
•6 volts maximum safe trigger voltage on hot-shoe centre pin.
•300 volts maximum safe trigger voltage on PC-sync port.
•Digital FSK 2.4GHz radio transceiver. Range up to 100m (300ft), 7 channels.
Connectors
•Canon-compatible Hot Foot with locking ring and locating pin, for mounting on camera as a
Transmitter.
•Canon-compatible Hot Shoe for mounting a hot-shoe flash, including on Transmitter.
•PC-Sync screwlock socket, sync out only (1CS, 2CS, Super Sync).
Indicators
•Status LED: Red/Yellow.
•3x Channel LEDs.
•3x Group LEDs.
Controls
•[On/Off] power switch.
•[CH Set] button selects one of 7 channels
•[GP Set] button selects one of 3 groups
•[Test] button awakens flash and tests communications.
•[CH + GP] clears all settings and restores Factory defaults.
Other fittings
•Red AF-Assist beam (with a non-adjustable angle), enabled only on Transmitter, effective
to about 13 ft/4 m.
Provide-your-own extras
•Batteries
•PC-sync cord for studio flashes
•Mini-stand for hotshoe flash
•Cold-shoe for mounting on light-stand.

The Other YN-622C User Guide v.4.09
11/12/2014 Part 1 – The System Page 12 of 64
622C-TX Flash Controller
Control by LCD Display and Camera
C-TX Functions
Simple or Complex setups
•The controller’s LCD menu provides an alternative to the camera’s External Flash menus,
and enables extensions not provided by Canon.
•The minimum is one C-TX controller on camera, and one remote 622C under flash. Or, add
more remote 622Cs and various flashes.
•Lights can be at any angle to the camera, but walls may reduce range.
•Will also sync with most studio flash lighting, including by time-adjusted Super Sync.
Control/Trigger Modes
•Full Remote – Uses Canon 5-pin hotshoe signals.
•Basic hotshoe – Uses single-pin hotshoe (Non-Canon cameras).
•Basic without hotshoe – Uses camera’s PC-Sync out connection to C-TX’s PC-sync In.
Flash Modes
•Independent Groups (E-TTL + FEC / Manual Levels / Super Sync / Off) mode
•E-TTL global (FEC / Ratio + Backlight / FEB )
•Multi/Stroboscopic global
Independent Group Settings
E-TTL
•E-TTL II with global FEC.
•FEC by each group in E-TTL.
Manual
•Manual flash output levels, 1/1 to 1/128.
Super Sync
•Super Sync – for studio flashes (monolights and pack-and-heads).
Group Off
•Previous setting for group is not remembered.
•The Free Mask feature temporarily sets Groups A and B to off, and uses Group C only to
produce a cutout mask, then returns to the previous main settings.
Flash Zoom
•Remote Zoom by Group, including Auto, 24mm – 105mm.
•Local Zoom Lock can over-ride C-TX setting.
Sync Modes
•1
st
Curtain Sync; shutter speed up to camera’s x-sync.
•2
nd
Curtain Sync up to 1/8000s, including with HSS.
•High Speed Sync (HSS or FP); Max. Sync Speed: 1/8000s, depending on camera and
flash.
•Super Sync for non-HSS flashes. The timing of the advanced sync is adjustable from 0.0 to
2.0. Max. Sync Speed: 1/8000s, depending on camera. PC-sync port can output 1CS / 2CS
/ HSS / Super Sync signal to trigger studio flash.
•Single-contact camera and single-contact flash sync at max. 1/250s.

The Other YN-622C User Guide v.4.09
11/12/2014 Part 1 – The System Page 13 of 64
Extras
•Shutter release, using a supplied cable from C-TX to camera, and triggered by a 622C.
•Remote Manual control of Pre-2007 Speedlites (e.g. 370EX, 550EX, 580EX).
•FEL E-TTL Flash Exposure Lock.
•Firmware updates user-installable.
•Reset to Factory defaults.
•Auto-Focus Beam.
•Test firing.
•Flash-awaking with capable flashes.
•Remote Zooming (Auto, Manual, local Zoom lock)
•Free Mask auto cutout image
•Modelling Flash
•Live View triggering
•High-speed continuous shooting triggering, depending on limits of flash.
•Common AA Alkaline or NIMH batteries, but NOT Lithium.
•LCD backlight which lights for a few seconds when any button is pressed.
C-TX Specifications
Standard Pack
•1 x YN-622C-TX Controller. (Resellers may offer the C-TX with single or multiple 622C
Remotes.)
•User Manual with Warranty Card
•Shutter release cables LS-2.5/C1 (= Canon E3) and LS-2.5/C3 (= Canon N3).
Transceiver Measurements
•90 x 53 x 39mm including the hot-foot.
•82gm without batteries.
Electrical
•The C-TX requires 2x AA batteries (1.5v Alkaline or 1.2v NiMH) – not supplied.
•Standby time: 120 hours.
•Digital FSK 2.4GHz radio transceiver.
•Range claimed up to 100M. Our tests indicated 50M in enclosed spaces, and 20M in open.
LCD Display
•Displays settings of the controller on the LCD screen.
•Battery Level and low-battery warning.
Connectors
•Canon-compatible Hot Foot with locking ring and locating pin, for mounting on camera as a
“Master” Controller.
•PC-Sync screwlock socket for sync-IN only – for triggering the C-TX, e.g. by a light meter,
or a camera with no hotshoe. It will NOT trigger a flash.
•Two 2.5mm connectors for Shutter Release cables supplied:
LS-2.5/C1 for 60D, 70D and series 400D, 500D, 600D, 1000D
LS-2.5/C3 for 40D, 50D, 7D and series 1D, 5D.
•USB Mini-B socket for user to instal Firmware upgrades.

The Other YN-622C User Guide v.4.09
11/12/2014 Part 1 – The System Page 14 of 64
Indicators
•Status LED: indicates when communicating, when triggering and on remote shutter release.
Controls
•[On/Off] power switch.
•“Setting” buttons – multi-purpose selection of values. They have no labels, so in this Guide
are called [Up], [Down], [Left], [Right] and [Set]. [Left] and [Right] change values in whole
steps, and [Up] and [Down] change in 1/3 steps. [Set] completes some operations.
•[GR/*] button – Group/row selection, and enabling of Free Mask cutout feature.
•[Mode/E-M] button – Flash mode selection, and setting of E-TTL and M parameters.
•[Sync/Fn] button – Sync mode selection, and setting of at least 5 functions.
•[Zoom/CH] button – Setting of Zoom factor by Group, and Radio Channel selection.
•[Test] button - Awakens flash, and tests communications.
•[Clear] - Clears all settings and restores Factory defaults.
Other fittings
•Red AF-Assist beam.
•Two 2.5mm shutter release cables, N3 and E3.(Canon equivalents)
Provide-your-own extras
•Batteries
•PC-sync cord for non-hotshoe camera, etc.
•USB cable for updating firmware (e.g. the Canon camera USB cable).

The Other YN-622C User Guide v.4.09
11/12/2014 Part 1 – The System Page 15 of 64
COMPATIBILITY
The Key
For the YN-622C (and many other triggers) it’s about what each camera body provides for digital
data in and out through the accessory shoe, and what the flash moves in and out through it’s hot-
foot. These capabilities are set by the manufacturers. However, the 622C can massage the data as
it transmits it back and forth, providing numerous functions not provided by Canon.
What’s the Problem?
Why are there several “types” of camera and “classes” of flashes? It’s due to the historic
development of the technologies.
1. There was an Accessory shoe on camera to mount a device, and a centre-pin contact to
fire a flash. All settings were made on-flash. The camera did not know what they were.
2. More pins were added, and TTL, A-TTL, E-TTL then E-TTL II were developed as key flash
technologies. The camera became increasingly aware of flash settings. Settings were still
made on-flash.
3. Canon implemented an off-camera system using a Master flash to drive one or more slaves
using light-pulse coding. Communication was one-way. The camera was taught to read the
Master flash settings, and act accordingly. FEC was added to the camera. There was no
provision on the camera for setting Manual output levels, so there was no need to
implement a control path in the flash's hot-foot. Settings were still on-flash. (Class 2
flashes.)
4. A better interface was required, and in-camera. Canon designed the External Flash menus
(from 1D-III, March 2007 on) so that the camera could both read and set ALL settings in the
flash. This meant that all flash settings needed to be digital (i.e. no positional switches). The
only flashes which can be fully controlled by flash menus are ones that have the required
communication through the hot-foot. (Class 1 flashes.)
5. The YN-622C was released in August 2012 to replace the light-pulse coding and its
limitations. Some functional improvements were added, without over-riding Canon facilities.
6. Some flashes are designed for “I just want a photo in poor light” use, so do not have the
means for the user to set output levels manually. They can handle the automatic exposure
E-TTL commands through the hot-foot, however. (Class 3 flashes.)
7. Later, after YongNuo had released the YN-622C, Canon released the 5DIII, ST-E3, 1D X
and 600EX-RT, which provide two-way radio communication. These also provide new
features like mixed firing modes (ETTL/M/Auto), channels 5-15, Wireless IDs and groups D
& E. The 622C cannot use these extensions, and the camera must be used in “optical
wireless” mode.
8. In June 2014, YongNuo released a YN-622C-TX LCD Controller unit. It provides full control
of remote 622Cs by type B cameras, and an alternative control interface for type A
cameras.
9. The Canon YN-622C is NOT compatible with the Nikon YN-622N. The cameras’ code sets
are not the same.

The Other YN-622C User Guide v.4.09
11/12/2014 Part 1 – The System Page 16 of 64
CAMERA COMPATIBILITY
Cameras can be put into one of three types for use with the 622C system. The “RT” capable
flashes are currently classed as Type A. Both triggers work with all classes of camera and all types
of flash. The question is: to what extent?
Key features of the 622C Transmitter are described, then the C-TX additions.
Type A Camera - Menu Control (2007 and on)
EOS
622C Transmitter using class 1 flashes: Remote E-TTL, FEC and Ratios; remote Manual levels;
HSS if available; fixed Super Sync; Firing Groups; Zoom Control.
C-TX Controller adds class 2 flashes and: Variable Super Sync; mixed Flash Mode Groups.
1D III, 1Ds III, 1D 4
1DX (except that ETTL + Wireless + Groups B, C = overexposed)
5D II, 5D III
6D, 7D, 7D II
40D, 50D, 60D, 70D
450D, 500D, 550D, 600D, 650D, 700D
XSi, T1i, T2i, T3i, T4i, T5i
100D, 1000D, 1100D
SL, XS, T3
EOS-M (no AF-beam)
Power Shot
622C Transmitter using class 1 flashes: Remote E-TTL and FEC; remote Manual levels; HSS if
available; fixed Super Sync; Zoom Control.
C-TX Controller adds class 2 flashes and: Remote E-TTL Ratios; variable Super Sync; Firing
Groups; mixed Flash Mode Groups.
G12, G15, G1X
SX20 IS, SX30 IS, SX40 HS, SX50 HS.
Type B Camera – Flash Button Control (prior to 2007)
EOS
622C Transmitter using class 1 flashes: Remote ETTL/FEC, local Manual levels, HSS if
available, fixed Super Sync.
C-TX Controller adds class 2 flashes and: Remote ETTL FEB and Ratio; remote Manual levels,
Firing Groups, mixed Flash Mode Groups, variable Super Sync.
1D II, 1D II N, 1Ds II, (NOT 1D, NOT 1Ds)
5D
10D, 20D, 30D
300D, 350D, 400D
D-Rebel, XT, XTi

The Other YN-622C User Guide v.4.09
11/12/2014 Part 1 – The System Page 17 of 64
Type C Camera – Sync only
•Does not support HSS or E-TTL functions.
•Max speed sync is 1/250s or less.
622C Transmitter and C-TX Controller using all flash classes: A “fire!” synchronised signal
•A camera with a standard single-pin hot-shoe.
•A camera with a PC-sync-out connection.
•A non-Canon ISO multi-pin hotshoe with an adapter to allow only the centre (X-sync) pin to
be accessible (e.g. Nikon).
•A brand-specific hot-shoe with an adapter to Canon hotshoe (e.g. Sony/Minolta).
FLASH COMPATIBILITY
Flashes can be grouped into five classes.
•The 622C is rated at only 6 volts on the trigger contact of its hot-shoe. The PC-sync
connection can withstand 300 volts.
Class 1 Flash – Remote E-TTL; Remote Manual Levels
622C: Set using External Flash menus not the on-Flash buttons.
C-TX: Set on C-TX, or by External Flash menus. On-flash settings are available for special lighting.
Brand HSS No HSS
Canon 580EX II, 600EX-RT
No Multi: 270EX II, 430EX II
Godox Ving V860C
Jessop No Multi: 360AFDC
Metz No Multi: 50 AF-1, 58 AF-2
Neewer NW680
Nissin Di866 II
Phottix Mitros
Yongnuo YN-500EX, YN-568EX YN-465, YN-467 II, YN-468 II, YN-565,
YN-565 II (YN-467, YN468 ?)
Class 2 Flash – Remote E-TTL; Flash-set Manual Levels
622C Set On-Camera: Sync mode (1CS, 2CS, HSS); ETTL (FEC, FEB, FEL and Ratio).
Set on-flash: Flash mode (ETTL, M, Multi); Zoom; Manual levels.
C-TX Set on C-TX: or by External Flash menus For remote Manual levels on Canons, set C.Fn 05
to “On”, and set the mode on Flash to “E-TTL”.
Brand HSS No HSS
Canon 550EX, 580EX. No Multi: 430EX
Metz No Multi: 48 AF-1, 48 AF-2,
54mz4 (Mix mode, Wireless disabled)
Nissin Di866 Di622 II
Pixel Mago
Sigma No Multi: EF 500, 530, 610 DG Super
Sunpak No Multi: Z42X

The Other YN-622C User Guide v.4.09
11/12/2014 Part 1 – The System Page 18 of 64
Class 3 Flash – Remote E-TTL; Manual Levels not provided
622C Set On-Camera: Sync mode (1CS, 2CS, HSS); ETTL (FEC, FEB, FEL and Ratio).
Set on-flash: Flash mode (ETTL, M, Multi); Zoom.
C-TX Set on-C-TX: or by External Flash menus For remote Manual levels, set C.Fn 05 to “On”, and
set the mode on Flash to “E-TTL”. (Yet to be tested.)
Brand HSS No HSS
Canon No Multi: 220EX, 270EX, 320EX, 380EX, 420EX
Class 4 Flash – No E-TTL provided; Flash-set Manual Levels
•Synchronises at up to 1/8000s (Super Sync), limited by camera and studio flash. Otherwise
the fastest shutter is 1/250s.
•A hotshoe flash with only the centre pin effective will receive only a 1
st
Curtain sync signal.
•A flash connected by a PC-sync cable (including through a PC to Hot-shoe adapter) will
receive a 1
st
Curtain, 2
nd
Curtain or pre-shutter sync signal.
622C No E-TTL; on-flash Manual.
C-TX Use variable timing Super Sync with fast shutter speeds.
Brand Model
Canon 540EZ (updates LCD info.)
MeiKe 940
Vivitar 285, 285HV only if trigger voltage is 6 volts or less.
Yongnuo YN460, YN460-II, YN560, YN560-II, YN560EX
Class 5 - Studio Flashes: No E-TTL; Sync Only
•A user-supplied PC-sync cable is required between remote 622C and studio flash’s input.
622C Standard Sync and Fixed Super Sync
C-TX Standard Sync and Variable Super Sync
Sync mode Studio flash Model Shutter
1
st
Curtain Most studio flashes X-sync and slower
2
nd
Curtain Most studio flashes 1/30s to 1/60s and slower
High Speed Sync Cheetah CL180. CL360
Godox Wistro AD180, AD360
ProMaster/Mettle D400R
HSS (flat light) above X-sync
Fixed Super Sync Jinbei Discovery 1200w
Pioneer III 600w
Calumet Genesis 300B
Mettle 600ws
Burn-time adequate, above x-
sync
Fixed Super Sync unusable Alien Bee 400, 800, 1600
Bowens Travelite
Einstein E640
Elinchrom D-Lite 2
Burn-time too short
Variable Super Sync Many studio flashes, and may
include “unusable” ones above.
Start of burn time is adjustable

The Other YN-622C User Guide v.4.09
11/12/2014 Part 1 – The System Page 19 of 64
GETTING STARTED
1. Prepare the Camera
•Set the camera to a Creative exposure mode (P, Av, Tv or M), not a Basic mode (Scenic,
Sports or Flash-disabled.)
•Set External Flash menu to Flash Firing = Enabled, and Wireless = Disabled.
•Disable Silent Shooting mode.
•Enable AF-Assist Beam (e.g. C.Fn III/5 = 0, Enabled).
•Set AF mode to One-Shot.
•Disable Face Detection mode.
2. Prepare the Units
•Remove the protective film from each 622C’s top plate, and/or from the AF-assist beam’s
red cover.
•Wipe the contacts in both the hot-shoe and the hot-foot to remove oils and other dirt.
•Insert fresh, fully-charged batteries. They are critical. Do not make assumptions.
Recommendation: load all units with good quality (i.e. more expensive) new Alkalines (1.5v)
to start with. When all is working well, good quality NiMH (1.2v) can be used. Do NOT use
Lithium (1.6v).
3. Reset / Clear to restore Factory Defaults
•The units as delivered may not be in a factory-fresh state, or may be altered accidentally by
a user. When first starting to use the units (or if they seem erratic), perform a Factory
Defaults reset.
622C Transmitter Reset (Clear) C-TX Controller Reset (Clear)
•Hold down [CH SET] plus [GP SET] at
the same time.
•Keep holding until the Status indicator
has winked red-green alternately 3 times
and then stays red.
•Release the buttons.
•Factory defaults will be restored to:
622C mode = Remote
Flash mode = E-TTL
Sync mode = HSS.
•The C.Fn (AF-Assist Beam) setting is
not changed.
•Hold down [MODE] plus [SYNC] at the
same time. The display will show only a
steady “CLR”.
•Keep holding until “CLR” winks slowly.
•Release the buttons.
•The Main screen will appear, showing all
the groups in TTL.
•Note: Updating the firmware performs
this step automatically
•If the CLR screen does not appear,
navigate back to the Main screen, and
try again.

The Other YN-622C User Guide v.4.09
11/12/2014 Part 1 – The System Page 20 of 64
4. Check the Firmware
622C
When first released in 2012, there were two changes in the firmware. One (Sep. 2012) fixed a
transmitter mode problem when using 1D series bodies. The other a little later matched a hardware
change.
The firmware has been stable since then, and the 622C does not have a user-upgrade facility, so
future upgrades are unlikely.
C-TX
Firmware in the C-TX can be updated by the user. Ensure that the unit’s Firmware is the latest
version.
•A computer-to-USB 2.0 Mini-B cable (e.g.Canon USB cable) is required.
•A Windows computer platform is required.
•See page 43 for full details for downloading and installing firmware updates.
Version History
1.00 Pre-release version.
1.01 01/07/14 First commercial release built in. Upgrade required only for pre-release testers.
1.02 11/07/14 Added YN560-TX proxy mode. Improved stability.
1.03 12/07/04 Made backlight/setting time longer. Changed Updater display to UP.
1.04 18/08/14 Improved stability and transmission range.
1.05 Fixed 7D HSS problem, and fixed 7D II E-TTL compatibility.
1.06 03/12/14 Improved power supply on some circuit boards. Corrected display errors.
5. Instal a 622C Transmitter or C-TX Controller
•Turn back the hot-foot’s locking ring up to the case to
fully withdraw the locating pin.
•Mount the unit in the camera’s hot-shoe. Use the thumb
to press the foot firmly forward.
•Clamp the locking ring onto the hot-shoe. The locating
pin will engage.
•Turn on camera and transmitter/controller.
•If the unit is a 622C Transmitter, press half-shutter or
open External Flash menus to activate.
Other manuals for TOYUG YN-622C
3
Table of contents
Other Yongnuo Camera Accessories manuals

Yongnuo
Yongnuo Speedlite YN468-II User manual

Yongnuo
Yongnuo RF-603 II User manual

Yongnuo
Yongnuo YN650EX-RF User manual

Yongnuo
Yongnuo yn565ex II User manual

Yongnuo
Yongnuo TOYUG YN-622C User manual

Yongnuo
Yongnuo YN565EXII User manual

Yongnuo
Yongnuo YN-04II User manual

Yongnuo
Yongnuo TOYUG YN-622C User manual

Yongnuo
Yongnuo yn565ex II User manual

Yongnuo
Yongnuo YN60RGB User manual