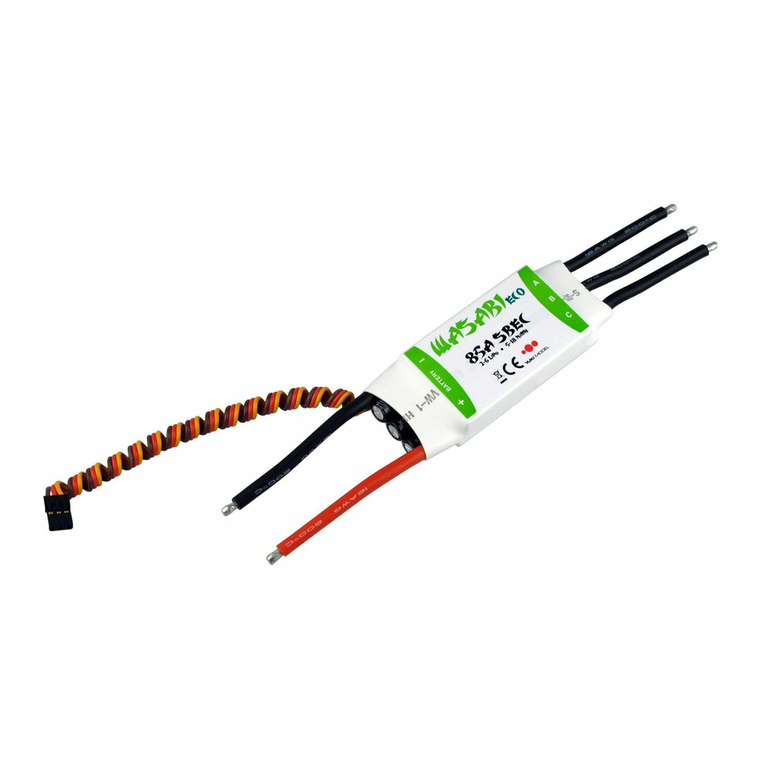
YUKI MODEL WASABI ECO User manual

Anleitung: Manual:
Vielen Dank, dass Sie sich für den Wa-
sabi Eco Regler entschieden haben. Eine
neue Generation von Wasabi Eco Regler
mit der neuesten Software und für alle
brushless Motoren erwarten Sie.
Bitte lesen Sie diese Anleitung vollstän-
dig und ausführlich durch.
Thank you for choosing our Wasabi Eco
controller. A new generation with the
newest software for all types of brush-
less engines awaits you.
Please read these instructions carefully
and in detail.
ACHTUNG! WARNING!
- Schließen Sie die Regler erst kurz vor
dem Start an und entfernen Sie sie un-
verzüglich nach der Landung
- Wenn der Motor angeschlossen ist, sei-
en Sie extrem vorsichtig!
- Rotierende Propeller sind sehr gefähr-
lich. Vorsicht!
- Benutzen Sie keine abgelaufene, be-
schädigte, eingerissene oder aufgebläh-
te Akkus.
- Verbinden Sie den Motor nicht mit ei-
ner beliebigen Stromquelle. Achten Sie
auf die Polarität von NiCd, NiMH oder
LiPo Akkus.
- Connect the controller just before the
start, and remove it immediately after
landing
- If the motor is connected, be extremely
careful !
- Rotating propellers are extremely dan-
gerous. Caution!
- Do not use expired, damaged, torn, or
swollen batteries
- Do not connect the engine with any
power source. Pay attention to the po-
larity of NiCd, NiMH or LiPo batteries

Spezifikationen Specifications
Art. Nr.: Cont./Burst
Current Akku Zelle
Li-xx Ni-xx BEC Größe (mm)
LxBxH g
Gewicht
20A
40A
60A
80A
4100220
4100245
4100265
4100285
2-4 LiPo
2-6 LiPo
2-6 LiPo
2-6 LiPo
5-12 NC
5-18 NC
5-18 NC
5-18 NC
5V / 3A
5V / 4A
5V / 4A
5/6/7.4V / 6A
30x24x8.5
24x52x8
52x25x11
60x30x14
18
26
43
50

Kabel Verbindung: Cabel connection:
Installation des Reglers: Installation of the controller:
Normaler Start: Normal start:
Der Wasabi Eco Regler kann an den
Motor per Lötung oder mit hochwer-
tigen Anschlüssen verbunden werden.
Benutzen Sie stets neue Anschlüsse die
mit Vorsicht an den Motor angelötet
werden sollten und mit einen Schrumpf-
schlauch abgedeckt werden.
Die maximale Länge der Kabel sollte
15cm sein.
- Löten Sie den Regler an die Motor Ka-
bel
- Löten Sie die geeigneten Verbindun-
gen an die Batterie Kabel
- Isolieren Sie alle gelöteten Verbindun-
gen mit Sachrumpfschläuchen
- Verbinden Sie die „JR“-Verbindung an
den Empfänger Kanal
- Verbinden Sie das rote und schwarze
Kabel vom Regler an den Akku
The Wasabi Eco controller can be con-
nected to the motor by soldering or
with high quality connectors. Always
use new connectors which should be
soldered carefully to the motor and are
covered with a shrink tube.
The maximum length of the cable
should be 15cm.
- Solder the controller to the motor ca-
ble
- Solder the appropriate connections to
the battery cables
- Insulate all soldered connections with
shrink tubes
- Connect the “JR”- connection to the
receiver channel
- Connect the red and black wires from
the controller to the battery
Seien Sie bei der Installation des Reglers
in das Modell achtsam, das er frei von
Vibrationen und Stößen sich befindet.
Be careful installing the controller into
the model. Ensure the controller is free
from vibrations and impacts.
Schalten Sie den Sender ein und bringen
Sie den Hebel auf +/- 100%. Für Futaba
Signal Programme nutzen Sie die „Servo
Reverse“ Funktion im Gas-Kanal.
- Sender auf „EIN“
- Verbinden sie den Akku mit dem Reg-
ler
- Verbinden Sie das Stabilisierungssys-
tem
- Die Position für Vollgas wird automa-
tisch kalibriert
- Ihr Motor ist fertig für den Start
Turn on the transmitter and turn the
handle to +/- 100 %. For Futaba signal
programs you can use the „Servo re-
verse“ function in the throttle channel.
- Transmitter to “ON”
- Connect the battery to the controller
- Connect the stabilization system
- The position of full throttle is automat-
ically calibrated
- Your engine is ready to start

Werkseinstellungen: Default settings:
Wie Sie Ihren Regler Programmieren: How you program your Controller:
Umgekehrte Rotationsrichtung:
Bremse AN oder AUS:
Reverse the direction of rotation:
Brake setting ON or OFF:
Akku Typ: Li-Po Auto
Soft Start: Aktiviert
Timing: Auto
Frequenz: 16KHz
Battery type: Li-Po Auto
Soft Start: Activated
Timing: Auto
Frequency: 16KHz
- Schalten Sie Ihren Sender an und schie-
ben Sie den Hebel auf Vollgas
- Verbinden Sie den Motor und schalten
Sie den Empfänger (BEC) Schalter ein
- Warten Sie 2 Sekunden und Sie hören
zwei Piep-Töne. Der Programmiermo-
dus ist damit für 5 Sekunden beigetre-
ten.
- Wenn Sie die 2 Piep-Töne gehört ha-
ben, drücken Sie den Hebel runter und
Sie hören zwei weitere Piep-Töne die
Ihre Einstellungen bestätigen
- Sie können nur eine Einstellung zurzeit
vornehmen. Wenn Sie weitere Einstel-
lungen vornehmen möchten, trennen
Sie die Verbindung zum Akku und war-
ten Sie weitere 5 Sekunden um die oben
genannte Prozedur erneut durchzufüh-
ren
- Turn on your transmitter and move the
control to full throttle
- Connect the motor and turn on the re-
ceiver (BEC) switch
- Wait 2 seconds and you will hear two
beeps. The programming mode is joined
for 5 seconds.
- When you hear the 2 beeps, press the
lever down and you will hear two beeps
again confirming your settings
- You can make only one adjustment
at the time. If you want to make multi-
ple settings, disconnect the battery and
wait another 5 seconds. Now you can
perform the actions again
Diese Funktion kehrt die Rotationsrich-
tung des Motors um.
Folgen Sie der oben genannten Proze-
dur. Wenn Sie den Schubhebel auf AUS
stellen, die Bremseinstellung wird geän-
dert. (AN->AUS oder AUS->AN)
This function reverses the rotation di-
rection of the motor.
Follow above procedure then enter
the programming mode. If you pull
the throttle stick to OFF, brake will be
changed. (ON->OFF or OFF->ON)
_• _• _• _•
_••_ _••_ _••_ _••_
_• _• _• _•
_••_ _••_ _••_ _••_

Batterie-Typ: Battery type:
Sanfter Start (Beschleunigung): Soft start (acceleration):
Timing: Timing:
niedrig low
Automatic: (7-30 Grad) automatic: (7-30 degrees)
normal normal
Sanft: (7 Grad) soft: (7 degree)
hoch high
Hart: (22-30 Grad) hard: (22-30 degrees)
(wählen Sie den Batterie-Typen aus, den
Sie in das Modell eingebaut haben.)
NiCad: (50% Anfangsspannung)
LiPo: Auto-Ermitteln, 3.2V/Zelle
(select battery type which is being used
in your model)
NiCad: (50% initial voltage)
Lipo: Auto detect , 3.2V/Cell
Wenn das Getriebe System verwendet
wird, empfehlen wir den „Soft Start“
Modus. Er schützt das Getriebe beson-
ders bei längeren Rotoren.
If the transmission system is used, we
recommend the „Soft Start“ mode. It
protects the gearbox particularly for
longer rotors.
Der Regler hat 3 Timing Einstellungen.
„Automatic“ funktioniert perfekt für
alle Brushless Motoren.
The controller has 3 timing settings.
Automatic works perfectly for all brush-
less motors
• • • • • • • •
_ _ _ _ _ _ _ _
- - - - - - - -
_ _ _ _ _ _ _ _ _ _ _ _ _ _ _ _
- - - - - - - - - - - - - - - -
_ _ _ _ _ _ _ _ _ _ _ _ _ _ _ _ _ _ _ _ _ _ _ _
- - - - - - - - - - - - - - - - - - - - - - - -

Under voltage (low voltage cut-off LVC):Unter-Spannung (Niederspannungsabschaltung LVC):
If the motor battery pack drops to the
programmed cut-off voltage, the con-
troller will either ignore, reduce the
motor speed or stop the motor to en-
sure that there is enough power for the
receiver and servos. Either one is active,
you can resume to normal operation by
pull down the throttle stick and push up
again.
reduce power:
(reduce motor speed )
•_ •_ •_ •_
cut off:
(stop motor immediately)
_ • _ • _ • _ •
Wenn die Batterie auf die programmi-
erte Abschaltspannung fällt, wird der
Controller entweder es ignorieren, die
Motordrehzahl reduzieren oder den
Motor stoppen, um sicherzustellen, dass
es für den Empfänger und Servo genug
Leistung gibt. Es kann nur eine Option
aktiv sein. Sie können den Normalbe-
trieb wieder aufnehmen indem Sie den
Gashebel nach unten ziehen und wieder
rauf.
Power reduzieren:
(reduce motor speed )
•_ •_ •_ •_
cut off:
(stop motor immediately)
_ • _ • _ • _ •
Active RPM control (Heli Governor mode):Aktive Drehzahlregelung (Heli Governor-Modus):
Off:
_ •_ _ •_ _ •_ _ •_
RPM control on:
_••_ _••_ _••_ _••_
Low voltage protection:
Low (2.8v/cell):
-_- -_- -_- -_-
Mid (3.1v/cell):
-_ _- -_ _- -_ _- -_ _-
High (3.3v/cell):
-_ _ _- -_ _ _- -_ _ _- -_ _ _-
AUS:
_ •_ _ •_ _ •_ _ •_
Drehzahlregelung AN:
_••_ _••_ _••_ _••_
Niederspannungsschutz:
Niedrig (2.8V/Zelle):
-_- -_- -_- -_-
Mittel (3.1V/Zelle):
-_ _- -_ _- -_ _- -_ _-
Hoch (3.3V/Zelle):
-_ _ _- -_ _ _- -_ _ _- -_ _ _-

Änderung der Frquenzen: Change the frequencies:
Die Werkseinstellungen wiederherstel-
len: Restore the factory settings:
Der Regler hat 2 verschiedene Frequen-
zen. 8KHz ist für alle Brushless 2-Pol Mo-
toren geeignet. 16KHz ist für Multi-Pole
Motoren geeignet.
The controller has 2 different frequen-
cies. 8KHz is suitable for all brushless 2-
pole motors. 16KHz is suitable for multi
-pole motors.
8KHz 8KHz
16KHz 16KHz
\ \ \ \ \ \ \ \
___ ___ ___ ___ ___ ___ ___ ___
/ / / / / / / /
ACHTUNG! WARNING!
Modelle, ausgestattet mit Hochleis-
tungsmotoren können schwere Verlet-
zungen verursachen. Hohe Spannungen
können Kabel und Akkus stark erhitzen.
Es besteht Brandgefahr. Befolgen Sie
den Anweisungen!
Models equipped with high-perfor-
mance engines can cause serious injury .
High voltages may cause very hot cables
and batteries. Risk of fire! Follow the in-
structions carefully!

CN DEVELOPMENT & MEDIA
Haselbauer & Piechowski GbR
Am Hasselt 20C
D-24576 Bad Bramstedt
Tel: +49 (0) 4191 891 90 83
Fax: +49 (0) 4191 891 90 85
E-Mail: [email protected]
Web: www.yuki-model.de
Other manuals for WASABI ECO
1
This manual suits for next models
4
Table of contents
Other YUKI MODEL Controllers manuals