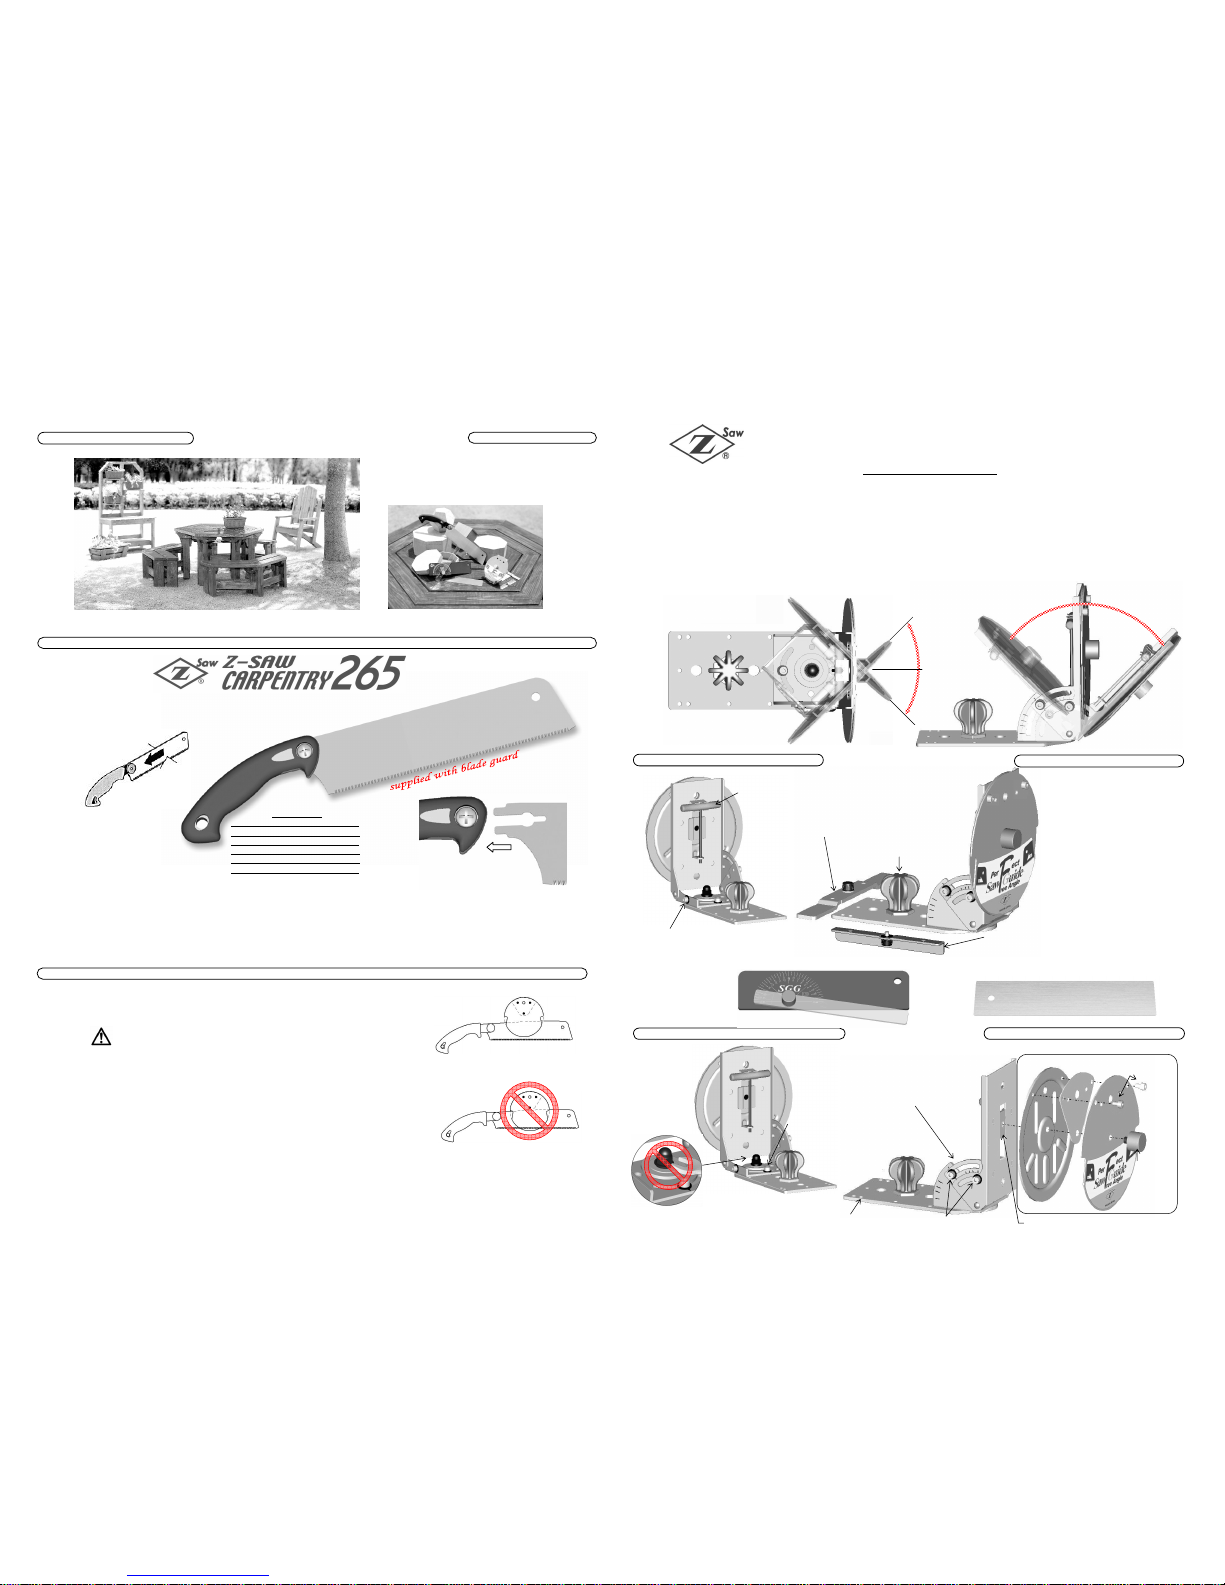
Perfect Saw Guide, Free Angle
Instructions for use
TFE200508A
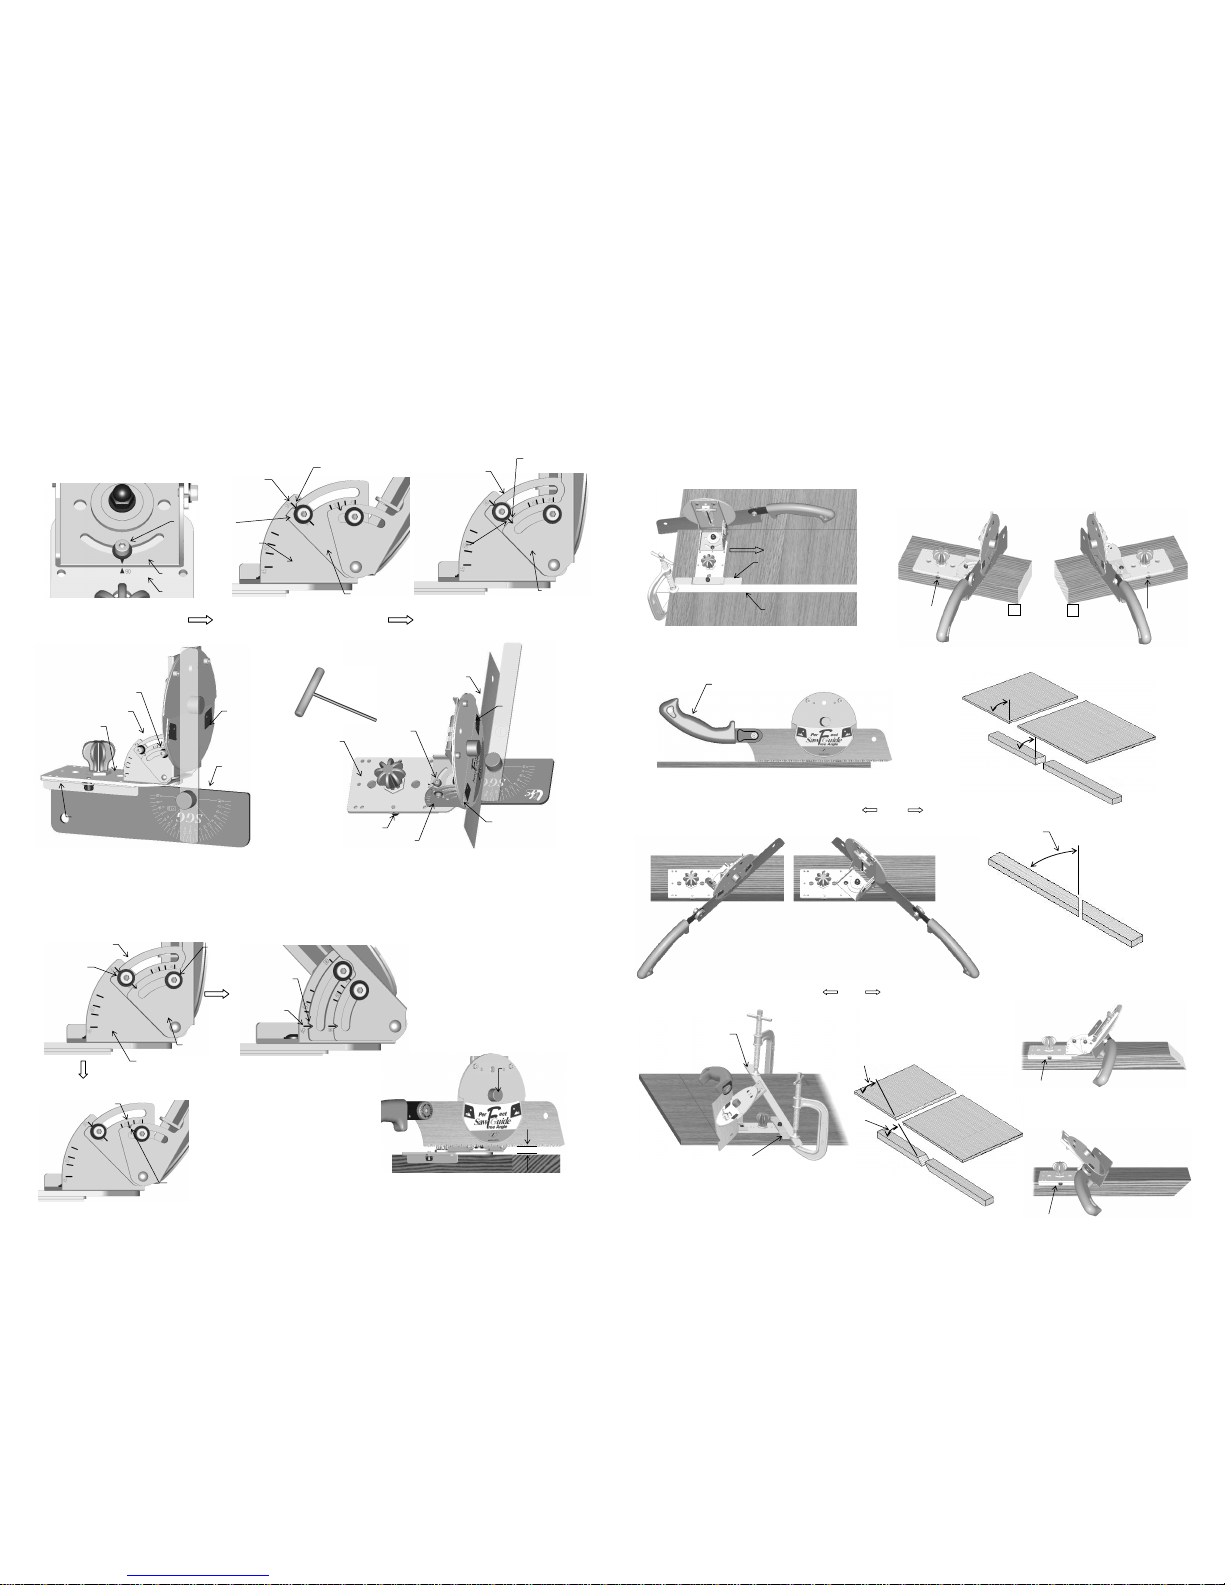
45°
90°
※KNOB
T-SHAPE HEX WRENCH
Package Contents
※GUIDE FENCE
… for cutting square timber
※marked parts are packed
in a Vinyl envelope.
SPARE SCREW
SPARE WASHER
DUMMY BLADE
Saw teeth should always stay
clear of the saw guide plates.
Saw teeth will be seriously
damaged by contact with
saw guide plates.
This furniture was actually made using the Z-SAW CARPENTRY 265 & Perfect Saw Guide.
THIS SAW IS SPECIALLY DESIGNED AND PRODUCED TO
MAXIMIZE THE CAPABILITY OF THE "PERFECT SAW
ADVANTAGES OF Z-SAW CARPENTRY 265
●THE HIGHEST QUALITY BLADE IS DURABLE, FLEXIBLE AND RUST RESISTANT.
●SPECIAL CUTTING EDGE DESIGNED FOR RIP, CROSS & SLANT CUTS.
●EASY & QUICK REPLACEMENT BLADE STYLE (Convenient for tool box storage).
●NON-SLIP ELASTOMER COVERED GRIP HANDLE.
Cutting on the pull-stroke
prevents the blade from
buckling and binding, and
allows the blade to be thin.
The thinner blade removes
less material, makes sawing
easier, faster and more
accurate!
45°
45°
45°
90°
Great Features:
This innovative adjustable-angle saw guide is designed exclusively for use with Z-SAW CARPENTRY 265 saw.
Quick and very easy angle adjustment for sawing at any angle between 45° right & 45° left as well as between 45°
forward & 45° backward inclined.
The rigidly and precisely constructed steel-made adjustable angle saw guide ensures accurate straight cuts, and it
can be held in position firmly by hand or supported with positioning clamps. Equally suited for left- and right-hand
use.
Long straight cuts on wide boards are also easily made by using the parallel sliding holder.
Special Saw Guide Gauge and Dummy Blade for exact angle adjustment are included.
Oh, did you really make these yourself?
Vertical angle bracket
Spacing
plate
Guide plate
fixing screw
Height
adjusting
knob
Base plate Vertical angle fixing screws
Guide Plate
Height adjusting nut
Assembly
※PARALLEL SLIDING HOLDER
… for cutting wide board
CUTS ON
THE PULL
STROKE
Horizontal angle
adjusting screw
Rotating base part of angle bracket is
pre-set at factory. Do not attempt to
adjust this screw.
Okada Hardware Mfg.Co.,Ltd.
561 Omura, Miki-shi, Hyogo, Japan 673-0404
TEL: 81-794-83-1111 / FAX: 81-794-83-5111
Model:265
Type Medium-Fine
Overall Length 445mm(17-½”)
Blade Length 265mm(10-½”)
Blade Thickness 0.60mm(0.024”)
Kerf 0.92mm(0.037”)
Pitch 14TPI
Thank you for your purchase of Perfect Saw Guide Free Angle.
Please read these instructions carefully and keep them safely for future
reference.
Caution
○Do not overtighten hex screws, as doing so is likely to damage hex screw or
the special T-shape hex wrench.
○Saw teeth should always stay out of the saw guide plate. See pictures
→
○Do not overtighten the knob
○Wear safety goggles.
Notice
○Specification may change without notice to improve quality.
○Copyright © Okada Hardware Manufacturing Company Limited.
SAW GUIDE GAUGE…for angle adjustment
Insert the saw blade into the
handle deeply enough to
cover the end of the slit in
the blade. Tighten the
screw.