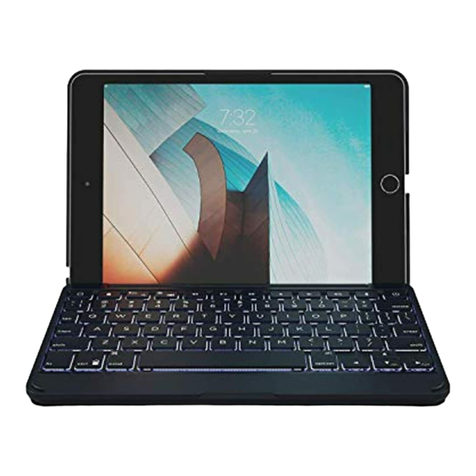
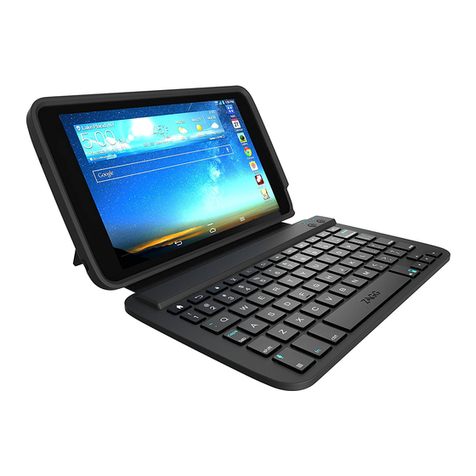
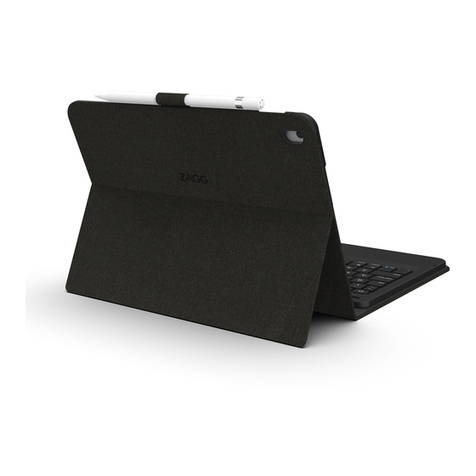
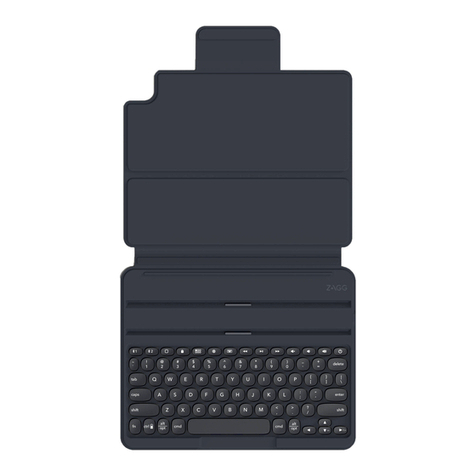
Zagg slim book go User manual

Keyboard Instructions
slim book go™
*WARRANTY REGISTRATION
Your ZAGG Slim Book Go comes with a one-year manufacturer’s warranty. In order to activate
the warranty, you must register your Slim Book Go as well as keep your purchase receipt. If you
purchased your ZAGG Slim Book Go from ZAGG.com, ZAGG has already registered it and has a
copy of your proof of purchase.
NEED MORE HELP? PLEASE SEE OUR FAQ SECTION AT: www.ZAGG.com/faq
See the important Health and Safety information on page 7 before using this product.

INSERTING/REMOVING YOUR DEVICE
DETACHING THE CASE FROM THE KEYBOARD
1. Hold your device in landscape mode with the volume control
buttons facing up. Insert the top half of your device at an angle
into the top of the case and apply light pressure to snap it snuggly
into place.
2. Press the bottom half of your device into the cover and press it in.
Press all around your device to ensure it has seated properly.
3. Once your device has been inserted into the case, set the case into
the cradle hinge on the keyboard. You should feel the magnets
connect as the case clicks into place.
4. To easily remove your device from the case, first detach the case
from the keyboard. (See directions below.) Then hold the top of
the case with one hand and press against the back of the case with
the other. Then grasp the exposed side of your device and lift/pull
it away from the cover.
1. To detach the case and the keyboard, open the case at a 90˚ angle to
the keyboard.
2. Hold one of the top corners of the keyboard with one hand, and
with the other hand on the corresponding top corner of the case,
pull directly up. This will disengage the magnets holding the
keyboard and case together.
POWERING ON AND OFF
1. To turn your Slim Book Go on, press the Power button located at
the top right corner of the keyboard. A green LED will light briefly.
2. To turn your Slim Book Go o, press and hold the Power button for
three seconds. A red LED will flash indicating it has turned o.

1. Ensure your device’s Bluetooth® is on.
2. Press your Slim Book Go’s or keys for three seconds. A blue
LED light on the power button will begin pulsing, indicating your
Slim Book Go is in pairing mode.
3. Your device will display “ZAGG Slim Book Go” as an available
pairing option. Select it and complete any ohter pairing steps
based on your device.
4. To pair your Slim Book Go to another device, repeat steps 2 and 3.
To toggle between devices, simply press or .
5. Once paired, the Bluetooth® key will stop pulsing and fade to o.
Once begun, if the Slim Book Go doesn’t complete pairing after
60 seconds, it will abort the process. If this happens, repeat steps
2 and 3.
1. To activate your device’s keyboard once disconnected, press the
hide/show button.
2. Turn o the Bluetooth® connection from your device.
3. Turn your Slim Book Go keyboard o.
PAIRING YOUR SLIM BOOK GO
DISCONNECTING YOUR KEYBOARD
Your Slim Book Go can pair with up to two devices at once. Pairing your Slim
Book Go is easy; just follow these instructions.
Your Slim Book Go features a case that protects your device even when it’s
not connected to your keyboard. When you’d like to use the case without the
keyboard, there are three ways you can switch to your onscreen keyboard.
1
1
2
2

BATTERY LIFE
To check your Slim Book Go keyboard’s battery life, press fn + the battery
key. The LED light on the power key will flash one of the following
three ways:
Three green flashes = 50% or more battery life
Three yellow flashes = 25-49% battery life
Three red flashes = less than 25% battery life
CHARGING
Your Slim Book Go features a powerful lithium polymer battery that lasts
up to two years of normal use between charges.* To charge your Slim
Book Go, follow these steps.
1 . Plug the micro USB or Type-C connector into the charging port.
2. Plug the regular USB connector on your cable into any 5V USB
outlet. The power button LED on your Slim Book Go will light to
indicate your keyboard is charging. This LED will turn o when your
keyboard is fully charged.
*Normal use is approximately one hour of use per day without the backlit feature. Using the backlit feature will impact
battery life and require more frequent charging.

1 & 2 MULTI-PAIRING – Activates your device’s pairing mode.
HOME –Displays your device’s home screen.
LOCK –Activates and deactivates your device’s sleep mode.
APPS RUNNING –Displays all of the apps currently running on your device.
LANGUAGE SYMBOL –Toggles between keyboard languages and emojis (if active on
your device); pressing cmd + spacebar will do the same.
KEYBOARD HIDE/SHOW – Hides or shows your tablet’s on-screen keyboard.
PREVIOUS TRACK –Skips to the previous track on your selected playlist.
PLAY/PAUSE – Starts or pauses your current playlist.
NEXT TRACK –Skips to the next track on your selected playlist.
MUTE –Mutes your device’s audio.
VOLUME DOWN –Decreases your device’s volume.
VOLUME UP – Increases your device’s volume.
POWER – Turns your Slim Book Go keyboard on and o.
BATTERY LEVEL – Indicates remaining battery life.
FN + BACKLIGHT SYMBOL – Activates the backlight feature.
FN + COLOR CHANGE SYMBOL –Changes backlight colors. (7 possible)
SPECIAL FUNCTION KEYS
Your Slim Book Go keyboard has been designed with the following
special function keys to give you more control of your device:

TROUBLESHOOTING
If your device doesn’t respond to the Slim Book Go keyboard, there may
be a simple explanation such as a dead battery or unsuccessful pairing.
Please use the following to help troubleshoot your situation. If none of the
following solve your issue, please contact ZAGG Customer Service and
one of our trained professionals will be happy to assist you.
1. Restart your device.
2. Turn your Slim Book Go keyboard o and back on.
3. Forget and re-pair your Slim Book Go keyboard.
4. If your Slim Book Go keyboard does not establish or maintain a
Bluetooth®connection, reset the Bluetooth®module by charging
your keyboard.
5. If, after charging, your keyboard doesn’t operate correctly, please
contact ZAGG Customer Service.

For more help please visit: www.zagg.com/support
For unparalleled scratch protection for your device, we recommend
ZAGG’s InvisibleShield®.
©2005 - 2018 ZAGG Inc All Rights Reserved.
Patents: zagg.com/patents | NASDAQ: ZAGG | MADE IN CHINA
The Bluetooth® word mark and logo are trademarks of Bluetooth SIG, Inc.
and any use of such marks by ZAGG Inc is under license.
ZAGG, InvisibleShield, ZAGG logo, and Slim Book Go are trademarks of
ZAGG IP Holdings Co., Inc.
iPad is a trademark of Apple Inc.
Changes or modifications not expressly approved by the party responsible for
compliance could void the user’s authority to operate the equipment.
This equipment has been tested and found to comply with the limits for a Class
B digital device, pursuant to Part 15 of the FCC Rules. These limits are designed
to provide reasonable protection against harmful interference in a residential
installation. This equipment generates uses and can radiate radio frequency energy
and, if not installed and used in accordance with the instructions, may cause
harmful interference to radio communications. However, there is no guarantee that
interference will not occur in a particular installation. If this equipment does cause
harmful interference to radio or television reception, which can be determined
by turning the equipment o and on, the user is encouraged to try to correct the
interference by one of the following measures:
• Reorient or relocated the receiving antenna.
• Increase the separation between the equipment and receiver.
• Connect the equipment into an outlet on a circuit dierent from that to which
the receiver is connected.
• Consult the dealer or an experienced radio/TV technician for help.
Any changes or modifications not expressly approved by the party responsible for
compliance could void the user’s authority to operate this equipment.
This device complies with Part 1S of the FCC Rules. Operation is subject to the
following two conditions:
1. This device may not cause harmful interference.
2. This device must accept any interference received, including interference that
may cause undesired operation.
1. Health Warning: Take frequent breaks when using your keyboard. If you
experience any discomfort, pain, tingling, numbness or burning in your neck,
shoulders, arms, wrists, hands or any other part of the body, stop using your
keyboard and consult a physician.
2. Use only micro USB chargers in connection with your keyboard.
3. Do not attempt to service your keyboard.
4. Do not disassemble or attempt to disassemble your keyboard.
5. Do not crush or puncture the keyboard.
6. Do not immerse your keyboard in water.
7. Do not put your keyboard in contact with water or other liquids as they could
cause a short circuit, fire, or electric shock which could result in serious injury,
death or property damage.
8. Do not use liquid or aerosol cleaners or solvents on or near your keyboard.
Clean only with a soft, dry cloth. Disconnect any cords before cleaning
the keyboard.
9. Do not use your keyboard while operating a motorized vehicle, including
automobile, boat or airplane. Doing so could put you and others at risk of
serious injury, death or property damage.
10. Do not use or place your keyboard near any heat sources including, but not
limited to, radiators, heat registers, stoves, other appliances, campfires or
barbeque grills.
11. To reduce the risk of fire or electric shock, wire or connect your keyboard
to products only in the manner instructed in the documentation supplied
herewith.
12. Do not attempt to modify or adjust any ports. Any improper connections or
adjustments may cause damage.
13. When you are ready to discard your keyboard, recycle your keyboard in a
manner consistent with electronic recycling requirements or recommendations
in your geographic area.
Please read the precautions and operation information before using your keyboard
or any accessories that accompany it. Retain this information for future use.
7

ADVERNTENCIA
Instrucciones del teclado
slim book go®
*REGISTRO DE LA GARANTÍA
Tu ZAGG Slim Book Go viene con una garantía de fábrica de un año. Para activar la garantía, debes
registrar tu Slim Book Go y guardar tu recibo de compra. Si compraste tu ZAGG Slim Book Go en
ZAGG.com, ZAGG ya lo registró y tiene una copia de tu comprobante de compra.
¿NECESITAS MÁS AYUDA? POR FAVOR LEE NUESTRA SECCIÓN DE PREGUNTAS FRECUENTES
EN: www.ZAGG.com/faq
Lee la importante información de salud y seguridad en la página 7 antes de usar este producto.

INSERTAR / SACAR TU DISPOSITIVO
1. Sostén tu dispositivo en modo horizontal con los botones de control
de volumen hacia arriba. Inserta la mitad superior de tu dispositivo
de forma inclinada en la parte superior de la funda y aplica una ligera
presión para que encaje en su lugar.
2. Presiona la mitad inferior de tu dispositivo en la cubierta y presiona
hacia adentro. Presiona alrededor de tu dispositivo para asegurarte
de que esté colocado correctamente.
3. Una vez que hayas insertado tu dispositivo en la funda, coloca la
funda en la bisagra de la base del teclado. Debes sentir que los
imanes se conectan cuando la funda encaja en su lugar.
4. Para sacar fácilmente tu dispositivo de la funda, primero separa
la funda del teclado. (Ver las instrucciones a continuación). Luego
sostén la parte superior de la funda con una mano y presiona contra
la parte posterior de la funda con la otra. Luego, toma el lado
expuesto de tu dispositivo y levántalo / sácalo de la cubierta.
1
SEPARAR LA FUNDA DEL TECLADO
1. Para separar la funda del teclado, abre la funda en un ángulo de 90˚
con respecto al teclado.
2. Sostén una de las esquinas superiores del teclado con una mano, y
con la otra mano en la esquina superior correspondiente de la funda,
tira directamente hacia arriba. Esto desconectará los imanes que
mantienen unidos el teclado y la funda.

ENCENDER Y APAGAR
EMPAREJAR TU SLIM BOOK GO
1. Para encender tu Slim Book Go, presiona el botón de encendido /
apagado ubicado en la esquina superior derecha del teclado. Una luz
LED verde se encenderá brevemente.
2. Para apagar tu Slim Book Go, mantén presionado el botón de
encendido / apagado durante tres segundos. Una luz LED roja
parpadeará indicando que se ha apagado.
Tu Slim Book Go puede emparejarse con un máximo de dos dispositivos a
la vez. Emparejar tu Slim Book Go es fácil; solo sigue estas instrucciones.
1. Verifica que la conexión Bluetooth® de tu dispositivo esté activada.
2. Mantén presionada la tecla o de tu Slim Book Go durante tres
segundos. Una luz LED azul en el botón de encendido / apagado
comenzará a parpadear, lo que indica que tu Slim Book Go está en
modo de emparejamiento.
3. Tu dispositivo mostrará “ZAGG Slim Book Go” como una opción de
emparejamiento disponible. Selecciónala y sigue cualquier otro paso
de emparejamiento que requiera tu dispositivo.
4. Para emparejar tu Slim Book Go con otro dispositivo repite los pasos
2 y 3. Para alternar entre dispositivos, simplemente presiona o .
5. Una vez emparejado, la tecla de Bluetooth® dejará de parpadear y
se apagará. Después de comenzar el proceso, si el Slim Book Go no
completa el emparejamiento en un plazo de 60 segundos, cancelará
el proceso. Si esto sucede, repite los pasos 2 y 3.
3
1
2
1
2

4
DESCONECTAR TU TECLADO
Tu Slim Book Go viene equipado con una funda que protege tu
dispositivo incluso cuando no está conectado a tu teclado. Si deseas
utilizar la funda sin el teclado, hay tres formas en que puedes cambiar al
modo de teclado en pantalla.
1. Para activar el teclado de tu dispositivo una vez desconectado,
presiona el botón ocultar / mostrar.
2. Desactiva la conexión Bluetooth® de tu dispositivo.
3. Apaga el teclado de tu Slim Book Go.
CARGA
Tu Slim Book Go cuenta con una poderosa batería de polímero de litio
que dura hasta dos años de uso normal entre cargas.* Para cargar tu Slim
Book Go, sigue estos pasos.
1. Enchufa el conector micro USB o conector tipo C en el puerto
de carga.
2. Enchufa el conector USB normal en tu cable en cualquier toma USB
de 5V. La luz LED del botón de encendido / apagado de tu Slim Book
Go se encenderá para indicar que tu teclado se está cargando. Esta
luz LED se apagará cuando tu teclado esté completamente cargado.
* El uso normal es de aproximadamente una hora de uso por día sin la función de retroiluminación. El uso de la función
de retroiluminación afectará la duración de la batería y requerirá una carga más frecuente.

45
DURACIÓN DE LA BATERÍA
Para verificar la duración de la batería de tu teclado Slim Book Go,
presiona fn + la tecla de la batería. La luz LED en la tecla DELETE
parpadeará de una de las siguientes tres maneras:
Tres destellos verdes = 50% o más de duración de la batería
Tres destellos amarillos = 25-49% de duración de la batería
Tres destellos rojos = menos de 25% de duración de la batería

EMPAREJAMIENTO MÚLTIPLE 1 y 2 - Activa el modo de emparejamiento de
tu dispositivo.
INICIO – Muestra la pantalla de inicio de tu dispositivo.
BLOQUEO – Activa y desactiva el modo de suspensión de tu dispositivo.
APLICACIONES EN EJECUCIÓN - Muestra todas las aplicaciones que se
ejecutan actualmente en tu dispositivo.
SÍMBOLO DE IDIOMA – Alterna entre los idiomas del teclado y emojis (si están
activos en tu dispositivo); también se logra el mismo efecto presionando cmd +
barra espaciadora.
OCULTAR/MOSTRAR TECLADO – Oculta o muestra el teclado de pantalla de
tu dispositivo.
PISTA ANTERIOR – Salta a la pista anterior en tu lista de
reproducción seleccionada.
REPRODUCIR/PAUSA – Reproduce o hace una pausa en tu lista de
reproducción actual.
SIGUIENTE PISTA – Salta a la siguiente pista en tu lista de reproducción actual.
SILENCIO – Silencia el audio de tu dispositivo.
BAJAR VOLUMEN – Reduce el volumen de tu dispositivo.
SUBIR VOLUMEN – Aumenta el volumen de tu dispositivo.
ENCENDIDO / APAGADO - Enciende y apaga tu teclado Slim Book Go.
NIVEL DE BATERÍA - Indica el nivel de batería restante.
FN + SÍMBOLO DE RETROILUMINACIÓN – Activa la función de retroiluminación
de tu Slim Book Go. Presiona esta tecla una vez para encender la
retroiluminación, presiónala dos veces para apagarla.
FN + SÍMBOLO DE CAMBIO DE COLOR - Cambia el color de la retroiluminación.
TECLAS DE FUNCIONES ESPECIALES
Tu teclado Slim Book Go ha sido diseñado con las siguientes teclas de
funciones especiales para darte más control sobre tu dispositivo:

6
SOLUCIÓN DE PROBLEMAS
Si tu dispositivo no responde al teclado Slim Book Go, se puede
deber a algo simple como una batería descargada o un error en el
emparejamiento. Por favor, utiliza la siguiente guía de solución de
problemas para resolver tu situación. Si ninguno de los siguientes pasos
soluciona tu problema, ponte en contacto con el Servicio al cliente de
ZAGG y uno de nuestros expertos te ayudará gustosamente.
1. Reinicia tu dispositivo.
2. Apaga tu teclado Slim Book Go y vuelve a encenderlo.
3.
Desvincula y olvida tu teclado Slim Book Go en tu configuración
de Bluetooth® y vuelve a emparejarlo.
4. Si tu teclado Slim Book Go no puede establecer o mantener una
conexión Bluetooth®, reinicia el módulo Bluetooth® cargando tu
teclado.
5. Si, después de cargarlo, tu teclado no funciona correctamente, por
favor ponte en contacto con Servicio al cliente de ZAGG.

Para obtener más ayuda visita: www.zagg.com/support
Para una incomparable protección contra arañazos para tu dispositivo,
recomendamos ZAGG’s InvisibleShield®.
©2005 - 2018 ZAGG Inc Todos los derechos reservados.
Patentes: zagg.com/patents | NASDAQ: ZAGG | HECHO EN CHINA
Bluetooth® es una marca registrada de Bluetooth SIG, Inc.
ZAGG, InvisibleShield, el logotipo de ZAGG, y Slim Book Go son marcas
registradas de ZAGG IP Holdings Co., Inc.
Cualquier cambio o modificación que no haya sido autorizado de forma
expresa por la parte responsable del cumplimiento de lo estipulado
podría revocar la autorización del usuario para operar el equipo.
Este equipo ha sido probado y se determinó que cumple con los límites
establecidos para un dispositivo digital de Clase B, de conformidad
con la Parte 15 de las normativas de la FCC (Comisión Federal de
Comunicaciones). Dichos límites se han establecido para garantizar un
nivel de protección razonable frente a interferencias dañinas en una
instalación residencial. Este equipo genera, utiliza y puede emitir energía
de radiofrecuencia y, si no se ha instalado y usado de conformidad con
las instrucciones del fabricante, puede provocar interferencias dañinas
en las comunicaciones de radio. Sin embargo, no se puede garantizar
que no se produzcan interferencias en una instalación concreta. Si
este equipo provoca interferencias dañinas en la recepción de radio
y televisión, lo cual se puede comprobar encendiendo y apagando el
equipo, se sugiere al usuario que intente corregirlo mediante una o
varias de las siguientes medidas:
• Cambie la orientación o la ubicación de la antena receptora.
• Aumente la separación entre el equipo y el receptor.
• Conecte el equipo a una toma de corriente distinta a la que se
encuentra conectado el receptor.
• Consulte con el distribuidor o con un técnico especializado en radio y
televisión para obtener ayuda.
Cualquier cambio o modificación que no haya sido autorizado de forma
expresa por la parte responsable del cumplimiento de lo estipulado
podría revocar la autorización del usuario para operar el equipo. Este
dispositivo cumple con la Parte 1S de las normativas de la FCC. Su
funcionamiento está sujeto a las dos condiciones siguientes:
1. Este dispositivo no debe causar interferencias dañinas.
2. Este dispositivo debe aceptar cualquier interferencia recibida,
entre ellas interferencias que puedan causar un funcionamiento
no deseado.

ADVERTENCIA
1. Advertencia de salud: toma descansos frecuentes cuando uses tu teclado.
Si experimentas alguna incomodidad, dolor, hormigueo, entumecimiento o
ardor en el cuello, hombros, brazos, muñecas, manos o cualquier otra parte
del cuerpo, detén el uso del teclado y consulta a un médico.
2. Usa solo cargadores micro USB para conectarlos a tu teclado.
3. No intentes reparar tu teclado.
4. No desarmes ni intentes desarmar tu teclado.
5. No aplastes ni perfores el teclado.
6. No sumerjas tu teclado en agua.
7. Evita que el teclado entre en contacto con agua u otros líquidos, ya que
podría provocar un cortocircuito, un incendio o una descarga eléctrica, lo
que podría ocasionar lesiones graves, muerte o daños a la propiedad.
8. No uses limpiadores o solventes líquidos o en aerosol sobre o cerca de tu
teclado.Limpia solo con un paño suave y seco. Desconecta los cables antes
de limpiar el teclado.
9. No uses tu teclado mientras maneja un vehículo motorizado, incluyendo
automóviles, barcos o aviones. Hacerlo podría ponerte a ti y a otras
personas en riesgo de sufrir lesiones graves, muerte o daños a la propiedad.
10. No uses ni coloques el teclado cerca de fuentes de calor, incluidos, entre
otros, radiadores, calentadores, estufas, otros electrodomésticos, fogatas o
parrillas para barbacoa.
11. Para reducir el riesgo de incendio o descarga eléctrica, enchufa o
conecta tu teclado a los productos solo de la manera que se indica en la
documentación suministrada.
12. No intentes modificar o ajustar ningún puerto. Cualquier conexión o ajuste
inadecuado puede causar daños.
13. Cuando estés listo para desechar tu teclado, recicla tu teclado de una
manera que cumpla con los requisitos o recomendaciones de reciclaje de
equipos electrónicos en tu área geográfica.
Lee las precauciones e información de funcionamiento antes de usar tu teclado
o cualquier accesorio que lo acompañe. Guarda esta información para consultarla
en el futuro.
7

ATTENTION
Mode d’emploi du clavier
slim book go®
* ENREGISTREMENT DE LA GARANTIE
Votre ZAGG Slim Book Go est couvert par une garantie constructeur d’un an. Pour activer la
garantie, vous devez enregistrer votre Slim Book Go et conserver votre preuve d’achat. Si vous
avez acheté votre ZAGG Slim Book Go sur ZAGG.com, ZAGG l’a déjà enregistré et possède une
copie de votre preuve d’achat.
BESOIN DE PLUS D’AIDE ? VEUILLEZ CONSULTER NOTRE FAQ SUR : www.ZAGG.com/faq
Veuillez consulter les informations importantes sur la santé et la sécurité à la page 7 avant
d’utiliser ce produit.

INSERTION/RETRAIT DE VOTRE APPAREIL
ENLEVER L’ETUI DU CLAVIER
1. Maintenez votre appareil en mode paysage avec les boutons de
réglage du volume vers le haut. Insérez la moitié supérieure de votre
appareil au niveau de l’angle dans le haut de l’étui et exercez une
légère pression pour le mettre en place.
2. Mettez la moitié inférieure de votre appareil dans l’étui et enfoncez-le.
3. Appuyez tout autour de votre appareil pour vous assurer qu’il est
bien en place.
4. Une fois votre appareil inséré dans l’étui, placez-le dans la charnière
du socle du clavier. Vous devriez sentir l’accolage des aimants au fur
et à mesure que l’étui se mette en place.
5. Pour retirer facilement votre appareil de son étui, détachez d’abord
l’étui du clavier. (Voir les instructions ci-dessous.) Tenez ensuite le
haut de l’étui d’une main et appuyez sur le dos de l’étui de l’autre.
Saisissez ensuite le côté exposé de votre appareil et soulevez/tirez
loin de socle.
1. Pour détacher l’étui et le clavier, ouvrez le l’étui à un angle 90˚ par
rapport au clavier.
2. Tenez l’un des coins supérieurs du clavier d’une main et, de l’autre main,
tirez directement vers le haut sur le coin supérieur correspondant de
l’étui. Cela désengagera les aimants qui maintiennent le clavier et l’étui
ensemble.
1

3
MISE SOUS TENSION ET HORS TENSION
SYNCHRONISATION DE VOTRE SLIM BOOK GO
1. Pour allumer votre Slim Book Go, appuyez sur le bouton
d’alimentation situé dans le coin supérieur droit du clavier. Une LED
verte s’allume brièvement.
2. Pour éteindre votre Slim Book Go, maintenez le bouton
d’alimentation enfoncé pendant trois secondes. Une LED rouge
clignotera pour indiquer qu’il est éteint.
Votre Slim Book Go peut se synchroniser avec deux appareils à la fois.
La synchronisation de votre Slim Book Go est facile; Il sut de suivre ces
instructions.
1. Assurez-vous que le Bluetooth® de votre appareil est activé.
2. Appuyez sur les touches ou de votre Slim Book Go pendant
trois secondes. Une diode bleue sur le bouton d’alimentation
commence à clignoter, indiquant que votre Slim Book Go est en
mode de synchronisation.
3. Votre appareil achera “ZAGG Slim Book Go” comme option de
synchronisation disponible. Sélectionnez-le et complétez toutes les
étapes de synchronisation en fonction de votre appareil.
4. Pour associer votre Slim Book Go à un autre appareil, répétez
les étapes 2 et 3. Pour basculer d’un appareil à l’autre, appuyez
simplement sur ou .
5. Une fois jumelée, la touche Bluetooth® arrête les pulsations et s’éteint
progressivement. Une fois lancé, si Slim Book Go ne complète
pas la synchronisation au bout de 60 secondes, le processus sera
interrompu. Si cela se produit, répétez les étapes 2 et 3.
1
2
1
2
Table of contents
Languages:
Other Zagg Keyboard manuals

Zagg
Zagg Pro User manual

Zagg
Zagg messenger folio 2 User manual

Zagg
Zagg ID6BSF User manual

Zagg
Zagg Rugged Book Go User manual

Zagg
Zagg VYVPA-BK04 User manual

Zagg
Zagg ZAGGkeys MINI 7 Installation guide

Zagg
Zagg Basic 7in User manual

Zagg
Zagg 10.1& 8.0 Folio User manual

Zagg
Zagg 10 Key User manual

Zagg
Zagg messenger folio 2 Setup guide

Zagg
Zagg Folio Ellipsis 10 User manual

Zagg
Zagg FOLIO User manual

Zagg
Zagg Pocket User manual

Zagg
Zagg FOLIO User manual

Zagg
Zagg Keyboard Case User manual

Zagg
Zagg ZAGGkeys PROFILE User manual

Zagg
Zagg Slim Book User manual

Zagg
Zagg Messenger Folio User manual

Zagg
Zagg Messenger Universal User manual

Zagg
Zagg Rugged Book User manual