®
FRISBEE
INSTALLATION GUIDE
Zaneen Group Inc. © 2018, T 1800-388-3382, F 416-247-9319, www.zaneen.com
In a constant effort to supply the best product, we reserve the right to change specifications or materials without notice. The most recent specification sheets are found at zaneen.com
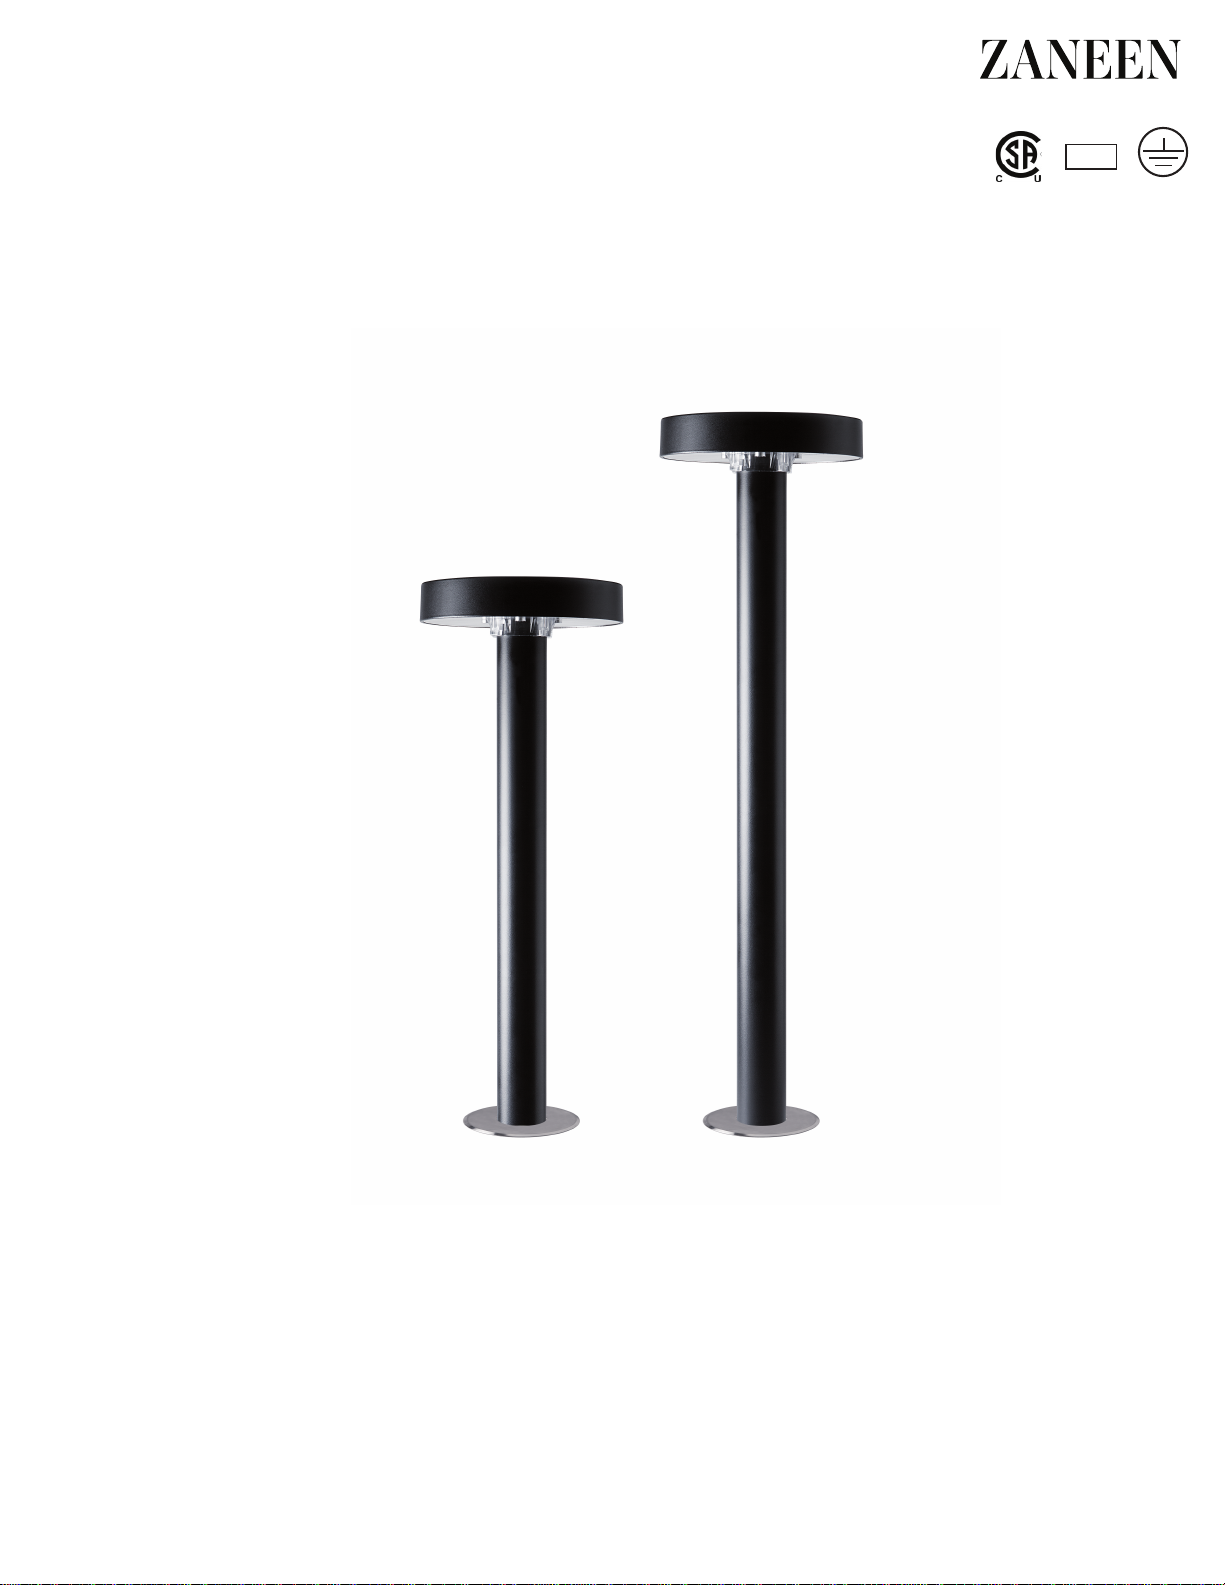
BOLLARD
Filo pavimento
Floor
max +1mm
30 cm
min.
FIG.4
C
B
FIG.2
C
A
F
A
Filo pavimento
Floor
max +1mm
30 cm
min.
FIG.4
C
D
E
FIG.5
B
230V
FIG.2
C
A
F
A
D
FIG.3
E
A
D
FIG.3
E
B
ISTRUZIONI DI MONTAGGIO - ASSEMBLY INSTRUCTIONS - INSTRUCTIONS DE MONTAGE
I
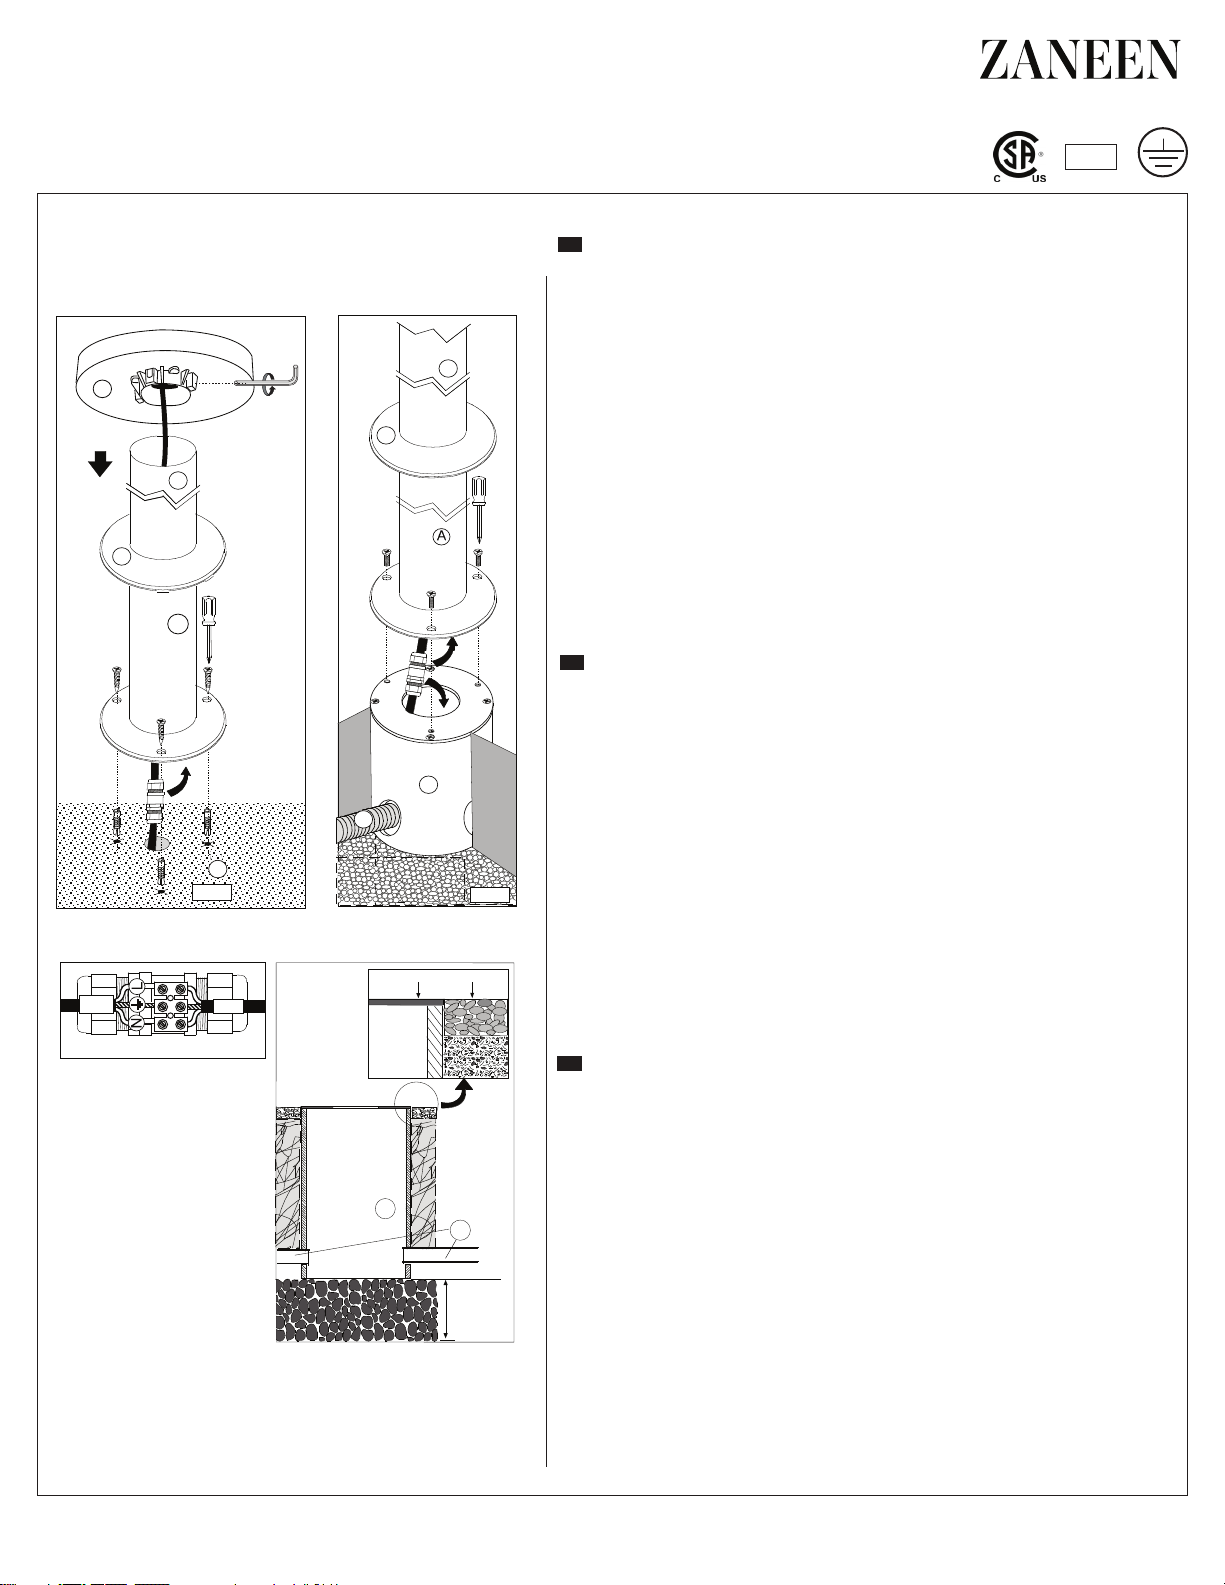
- Se si utilizza l’accessorio copri base B , prima dell’installazione inserirlo dall’alto sul
paloA (ø60).FIG.2
- Inserire il cavo di alimentazione all’interno del palo A , montare il vano otticoF
sul palo A (ø60), facendo pressione fino ad inserirlo nella sua sede.
Bloccare il vano otticoF sul palo A tramite 4 grani M5 inox.FIG.2
FRISBEE A PAVIMENTO
- Fissare a pavimento l’apparecchio con tasselli e viti adeguate usando come dima
l’apparecchio stesso.FIG.2
FRISBEE CON POZZETTO
- Prima di interrare e/o cementare il pozzetto, fare attenzione a creare nella zona di
alloggiamento uno strato di ghiaia di drenaggio sufficiente a garantire l’eventuale deflusso
dell’acqua (minimo 30 cm). Interrare e/o cementare il pozzettoD avendo
cura di posizionarlo in bolla e non tenerlo mai al di sotto del filo del terreno.FIG.3/4
Introdurre negli appositi fori del pozzetto il tubo o i tubi rigidi Eper il passaggio dei cavi.
FIG.3/4
FRISBEE CON COLLEGAMENTO ELETTRICO
- Dopo essersi assicurati che il cavo di rete non sia in tensione collegarlo all’apparecchio
tramite muola che ne mantenga l’ IP. (vedi nostro articolo L10A0003 IP 63).FIG.5
GB
- If you use the accessory base plate B, before installing add on top poleA (ø60).FIG
.2
-Insert the supply cable inside the poleA, F
mounting the optical tray on poleA (ø60),
and press until it snaps into place.
Block optic tray Fon pole Awithin 4 inox grub screw M5. FIG.2
FRISBEE ON THE FLOOR
- Fix the unit to the floor trough anchors and appropriate screws using the unit as a template.
FIG.2
FRISBEE WITH PIT
- Before putting and/or cementing the pit, paying attention to have a layer of gravel
to ensure the correct draining of the water (minimum 30 cm ). Lay and/or cementing
the pit D, taking care to place it in a bubble and never keep it under the level of the ground.
FIG.3/4
Introduce into the holes of the pit the pipe or the rigid pipes Ein order to insert
the cable.FIG.3/4
ELECTRICAL CONNECTION OF THE FRISBEE
- Check carefully that there is no tension and connect the fitting by a junction
box that maintains theIPgrade. (see our article L10A0003 IP68).FIG.5
F
- Si vous utilisez l’accessoire plaque de base B, avant d’installer ajouter sur le dessus pôle A
(ø60).FIG.2
-
Insérez le câble d’alimentation à l’intérieur du pôle A, montage optiques F en pole A(ø60),
fappliquant une pression jusqu’à ce qu’elle se mette en place.
-
Bloquer optiques Fsur le pôle Adans 4 grains en inox M5
FIG.2.
FRISBEE SUR LE SOL
- Fixer l’unité au sol avec chevilles et vis appropriées en utilisant l’appareil comme un modèle.
FIG.2
FRISBEE AVEC PUISARD
- Avant de enterrer et/ou cimenter le puisard, faire attention à créer dans la zone de logement
une couche de gravier de drénage suffisant pour assurer l’écoulement de éventuel de l’eau
(minimum 30 cm). Enterrer et/ou cimenter le puisard D en prenant soin de le placer dans
une bulle et de ne jamais garder sous le niveau du sol FIG.3/4.
- Intoduire dans les trous du puisard la conduite ou les conduites rigides E pour
le passage des câblesFIG.3/4.
FRISBEE AVEC CONNEXION ÉLECTRIQUE
- Vérifier soigneusement que le câble réseau est hors tension, connecter l’appareil par
une boîte de jonction qui maintient le gradeIP. (voir notre article L10A0003
IP63).
FIG.5
Filo pavimento
Floor
max +1mm
30 cm
min.
FIG.4
C
D
E
FIG.5
120V
STICK
Filo pavimento
Floor
max +1mm
30 cm
min.
FIG.4
D
E
IP 65