manuals.online logo
Brands
  1. Home
  2. •
  3. Brands
  4. •
  5. Zanussi
  6. •
  7. Oven
  8. •
  9. Zanussi ZBM 972 User manual

Zanussi ZBM 972 User manual

Other manuals for ZBM 972

2

Other Zanussi Oven manuals

Zanussi ZOCND7K1 User manual

Zanussi

Zanussi ZOCND7K1 User manual

Zanussi ZOB140 User manual

Zanussi

Zanussi ZOB140 User manual

Zanussi FM 5230 User manual

Zanussi

Zanussi FM 5230 User manual

Zanussi ZHF865 User manual

Zanussi

Zanussi ZHF865 User manual

Zanussi ZBF 361 User manual

Zanussi

Zanussi ZBF 361 User manual

Zanussi ZOP38903XD User manual

Zanussi

Zanussi ZOP38903XD User manual

Zanussi ZOB12401 User manual

Zanussi

Zanussi ZOB12401 User manual

Zanussi ZBF 760 Specification sheet

Zanussi

Zanussi ZBF 760 Specification sheet

Zanussi ZOB 492 Operation manual

Zanussi

Zanussi ZOB 492 Operation manual

Zanussi ZOHEE2K2 User manual

Zanussi

Zanussi ZOHEE2K2 User manual

Zanussi ZCE 7600 User manual

Zanussi

Zanussi ZCE 7600 User manual

Zanussi ZBG 331 User manual

Zanussi

Zanussi ZBG 331 User manual

Zanussi ZOHKF1X1 User manual

Zanussi

Zanussi ZOHKF1X1 User manual

Zanussi ZOU 481 Operation manual

Zanussi

Zanussi ZOU 481 Operation manual

Zanussi FM 55 Quick reference guide

Zanussi

Zanussi FM 55 Quick reference guide

Zanussi ZCG 6200 User manual

Zanussi

Zanussi ZCG 6200 User manual

Zanussi ZBM973 User manual

Zanussi

Zanussi ZBM973 User manual

Zanussi ZOS 5 User manual

Zanussi

Zanussi ZOS 5 User manual

Zanussi ZOB140X User manual

Zanussi

Zanussi ZOB140X User manual

Zanussi ZOHXX3X2 User manual

Zanussi

Zanussi ZOHXX3X2 User manual

Zanussi ZOG11311 User manual

Zanussi

Zanussi ZOG11311 User manual

Zanussi ZOCNX3WL User manual

Zanussi

Zanussi ZOCNX3WL User manual

Zanussi ZOP27901XE User manual

Zanussi

Zanussi ZOP27901XE User manual

Zanussi ZOF35802XK User manual

Zanussi

Zanussi ZOF35802XK User manual

Popular Oven manuals by other brands

Brandt FC 222 user manual

Brandt

Brandt FC 222 user manual

aumate TOA20M04N-1E instruction manual

aumate

aumate TOA20M04N-1E instruction manual

Maytag CWE4100AC - 24" Single Electric Wall Oven Dimension Guide

Maytag

Maytag CWE4100AC - 24" Single Electric Wall Oven Dimension Guide

Kernau KBO 1076 S PT B instruction manual

Kernau

Kernau KBO 1076 S PT B instruction manual

Bosch HB 37 N Series User manual and installation instructions

Bosch

Bosch HB 37 N Series User manual and installation instructions

Electrolux EOD5420AA user manual

Electrolux

Electrolux EOD5420AA user manual

Mx Onda MX-HC2183 instruction manual

Mx Onda

Mx Onda MX-HC2183 instruction manual

Daewoo F6EV19SM2 Service manual

Daewoo

Daewoo F6EV19SM2 Service manual

Blodgett MT3870 Specifications

Blodgett

Blodgett MT3870 Specifications

GE ZET2F owner's manual

GE

GE ZET2F owner's manual

GE JK3000DF3WW owner's manual

GE

GE JK3000DF3WW owner's manual

eka EKF 523 NT Operating and instruction manual

eka

eka EKF 523 NT Operating and instruction manual

AEG Electrolux E3191-5 user manual

AEG Electrolux

AEG Electrolux E3191-5 user manual

Pratica Rocket Express quick start guide

Pratica

Pratica Rocket Express quick start guide

Viking Professional VGSO260T user guide

Viking

Viking Professional VGSO260T user guide

FM RX203 instruction manual

FM

FM RX203 instruction manual

Bosch HBN331 9B Series instruction manual

Bosch

Bosch HBN331 9B Series instruction manual

NEFF B95M42N0MK Instructions for use

NEFF

NEFF B95M42N0MK Instructions for use

manuals.online logo
manuals.online logoBrands
  • About & Mission
  • Contact us
  • Privacy Policy
  • Terms and Conditions

Copyright 2025 Manuals.Online. All Rights Reserved.

BUILT-IN OVENS
ZBM 972
INSTRUCTION BOOKLET
Please read this instruction booklet before using the appliance
GB
2
This appliance complies with the following
E.E.C. Directives:
* 73/23 - 90/683
(Low VoltageDirective);
* 93/68 (General Directives);
* 89/336 (Electromagnetical
Compatibility Directive) .
an subsequent mo ifications
Important Safety Information
Installation
 This oven must be installe by qualifie personnel to
the relevant British Stan ar s.
 This oven is heavy. Take care when moving it.
 Remove all packaging, both insi e an outsi e the
oven, before using the oven.
 Do not attempt to mo ify the oven in any way.
Child Safety
 This oven is esigne to be operate by a ults. Do not
allow chil ren to play near or with the oven.
 The oven gets hot when it is in use. Chil ren shoul be
kept away until it has coole .
During Use
 This oven is inten e for omestic cooking only. It is
not esigne for commercial or in ustrial purposes.
 Never line any part of the oven with aluminium foil.
 Do not allow heatproof cooking material, e.g. roasting
bags, to come into contact with oven elements.
 Never place plastic or any other material which may
melt in or on the oven.
 Do not place seale cans or aerosols insi e the oven.
They may explo e if they are heate .
 Do not hang towels, ishcloths or clothes from the
oven or its han le.
 Do not use this oven if it is in contact with water an
never operate it with wet han s.
 Take great care when heating fats an oils as they will
ignite if they become too hot.
 Always use oven gloves to remove an replace foo in
the oven.
 Ensure that all control knobs are in the OFF position
when not in use.
 Do not leave cookware containing foo stuffs, e.g. fat
or oil in or on the oven in case it is ina vertently
switche ON.
 When using other electrical appliances, ensure the
cable oes not come into contact with the hot surfaces
of the oven.
Maintenance and Cleaning
 Only clean this oven in accor ance with the instructions.
 The oven shoul be kept clean at all times. A buil -up
of fats or other foo stuffs coul result in a fire,
especially in the grill pan.
 Always allow the oven to cool own an switch off the
electrical supply before carrying out any cleaning or
maintenance work.
Guide to Use the instructions
The following symbols will be foun in the text to gui e you
throughout the Instructions:
Safety Instructions
Step by step instructions for an operation
Hints an Tips
Environmental information
F
Service
 This oven shoul only be repaire or service by an
authorise Service Engineer an only genuine approve
spare parts shoul be use .
Environmental Information
 After installation, please ispose of the packaging
with ue regar to safety an the environment.
 When isposing of an ol appliance, make it unusable,
by cutting off the cable. Remove any oor catches,
to prevent small chil ren being trappe insi e.
You MUST rea these warnings carefully before installing or using the oven. If you nee assistance,
contact our Customer Care Department on 08705 727727
Keep this instruction book or uture re erence
and ensure it is passed on to any new owner.
3
For the User
Contents
Description of the Oven
Grease Filter
Oven Light
Grill Element
Fan
Rating Plate
Control
Panel
Important Safety Information 2
Description of the Oven 3
Control Panel
Using the Oven 7
Before the First Use 7
Hints and Tips 7
Programming the Oven 8
Child Safety Function 9
Safety and Energy Saving Functions 9
The Fan Oven 10
The Conventional Oven 11
Defrosting 12
Grilling 13
Pizza Oven 15
Baking Function 15
Cleaning the Oven 16
Grease Filter 16
Cleaning the hinged grill 17
Replacing the Oven Light 17
Service and Spare Parts 18
Something not working 18
Guarantee Conditions 19
For the Installer
Installation 22
Technical Data 22
Electrical Connection 22
Building In 23
4
Control Panel
All the oven functions are controlled by an electronic
programmer.
You can select any combination of cooking function,
cooking temperature and automatic timing.
In the event of a power failure, the programmer will
keep all the settings (time of day, program setting
or program in operation) for about 3 minutes. If
power is not restored within 3 minutes, all the
settings will be cancelled. When the power is
restored, the numbers on the display will flash,
and the clock/timer has to be reset.
1. ON / OFF
2. Oven Function Control
3. Fast Heat Up / Defrost Function
. Temperature Control / Current Temperature
5. Decreasing Control (Time or Temperature)
6. Increasing Control (Time or Temperature)
7. Minute Minder
8. Cooking Time
9. End of Cooking Time
Push Buttons
"On/Off" Push Button
The oven must be switched on before setting any cooking
function or programme. When button is pressed, the
pilot light above will come on, and the oven light will switch
on.
To switch off the oven, you can press button at any
time. Any cooking function or programme will stop, the
oven light will switch off and the time display will show the
time of day only.
When button is pressed, the display will show
the current internal temperature if the oven has
not completely cooled down.
Oven Function Control Push
Button
Push button allows you to select the cooking function.
Each time you push this button, a pilot light will come on
in the Oven Function Display, showing which cooking
function has been chosen.
Increase and Decrease Push
Buttons
Push buttons and allow you to increase or decrease
temperature or time settings.
123 456789
}
Cooking Function Display Time display
}
Temperature
display
Programming
Controls
5
If the internal temperature is higher than the
selecte temperature (e.g. when a cooking
function has been complete an the oven is still
hot) the internal temperature will not be isplaye .
How to select a Cooking
Function and Temperature
The oven has 8 ifferent cooking functions. For each of
them, a pre-set temperature will be automatically
selecte .
1) Switch on the oven by pressing the "ON"
button.
2) Press button to select the require oven
function. Each time button is epresse , a
pilot light will come to the left of the currently
selecte cooking function symbol.
3) If the pre-set temperature is not suitable, press
button or to a just the temperature in 5
egree steps.When the require temperature is
reache an acoustic alarm will soun for a short
time.
You can also get the current internal temperature by
pressing button once.
F
F
How to set the Time of Day
The oven has a 24 hour clock.
When the oven is first connecte to the electrical supply,
the isplay will automatically show 12:00.
I no button is pressed within 10 seconds, the
numbers will stop flashing an the clock will start
running from 12.00.
To set the correct time of day :
I numbers are lashing:
press button or . When the correct time is
isplaye , confirm the setting by pressing button
. The clock will start running.
I numbers are static:
press buttons an at the same time an
keep them presse until the numbers start flashing.
Release buttons an , then a just the
time by pressing buttons or an confirm by
pressing button .
F
6
Thermal Grilling - This function offers an alterna-
tive metho of cooking foo items, normally
associate with conventional grilling. The grill
element an the oven fan operate together,
circulating hot air aroun the foo . Select a
maximum temperature o 200°C.
Baking Function - The top an bottom elements
heat the oven cavity an the fan circulates hot air
aroun your ishes. Best for baking cakes, biscuits
or brea .
Bottom heating element - The heat comes from
the bottom of the oven only, to allow you finish your
ishes.
Inner grill element only - can be use for grilling
small quantities.
Cooking Function Symbols
Fan cooking - This setting allows you to roast or
roast an bake simultaneously using any shelf,
without flavour transference.
Conventional cooking - The heat comes from
both the top an bottom element, ensuring even
heating insi e the oven.
Full Grill - The full grill element will be on.
Recommen e for large quantities.
Pizza Oven - The bottom element provi es irect
heat to the base of pizzas, quiches or pies, while
the fan ensures air is circulate to cook the pizza
toppings or pie fillings.
"Fast Heat Up" function
After a cooking function has been selecte an the
temperature has been a juste , the cavity will gra ually
heat up until the selecte temperature is reache . This
will take from 10 to 15 minutes, epen ing on selecte
function an temperature.
If it is necessary to reach the require temperature in a
shorter time, the "Fast Heat Up" Function can be use .
1) Switch the oven on by pressing button .
2) Set the require cooking function an
temperature as explaine in the previous pages.
3) Press button once. The temperature
isplay will show "FHU".
4) When the require temperature is reache , an
acoustic alarm will soun for a short time, an the
temperature isplay will revert to the set temperature.
This function can be use with any cooking function or
temperature.
Defrost Function
It is possible for the oven fan to operate without heat an
circulate the air, at low temperature, insi e the oven. This
increases the spee of efrosting.
1) Switch the oven on by pressing button .
2) Press button twice. The temperature
isplay will show "32". This temperature setting
cannot be change .
3) To switch the " efrost" function off, just press
button once again. The oven will switch off,
an the isplay will only show the time of ay.
This function is particularly suitable for efrosting elicate
foo which coul be amage by heat, e.g. cream fille
gateaux, ice cakes, pastries, brea an other yeast
pro ucts.
F
F
7
Hints and Tips
Condensation and steam
When food is heated it produces steam in the same way
as a boiling kettle. The oven vents allow some of this
steam to escape. However, always stand back from
the oven when opening the oven door to allow any
build up of steam or heat to release.
If the steam comes into contact with a cool surface on
the outside of the oven, e.g. a trim, it will condense and
produce water droplets. This is quite normal and is not a
fault with the oven.
To prevent discolouration, regularly wipe away
condensation and also soilage from surfaces.
Cook are
 Use any oven proof cookware which will withstand
temperatures of 250°C.
 Baking trays, oven dishes, etc. should not be placed
directly against the grid covering the fan at the back
of the oven, or placed on the oven base.
 Do not use baking trays larger than 30 cm x 35 cm
(12 in x 1 in) as they will restrict the circulation of
heat and may affect performance.
The effects of dishes
on cooking results
Dishes and tins vary in their thickness, conductivity,
colour, etc. which affects the way they transmit heat to
the food inside them.
AAluminium, earthenware, oven glassware and bright
shiny utensils reduce cooking and base browning.
BEnamelled cast iron, anodized aluminium, aluminium
with non-stick interior and coloured exterior and dark,
heavy utensils increase cooking and base browning.
Cooling fan
The cooling fan operates during cooking. Air is expelled
through vents between the oven door and the control
panel.
The cooling fan may run on after the oven is switched off
to keep the controls cool. This is quite normal.
Before the First Use
Remove all packaging, both inside and outside
the oven, before using the oven.
Before first use, the oven should be heated without food.
During this time, an unpleasant odour may be emitted.
This is quite normal.
1. Switch on the oven by pressing the "ON" push
button.
2. Press button twice. The pilot light to the left of
symbol will come on.
3. Set the temperature to 250°C using the "Increase"
button (push button ).
. Open a window for ventilation.
5. Allow the oven to run empty for approximately 5
minutes.
This procedure should be repeated with the full grill
function and the fan oven function for
approximately 5-10 minutes.
Using the Oven
Always cook with the oven door closed.
Stand clear when opening the oven door. Do
not allow it to fall open - support the door using
the door handle, until it is fully open.
 The oven has six shelf levels, counted from the
bottom, as shown in the diagram.
The anti-tip shelf has four small metal tabs on
its frame to prevent it from sliding out from the
shelf supports.
It is important that the shelves are correctly
positioned as shown in the diagram.
 Do not place cookware directly on the oven
base.
F
1
2
3
4
5
6
Oven accessories
ANTI-TIP SHELF
metal tabs
Grill trivet
Grill/roasting pan
Removable
handles
8
Ho to set the minute minder
1) Press button to select the Minute Minder
Function. The relevant pilot light will flash and the
control panel will display 0.00.
2) Press button or within 3 seconds to select
the required time (up to 19 hours 59 minutes). The
Minute Minder will wait 3 seconds and then start
running.
3) The display will revert to the time of day. To check
the minute minder, press button .
) When the programmed time has elapsed, an
acoustic alarm will be heard. The oven will NOT
switch off if in use.
5) To switch off the acoustic alarm, press any button
between and 9 (see page ). The Minute Minder
pilot light will go out.
To cancel the Minute Minder:
Press button and, while keeping it pressed,
press button too.
To programme the Oven to
s itch off
1) Place food in the oven, select a cooking function
and adjust the cooking temperature if required.
2) Press button to select the Cooking Duration
function. The Cooking Duration pilot light will flash
and the control panel will display 0.00.
3) Press button or to select the required time
(up to 19 hours 59 minutes). The programmer will
wait 3 seconds and then start running.
) The display will revert to the time of day. To check
the cooking time, press button .
5) When cooking time is over, the oven will be
switched off automatically and an acoustic alarm
will be heard.
6) To switch off the acoustic alarm, press any button
between and 9. The Cooking Duration pilot light
will go out.
To cancel the Duration Time:
Press button and, while keeping it pressed,
press button too.
f this operation is carried out while a
program is running on, the oven will NOT
switch off.
Programming the Oven
F
F
F
F
When a Cooking Duration time is set, the oven will
switch off a few minutes before the end of the
programmed time, and use the residual heat. See
Safety and Energy Saving Functions.
9
To programme the ven to
switch on and off
1) Carry out the cooking uration setting as escribe in
To programme the Oven to switch off.
2) Press button . The "En of Cooking" function will
be selecte , an the relevant pilot lamp will flash. The
control panel will isplay the en of cooking time (that
is, the actual time + cooking uration).
3) Press button or within 3 secon s to select the
require en of cooking time.
4) The programmer will wait 3 secon s, then the cooking
uration time will appear on the control panel. When
the oven switches on, the isplay will revert to the time
of ay.
If you press button the isplay will show the en
of cooking time.
5) The oven will switch on an off automatically. The en
of cooking will be marke by an acoustic alarm.
6) To switch off the acoustic alarm, press any button
between 4 an 9. The pilot lamps will go off.
To cancel the programme, simply cancel the
Duration Time.
Press button an , while keeping it presse ,
press button too.
I this operation is carried out while a
program is running on, the oven will NOT
switch o .
F
F
Safety Cut- ff Function
If no changes are ma e to the oven settings, the oven will
switch off automatically accor ing to the following table:
If temperature setting is: the oven will switch off:
250°C or more after 1 1/2 hours
from 120 up to 250°C after 5 hours
less than 120°C after 12 hours
Child Safety Function
To avoi chil ren switching on the oven, it is
possible to lock the oven controls.
1) Turn off the oven by pressing button .
2) Press buttons an at the same time an
keep them presse for about 3 secon s. A flashing
ot will be isplaye after the time of ay.
3) The oven is now locke . Neither oven functions nor
temperatures can be selecte .
To unlock the oven:
Press buttons an at the same time an
keep them presse for about 3 secon s. The
flashing ot will go off. The oven can now be
operate .
Safety and Energy Saving Functions
F
F
Residual Heat Function
When a Cooking Duration time is set, the oven will
automatically switch off a few minutes before the en of
the programme time, an use the resi ual heat to finish
your ishes without energy consumption. The oven pilot
light will remain on until the Cooking Duration time is over.
This function will not operate when the Cooking Duration
time is less than 15 minutes.
10
The Fan Oven
The air inside the oven is heated by the element around
the fan situated behind the back panel. The fan circulates
hot air to maintain an even temperature inside the oven.
The advantages of cooking with this function are:
l
Faster Preheating
As the fan oven quickly reaches temperature, it is not
usually necessary to preheat the oven although you
may find that you need to allow an extra 5-7 minutes
on cooking times. For recipes which require higher
temperatures, best results are achieved if the oven
is preheated first, e.g. bread, pastries, scones,
souffles, etc.
l
Lower Temperatures
Fan oven cooking generally requires lower
temperatures than conventional cooking.
Follow the temperatures recommended in the chart
at page 18. Remember to reduce temperatures by
about 20-25°C for your own recipes which use
conventional cooking.
l
Even Heating for Baking
The fan oven has uniform heating on all runner
positions. This means that batches of the same food
can be cooked in the oven at the same time.
However, the top shelf may brown slightly quicker
than the lower one.
This is quite usual. There is no mixing of flavours
between dishes.
Ho to use the Fan Oven
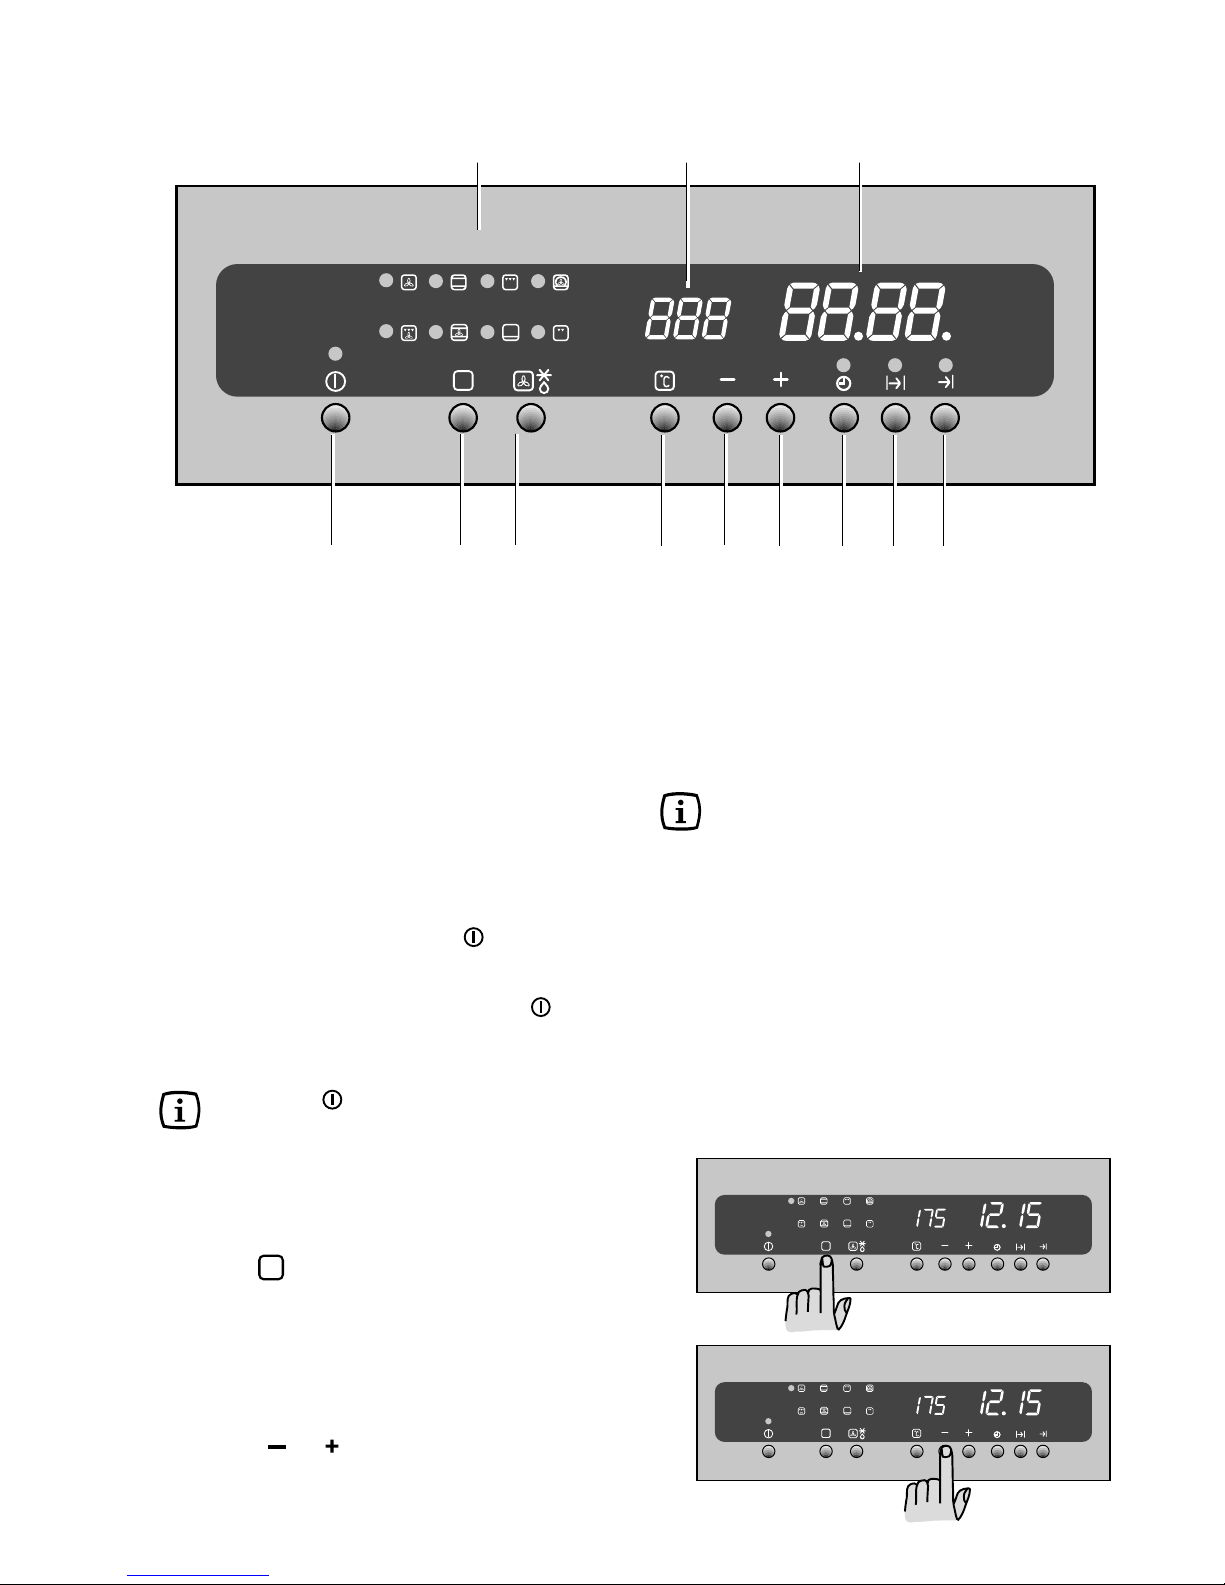
1. Switch the oven on.
2. Press the Oven Function Control button once.
3. If necessary adjust temperature setting using
the "Increase" or "Decrease" buttons.
THINGS TO NOTE
l
The oven light will come on when the oven is switched
on.
l
The cooling fan will operate continually during cooking.
It may run on after the oven is switched off to keep
the controls cool. This is quite normal.
NOTE
The action of the cooling fan will depend on how long the
oven has been used and at what temperature. It may not
switch on at all at lower temperature settings nor run on
where the oven has only been used for a short time.
FO 2079
F
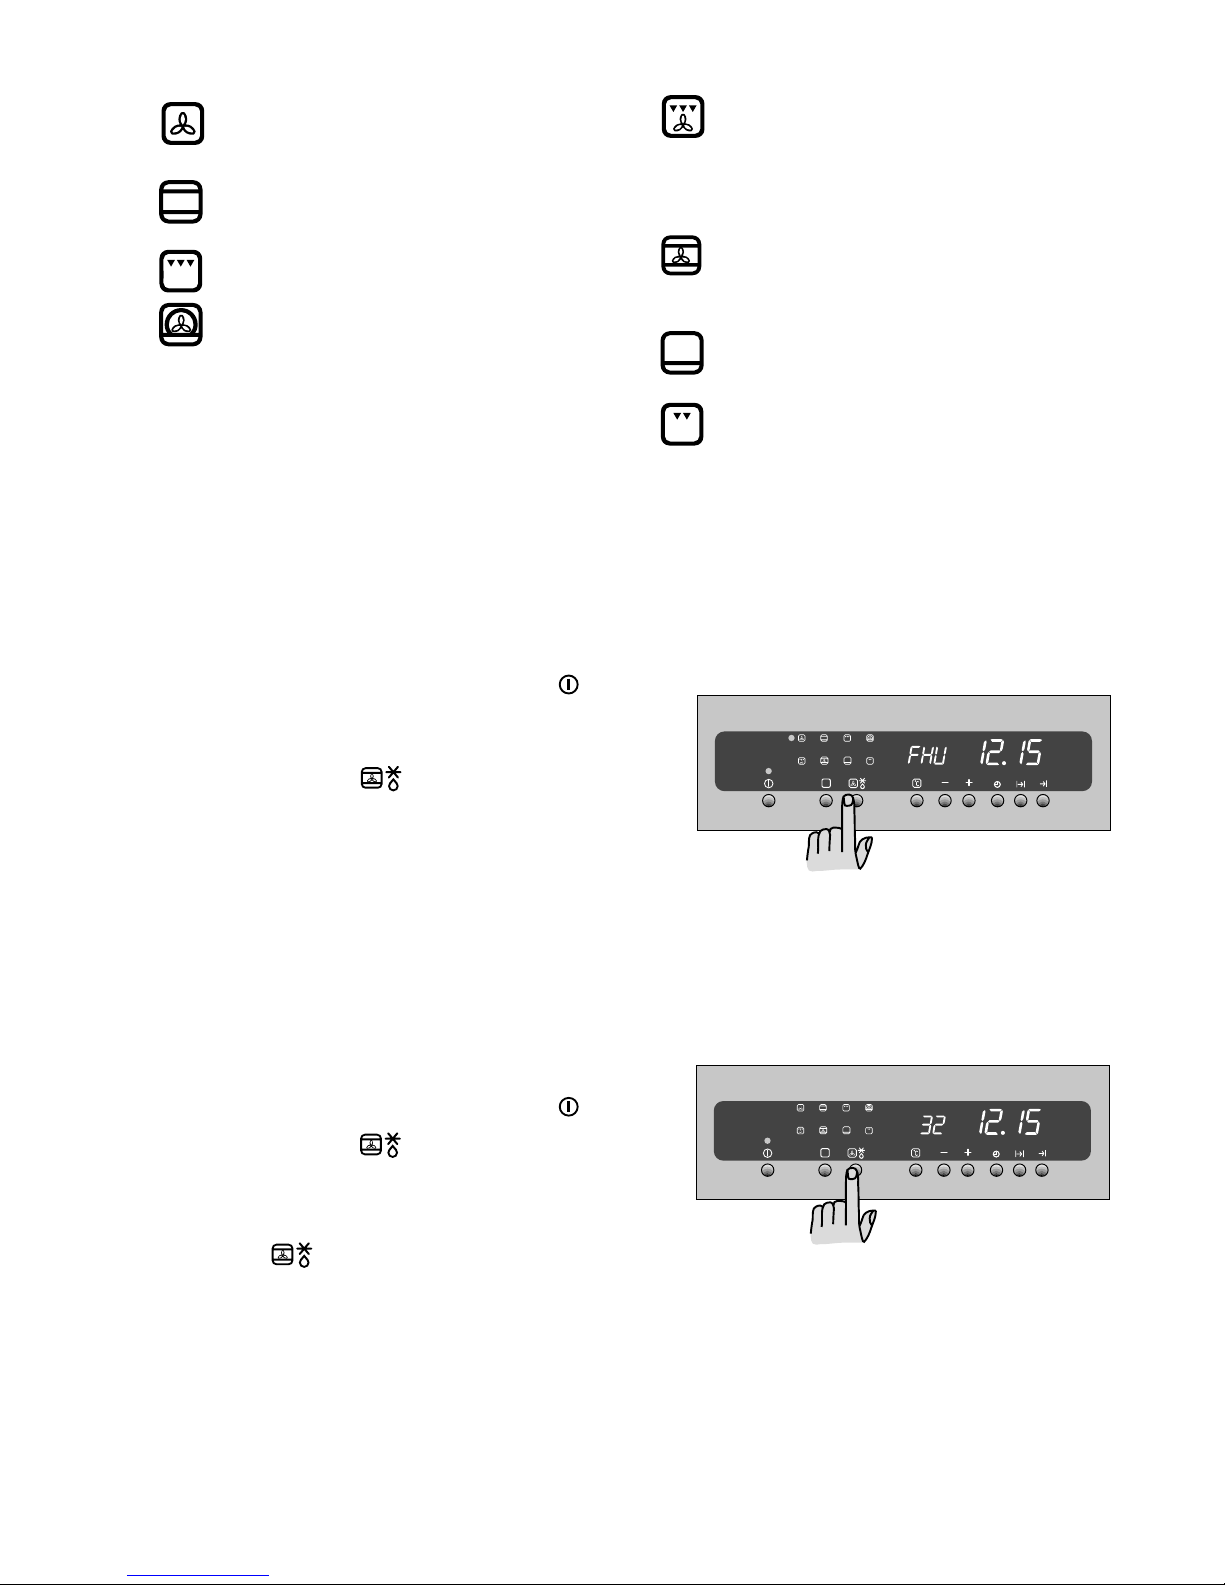
FAN OVEN FUNCTION SYMBOL
PRE-SET TEMPERATURE: 175°C
TEMPERATURE SELECTION: 50°C - 250°C
Hints and Tips
Runner positions are not critical, but make sure the
shelves are evenly spaced.
When cooking more than one dish in the fan oven, place
dishes centrally on the shelves rather than several dishes
on one shelf.
When the oven is full, you may need to allow a slightly
longer cooking time.
A shelf may be placed on the floor of the oven. Place
dishes on a shelf in this position rather than on the oven
base, to allow air circulation around the food.
When the oven is full of the same food, e.g. equal trays
of small cakes or equal size victoria sandwich cakes,
then they will be cooked in the same time and removed
from the oven together. When different sizes of trays or
types of food, e.g. biscuits and cakes are cooked, they
will not necessarily be ready together.
The fan oven can be used to heat foods through without
thawing first, e.g. fruit tarts, mince pies, sausage rolls,
and other small pastry items. Use a temperature of 190-
200°C and allow 20- 0 minutes (depending on the quantity
of food in the oven).
The use of too high temperatures can cause uneven
browning. Check with the recommendations for oven
temperatures given in the cooking charts, but be prepared
to adjust the temperature by 10°C if necessary.
Remember to reduce temperatures by about 20-25°C for
your own conventional recipes.
The meat tin should not be placed on a heated hotplate
or burner as this may cause the enamel to crack.