manuals.online logo
Brands
  1. Home
  2. •
  3. Brands
  4. •
  5. Zeiss
  6. •
  7. Binoculars
  8. •
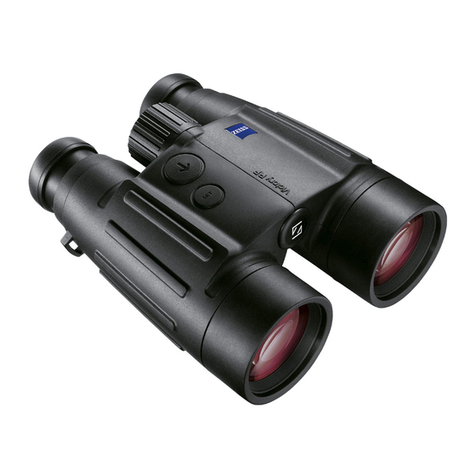
  9. Zeiss VICTORY RF Series User manual

Zeiss VICTORY RF Series User manual

VICTORY RF
BLUETOOTH®ENABLED
OWNER’S MANUAL
North America
This product may be covered by
one or more of the following
United States patents:
US6542302, US6816310,
US6906862
For further United States patents
which may cover this product see:
www.zeiss.com/sports-optics/us/patents
PRECISION RANGEFINDERS FOR YOUR HUNTING AND SHOOTING ADVENTURES
8x54 | 10x548x42 | 10x42
VICTORY RF OWNER’S MANUAL - NORTH AMERICA | 3
For the latest updates and information regarding our products, visit zeiss.com/us/sportsoptics.
TABLE OF CONTENTS
Victory RF Anatomy 3
Instructions for Use 4
Safety 4
Scope of Supply 5
Technical Data 6
Preparation 7
Attaching the Carrying Strap and Protective Caps 8
Observation With and Without Eyeglasses 9
Cleaning and Replacing the Eyecups 9
Adjusting the Binocular for Appropriate Fit Between the User’s Pupils 10
Focusing the Aiming Mark and Diopter Compensation 10
User Setup – Stand-Alone Product Menu Conguration of the Rangender 10
Ballistic Settings (B.I.S. II) 12
Display Settings and Selecting the Unit of Measure 14
Measuring Mode and Key Layout (Control Button Conguration) 15
Instructions for Connecting the Victory RF and the ZEISS Hunting App 16
Establishing a Connection Between the ZEISS Hunting App and Victory RF 17
How to Input Your Ballistic Prole(s) 19
Care and Maintenance of Your Victory RF 25
Warranty 26
No-Fault Policy and Consumer Product Returns 27
1. Adjustable eyecup
2. Center focus wheel
3. Diopter compensation for binocular
4. Diopter compensation for display
5. Eyelet (for carrying strap)
6. Ranging control button
7. Set control button
8. Battery cover/battery compartment
9. LED sighting reference point
10. Four-gure LED display
11. Unit yard display
12. Unit meter display
13. Bluetooth display
14. Battery display
15. Carrying strap (not pictured)
16. Eyepiece cap (not pictured)
17. Protective lens caps (not pictured)
Illustrations above may dier from actual displayed image or product accessories. Artwork is for illustration purposes only.
2- VICTORY RF OWNER’S MANUAL - NORTH AMERICA
ZEISS Sports Optics is not responsible for typographical errors. Product images are for illustration purposes only. Specications and products may change without prior written
notice. All eorts have been made to make sure content is accurate at time of printing.
2 | 7 EN
IDENTIFICATION OF THE COMPONENTS
1 Eye cup
2 Central focusing
3 Diopter compensation
4 Diopter compensation for display
5 Eyelet for fixing the carrying strap
6 Range finder button
7 Set button
8 Battery cover/battery compartment
User information for the disposal of electrical and electronic
equipment (private households)
This symbol on products and/or accompanying documents indicates that
used electrical and electronic products are not to be mixed with ordinary
household waste. Take these products to the appropriate collection point
for proper handling, recovery and recycling, where they will be taken
back for free. In some states, it may also be possible to hand in these
products to your local dealer when purchasing a corresponding new
product. The proper disposal of this product serves to protect the
environment and prevents possible harmful effects on human beings and their
surroundings, which may arise as a result of incorrect handling of waste. More
detailed information on your nearest collection point is available from your local
authority. According to state law, fines may be issued for the incorrect disposal of
this type of waste.
For business customers within the European Union
To dispose of electrical and electronic equipment, please contact your dealer or
supplier, who will be able to provide you with more information.
Information on disposal in other countries outside of the European Union
This symbol is applicable only in the European Union. Please contact your local
authority or your dealer if you wish to dispose of this product and enquire about
how to dispose of it.
Labelled in accordance with the statutory guidelines 2014/53/EU
and 2011/65/EU.
SCOPE OF SUPPLY
ZEISS Victory® RF binoculars:
Product Order number Scope of supply
Victory RF 8x42 52 45 48 ZEISS Victory RF
Protective lens caps
Eyepiece cap
Carrying strap
Bag with strap
CR2 battery
Lens cleaning cloth
Quick Guide Part 1 & 2
Victory RF 10x42 52 45 49
Victory RF 8x54 52 56 48
Victory RF 10x54 52 56 49
(5)
(3)
(1)
Fig. 1
(7)
(4)
(6)
(8)
(2)
Fig. 2
(12)
(11)
(14)
(13)
(9)
(10)
9 LED sighting mark
10 4-figure LED display
11 Unit yard display
12 Unit meter display
13 Battery display
14 Bluetooth display
15 Carrying strap
16 Eyepiece cap
17 Protective lens caps
INSTRUCTIONS FOR USE
Congratulations on the purchase of your new binoculars with integrated
laser range finder.
ZEISS products are famous for outstanding optical performance, precision
engineering and a long service life.
Please observe the following instructions for use in order to obtain the best from
your binoculars and to ensure that they remain your constant companion for many
years to come.
INFORMATION FOR YOUR SAFETY
Environmental influences
• Caution: Do not use the binoculars to look at the sun or at laser light sources.
This could result in serious injury to the eyes and in considerable damage to the
product.
• Caution: Never leave the binoculars in the sun for extended periods of time
without the protective lens cap. The objective lens and eyepiece can function as a
burning glass and damage the interior components.
Danger of swallowing
Caution: Do not leave the batteries and removable exterior parts within reach of
children (danger of swallowing).
Further information and safety instructions be found in the QuickGuide provided.
This guide can also be found at the Download Center on our website.
Battery disposal
Batteries do not belong in household rubbish!
Please use a recycling facility in your area to dispose of used batteries.
Please only recycle discharged batteries.
As a rule, batteries are discharged if the device being run
• shuts off and signals “Battery empty”.
• no longer functions properly after extended use of the batteries.
To prevent short circuits, cover the battery contacts with an adhesive strip.
Caution: Use only battery types recommended by the manufacturer.
Handle used batteries in accordance with the manufacturer’s instructions.
Under no circumstances should batteries be thrown into a fire, heated up,
recharged, taken apart or broken open.
Germany: As a consumer, you have a legal obligation to return used
batteries. You can hand in your batteries for free to wherever the
batteries were purchased or to the public collection points in your city or
community.
You will find these symbols on batteries that contain harmful substances:
Pb = Battery contains lead
Cd = Battery contains cadmium
Hg = Battery contains mercury
Li = Battery contains lithium
VICTORY RF
ANATOMY
VICTORY RF OWNER’S MANUAL - NORTH AMERICA | 54 | VICTORY RF OWNER’S MANUAL - NORTH AMERICA For the latest updates and information regarding our products, visit zeiss.com/us/sportsoptics.
WARNING!
Do NOT look directly at the sun
or other bright lights through the
rangender. Doing so may cause eye
damage or blindness.
SCOPE OF SUPPLY
ZEISS Victory®RF binocular(s): Bluetooth Enabled
Product Order Number Included With Victory RF
Victory RF 8x42 52 45 48 • ZEISS Victory RF
• Protective lens caps
• Eyepiece cap
• Carrying strap
• Bag with strap
• CR2 battery
• Lens cleaning cloth
• Quick Guide
• Owner’s Manual - N. America
Victory RF 10x42 52 45 49
Victory RF 8x54 52 56 48
Victory RF 10x54 52 56 49
Congratulations on the purchase of your new binocular with integrated
laser rangender!
ZEISS products are famous for outstanding optical performance, precision
engineering and a long service life. Please observe the following instructions
for use in order to obtain the best from your binoculars and to ensure that they
remain your constant companion for many years to come.
INFORMATION FOR YOUR SAFETY
ENVIRONMENTAL INFLUENCES
• Caution: Do not use the binoculars to look at the sun or at laser light
sources. This could result in serious injury to the eyes and in considerable
damage to the product.
• Caution: Never leave the binoculars in the sun for extended periods of time
without the protective lens cap in place. The objective lens and eyepiece
can function as a burning glass and damage the interior components.
DANGER OF SWALLOWING
Caution: Do not leave the batteries and removable exterior parts within reach
of children (danger of swallowing).
Further information and safety instructions can be found in the provided
QuickGuide. This guide can also be found at the Download Center on the ZEISS
website.
BATTERY DISPOSAL
Batteries do not belong in household garbage. Please use a recycling facility
in your area to dispose of used batteries. Please only recycle discharged
batteries. Remove battery when storing device for extended periods of time.
Batteries are being discharged as the rangender is being activated and used.
Batteries are discharged if the device being run:
• Shuts o and signals “Battery empty.”
• No longer functions properly after extended use of the batteries.
To prevent short circuits, cover the battery contacts with an adhesive strip.
Caution: Use only battery types recommended by the manufacturer.
Handle used batteries in accordance with the manufacturer’s instructions.
Under no circumstances should batteries be thrown into a re, heated,
recharged, taken apart or broken open.
For appropriate disposal of electrical and electronic equipment, to include
battery recycling and disposal, please contact your state or local governing or
regulatory body.
INSTRUCTIONS FOR USE
VICTORY RF OWNER’S MANUAL - NORTH AMERICA | 76 | VICTORY RF OWNER’S MANUAL - NORTH AMERICA For the latest updates and information regarding our products, visit zeiss.com/us/sportsoptics.
TECHNICAL DATA 8 × 42 10 × 42 8 × 54 10 × 54
Magnification 8 × 10 × 8 × 10 ×
Effective Lens Diameter 42 mm 54 mm
Exit Pupil Diameter 5.3 mm 4.2 mm 6.8 mm 5.4 mm
Twilight Factor 18.3 20.5 20.8 23.2
Field of View at 1,000 yds 405 ft 345 ft 360 ft 330 ft
Angular Field of View, Apparent 62° wide angle 66° wide angle 55° wide angle 63° wide angle
Close Focus 8.2 ft 11.5 ft
Diopter Range +/− 3 dpt +/− 3 dpt
Eye Relief 17 mm 14 mm
Interpupillary Distance 53.5 – 76 mm 58.5 – 76 mm
Lens Type FL
Prism System Abbe-Köenig
Coating LotuTec® / T*
Fogproof Nitrogen Purged
Waterproof 100 mbar(submerged 3.28 ft for 2 hours)
Operating Temperature1− 13 / + 145.4° F
Length 6.54 in 7.68 in
Width 5.1 in 5.6 in
Weight 32 oz 33 oz 38 oz 39 oz
Range211 – 2,500 yds
Measuring Accuracy ± 1 – 600 / ± 0.5 % > 600 yds
Measuring Time < 0.3 Sec.
Laser Wavelength 905 nm
Laser Beam Divergence 1.6 × 0.5 nm
Battery 1 x 3V / CR2
Battery life at 68° F > 2,500 ×
PREPARATION
INSERTING/REMOVING THE BATTERY
The laser rangender is powered by a type CR2 lithium
battery.
To insert and replace the battery, turn the screw that
secures the battery cover counterclockwise (Fig. 3/8) using
a coin or a protected tip at-head screwdriver that properly
ts the slot. Insert the battery with the positive end forward
(according to the symbol in the battery compartment).
To replace the battery cover, ensure that water, dirt, and
debris have not contaminated the battery compartment or
threads of the compartment and battery cover, align and
tighten the cover by turning it clockwise, taking care not to
cross the threads. Turn the cover until it stops in order to
ensure a snug t and waterproofness.
NOTE: At 68° F, a new battery will last for over 2,500
measurements. However, depending on the conditions of
use–such as low temperatures or frequent use of the Scan
Mode–the life of the battery may be considerably shorter.
Low battery is indicated by the appearance of the battery
symbol on the display. If the equipment will not be used
for a long period of time, remove the battery in order to
prevent damage caused by leakage from the battery. Use
only high-quality brand batteries to ensure proper function
of the rangender.
Subject to changes in design and
scope of supply due to technical
improvements.
1. Battery is subject to a lower
temperature limit. Product also
functions under – 10 °C /14 °F.
2. The range is inuenced by the
size and the degree of reection
of the object, as well as by the
weather and sunbeams.
3 | 7 EN
PREPARATION
Inserting/Removing the battery
The laser range finder is powered by a type CR 2 lithium battery.
To insert and replace the battery, unscrew the battery cover (Fig. 3/8) – using a coin
or similar – by turning anticlockwise. Insert the battery with the positive end forward
(according to the symbol in the battery compartment).
Then screw the battery cover back on by turning clockwise.
At 20 °C, a new battery will last for over 2,500 measurements.
Depending on the conditions of use, however, low temperatures or frequent use of
the scan mode for example may result in the battery life being considerably shorter.
Low battery is indicated by the appearance of the battery symbol on the display.
If the equipment will be unused for a long period, remove the battery in order to
prevent damage by leakage from the battery. Use only high quality brand batteries.
+
–
(8)
Fig. 3
Fig. 4
(16)
(15)
Fig. 5
(17)
Attaching the carrying strap and the protective caps
The carrying strap (Fig. 4/15) and the eyepiece cap (Fig. 4/16) are attached as
shown in the illustrations.
Note: Feed the carrying strap only once through the eyelet on the eyepiece cap.
Depending on personal taste, use the carrying strap to connect the eyepiece cap
either on both sides or on one side only. The eyepiece cap is held onto the eye cups
by a catch.
Before using the binoculars, remove the eyepiece cap with the index finger.
After observation, replace the eyepiece cap in order to protect the eyepieces.
The protective lens covers (Fig. 5/17) are fitted on the binoculars as shown.
TECHNICAL DATA 8x42 10x42 8x54 10x54
Magnification 810 810
Effective lens diameter mm 42 42 54 54
Exit pupil diameter mm 5.3 4.2 6.8 5.4
Twilight factor 18.3 20.5 20.8 23.2
Field of view m/1000m (ft/1000yds) 135 (405) 115 (345) 120 (360) 110 (330)
Subjective angle of view °62 66 55 63
Close-up setting limit m (ft) 2.5 (8.2) 3.5 (11.5)
Diopter adjustment range dpt +/- 3 +/- 3
Eye relief mm 17 (0.7) 14 (0.6)
Pupil Distance mm 53.5 - 76 58.5 - 76
Lens type FL FL
Prism system Abbe-König Abbe-König
Coating T*/LotuTec®T*/LotuTec®
Nitrogen filling  
Waterproof mbar 400 400
Operating temperature1°C (°F) -25 / +63 (-13 / +145) -25 / +63 (-13 / +145)
Length mm (in) 166 (6.5) 166 (6.5) 195 (7.7) 195 (7.7)
Width with an eye spacing of 65 mm mm (in) 121 (4.8) 121 (4.8) 136 (5.4) 136 (5.4)
Weight g (oz) 895 (31.6) 915 (32.3) 1,095 (38.6) 1,115 (39.3)
Measuring range2m (yds) 15 - 2,300 (16 - 2,500) 15 - 2,300 (16 - 2,500)
Measuring precision mrad ± 1 – 600 / ± 0.5 % > 600 ± 1 – 600 / ± 0.5 % > 600
Measuring time Sek. (sec.) < 0.3 < 0.3
Laser shaft length nm 905 905
Laser beam divergence mrad 1.6 x 0.5 1.6 x 0.5
Battery 1 x 3V / CR2 1 x 3V / CR2
Battery life at +20°C > 2,500x > 2,500x
Subject to changes in design and scope of supply due to technical improvements.
1 Battery is subject to a lower temperature limit.
Product also functions under – 10 °C /14 °F.
2 The range is influenced by the size and the degree of reflection of the object
as well as by the weather and sun beams.
VICTORY RF OWNER’S MANUAL - NORTH AMERICA | 98 | VICTORY RF OWNER’S MANUAL - NORTH AMERICA For the latest updates and information regarding our products, visit zeiss.com/us/sportsoptics.
ATTACHING THE CARRYING STRAP AND THE PROTECTIVE CAPS
The carrying strap (Fig. 4/15) and the eyepiece cap (Fig. 4/16) are
attached as shown in the illustrations. Note: Feed the carrying strap only
once through the eyelet on the eyepiece cap. Depending on personal
preference, use the carrying strap to connect the eyepiece cap either on
both sides or on one side only. The eyepiece cap is held onto the eyecups by
a catch. Before using the binoculars, remove the eyepiece cap with the index
nger. After observation, replace the eyepiece cap in order to protect the
eyepieces. The protective lens covers (Fig. 5/17) are tted on the binoculars
as shown.
OBSERVATION WITH AND WITHOUT EYEGLASSES
When observing without glasses, use the equipment with the eyecup
extended. To do this, rotate the eyecup (Fig. 6/1) counterclockwise until
it locks in the highest position. The eyecup can be set in four positions –
in the upper and lower settings, plus in two intermediate positions. This
adjustment option allows variation of the distance from the eye to the exit
pupil and thus individual adjustment for each user. When observing with
glasses, rotate the eyecup clockwise until it stops in the most downward
position (Fig. 6).
CLEANING AND REPLACING THE EYECUPS
For cleaning purposes, the eyecups can be removed. To do so, turn the
eyecups counterclockwise past the uppermost set position, and continue to
turn until the eyecup is loosened for removal.
After proper cleaning of the eyecup and lenses, ensure there is no debris
(e.g., sand, dirt, or grime) on the threads of the eyecup housing and ocular
housing. Replace the eyecups by turning them onto the ocular housing in a
clockwise direction. Be careful not to cross-thread the ne threads. Continue
to turn in a clockwise direction to the lowest setting position, and apply
a small amount of additional torque to secure the eyecup to the ocular
housing. The eyecups are ready for regular adjustments at this time.
4 | 7 EN
Adjusting the interpupilary distance
By folding the halves of the binoculars about the central axis, the eye relief can
be adjusted such that a circular image is formed when observing with both eyes
(Fig. 7).
Note: Depending on the set of the interpupilary distance, the aiming mark and
display may be slightly angled.
Focusing the aiming mark and diopter compensation
Use the range finder button (Fig. 1/6) to switch on the aiming mark (Fig. 2/9) and
hold down the button. Focus the aiming mark and the display by turning the right
hand diopter compensation (Fig. 1/4) to the left or the right. Then carefully use
the central focusing (Fig. 1/2) for sharp focusing of the image in the right hand
binocular tube.
Next, use the left hand diopter compensation (Fig. 1/3) for sharp focusing on the
same object of the image in the left hand binocular tube. The values that are set can
be read from the “+” or “–” scale on the back of the binoculars.
Menu settings in the rangefinder
Press the SET button for approx. two seconds to load the menu of your ZEISS Victory
RF. You can then switch between the individual menu options by pressing the SET
button once for each option.
Table 1
Menu 1 Brightness Press SET button for 2 seconds
Menu 2 Ballistics settings Press SET button for 2 seconds
+ press the SET button once
Menu 3 Display settings Press SET button for 2 seconds
+ press the SET button twice
Menu 4 Unit of measure Press SET button for 2 seconds
+ press the SET button three times
Menu 5 Measuring mode Press SET button for 2 seconds
+ press the SET button four times
Menu 6 Key layout Press SET button for 2 seconds
+ press the SET button five times
Menu 7 Turn off Press SET button for 2 seconds
+ press the SET button six times
Brightness
The brightness settings are located in menu 1 (press the SET button for 2 seconds).
The ZEISS Victory RF has 11 brightness curves. By pressing the range finding button,
you can select one of the 11 different brightness curves (curve 1  darkest setting
possibility; curve 11  lightest setting possibility).
In addition to this, your ZEISS Victory RF also has automatic brightness adjustment
for each of the selected brightness curves.
Simply release the range finding button (Fig. 1/6) when it reaches the appropriate
setting for you. The brightness curve displayed most recently will then be saved. To
check, you can always display the saved settings in the menu.
Fig. 7
Fig. 8
(2)
(4)

(1)
(3)
LR
LR
LR
(2)
(
4
)
R
R
Fig. 6
(1)
Observation with and without glasses
When observing without glasses, use the equipment with the eye cup extended.
To do this, turn the eye cup (Fig. 6/1) upwards and to the left (anticlockwise) until it
locks in the highest position.
The eye cup can be locked in four positions – in the upper and lower plus in two
intermediate positions. This adjustment option allows variation of the distance from
the eye to the exit pupil and thus individual adjustment for each user.
When observing with glasses, turn the eye cup downwards and to the right
(clockwise) until it locks in the lowest position (Fig. 6).
Cleaning and replacing the eyecups
To replace the eyecups or for cleaning, they can be completely screwed off of the
binoculars. Turn the eyecups out as shown in Fig. 6 to the top click stop position
and turn one more thread in the same direction until the eyecup is completely
screwed out.
After cleaning, or replacing the eyecup, turn it to the right (clockwise) completely on
the eyepiece. Using a slight jerk to the right the thread of the eyepiece clicks into the
lowest setting. Finally, you can again set your desired distance between the eye and
eyepiece using the click stops.
3 | 7 EN
PREPARATION
Inserting/Removing the battery
The laser range finder is powered by a type CR 2 lithium battery.
To insert and replace the battery, unscrew the battery cover (Fig. 3/8) – using a coin
or similar – by turning anticlockwise. Insert the battery with the positive end forward
(according to the symbol in the battery compartment).
Then screw the battery cover back on by turning clockwise.
At 20 °C, a new battery will last for over 2,500 measurements.
Depending on the conditions of use, however, low temperatures or frequent use of
the scan mode for example may result in the battery life being considerably shorter.
Low battery is indicated by the appearance of the battery symbol on the display.
If the equipment will be unused for a long period, remove the battery in order to
prevent damage by leakage from the battery. Use only high quality brand batteries.
+
–
(8)
Fig. 3
Fig. 4
(16)
(15)
Fig. 5
(17)
Attaching the carrying strap and the protective caps
The carrying strap (Fig. 4/15) and the eyepiece cap (Fig. 4/16) are attached as
shown in the illustrations.
Note: Feed the carrying strap only once through the eyelet on the eyepiece cap.
Depending on personal taste, use the carrying strap to connect the eyepiece cap
either on both sides or on one side only. The eyepiece cap is held onto the eye cups
by a catch.
Before using the binoculars, remove the eyepiece cap with the index finger.
After observation, replace the eyepiece cap in order to protect the eyepieces.
The protective lens covers (Fig. 5/17) are fitted on the binoculars as shown.
TECHNICAL DATA 8x42 10x42 8x54 10x54
Magnification 810 810
Effective lens diameter mm 42 42 54 54
Exit pupil diameter mm 5.3 4.2 6.8 5.4
Twilight factor 18.3 20.5 20.8 23.2
Field of view m/1000m (ft/1000yds) 135 (405) 115 (345) 120 (360) 110 (330)
Subjective angle of view °62 66 55 63
Close-up setting limit m (ft) 2.5 (8.2) 3.5 (11.5)
Diopter adjustment range dpt +/- 3 +/- 3
Eye relief mm 17 (0.7) 14 (0.6)
Pupil Distance mm 53.5 - 76 58.5 - 76
Lens type FL FL
Prism system Abbe-König Abbe-König
Coating T*/LotuTec®T*/LotuTec®
Nitrogen filling  
Waterproof mbar 400 400
Operating temperature1°C (°F) -25 / +63 (-13 / +145) -25 / +63 (-13 / +145)
Length mm (in) 166 (6.5) 166 (6.5) 195 (7.7) 195 (7.7)
Width with an eye spacing of 65 mm mm (in) 121 (4.8) 121 (4.8) 136 (5.4) 136 (5.4)
Weight g (oz) 895 (31.6) 915 (32.3) 1,095 (38.6) 1,115 (39.3)
Measuring range2m (yds) 15 - 2,300 (16 - 2,500) 15 - 2,300 (16 - 2,500)
Measuring precision mrad ± 1 – 600 / ± 0.5 % > 600 ± 1 – 600 / ± 0.5 % > 600
Measuring time Sek. (sec.) < 0.3 < 0.3
Laser shaft length nm 905 905
Laser beam divergence mrad 1.6 x 0.5 1.6 x 0.5
Battery 1 x 3V / CR2 1 x 3V / CR2
Battery life at +20°C > 2,500x > 2,500x
Subject to changes in design and scope of supply due to technical improvements.
1 Battery is subject to a lower temperature limit.
Product also functions under – 10 °C /14 °F.
2 The range is influenced by the size and the degree of reflection of the object
as well as by the weather and sun beams.
VICTORY RF OWNER’S MANUAL - NORTH AMERICA | 1110 | VICTORY RF OWNER’S MANUAL - NORTH AMERICA For the latest updates and information regarding our products, visit zeiss.com/us/sportsoptics.
4 | 7 EN
Adjusting the interpupilary distance
By folding the halves of the binoculars about the central axis, the eye relief can
be adjusted such that a circular image is formed when observing with both eyes
(Fig. 7).
Note: Depending on the set of the interpupilary distance, the aiming mark and
display may be slightly angled.
Focusing the aiming mark and diopter compensation
Use the range finder button (Fig. 1/6) to switch on the aiming mark (Fig. 2/9) and
hold down the button. Focus the aiming mark and the display by turning the right
hand diopter compensation (Fig. 1/4) to the left or the right. Then carefully use
the central focusing (Fig. 1/2) for sharp focusing of the image in the right hand
binocular tube.
Next, use the left hand diopter compensation (Fig. 1/3) for sharp focusing on the
same object of the image in the left hand binocular tube. The values that are set can
be read from the “+” or “–” scale on the back of the binoculars.
Menu settings in the rangefinder
Press the SET button for approx. two seconds to load the menu of your ZEISS Victory
RF. You can then switch between the individual menu options by pressing the SET
button once for each option.
Table 1
Menu 1 Brightness Press SET button for 2 seconds
Menu 2 Ballistics settings Press SET button for 2 seconds
+ press the SET button once
Menu 3 Display settings Press SET button for 2 seconds
+ press the SET button twice
Menu 4 Unit of measure Press SET button for 2 seconds
+ press the SET button three times
Menu 5 Measuring mode Press SET button for 2 seconds
+ press the SET button four times
Menu 6 Key layout Press SET button for 2 seconds
+ press the SET button five times
Menu 7 Turn off Press SET button for 2 seconds
+ press the SET button six times
Brightness
The brightness settings are located in menu 1 (press the SET button for 2 seconds).
The ZEISS Victory RF has 11 brightness curves. By pressing the range finding button,
you can select one of the 11 different brightness curves (curve 1  darkest setting
possibility; curve 11  lightest setting possibility).
In addition to this, your ZEISS Victory RF also has automatic brightness adjustment
for each of the selected brightness curves.
Simply release the range finding button (Fig. 1/6) when it reaches the appropriate
setting for you. The brightness curve displayed most recently will then be saved. To
check, you can always display the saved settings in the menu.
Fig. 7
Fig. 8
(2)
(4)

(1)
(3)
LR
LR
LR
(2)
(
4
)
R
R
Fig. 6
(1)
Observation with and without glasses
When observing without glasses, use the equipment with the eye cup extended.
To do this, turn the eye cup (Fig. 6/1) upwards and to the left (anticlockwise) until it
locks in the highest position.
The eye cup can be locked in four positions – in the upper and lower plus in two
intermediate positions. This adjustment option allows variation of the distance from
the eye to the exit pupil and thus individual adjustment for each user.
When observing with glasses, turn the eye cup downwards and to the right
(clockwise) until it locks in the lowest position (Fig. 6).
Cleaning and replacing the eyecups
To replace the eyecups or for cleaning, they can be completely screwed off of the
binoculars. Turn the eyecups out as shown in Fig. 6 to the top click stop position
and turn one more thread in the same direction until the eyecup is completely
screwed out.
After cleaning, or replacing the eyecup, turn it to the right (clockwise) completely on
the eyepiece. Using a slight jerk to the right the thread of the eyepiece clicks into the
lowest setting. Finally, you can again set your desired distance between the eye and
eyepiece using the click stops.
2 | 7 EN
IDENTIFICATION OF THE COMPONENTS
1 Eye cup
2 Central focusing
3 Diopter compensation
4 Diopter compensation for display
5 Eyelet for fixing the carrying strap
6 Range finder button
7 Set button
8 Battery cover/battery compartment
User information for the disposal of electrical and electronic
equipment (private households)
This symbol on products and/or accompanying documents indicates that
used electrical and electronic products are not to be mixed with ordinary
household waste. Take these products to the appropriate collection point
for proper handling, recovery and recycling, where they will be taken
back for free. In some states, it may also be possible to hand in these
products to your local dealer when purchasing a corresponding new
product. The proper disposal of this product serves to protect the
environment and prevents possible harmful effects on human beings and their
surroundings, which may arise as a result of incorrect handling of waste. More
detailed information on your nearest collection point is available from your local
authority. According to state law, fines may be issued for the incorrect disposal of
this type of waste.
For business customers within the European Union
To dispose of electrical and electronic equipment, please contact your dealer or
supplier, who will be able to provide you with more information.
Information on disposal in other countries outside of the European Union
This symbol is applicable only in the European Union. Please contact your local
authority or your dealer if you wish to dispose of this product and enquire about
how to dispose of it.
Labelled in accordance with the statutory guidelines 2014/53/EU
and 2011/65/EU.
SCOPE OF SUPPLY
ZEISS Victory® RF binoculars:
Product Order number Scope of supply
Victory RF 8x42 52 45 48 ZEISS Victory RF
Protective lens caps
Eyepiece cap
Carrying strap
Bag with strap
CR2 battery
Lens cleaning cloth
Quick Guide Part 1 & 2
Victory RF 10x42 52 45 49
Victory RF 8x54 52 56 48
Victory RF 10x54 52 56 49
(5)
(3)
(1)
Fig. 1
(7)
(4)
(6)
(8)
(2)
Fig. 2
(12)
(11)
(14)
(13)
(9)
(10)
9 LED sighting mark
10 4-figure LED display
11 Unit yard display
12 Unit meter display
13 Battery display
14 Bluetooth display
15 Carrying strap
16 Eyepiece cap
17 Protective lens caps
INSTRUCTIONS FOR USE
Congratulations on the purchase of your new binoculars with integrated
laser range finder.
ZEISS products are famous for outstanding optical performance, precision
engineering and a long service life.
Please observe the following instructions for use in order to obtain the best from
your binoculars and to ensure that they remain your constant companion for many
years to come.
INFORMATION FOR YOUR SAFETY
Environmental influences
• Caution: Do not use the binoculars to look at the sun or at laser light sources.
This could result in serious injury to the eyes and in considerable damage to the
product.
• Caution: Never leave the binoculars in the sun for extended periods of time
without the protective lens cap. The objective lens and eyepiece can function as a
burning glass and damage the interior components.
Danger of swallowing
Caution: Do not leave the batteries and removable exterior parts within reach of
children (danger of swallowing).
Further information and safety instructions be found in the QuickGuide provided.
This guide can also be found at the Download Center on our website.
Battery disposal
Batteries do not belong in household rubbish!
Please use a recycling facility in your area to dispose of used batteries.
Please only recycle discharged batteries.
As a rule, batteries are discharged if the device being run
• shuts off and signals “Battery empty”.
• no longer functions properly after extended use of the batteries.
To prevent short circuits, cover the battery contacts with an adhesive strip.
Caution: Use only battery types recommended by the manufacturer.
Handle used batteries in accordance with the manufacturer’s instructions.
Under no circumstances should batteries be thrown into a fire, heated up,
recharged, taken apart or broken open.
Germany: As a consumer, you have a legal obligation to return used
batteries. You can hand in your batteries for free to wherever the
batteries were purchased or to the public collection points in your city or
community.
You will find these symbols on batteries that contain harmful substances:
Pb = Battery contains lead
Cd = Battery contains cadmium
Hg = Battery contains mercury
Li = Battery contains lithium
4 | 7 EN
Adjusting the interpupilary distance
By folding the halves of the binoculars about the central axis, the eye relief can
be adjusted such that a circular image is formed when observing with both eyes
(Fig. 7).
Note: Depending on the set of the interpupilary distance, the aiming mark and
display may be slightly angled.
Focusing the aiming mark and diopter compensation
Use the range finder button (Fig. 1/6) to switch on the aiming mark (Fig. 2/9) and
hold down the button. Focus the aiming mark and the display by turning the right
hand diopter compensation (Fig. 1/4) to the left or the right. Then carefully use
the central focusing (Fig. 1/2) for sharp focusing of the image in the right hand
binocular tube.
Next, use the left hand diopter compensation (Fig. 1/3) for sharp focusing on the
same object of the image in the left hand binocular tube. The values that are set can
be read from the “+” or “–” scale on the back of the binoculars.
Menu settings in the rangefinder
Press the SET button for approx. two seconds to load the menu of your ZEISS Victory
RF. You can then switch between the individual menu options by pressing the SET
button once for each option.
Table 1
Menu 1 Brightness Press SET button for 2 seconds
Menu 2 Ballistics settings Press SET button for 2 seconds
+ press the SET button once
Menu 3 Display settings Press SET button for 2 seconds
+ press the SET button twice
Menu 4 Unit of measure Press SET button for 2 seconds
+ press the SET button three times
Menu 5 Measuring mode Press SET button for 2 seconds
+ press the SET button four times
Menu 6 Key layout Press SET button for 2 seconds
+ press the SET button five times
Menu 7 Turn off Press SET button for 2 seconds
+ press the SET button six times
Brightness
The brightness settings are located in menu 1 (press the SET button for 2 seconds).
The ZEISS Victory RF has 11 brightness curves. By pressing the range finding button,
you can select one of the 11 different brightness curves (curve 1  darkest setting
possibility; curve 11  lightest setting possibility).
In addition to this, your ZEISS Victory RF also has automatic brightness adjustment
for each of the selected brightness curves.
Simply release the range finding button (Fig. 1/6) when it reaches the appropriate
setting for you. The brightness curve displayed most recently will then be saved. To
check, you can always display the saved settings in the menu.
Fig. 7
Fig. 8
(2)
(4)

(1)
(3)
LR
LR
LR
(2)
(
4
)
R
R
Fig. 6
(1)
Observation with and without glasses
When observing without glasses, use the equipment with the eye cup extended.
To do this, turn the eye cup (Fig. 6/1) upwards and to the left (anticlockwise) until it
locks in the highest position.
The eye cup can be locked in four positions – in the upper and lower plus in two
intermediate positions. This adjustment option allows variation of the distance from
the eye to the exit pupil and thus individual adjustment for each user.
When observing with glasses, turn the eye cup downwards and to the right
(clockwise) until it locks in the lowest position (Fig. 6).
Cleaning and replacing the eyecups
To replace the eyecups or for cleaning, they can be completely screwed off of the
binoculars. Turn the eyecups out as shown in Fig. 6 to the top click stop position
and turn one more thread in the same direction until the eyecup is completely
screwed out.
After cleaning, or replacing the eyecup, turn it to the right (clockwise) completely on
the eyepiece. Using a slight jerk to the right the thread of the eyepiece clicks into the
lowest setting. Finally, you can again set your desired distance between the eye and
eyepiece using the click stops.
ADJUSTING THE BINOCULAR FOR APPROPRIATE FIT BETWEEN THE
USER’S PUPILS
By folding the halves of the binocular via the hinge, the user may adjust
the interpupillary distance such that a single circular image is formed when
observing with both eyes (Fig. 7).
Note: Depending on the user’s setting of the interpupillary distance, the
aiming mark and display may be displayed slightly at an angle in the eld
of view.
FOCUSING THE AIMING MARK AND DIOPTER COMPENSATION
From the user’s position, use the rangender button (Fig. 1/6) to switch
on the aiming mark (Fig. 2/9) and hold down the button. Focus the aiming
mark and the display by turning the right-hand diopter compensation (Fig.
1/4) to the left or the right. Then carefully use the central focus wheel (Fig.
1/2) for sharp focusing of the image in the right-hand binocular tube.
Next, use the left-hand diopter compensation (Fig. 1/3) for sharp focusing
on the same object of the image in the left binocular tube. The values that
are set can be read from the “+” or “–” scale on the back of the binoculars.
At this stage, if you prefer to congure your Victory RF through the ZEISS
Hunting App and your iOS/Android device, please refer to page 16.
USER SETUP VIA ON-BOARD PRODUCT MENU
CONFIGURATION OF THE RANGEFINDER
STAND-ALONE RANGEFINDER MENU SETTINGS
Press the SET button (Fig. 1/7) for approximately two seconds to load the
menu option(s) of your ZEISS Victory RF. You can then switch between the
individual menu options by pressing the SET button once for each option.
NOTE: See Options Table 1
BRIGHTNESS
There are 11 brightness settings in the ZEISS Victory RF. They are located
in Menu 1 (press the SET button [Fig. 1/7] for 2 seconds). By pressing
the range-nding button (Fig. 1/6),you can select one of the 11 dierent
brightness settings (Setting 1 ≙ darkest setting possibility; Setting 11 ≙
brightest setting possibility).
In addition to this, your ZEISS Victory RF also has automatic brightness
adjustment for each of the selected brightness settings. Simply release the
range-nding button (Fig. 1/6) when it reaches the appropriate setting for
you. The brightness setting displayed most recently will then be saved. To
check the brightness level, you can always display the saved settings in the
menu by pressing the SET button (Fig. 1/7).
OPTIONS – TABLE 1
Menu 1 Brightness Press SET button for 2 seconds
Menu 2 Ballistic settings Press SET button for 2 seconds
+ press the SET button once
Menu 3 Display settings Press SET button for 2 seconds
+ press the SET button twice
Menu 4 Unit of measure Press SET button for 2 seconds
+ press the SET button three times
Menu 5 Measuring mode Press SET button for 2 seconds
+ press the SET button four times
Menu 6 Key layout (control
button conguration)
Press SET button for 2 seconds
+ press the SET button ve times
Menu 7 Turn o Press SET button for 2 seconds
+ press the SET button six times
2 | 7 EN
IDENTIFICATION OF THE COMPONENTS
1 Eye cup
2 Central focusing
3 Diopter compensation
4 Diopter compensation for display
5 Eyelet for fixing the carrying strap
6 Range finder button
7 Set button
8 Battery cover/battery compartment
User information for the disposal of electrical and electronic
equipment (private households)
This symbol on products and/or accompanying documents indicates that
used electrical and electronic products are not to be mixed with ordinary
household waste. Take these products to the appropriate collection point
for proper handling, recovery and recycling, where they will be taken
back for free. In some states, it may also be possible to hand in these
products to your local dealer when purchasing a corresponding new
product. The proper disposal of this product serves to protect the
environment and prevents possible harmful effects on human beings and their
surroundings, which may arise as a result of incorrect handling of waste. More
detailed information on your nearest collection point is available from your local
authority. According to state law, fines may be issued for the incorrect disposal of
this type of waste.
For business customers within the European Union
To dispose of electrical and electronic equipment, please contact your dealer or
supplier, who will be able to provide you with more information.
Information on disposal in other countries outside of the European Union
This symbol is applicable only in the European Union. Please contact your local
authority or your dealer if you wish to dispose of this product and enquire about
how to dispose of it.
Labelled in accordance with the statutory guidelines 2014/53/EU
and 2011/65/EU.
SCOPE OF SUPPLY
ZEISS Victory® RF binoculars:
Product Order number Scope of supply
Victory RF 8x42 52 45 48 ZEISS Victory RF
Protective lens caps
Eyepiece cap
Carrying strap
Bag with strap
CR2 battery
Lens cleaning cloth
Quick Guide Part 1 & 2
Victory RF 10x42 52 45 49
Victory RF 8x54 52 56 48
Victory RF 10x54 52 56 49
(5)
(3)
(1)
Fig. 1
(7)
(4)
(6)
(8)
(2)
Fig. 2
(12)
(11)
(14)
(13)
(9)
(10)
9 LED sighting mark
10 4-figure LED display
11 Unit yard display
12 Unit meter display
13 Battery display
14 Bluetooth display
15 Carrying strap
16 Eyepiece cap
17 Protective lens caps
INSTRUCTIONS FOR USE
Congratulations on the purchase of your new binoculars with integrated
laser range finder.
ZEISS products are famous for outstanding optical performance, precision
engineering and a long service life.
Please observe the following instructions for use in order to obtain the best from
your binoculars and to ensure that they remain your constant companion for many
years to come.
INFORMATION FOR YOUR SAFETY
Environmental influences
• Caution: Do not use the binoculars to look at the sun or at laser light sources.
This could result in serious injury to the eyes and in considerable damage to the
product.
• Caution: Never leave the binoculars in the sun for extended periods of time
without the protective lens cap. The objective lens and eyepiece can function as a
burning glass and damage the interior components.
Danger of swallowing
Caution: Do not leave the batteries and removable exterior parts within reach of
children (danger of swallowing).
Further information and safety instructions be found in the QuickGuide provided.
This guide can also be found at the Download Center on our website.
Battery disposal
Batteries do not belong in household rubbish!
Please use a recycling facility in your area to dispose of used batteries.
Please only recycle discharged batteries.
As a rule, batteries are discharged if the device being run
• shuts off and signals “Battery empty”.
• no longer functions properly after extended use of the batteries.
To prevent short circuits, cover the battery contacts with an adhesive strip.
Caution: Use only battery types recommended by the manufacturer.
Handle used batteries in accordance with the manufacturer’s instructions.
Under no circumstances should batteries be thrown into a fire, heated up,
recharged, taken apart or broken open.
Germany: As a consumer, you have a legal obligation to return used
batteries. You can hand in your batteries for free to wherever the
batteries were purchased or to the public collection points in your city or
community.
You will find these symbols on batteries that contain harmful substances:
Pb = Battery contains lead
Cd = Battery contains cadmium
Hg = Battery contains mercury
Li = Battery contains lithium
VICTORY RF OWNER’S MANUAL - NORTH AMERICA | 1312 | VICTORY RF OWNER’S MANUAL - NORTH AMERICA For the latest updates and information regarding our products, visit zeiss.com/us/sportsoptics.
BALLISTIC SETTINGS (B.I.S. II)
At this stage, you can upload up to nine personalized/customized ballistic
curves to your ZEISS Victory RF. In your ZEISS Victory RF, the curves are labeled
bAu 1 – bAu 9. (More information can be found in the “Settings With the
ZEISS Hunting App“ section.) In addition to customization, the Victory RF also
incorporates nine default ballistic curves, as explained below.
If you prefer, you can select from the nine default ballistic curves in Menu 2.
As an option, you can choose between these default curves, which cover
many European/International cartridge ballistics. In order to access the default
curves in Menu 2, press the SET button for 2 seconds and press the SET button
once. The default ballistic curves are numbered consecutively in the ZEISS
Victory RF, and they are labeled bA 1 – bA 9. Choose the most appropriate
bullet trajectory, dependent upon the bullet’s caliber and weight used. Your
knowledge of the ballistic data of the load used is a prerequisite for selecting
and matching the corresponding bullet trajectory.
In Table 2, on the basis of the bullet drop of the load, select the row with the
value that corresponds most precisely with your selected ammunition/load. By
pressing the range-nding button (Fig. 1/6), you can select the appropriate
ballistic curve. By releasing the button, you save the ballistic curve. To check,
you can always display the saved settings in the menu.
To select, release the range-nding button (Fig. 1/6) on the appropriate
bAu setting for your chosen prole/curve. The ballistic curve displayed most
recently is then saved. To check, you can always display the saved settings in
the menu.
Caution: Please note that the Ballistic Information System (B.I.S. II) is not to
be used as a replacement for the hunter’s/shooter’s assessment of the actual
shooting environment, but rather to support and increase safe shooting. ZEISS
recommends shooting exercises from dierent ranges, which can be used to
check the correct match of the specications with the actual points of impact
(also referred to as trajectory validation).
TABLE 2 (Relates to the nine default ballistic curves) TABLE 2 (Continued)
Compensation for the bullet drop with ASV+ at distance, in meters and yards
Curve (Distance) m / yd 100 (Distance)
m / yd 150 200 250 300 325 350 375 400 425 450 475 500 525 550 575 600
1
(bA 1)
Corr. cm / m 0Corr. cm / m -1.5 -4.0 -10.0 -21.0 -29.3 -35.0 -45.0 -56.0 -68.0 -81.0 -95.0 -110.0 -131.3 -148.5 -172.5 -198.0
Corr. in / yd Corr. in / yd -0.5 -1.4 -3.6 -7.6 -10.5 -12.6 -16.2 -20.2 -24.5 -29.2 -34.2 -39.6 -47.3 -53.5 -62.1 -71.3
2
(bA 2)
Corr. cm / m 0Corr. cm / m -1.5 -4.0 -12.5 -24.0 -32.5 -42.0 -52.5 -64.0 -76.5 -90.0 -109.3 -130.0 -152.3 -176.0 -201.3 -234.0
Corr. in / yd Corr. in / yd -0.5 -1.4 -4.5 -8.6 -11.7 -15.1 -18.9 -23.0 -27.5 -32.4 -39.3 -46.8 -54.8 -63.4 -72.5 -84.2
3
(bA 3)
Corr. cm / m 0Corr. cm / m -1.5 -8.0 -17.5 -30.0 -39.0 -49.0 -60.0 -72.0 -85.0 -99.0 -118.8 -135.0 -152.3 -176.0 -195.5 -222.0
Corr. in / yd Corr. in / yd -0.5 -2.9 -6.3 -10.8 -14.0 -17.6 -21.6 -25.9 -30.6 -35.6 -42.8 -48.6 -54.8 -63.4 -70.4 -79.9
4
(bA 4)
Corr. cm / m 0Corr. cm / m -3.0 -10.0 -20.0 -36.0 -45.5 -59.5 -71.3 -84.0
Corr. in / yd Corr. in / yd -1.1 -3.6 -7.2 -13.0 -16.4 -21.4 -25.7 -30.2
5
(bA 5)
Corr. cm / m 0Corr. cm / m -3.0 -10.0 -22.5 -39.0 -52.0 -63.0 -78.8 -96.0
Corr. in / yd Corr. in / yd -1.1 -3.6 -8.1 -14.0 -18.7 -22.7 -28.4 -34.6
6
(bA 6)
Corr. cm / m 0Corr. cm / m -4.5 -12.0 -27.5 -48.0 -58.5 -73.5 -90.0 -108.0
Corr. in / yd Corr. in / yd -1.6 -4.3 -9.9 -17.3 -21.1 -26.5 -32.4 -38.9
7
(bA 7)
Corr. cm / m 0Corr. cm / m -4.5 -14.0 -30.0 -51.0 -65.0 -80.5 -97.5 -120.0
Corr. in / yd Corr. in / yd -1.6 -5.0 -10.8 -18.4 -23.4 -29.0 -35.1 -43.2
8
(bA 8)
Corr. cm / m 0Corr. cm / m -4.5 -16.0 -32.5 -57.0 -74.8 -91.0 -108.8 -132.0
Corr. in / yd Corr. in / yd -1.6 -5.8 -11.7 -20.5 -26.9 -32.8 -39.2 -47.5
9
(bA 9)
Corr. cm / m 0Corr. cm / m -6.0 -18.0 -37.5 -66.0 -87.8 -105.0 -127.5 -156.0
Corr. in / yd Corr. in / yd -2.2 -6.5 -13.5 -23.8 -31.6 -37.8 -45.9 -56.2
Continued on following page.
VICTORY RF OWNER’S MANUAL - NORTH AMERICA | 1514 | VICTORY RF OWNER’S MANUAL - NORTH AMERICA For the latest updates and information regarding our products, visit zeiss.com/us/sportsoptics.
DISPLAY SETTINGS
Display settings allow you to reference the data being displayed while
reading the rangender’s output. The output function is displayed in the
form of distance, equivalent horizontal distance, angle, and/or holdover – or
some combination thereof, as selected by the user. (See Table 3)
Holdover can be displayed in the following units of measure: centimeters
(cm), inches (in), minute of angle (MOA), milliradian (MIL), and clicks. Clicks
reference the riescope’s elevation turret adjustment value per click.
You can select the appropriate display settings in Menu 3. You may
choose between seven dierent display settings, which are labeled
consecutively dl 1 – dl 7 (press the SET button for 2 seconds + press
the SET button twice).
TABLE 3
Display in Your ZEISS
Victory RF Function
dl 1 Distance
dl 2 Distance & angle
dl 3 Distance & equivalent horizontal distance
dl 4 Distance & holdover in cm/in
dl 5 Distance & holdover in MOA
dl 6 Distance & holdover in MIL
dl 7 Distance & number of clicks
In addition to the seven standard settings, you can add three more
personalized display settings to your ZEISS Victory RF. On your ZEISS Victory
RF, the curves are labeled dIu 1 – dIu3.
NOTE the dierence between dl and dlu.
dl = Rangender’s default display settings
dlu = Rangender’s user-dened display settings
(Further information can be found in the “Settings With the ZEISS Hunting
App“ section.)
Simply release the range-nding button (Fig. 1/6) on the appropriate
setting for you. The last display setting shown will then be saved. To check,
you can always display the saved settings in the menu.
UNIT (Selecting the unit of measure between meters or yards)
Choose the appropriate unit in Menu 4 (See Table 1; press the SET button
for 2 seconds + press the SET button three times).
The distance can be measured in either meters or yards. You can change the
settings with the range-nding button (Fig. 1/6). On your ZEISS Victory RF,
the units have the indicators unit M(for meters) and unit Y(for yards). To
check, you can always display the saved settings in the menu.
MEASURING MODE
This mode allows the user to select the preferred target to range, taking
multiple targets within the laser’s path into appropriate consideration. In
turn, this should allow for better data output based on the user’s preference.
You can select the preferred measuring mode in Menu 5 (See Table 1;
press the SET button for 2 seconds + press the SET button four times). You
can select whether you are shown the best measurement (tA b) or the
furthest measurement (tA L). You can change the settings with the range-
nding button (Fig. 1/6).
NOTE the dierence between tA b and tA L.
tA b = Rangender’s best measurement
tA L = Rangender’s furthest measurement
Fig. 9 is used to illustrate the options. The animal in the background is, in
this case, the furthest measured point (tA L). Since a higher proportion of
the laser’s measuring points encounter the tree in the foreground, this point
is equivalent to the best measurement (tA b). To check, you can always
display the saved settings in the menu.
KEY LAYOUT (Control button conguration)
The user can congure/reverse the two control buttons, one referred to as
the RANGE button and the other referred to as the SET button (See Fig.
1/6 and 1/7). This reconguration would allow the user to operate the
rangender in their preferred layout for the intended eld application (e.g.,
left- or right-hand preference and/or single-handed bow hunting scenario).
You can select the most appropriate button conguration for yourself in
Menu 6 (See Table 1; press the SET button for 2 seconds + press the SET
button ve times). By pressing the range-nding button (Fig. 1/6), you
can choose between the standard setting, displayed as („5 _ _ °“), or the
reverse setting, displayed as („° _ _ 5“).
NOTE: The ZEISS Victory RF control button default setting is congured for
right-handed users. In this setting, the RANGE button is operated with the
right hand and the SET button is operated with the left hand. To check, you
can always display the saved settings in the menu.
Default Settings for Control Buttons
RANGE = Right hand (Fig. 1/6)
SET = Left hand (Fig. 1/7)
5 | 7 EN
Fig. 9
Ballistics Settings (BIS II)
You can select the appropriate ballistics curve in menu 2 (press the SET button for 2
seconds + press the SET button once). As standard, you can choose between nine
different ballistics curves, which cover almost all calibres. The ballistics curves are
numbered consecutively in your ZEISS Victory RF and are labelled bA 1 – bA 9.
Choose the most appropriate bullet trajectory dependant on the calibre, bullet type
and bullet weight used. Knowledge of the ballistic data (bullet drop) for the load
used is a prerequisite for selecting the corresponding bullet trajectory.
In table 1 (below), on the basis of the bullet drop of the load, select the row with
the value that corresponds most precisely. By pressing the range finding button
(Fig. 1/6), you can simply select the appropriate ballistics curve for you. By releasing
the button, the ballistics curve is saved. To check, you can always display the saved
settings in the menu.
In addition to the 9 default curves, you can upload up to 9 additional personalised
ballistics curves to your ZEISS Victory RF. In your ZEISS Victory RF, the curves are
labelled bAu 1 – bAu 9.
(More information can be found in the „Settings with the ZEISS Hunting App“
section).
Simply release the range finding button (Fig. 1/6) on the appropriate setting for
you. The ballistics curve displayed most recently is then saved. To check, you can
always display the saved settings in the menu.
Caution: Please note that the ballistic information system BIS II is not to be used as
a replacement for the hunter’s assessment of the situation, but rather to support and
increase hunting safety. We recommend shooting exercises from different ranges,
which can be used to check the correct match of the specifications with the actual
points of impact.
Table 2
Compensation for the bullet drop with ASV+ at distance, in meters and yards
Curve (Distance) m / yard 100 150 200 250 300 325 350 375 400 425 450 475 500 525 550 575 600
1Corr. cm / m 0-1,5 -4,0 -10,0 -21,0 -29,3 -35,0 -45,0 -56,0 -68,0 -81,0 -95,0 -110,0 -131,3 -148,5 -172,5 -198,0
Corr. Inches / Yards -0,5 -1,4 -3,6 -7,6 -10,5 -12,6 -16,2 -20,2 -24,5 -29,2 -34,2 -39,6 -47,3 -53,5 - 62,1 -71,3
2Corr. cm / m 0-1,5 -4,0 -12,5 -24,0 -32,5 -42,0 -52,5 -64,0 -76,5 -90,0 -109,3 -130,0 -152,3 -176,0 -201,3 -234,0
Corr. Inches / Yards -0,5 -1,4 -4,5 -8,6 -11,7 -15,1 -18,9 -23,0 -27,5 -32,4 -39,3 -46,8 -54,8 -63,4 -72,5 -84,2
3Corr. cm / m 0-1,5 -8,0 -17,5 -30,0 -39,0 -49,0 -60,0 -72,0 -85,0 -99,0 -118,8 -135,0 -152,3 -176,0 -195,5 -222,0
Corr. Inches / Yards -0,5 -2,9 -6,3 -10,8 -14,0 -17,6 -21,6 -25,9 -30,6 -35,6 -42,8 -48,6 -54,8 -63,4 -70,4 -79,9
4Corr. cm / m 0-3,0 -10,0 -20,0 -36,0 -45,5 -59,5 -71,3 -84,0
Corr. Inches / Yards -1,1 -3,6 -7,2 -13,0 -16,4 -21,4 -25,7 -30,2
5Corr. cm / m 0-3,0 -10,0 -22,5 -39,0 -52,0 -63,0 -78,8 -96,0
Corr. Inches / Yards -1,1 -3,6 -8,1 -14,0 -18,7 -22,7 -28,4 -34,6
6Corr. cm / m 0-4,5 -12,0 -27,5 -48,0 -58,5 -73,5 -90,0 -108,0
Corr. Inches / Yards -1,6 -4,3 -9,9 -17,3 -21,1 -26,5 -32,4 -38,9
7Corr. cm / m 0-4,5 -14,0 -30,0 -51,0 -65,0 -80,5 -97,5 -120,0
Corr. Inches / Yards -1,6 -5,0 -10,8 -18,4 -23,4 -29,0 -35,1 -43,2
8Corr. cm / m 0-4,5 -16,0 -32,5 -57,0 -74,8 -91,0 -108,8 -132,0
Corr. Inches / Yards -1,6 -5,8 -11,7 -20,5 -26,9 -32,8 -39,2 -47,5
9Corr. cm / m 0-6,0 -18,0 -37,5 -66,0 - 87,8 -105,0 -127,5 -156,0
Corr. Inches / Yards -2,2 -6,5 -13,5 -23,8 -31,6 -37,8 -45,9 -56,2
Display Settings
You can select the appropriate display settings in menu 3 (press the SET button for
2seconds + press the SET button twice).
As standard, you can choose between seven different display settings. The display
settings are numbered consecutively in your ZEISS Victory RF and are labelled
dI1 – dI 7.
Table 3
Display in your ZEISS
Victory RF Function
dI 1 Distance
dI 2 Distance & angle
dI 3 Distance & equivalent horizontal distance
dI 4 Distance & holdover in cm/in
dI 5 Distance & holdover in MOA
dI 6 Distance & holdover in MIL
dI 7 Distance & number of clicks
In addition to the 7 standard settings, you can 3 more personalised display settings
to your ZEISS Victory RF. On your ZEISS Victory RF, the curves are labelled dIu 1 –
dIu3.
(Further information can be found in the „Settings with the ZEISS Hunting App“
section).
Simply release the range finding button (Fig. 1/6) on the appropriate setting for
you. The display setting last show will then be saved. To check, you can always
display the saved settings in the menu.
Unit
Choose the appropriate unit in Menu 4 ( press the SET button for 2 seconds + press
the SET button three times).
The distance can be shown in either meters or yards. You can change the settings
with the range finding button (Fig. 1/6). On your ZEISS Victory RF, the units have
the indicators unitM (for meters) and unitY (for yards). To check, you can always
display the saved settings in the menu.
Measuring Mode
You can select the appropriate measuring mode for you in menu 5 (press the SET
button for 2 seconds + press the SET button four times). You can select whether you
are shown the best measurement (tA b) or the furthest measurement (tA L). You can
change the settings with the range finding button (Fig. 1/6).
Fig. 9 illustrates the options. The animal in the background is, in this case, the
furthest measured point (tA L). Since a higher proportion of the measuring
points encounter the tree in the foreground, this point is equivalent to the best
measurement (tA b).
To check, you can always display the saved settings in the menu.
Key Assignment
You can select the most appropriate key assignment for you in menu 6 (press SET
button for 2 seconds + press the SET button five times). By pressing the range finding
button (Fig. 1/6), you can choose between the standard setting („5 _ _ °“ is shown
on your ZEISS Victory RF) and the reverse setting („° _ _ 5“ is shown on your ZEISS
Victory RF). As standard, your ZEISS Victory RF is configured for right-handed users.
In this setting, the measuring button is operated with the right hand and the SET
button is operated with the left hand. In the reverse setting, you measure with your
left hand and the SET button is in your right hand. To check, you can always display
the saved settings in the menu.
5 | 7 EN
Fig. 9
Ballistics Settings (BIS II)
You can select the appropriate ballistics curve in menu 2 (press the SET button for 2
seconds + press the SET button once). As standard, you can choose between nine
different ballistics curves, which cover almost all calibres. The ballistics curves are
numbered consecutively in your ZEISS Victory RF and are labelled bA 1 – bA 9.
Choose the most appropriate bullet trajectory dependant on the calibre, bullet type
and bullet weight used. Knowledge of the ballistic data (bullet drop) for the load
used is a prerequisite for selecting the corresponding bullet trajectory.
In table 1 (below), on the basis of the bullet drop of the load, select the row with
the value that corresponds most precisely. By pressing the range finding button
(Fig. 1/6), you can simply select the appropriate ballistics curve for you. By releasing
the button, the ballistics curve is saved. To check, you can always display the saved
settings in the menu.
In addition to the 9 default curves, you can upload up to 9 additional personalised
ballistics curves to your ZEISS Victory RF. In your ZEISS Victory RF, the curves are
labelled bAu 1 – bAu 9.
(More information can be found in the „Settings with the ZEISS Hunting App“
section).
Simply release the range finding button (Fig. 1/6) on the appropriate setting for
you. The ballistics curve displayed most recently is then saved. To check, you can
always display the saved settings in the menu.
Caution: Please note that the ballistic information system BIS II is not to be used as
a replacement for the hunter’s assessment of the situation, but rather to support and
increase hunting safety. We recommend shooting exercises from different ranges,
which can be used to check the correct match of the specifications with the actual
points of impact.
Table 2
Compensation for the bullet drop with ASV+ at distance, in meters and yards
Curve (Distance) m / yard 100 150 200 250 300 325 350 375 400 425 450 475 500 525 550 575 600
1Corr. cm / m 0-1,5 -4,0 -10,0 -21,0 -29,3 -35,0 -45,0 -56,0 -68,0 -81,0 -95,0 -110,0 -131,3 -148,5 -172,5 -198,0
Corr. Inches / Yards -0,5 -1,4 -3,6 -7,6 -10,5 -12,6 -16,2 -20,2 -24,5 -29,2 -34,2 -39,6 - 47,3 -53,5 -62,1 -71,3
2Corr. cm / m 0-1,5 -4,0 -12,5 -24,0 -32,5 -42,0 -52,5 -64,0 -76,5 -90,0 -109,3 -130,0 -152,3 -176,0 -201,3 -234,0
Corr. Inches / Yards -0,5 -1,4 -4,5 -8,6 -11,7 -15,1 -18,9 -23,0 -27,5 -32,4 -39,3 -46,8 -54,8 -63,4 -72,5 -84,2
3Corr. cm / m 0-1,5 -8,0 -17,5 -30,0 -39,0 -49,0 -60,0 -72,0 -85,0 -99,0 -118,8 -135,0 -152,3 -176,0 -195,5 -222,0
Corr. Inches / Yards -0,5 -2,9 -6,3 -10,8 -14,0 -17,6 -21,6 -25,9 -30,6 -35,6 -42,8 -48,6 -54,8 -63,4 -70,4 -79,9
4Corr. cm / m 0-3,0 -10,0 -20,0 -36,0 -45,5 -59,5 -71,3 -84,0
Corr. Inches / Yards -1,1 -3,6 -7, 2 -13,0 -16,4 -21,4 -25,7 -30,2
5Corr. cm / m 0-3,0 -10,0 -22,5 -39,0 -52,0 -63,0 -78,8 -96,0
Corr. Inches / Yards -1,1 -3,6 -8,1 -14,0 -18,7 -22,7 -28,4 -34,6
6Corr. cm / m 0-4,5 -12,0 -27,5 -48,0 -58,5 -73,5 -90,0 -108,0
Corr. Inches / Yards -1,6 -4,3 -9,9 -17,3 -21,1 -26,5 -32,4 -38,9
7Corr. cm / m 0-4,5 -14,0 -30,0 -51,0 -65,0 -80,5 - 97,5 -120,0
Corr. Inches / Yards -1,6 -5,0 -10,8 -18,4 -23,4 -29,0 -35,1 -43,2
8Corr. cm / m 0-4,5 -16,0 -32,5 -57,0 -74,8 -91,0 -108,8 -132,0
Corr. Inches / Yards -1,6 -5,8 -11,7 -20,5 -26,9 -32,8 -39,2 -47,5
9Corr. cm / m 0-6,0 -18,0 -37,5 -66,0 -87, 8 -105,0 -127,5 -156,0
Corr. Inches / Yards -2,2 -6,5 -13,5 -23,8 -31,6 -37,8 -45,9 -56,2
Display Settings
You can select the appropriate display settings in menu 3 (press the SET button for
2seconds + press the SET button twice).
As standard, you can choose between seven different display settings. The display
settings are numbered consecutively in your ZEISS Victory RF and are labelled
dI1 – dI 7.
Table 3
Display in your ZEISS
Victory RF Function
dI 1 Distance
dI 2 Distance & angle
dI 3 Distance & equivalent horizontal distance
dI 4 Distance & holdover in cm/in
dI 5 Distance & holdover in MOA
dI 6 Distance & holdover in MIL
dI 7 Distance & number of clicks
In addition to the 7 standard settings, you can 3 more personalised display settings
to your ZEISS Victory RF. On your ZEISS Victory RF, the curves are labelled dIu 1 –
dIu3.
(Further information can be found in the „Settings with the ZEISS Hunting App“
section).
Simply release the range finding button (Fig. 1/6) on the appropriate setting for
you. The display setting last show will then be saved. To check, you can always
display the saved settings in the menu.
Unit
Choose the appropriate unit in Menu 4 ( press the SET button for 2 seconds + press
the SET button three times).
The distance can be shown in either meters or yards. You can change the settings
with the range finding button (Fig. 1/6). On your ZEISS Victory RF, the units have
the indicators unitM (for meters) and unitY (for yards). To check, you can always
display the saved settings in the menu.
Measuring Mode
You can select the appropriate measuring mode for you in menu 5 (press the SET
button for 2 seconds + press the SET button four times). You can select whether you
are shown the best measurement (tA b) or the furthest measurement (tA L). You can
change the settings with the range finding button (Fig. 1/6).
Fig. 9 illustrates the options. The animal in the background is, in this case, the
furthest measured point (tA L). Since a higher proportion of the measuring
points encounter the tree in the foreground, this point is equivalent to the best
measurement (tA b).
To check, you can always display the saved settings in the menu.
Key Assignment
You can select the most appropriate key assignment for you in menu 6 (press SET
button for 2 seconds + press the SET button five times). By pressing the range finding
button (Fig. 1/6), you can choose between the standard setting („5 _ _ °“ is shown
on your ZEISS Victory RF) and the reverse setting („° _ _ 5“ is shown on your ZEISS
Victory RF). As standard, your ZEISS Victory RF is configured for right-handed users.
In this setting, the measuring button is operated with the right hand and the SET
button is operated with the left hand. In the reverse setting, you measure with your
left hand and the SET button is in your right hand. To check, you can always display
the saved settings in the menu.
Only one of
these will be
displayed.
2 | 7 EN
IDENTIFICATION OF THE COMPONENTS
1 Eye cup
2 Central focusing
3 Diopter compensation
4 Diopter compensation for display
5 Eyelet for fixing the carrying strap
6 Range finder button
7 Set button
8 Battery cover/battery compartment
User information for the disposal of electrical and electronic
equipment (private households)
This symbol on products and/or accompanying documents indicates that
used electrical and electronic products are not to be mixed with ordinary
household waste. Take these products to the appropriate collection point
for proper handling, recovery and recycling, where they will be taken
back for free. In some states, it may also be possible to hand in these
products to your local dealer when purchasing a corresponding new
product. The proper disposal of this product serves to protect the
environment and prevents possible harmful effects on human beings and their
surroundings, which may arise as a result of incorrect handling of waste. More
detailed information on your nearest collection point is available from your local
authority. According to state law, fines may be issued for the incorrect disposal of
this type of waste.
For business customers within the European Union
To dispose of electrical and electronic equipment, please contact your dealer or
supplier, who will be able to provide you with more information.
Information on disposal in other countries outside of the European Union
This symbol is applicable only in the European Union. Please contact your local
authority or your dealer if you wish to dispose of this product and enquire about
how to dispose of it.
Labelled in accordance with the statutory guidelines 2014/53/EU
and 2011/65/EU.
SCOPE OF SUPPLY
ZEISS Victory® RF binoculars:
Product Order number Scope of supply
Victory RF 8x42 52 45 48 ZEISS Victory RF
Protective lens caps
Eyepiece cap
Carrying strap
Bag with strap
CR2 battery
Lens cleaning cloth
Quick Guide Part 1 & 2
Victory RF 10x42 52 45 49
Victory RF 8x54 52 56 48
Victory RF 10x54 52 56 49
(5)
(3)
(1)
Fig. 1
(7)
(4)
(6)
(8)
(2)
Fig. 2
(12)
(11)
(14)
(13)
(9)
(10)
9 LED sighting mark
10 4-figure LED display
11 Unit yard display
12 Unit meter display
13 Battery display
14 Bluetooth display
15 Carrying strap
16 Eyepiece cap
17 Protective lens caps
INSTRUCTIONS FOR USE
Congratulations on the purchase of your new binoculars with integrated
laser range finder.
ZEISS products are famous for outstanding optical performance, precision
engineering and a long service life.
Please observe the following instructions for use in order to obtain the best from
your binoculars and to ensure that they remain your constant companion for many
years to come.
INFORMATION FOR YOUR SAFETY
Environmental influences
• Caution: Do not use the binoculars to look at the sun or at laser light sources.
This could result in serious injury to the eyes and in considerable damage to the
product.
• Caution: Never leave the binoculars in the sun for extended periods of time
without the protective lens cap. The objective lens and eyepiece can function as a
burning glass and damage the interior components.
Danger of swallowing
Caution: Do not leave the batteries and removable exterior parts within reach of
children (danger of swallowing).
Further information and safety instructions be found in the QuickGuide provided.
This guide can also be found at the Download Center on our website.
Battery disposal
Batteries do not belong in household rubbish!
Please use a recycling facility in your area to dispose of used batteries.
Please only recycle discharged batteries.
As a rule, batteries are discharged if the device being run
• shuts off and signals “Battery empty”.
• no longer functions properly after extended use of the batteries.
To prevent short circuits, cover the battery contacts with an adhesive strip.
Caution: Use only battery types recommended by the manufacturer.
Handle used batteries in accordance with the manufacturer’s instructions.
Under no circumstances should batteries be thrown into a fire, heated up,
recharged, taken apart or broken open.
Germany: As a consumer, you have a legal obligation to return used
batteries. You can hand in your batteries for free to wherever the
batteries were purchased or to the public collection points in your city or
community.
You will find these symbols on batteries that contain harmful substances:
Pb = Battery contains lead
Cd = Battery contains cadmium
Hg = Battery contains mercury
Li = Battery contains lithium
SETRANGE
VICTORY RF OWNER’S MANUAL - NORTH AMERICA | 1716 | VICTORY RF OWNER’S MANUAL - NORTH AMERICA For the latest updates and information regarding our products, visit zeiss.com/us/sportsoptics.
• Bluetooth-connectivity – synced to ZEISS Hunting App (ZHA)
• Range 11 to 2,500 yards
• Custom ballistic input via smartphone or tablet
• B.I.S. II – Onboard ballistic calculator with integrated sensors
and ballistic proles
• Measures angle, temperature and air pressure
• Calculates equivalent horizontal distance
• Displays holdover in inches/cm, MOA, MIL and clicks
• Features Scan and Target modes
• Automatic LED brightness adjustment (11 brightness curves)
• User-programmable control buttons and display
• One-touch ranging (right or left hand)
• Syncs personal settings and ballistic proles to and from the RF
• Superior image quality, enhanced by FL glass, ZEISS T* and LotuTec coatings
• Compact, lightweight and user-friendly ergonomics
• Large focusing wheel for minimal rotation
• High-grade magnesium frame with double-link bridge
• Rugged and waterproof
• Remote software updates via Bluetooth and ZEISS Hunting App
1. First, ensure you have your mobile device and the ZEISS Victory RF
in the same work area. ZEISS recommends a clean work area for the
initialization process in order to support each item as well as the
connecting instructions. The complete initial sync and data input process
should take less than 30 minutes.
2. Next, you will need to download the ZEISS Hunting App (ZHA) from
either Google Play or the App Store – depending upon your device
(smartphone, tablet, etc).
a. The ZHA is free, and it oers several other benets for the hunter
and shooter.
b. The ZHA allows for easy Victory RF (VRF) support, setup, and
syncing of your data for a positive eld-use experience.
c. While the VRF menus can be accessed and manipulated as
an on-board option, the ZHA provides a faster, easier, and
friendlier platform to input and update relevant data and settings
into the VRF model.
ESTABLISHING A CONNECTION BETWEEN
THE ZEISS HUNTING APP AND ZEISS VICTORY RF
6 | 7 EN
Turn off
You can turn off your ZEISS Victory RF menu by pressing the range finding button in
menu 7 (press SET button for 2 seconds + press the SET button six times).
There are two other ways to shut down your ZEISS Victory RF. Either hold the SET
button down for 2 seconds or don‘t press either of the buttons for around 10
seconds.
Adjustment with the ZEISS Hunting APP
With the ZEISS Hunting App, you have the option of carrying out all the adjustments
mentioned above with your smartphone, in a simple and user-friendly way.
You also have the option of making two further, personalised adjustments. Firstly,
you can enter your own ballistics profile, created in the ZEISS Hunting App, and you
can also set up to three different displays in the display settings.
ESTABLISHING A CONNECTION BETWEEN
THE ZEISS HUNTING APP AND ZEISS VICTORY RF
Initial Connection
When you first want to connect your ZEISS Victory RF, „Connect Your ZEISS Product“
will appear on the screen in the Connected Products section (Fig. 10). By clicking
the Connect Button once, your ZEISS Hunting App begins connection set-up.
As described in Fig. 11, you must then hold the SET button down for only
10seconds.
Then, the word „CON_“ appears on your ZEISS Victory RF. After you release the SET
button, the word „PAIr“ appears on the display and you confirm this by pressing the
measuring button once.
Now your ZEISS Victory RF is connected with your ZEISS Hunting App as shown in
Fig. 12. You only need to confirm the „PAIr“ for your first connection.
Repeated Connection
After you have initially connected your ZEISS Victory RF with your ZEISS Hunting
App, the Start screen changes the Connected Product Section, as shown in Fig. 13.
Above the (+) button on the bottom right, you can connect ZEISS Victory RF with
your ZEISS Hunting App again. Furthermore, by simply clicking on the stored ZEISS
Victory RF you can make adjustments on your device (Fig. 14) and then sync these.
MAKING ADJUSTMENTS
Ballistics Settings
In the ballistics settings (Fig. 15) in your ZEISS Hunting App, as well as selecting
the nine standard profiles, you also have the option of adding up to nine more
personalised profiles and subsequently syncing with your ZEISS Victory RF. To add
a personalised profile, click on the button „Add Profile“ in the ballistics menu. Then
you can select all previously created ballistics profiles (you can create these in the
„Ballistics“ section of the Toolbox) (Fig. 16).
You also have the option of setting one of your profiles as a „favourite“. The
favourite is the setting that is active on your ZEISS Victory RF and is indicated by a
blue star.
In the ZEISS Hunting App display settings (Fig. 17), as well as the choice of the seven
standard profiles, you have the option of adding up to three more personal profiles
and subsequently syncing them with your ZEISS Victory RF. To add a personal profile,
click on the button „Add Configuration“ in the ballistics menu. Unlike the standard
profiles (Fig.18), you can combine up to three display modes in your personal
profiles. Here, the distance is always set as the first display mode.
You also have the option to save one of your configurations as a „favourite“. The
favourite is the setting that is active on your ZEISS Victory RF and is indicated with a
blue star.
Fig. 10
Fig. 14
Fig. 11
Fig. 15
Fig. 12
Fig. 16
Fig. 13
Fig. 17
iOS / Android
Compatible
Continued on following page.
(The screenshots herein are depicted as accurately as possible at time of print. The ZEISS Hunting App
may be updated from time to time, which may reect a dierence in the screen image illustrated.)
(Illustrative examples were captured on an iPhone for the purpose of reference.)
VICTORY RF OWNER’S MANUAL - NORTH AMERICA | 1918 | VICTORY RF OWNER’S MANUAL - NORTH AMERICA For the latest updates and information regarding our products, visit zeiss.com/us/sportsoptics.
HOW TO INPUT YOUR BALLISTIC PROFILE(S)
1. From the ZHA Dashboard, go into the “Ballistics” menu. Locate
the blue-colored + button at the lower right-hand corner of the window,
and press it. (Fig. 12)
2. Input the riescope data, whether it is a ZEISS product or another brand.
Use the drop-down menu to select your ZEISS riescope model, or slide
the ZEISS Riescope button to the “o” position if you are not using a
ZEISS riescope.
3. Next, input the scope height above bore. This is a simple measurement,
and it is obtained by taking the measurement from the center of the
barrel’s bore to the center of the riescope’s main tube. (This helps to
ensure the utmost in accuracy of provided ballistic solutions.)
4. The default distance for the riescope’s sight-in zero is 100 yards.
ZEISS recommends this setting; however, you may select and input
another zero distance for your needs.
5. Next, choose the value setting of your riescope’s click adjustment values
(example: 1/4 MOA or 0.1 MIL).
6. Next, input the appropriate data for your ammunition. You can select
factory loads (over 7,000 options) or input your custom handload data.
The input data here is rather important. Ammunition brand, caliber, bullet
weight and muzzle velocity data are needed for input.
NOTE: ZEISS strongly suggests the validation of muzzle velocity via a quality
chronograph. (Muzzle velocity listed on some ammunition is for a specic
barrel length within a controlled environment and does not factor in the
many variables that are associated with obtaining true muzzle velocity
through your rie.)
3. Once the ZEISS Hunting App is downloaded, you will need to pair the
mobile device to the ZEISS Victory RF model.
a. Ensure your mobile device’s battery is charged or the device is
plugged in to the power outlet. Now ensure your Bluetooth setting is
switched to the “on” position.
b. Next, launch the ZEISS Hunting App (ZHA). Then go to the Dashboard
menu and select the “Connected Products” tab (Fig. 10).
c. Press the “Connect” button on the device, and then press the
“SET” button on the VRF. Continue pressing the “SET” button
while looking through the right-side barrel of the VRF until you see
the letters “con” for connect. (If you are having trouble reading
the letters clearly, please revert back to page 10 in order to
set your diopter settings for a clean and crisp image.)
d. Once “con” has appeared in the view, press the “RANGE” button
(indicated as an arrow on the VRF models) on the VRF, and this will
pair the VRF to the ZHA. (Fig. 11)
e. Once the pairing is completed, you may input up to nine customized
ballistic proles. (The ZHA is not needed to use the VRF in the eld.)
This ensures precise and on-target accuracy for multiple ries and
ammunition loads in the eld.
con_ conn
VRF is attempting to
connect to the ZHA.
VRF is paired
to the ZHA.
Visual
representation of
the VRF display
Fig. 11 Fig. 12Fig. 10
VICTORY RF OWNER’S MANUAL - NORTH AMERICA | 2120 | VICTORY RF OWNER’S MANUAL - NORTH AMERICA For the latest updates and information regarding our products, visit zeiss.com/us/sportsoptics.
7. Next, select which data you see through the VRF when you press the
“RANGE” button (Fig. 13).From the ZHA Dashboard, select the
“Connected Products” tab. While there, select the Bluetooth icon
button, which looks like this:
a. Scroll down to select the “Result Display” option and
select “Add Conguration” (Fig. 14).
i. This is the point at which you select the display data that you
want to see while in the eld. The VRF will display these three
pieces of data in the order you have selected for input (Fig. 15).
1. The rst piece of data defaults to “RANGE.”
2. You can then select the other data from the menu
options. Many people like to select one of the various
“Holdover” options. ZEISS strongly suggests choosing the
option that YOU are comfortable with. ZEISS recommends
selecting the option that most closely matches your elevation
turret value (e.g., select “Holdover MOA” option for
riescopes with .25 MOA-based elevation turrets).
button, which looks like this:
Fig. 13 Fig. 14 Fig. 15
(The above directions are illustrated in Fig. 13-15 on pages 20-21.)
VICTORY RF OWNER’S MANUAL - NORTH AMERICA | 2322 | VICTORY RF OWNER’S MANUAL - NORTH AMERICA For the latest updates and information regarding our products, visit zeiss.com/us/sportsoptics.
2. Once the settings have been saved and the ballistic data has been
entered, the ZHA and VRF are ready to communicate with each other.
a. In the ZHA, choose the ZEISS Victory RF model from the list of
“Connected Products.” Then select your chosen ballistic proles in
the order of your preferred listings, and select data display options
that you prefer to see in the VRF model while in the eld.
b. Choose the “Ballistics” tab. Then, on the User Conguration
page, add your custom load to your prole list by selecting the
“Add Prole” button and choosing the load you previously input
into the ZHA. Once selected, ensure the load is highlighted with a
blue star as illustrated (Fig. 17).
NOTE: The VRF model does not have to be connected to the ZHA in the eld
in order to work. The VRF operates as a stand-alone unit.
ESTABLISHING DEVICE SETTINGS
1. From the ZHA Dashboard, select the “Connected Products” tab.
Notice the ZEISS Victory RF model with serial number. Then select
“Device Settings.” (Fig. 16)
a. From here you can select:
i. Brightness: Choose from 11 intensity levels of the red LED display
by adjusting the sliding bar.
ii. Units: Choose to display measurements in yards or meters.
iii. Target Mode: Choose Best Target or Last Target. (For a more
detailed description of the Target mode, please see Measuring
Mode on page 15.)
iv. Button Orientation: Choose factory settings or reverse settings
(for conguring the orientation of “SET” and “RANGE”
buttons on VRF).
v. Once all of the criteria have been selected for your preferences,
be sure to press SAVE in order to capture the preferred settings!
Fig. 16 Fig. 17
VICTORY RF OWNER’S MANUAL - NORTH AMERICA | 2524 | VICTORY RF OWNER’S MANUAL - NORTH AMERICA For the latest updates and information regarding our products, visit zeiss.com/us/sportsoptics.
3. Next, transfer the data from the ZHA to the VRF.
a. Ensure the VRF is connected via Bluetooth (note the Bluetooth icon
in the VRF eld of view).
b. Select the “App to Product” sync button to allow the transfer of ZHA
data to the VRF on-board computer memory. (Successful syncing is
conrmed via the pop-up “Sync was successful.” If you do not see this,
repeat previous steps for proper syncing.) (Fig. 18)
4. Once the data and device sync has been accomplished, there is no further
need for the mobile device unless you elect to modify the input data or
add new data.
NOTE: The all-new ZEISS Victory RF Bluetooth-enabled binocular laser
rangenders will provide you with an exceptional binocular, state-of-the-art
Class I laser rangender, and immediate ballistic solutions out to 2,500
yards. The VRF features on-board sensors to measure distance, angle,
pressure and temperature in order to produce accurate data output.
Please keep in mind that the variable of wind remains the all-time enemy of
making accurate long-range and ultra-long-range shots. ALWAYS consider
wind variables when taking and making shots on live game. In regard to
hunting, when in doubt, don’t take the shot.
ExoLens
With the ExoLens Bracket and the suitable adapter,
you can connect a smartphone to your spotting scope
or binoculars to use it as a camera for digiscoping.
ExoLens Bracket for Order number
Apple iPhone 6 / 6s 21 86-887
Apple iPhone 7 / 7s 22 16-613
Samsung Galaxy S6 / S6 edge 21 88-170
ExoLens bracket adapter for Order number
Conquest Gavia 52 83 61-9901
Victory SF 52 83 60-9901
Victory HT 52 83 60-9902
Conquest 32/42 HD 52 83 60-9903
Conquest 56 HD 52 83 60-9904
Terra ED 52 83 60-9905 Bracket adapter for Conquest Gavia
Cleaning products
ZEISS premium lens care Products
ZEISS Lens Cleaning Kit
Bellows, dust brush, optics cleaning
solution (30 ml), microfi ber cloth
(18 × 18 cm) and 10 wet wipes.
ZEISS 60 ct. Box Lens Wipes
Includes: 60 individually packaged
pre-moistened lens cleaning wipes.
ZEISS Jumbo Microfi ber Lens Cloth
Includes: 12 × 16 in X-Large reusable,
machine washable microfi ber cloth.
44 45
ACCESSORIES
STOP: When cleaning your RF, PLEASE ENSURE THAT THE VRF’S LENS
COVERS ARE IN PLACE FIRST. These types of cleaning solvents can and will
destroy the ne and precision multi-layer lens coatings.
Cleaning Your Lenses
ZEISS recommends using original ZEISS branded lens cleaning solutions,
supplies and complete cleaning kits to care for the lenses on your VRF.
First, permit heavy or large debris on the lens surfaces to fall away from the
surface. Try to carefully remove loose dirt and dust with a lens brush.
STOP: Do NOT use the types of compressed air cans found typically in the oce
supply section of various retail outlets. When used improperly, they can destroy
lens coatings, causing the coatings to peel away or blister from the lens surface.
Ensure your ZEISS Victory RF is NOT exposed to extreme heat over
prolonged periods of time, such as those elevated temperatures
sometimes found inside of a vehicle on a sunny day.
Your ZEISS VRF is designed and manufactured to give you many years of reliable
and long-term service. One of the best ways to protect your optical investment
is to be sure to use appropriate lens covers when you are not using your VRF.
To further protect your VRF, ZEISS strongly suggests you keep the product clean
and free of troublesome sand, dirt, salt water and various contaminants.
Cleaning Your ZEISS VRF’s Exterior
For a heavily soiled VRF, you can rinse the VRF under a stream of cool or warm
water, and then wipe it down with a water-moistened towel. Do not use strong
solvents to clean your VRF or its optics. Using such solvents will void the ZEISS
warranty. (Refer to page 9 for additional help/instructions.)
CARE AND MAINTENANCE OF YOUR VICTORY RF
Fig. 18
VICTORY RF OWNER’S MANUAL - NORTH AMERICA | 2726 | VICTORY RF OWNER’S MANUAL - NORTH AMERICA For the latest updates and information regarding our products, visit zeiss.com/us/sportsoptics.
You can also remove stubborn grit and other contaminants by gently ushing
the surface with distilled water. With these larger contaminants removed, you
can now gently swab the lenses clean by following the respective lens cleaning
instructions.
ZEISS strongly suggests using a clean, lint-free, pre-moistened microber
cleaning cloth or appropriate lens swab and an appropriate lens cleaning
solution. Starting in the center of the lens, begin swabbing in a circular motion,
working toward the outside. Once you reach the outer diameter of the lens you
are cleaning, use a new swab or another portion of the microber cloth to avoid
streaking the lenses with contaminants and grease frequently located where the
lens comes in contact with the metal lens housing. Make only one pass to the
edge where the glass meets the metal. Repeat this process as necessary until
desired results are achieved. TIP: Use only a small amount of cleaning solution
for the nal lens swabbing to prevent streaks.
Long-Term Storage
ZEISS suggests you remove the battery if the VRF will not be used for a
prolonged period of time. Store the VRF in a cool, dry, clean and contaminant-
free location.
Continued on following page.
CONSUMER PRODUCT RETURNS – NORTH AMERICA
This process is subject to improvements and changes.
USA Residents: Please send to
ZEISS Service/Repair Dept.
ZEISS Consumer Products
1050 Worldwide Blvd.
Hebron, KY 41048-8632
P: 1-800-441-3005
Rest of the World:
Due to legal requirements and export/import restrictions, any product
exported or sold outside the United States and Canada must be returned to
the original point of purchase, with a copy of the invoice or your product
registration information.
DO NOT return exported items directly to Carl Zeiss Optical, Inc.
from outside the United States.
DO NOT return exported items directly to Gentec International
from outside Canada.
Carl Zeiss SBE, LLC and Gentec International cannot accept products
from or ship products to locations outside the United States and
Canada.
Canadian Residents: Please send
to ZEISS Authorized Distributor:
Gentec
90 Royal Crest Court
Markham, Ontario
CANADA L3R 9X6
P: 905-513-7733
STOP: Before sending a product in for service, please call ZEISS
Sports Optics Customer Care team at the number below in order to
determine if the issue/concern can be resolved without having to
return the product.
1-800-441-3005 • repair[email protected]
Please complete the online repair form at:
www.zeiss.com/sports-optics/en_us/hunting/service---support/customer-service.html
After your initial inquiry, if it was determined that your ZEISS product needs
to be sent in for evaluation, service, or repair, Customer Care will then
provide you with the ZEISS Service/Repair document. This is a PDF document,
congured as an easy-to-use auto-ll solution to be completed from your
computer. Please complete all sections of the Service/Repair document.
Afterward, save it for future reference, print it, and include the
printed copy with the product you are returning for service.
Be sure to place the appropriately wrapped and protected product in
a proper shipping container. Insure it for replacement value, and ship
it shipping prepaid to the appropriate address listed below.
Your ZEISS Sports Optics Optical System is warranted against defects in
workmanship and materials for the life of the Product. Electronic components
are warranted against defects in workmanship and materials for 5 years from
the original date of manufacture or purchase. Non-optical system components
and accessories are warranted against defects in workmanship and materials
for 1 year from the date of manufacture or purchase. If a defect that is
covered by this Warranty is found, ZEISS will, at its option, either repair or
replace the Product with a new or reconditioned ZEISS product of comparable
specications.
To view the full warranty, visit www.zeiss.com/us/warranty
Register your product at: zeiss.com/us/sportsoptics
ZEISS WARRANTY –NORTH AMERICA
5-YEAR NO FAULT POLICY
(VICTORY RF)
Every product we make is backed by an industry leading, limited lifetime,
transferable warranty. In addition, on select ZEISS products, including
Victory RF, we oer a No-Fault Policy. During the rst ve years of original
ownership, ZEISS will, at its discretion, repair or replace your product if it is
accidentally damaged during normal and intended use.
To view the full No-Fault Policy visit www.zeiss.com/us/NoFaultPolicy
ZEISS
HUNTING APP
iOS / Android Compatible
In order to maximize the use, features, and benets of
your ZEISS Victory RF and enjoy the rewards of hunting
and shooting, we invite you to download the ZEISS
Hunting App. This free app oers useful, unique and
easy-to-use information at your ngertips.
Hunt longer. Hunt better.
Hunt with condence.
ZEISS.
01/2020 | SAP# 000000-2285-607
(Manual – Victory RF Bluetooth Enabled)
Customer Service
1-800-441-3005
[email protected]
Carl Zeiss SBE, LLC
Sports Optics Division
zeiss.com/us/sportsoptics
JOIN THE CONVERSATION

Other Zeiss Binoculars manuals

Zeiss Victory PhotoScope 85 T FL User manual

Zeiss

Zeiss Victory PhotoScope 85 T FL User manual

Zeiss Victory RF 8x42 User manual

Zeiss

Zeiss Victory RF 8x42 User manual

Zeiss Conquest HD 8x32 User manual

Zeiss

Zeiss Conquest HD 8x32 User manual

Zeiss ZEISS VICTORY 8x20 T* COMPACT User manual

Zeiss

Zeiss ZEISS VICTORY 8x20 T* COMPACT User manual

Zeiss 20 x 60 S User manual

Zeiss

Zeiss 20 x 60 S User manual

Zeiss Terra Ed 8 x 32 User manual

Zeiss

Zeiss Terra Ed 8 x 32 User manual

Zeiss Victory 3 x 12 Mono User manual

Zeiss

Zeiss Victory 3 x 12 Mono User manual

Zeiss Conquest 8x20 B User manual

Zeiss

Zeiss Conquest 8x20 B User manual

Zeiss ZEISS VICTORY 8x20 T* COMPACT User manual

Zeiss

Zeiss ZEISS VICTORY 8x20 T* COMPACT User manual

Zeiss VICTORY 8x32 T* FL User manual

Zeiss

Zeiss VICTORY 8x32 T* FL User manual

Zeiss ZEISS VICTORY 8x20 T* COMPACT User manual

Zeiss

Zeiss ZEISS VICTORY 8x20 T* COMPACT User manual

Zeiss Victory NV 5.6x62 T User manual

Zeiss

Zeiss Victory NV 5.6x62 T User manual

Zeiss Victory 8x45 T RF User manual

Zeiss

Zeiss Victory 8x45 T RF User manual

Zeiss Victory 10 x 45 T RF Series User manual

Zeiss

Zeiss Victory 10 x 45 T RF Series User manual

Zeiss CONQUEST GAVIA 85 User manual

Zeiss

Zeiss CONQUEST GAVIA 85 User manual

Zeiss KF User manual

Zeiss

Zeiss KF User manual

Zeiss VICTORY SF User manual

Zeiss

Zeiss VICTORY SF User manual

Zeiss Victory 8x45 T RF User manual

Zeiss

Zeiss Victory 8x45 T RF User manual

Zeiss TERRA ED 8 x 32 User manual

Zeiss

Zeiss TERRA ED 8 x 32 User manual

Zeiss Victory 3 x12 Mono User manual

Zeiss

Zeiss Victory 3 x12 Mono User manual

Zeiss 10x56-FL User manual

Zeiss

Zeiss 10x56-FL User manual

Zeiss Dialyt 8x56 B/GA T User manual

Zeiss

Zeiss Dialyt 8x56 B/GA T User manual

Zeiss Conquest 30 T User manual

Zeiss

Zeiss Conquest 30 T User manual

Zeiss Dialyt 8 x 56 B/GA T Marine Series User manual

Zeiss

Zeiss Dialyt 8 x 56 B/GA T Marine Series User manual

Popular Binoculars manuals by other brands

NcSTAR B2070R brochure

NcSTAR

NcSTAR B2070R brochure

West Marine Lake Tahoe 8X32 Instructions for use

West Marine

West Marine Lake Tahoe 8X32 Instructions for use

Newcon Optik NVS 7 Operation manual

Newcon Optik

Newcon Optik NVS 7 Operation manual

Leupold RXB-IV operating instructions

Leupold

Leupold RXB-IV operating instructions

Levenhuk NELSON 8x30 user manual

Levenhuk

Levenhuk NELSON 8x30 user manual

Minox BV 8x25 instructions

Minox

Minox BV 8x25 instructions

Nikon 10x25CF TRAVELITE V Product guide

Nikon

Nikon 10x25CF TRAVELITE V Product guide

FujiFilm TS-X 1440 instruction manual

FujiFilm

FujiFilm TS-X 1440 instruction manual

Nikon Ecobins 10x25 brochure

Nikon

Nikon Ecobins 10x25 brochure

Bresser 9677480 instruction manual

Bresser

Bresser 9677480 instruction manual

ATN Night Cougar user guide

ATN

ATN Night Cougar user guide

Galileo C-72140 user guide

Galileo

Galileo C-72140 user guide

Rudolf Riester Riester I operating manual

Rudolf Riester

Rudolf Riester Riester I operating manual

ATN NVG7-3 Specifications

ATN

ATN NVG7-3 Specifications

Celestron Noble 10x50 Specifications

Celestron

Celestron Noble 10x50 Specifications

Noblex DOCTER 8x42 ED operating instructions

Noblex

Noblex DOCTER 8x42 ED operating instructions

Praktica Marine Product guide

Praktica

Praktica Marine Product guide

Bresser Porro prism instruction manual

Bresser

Bresser Porro prism instruction manual

manuals.online logo
manuals.online logoBrands
  • About & Mission
  • Contact us
  • Privacy Policy
  • Terms and Conditions

Copyright 2025 Manuals.Online. All Rights Reserved.