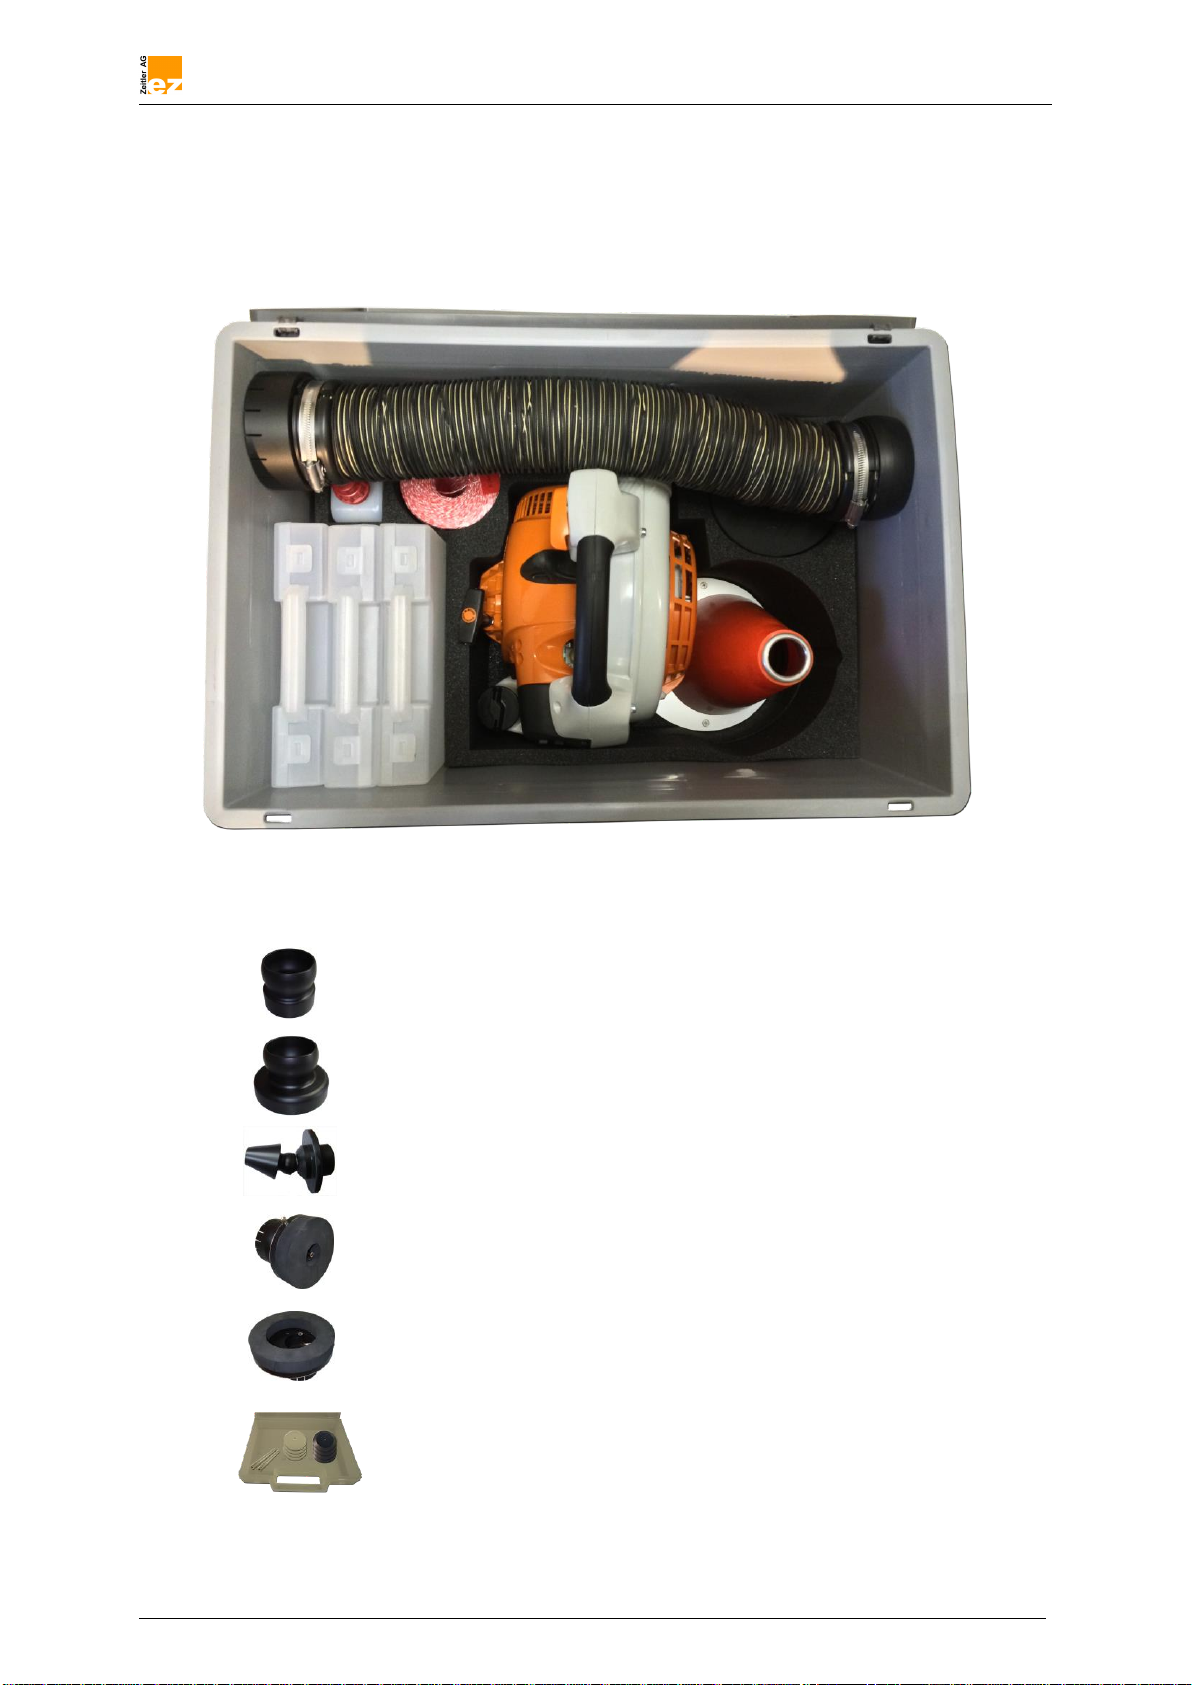
Blowing pull line into cable conduits (ø 25-200 mm)
Operating Manual EZ300 Version 05/2021 page 6 / 30
Before Starting
Check that your power tool is properly assembled and in good condition –refer to appropriate chapters in the
operating instructions.
•Throttle trigger must move freely and spring back to the idle position when released
•Setting lever/switch must move easily to position STOP or 0
•Check that the spark plug boot is secure –a loose boot may cause arcing that could ignite combustible
fumes and cause a fire
•Check condition of fan wheel and fan housing
•A worn fan housing (cracks, nicks, chips) may result in an increased risk of injury from thrown foreign
objects
•If either the fan wheel or fan housing is damaged, consult your dealer –ZEITLER AG recommends you
contact a service dealer
•Never attempt to modify the controls of the safety devices in any way
To reduce the risk of personal injury, do not operate your machine if it is damaged or not properly assembled.
Starting the Engine
Start the engine at least 3 meters from the fueling spot, outdoors only.
Your power tool is designed to be operated by one person only. Do not allow other persons in the work area –
even when starting the engine.
Do not drop start the engine –the correct starting procedure is described in the Operating Instructions.
Make sure to place the unit on level ground, to have secure footing, and do hold the unit securely.
As soon as the engine starts, the air flow may throw small objects (e.g. stones) in all direction.
During Operation
Do not direct the air blast towards bystanders on animals since the air flow can blow small objects at great
speed –risk of injuries.
In the event of impending danger or in an emergency, switch off the engine immediately by moving the setting
lever/switch to STOP or 0.
To reduce the risk of injury by thrown objects, do not allow other persons within 5 meters of your own position.
Never leave a running machine unattended.
Take special care in slippery conditions, on slopes or uneven ground.
Watch out for obstacles such as tree stumps, roots and ditches which could cause you to trip or stumble.
Never work on a ladder or any other insecure support.
Be particularly alert and cautious when wearing hearing protection because your ability to hear warnings (shouts,
alarms, etc.) is restricted.
To reduce the risk of accidents, take a break in good time to avoid tiredness or exhausting.
Work calmly and carefully –in daylight conditions and only when visibility is good. Stay alert so as not to
endanger others.
After finishing work, put the unit down on a level, non-flammable surface. To reduce the risk of fire, do not put it
down near easily combustible materials (e.g. wood chips, bark, dry grass, fuel)
Your power tool produces toxic exhaust fumes as soon as the engine is running. These fumes may be
colourless and odourless and contain unburned hydrocarbons and benzol. Never run the engine indoors or in
poorly ventilated locations.
To reduce the risk of serious or fatal injury from breathing toxic fumes, ensure proper ventilation when working
in ditches, hollows or other confined locations.
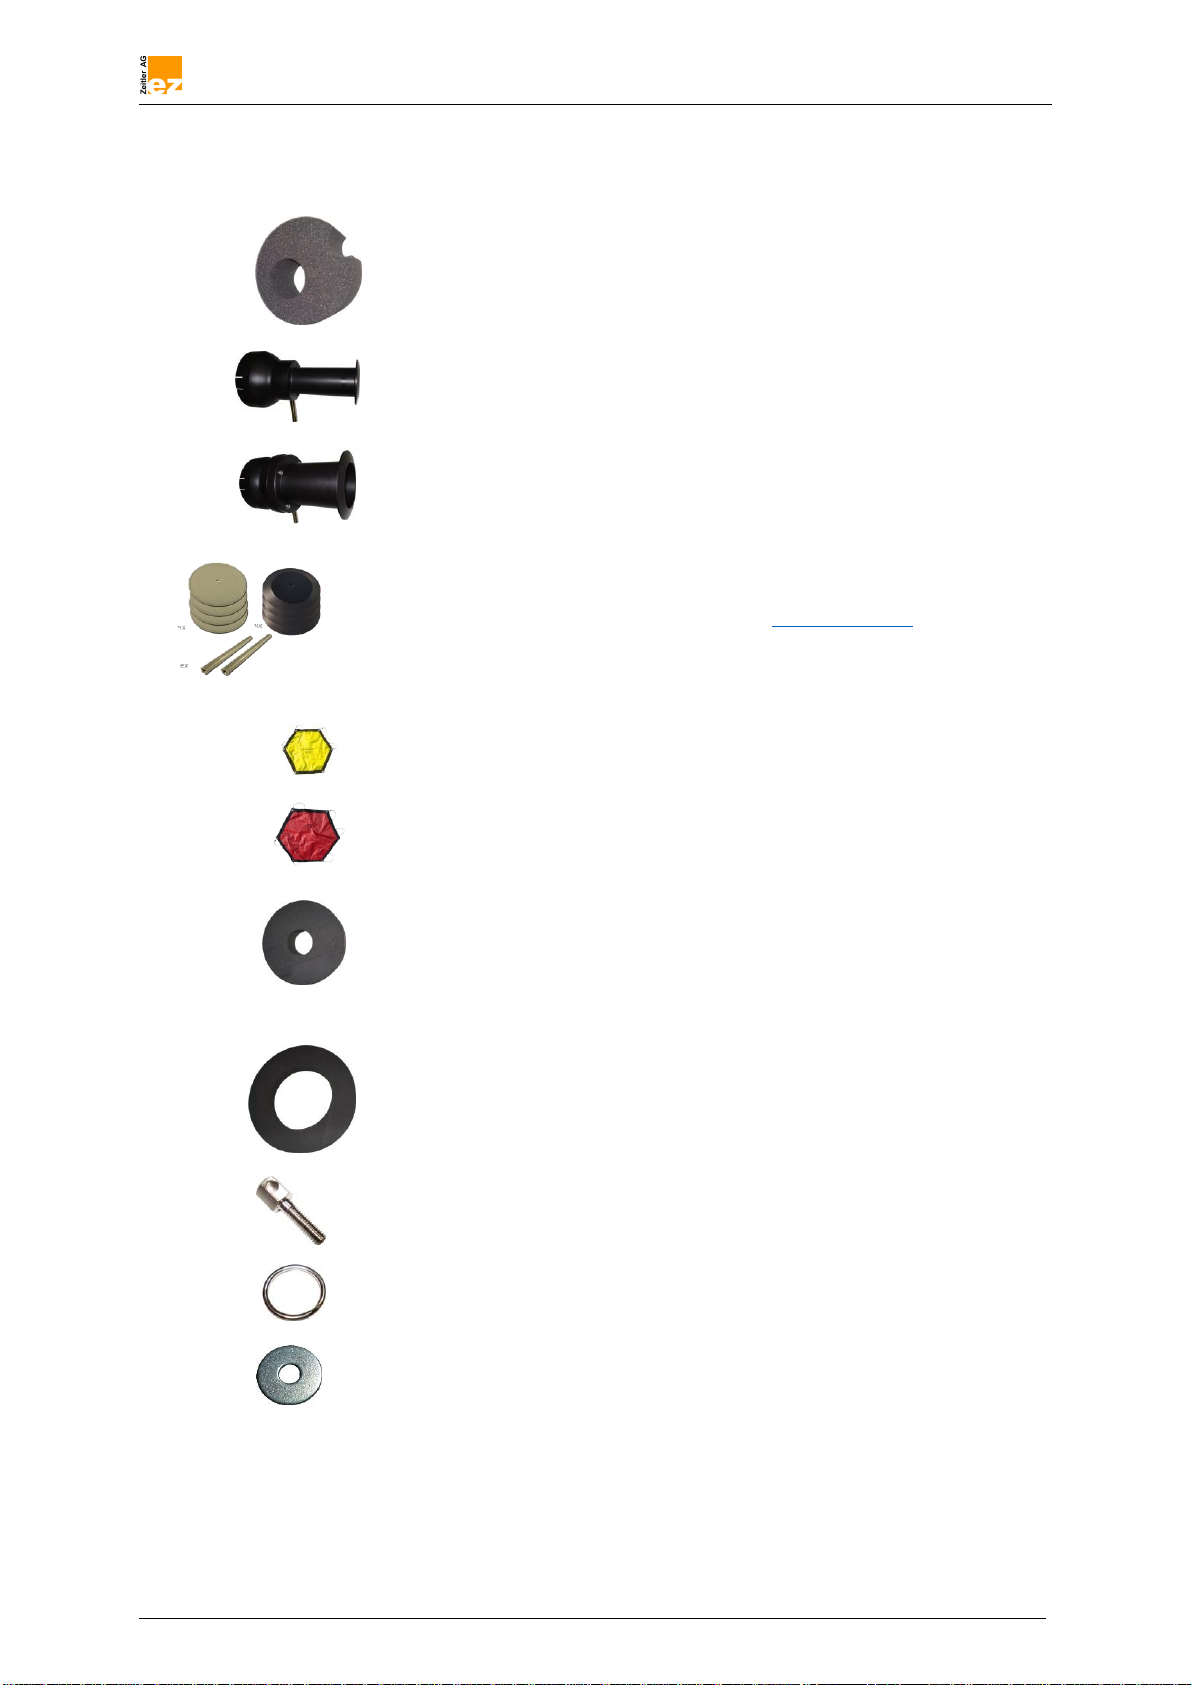
Optional accessories: air hose of 2 m for extension (see ‘To use accessories’)
To reduce the risk of accidents, stop work immediately in the event of nausea, headache, visual disturbances
(e.g. reduce field of vision), problems with hearing, dizziness, deterioration in ability to concentrate. Apart from
other possibilities, these symptoms may be caused by an excessively high concentration of exhaust gases in the
work area.
The dust that occurs during operation may be harmful to health. If dust levels are very high, wear a suitable
protective mask.
To reduce the risk of the fire, do not smoke while operating or standing near your power tool. Note that
combustible fuel vapour may escape from the fuel system.
If your power tool was exposed to unusual influences for which it was not designed (e.g. heavy impact or a fall)
always check that it is in good condition before continuing work –see also ‘Before Starting Work’. Check the fuel
system in particular for leaks and make sure the safety devices are working properly. Do not continue operating
your power tool if it is damaged. In case of doubt, have the machine checked by your servicing dealer.