manuals.online logo
Brands
  1. Home
  2. •
  3. Brands
  4. •
  5. Zero88
  6. •
  7. Controllers
  8. •
  9. Zero88 Level plus Series User manual

Zero88 Level plus Series User manual

WARNING
If a portable or temporary three
phase mains supply is used to
power this desk,
we recommend that the power supply
unit is unplugged from the mains
supply before connecting or
disconnecting the mains supply.
SERIOUS DAMAGE will occur if the
power supply is connected across
two phases.
This equipment is designed for use as a lighting
control desk only, and is unsuitable for any other
purpose. It should only be used by, or under the
supervision of, an appropriately qualified or trained
person.
Zero 88 Lighting Ltd. reserves the right to make
changes to the equipment described in this manual
without prior notice. E & OE.
Issue One November 1998
Manual Stock No. 73-712-00
Software Version 1.0
© Zero 88 Lighting Ltd. 1998
Zero 88 Lighting Ltd
.
Usk House
Llantarnam Park
Cwmbran
Gwent
NP44 3HD
United Kingdom
Tel: +44 (0)1633 838088
(24 hour Answer Phone)
Fax: +44 (0)1633 867880
e-mail: [email protected]
web: www.zero88.com
7371200P1/v1
PAGE 1
User Instructions
This Manual
This manual describes the operation of the Level Plus
series of lighting desks (Level 12 Plus, Level 18 Plus
and Level 24 Plus). It contains a general description of
the desk, the front panel controls, turning on the desk,
desk operation and technical specification of the desk.
Throughout this manual, references to controls,
buttons and lights on the front panel appear in capital
letters (eg GRAND MASTER, FADE TIME A, EXT.
PSU light).
Where the manual refers to outputs, it means
analogue and/or DMX outputs, depending on the
actual setup of the desk.
The Level Plus Lighting Desk
The Level Plus Lighting desk is a manual two preset
desk with separate fade time controls for the A and B
presets, and the ability to flash individual channels.
The Level 12 Plus, Level 18 Plus and Level 24 Plus
desks have 12, 18 and 24 control channels
respectively.
A DMX Output Kit is available which can be fitted to
analogue only desks.
On all desks with DMX Outputs, the DMX data is
transmitted on DMX channels 1 - 24. However on the
12 and 18 channel desks the first 12 and 18 channels
respectively have lighting data, the remaining channels
are always transmitted as zero.
Controls and Displays
PRESETS A AND B
The PRESET A faders control the output levels of the
individual channels in association with the A MASTER
and GRAND MASTER faders.
The PRESET B faders control the output levels of the
individual channels in association with the B MASTER
and GRAND MASTER faders.
A MASTER AND B MASTER
The A MASTER is used to control the maximum output
level from the PRESET A faders.
The B MASTER is used to control the maximum output
level from the PRESET B faders.
The B MASTER fader is reversed (100% at the bottom
of its travel) to facilitate crossfades when moving the A
MASTER and B MASTER in tandem (i.e. in the same
physical direction).
GRAND MASTER
The GRAND MASTER fader is used to control of the
maximum output levels from all channels of the desk.
FLASH ON/OFF
The FLASH ON/OFF button is used to enable/disable
the CHANNEL FLASH buttons. When the FLASH
FUNCTION is active, the red light in the button is
illuminated and the CHANNEL FLASH buttons are
enabled.
CHANNEL FLASH BUTTONS
The CHANNEL FLASH buttons are used to flash the
corresponding channels to the level on the GRAND
MASTER.
FADE TIME A and FADE TIME B
The FADE TIME A control is used to set the time taken
to fade in/out the scene on the PRESET A faders
when the A MASTER is moved from zero to full or vice
versa.
The FADE TIME B control is used to set the time taken
to fade in/out the scene on the PRESET B faders
when the B MASTER is moved from zero to full or vice
versa.
Both FADE TIME controls can be set independently to
values between 0 (manual) and the maximum fade
time indicated on the front panel.
POWER Input Lights
The red lights labelled EXT. PSU and RACKS indicate
which power source(s) are being used.
Turning on the Desk
1
If using DMX outputs, connect the DMX cable to
the socket at the back of the desk.
2
If an external power supply is used to power the
desk, connect the power supply unit to the desk
3
If the desk is being powered by the dimmer(s),with
the dimmers turned off connect the control
cable(s) to the analogue output socket(s) at the
back of the desk.
4
Set the GRAND MASTER fader to full.
5
Set the A and B MASTER faders, FADE TIME A
and FADE TIME B controls to zero.
6
Turn on the External Power supply or the Racks
7
The EXT. PSU light or the RACKS light will
illuminate. The desk is now ready to operate.
PAGE 2
7371200P1/v1
Introduction
Desk Operation
Separate scenes are set up on PRESET A and
PRESET B using the individual channel faders.
The A MASTER and B MASTER faders are used to
crossfade between scenes. The two FADE TIME
controls determine the A and B fade times
independently. Overall output is under the control of
the GRAND MASTER.
To Output a Scene from Preset A Only
1
Set the A MASTER and B MASTER to zero (0%),
and the GRAND MASTER to full (100%).
2
Set the required levels for each channel on the
PRESET A faders.
3
Set FADE TIME A control to the required value.
4
Move the A MASTER to full. The scene set up on
PRESET A fades up in the specified time.
To Output a Scene from Preset B Only
1
Set the A MASTER and B MASTER to zero (0%),
and the GRAND MASTER to full (100%).
2
Set the required levels for each channel on the
PRESET B faders.
3
Set FADE TIME B control to the required value.
4
Move the B MASTER to full. The scene set up on
PRESET B fades up in the specified time.
Manual Fading between Scenes
1
Ensure that the FADE TIME A and FADE TIME B
controls are both set to 0.
2
Set the A MASTER and B MASTER to zero (0%).
3
Set up a scene using the PRESET A faders.
4
Set up a different scene on the PRESET B faders.
5
Set the A MASTER to full. The scene set on the
PRESET A faders will be output.
6
To crossfade to the scene set up on PRESET B,
simultaneously move A MASTER to zero and
B MASTER to full. The operator has direct control
over the speed of the scene change. As the
master faders are moved in tandem the scene set
up on PRESET B will fade in and the scene set on
PRESET A will fade out. The crossfade is dipless.
7
A new scene can then be set up on PRESET A
without affecting the outputs.
8
To crossfade to the new scene on PRESET A,
simultaneously move the A MASTER to full and
the B MASTER to zero. As the master faders are
moved in tandem the scene set up on PRESET B
will fade out and the scene set on PRESET A will
fade in. The crossfade is dipless.
Timed Crossfades between Scenes
1
Set the A MASTER and B MASTER to zero, and
the GRAND MASTER to full.
2
Set up a scene using the PRESET A faders.
3
Set up a different scene on the PRESET B faders.
4
Set the FADE TIME A and FADE TIME B controls
to the times required.
5
Quickly move the A MASTER to full. The scene
on the PRESET A faders will fade in and be output
live. (The time taken for the fade to complete is
determined by the value set on the FADE TIME A
control).
6
To crossfade to the scene on PRESET B, quickly
move the A MASTER to zero and the B MASTER
to full. The scene on PRESET B will fade in and
the scene on PRESET A will fade out in the
selected times.
7
A new scene can then be set up on PRESET A
without affecting the outputs. Adjust FADE TIME A
if required.
8
To crossfade to the scene on PRESET A, quickly
move the A MASTER to full and the B MASTER
to zero. The scene on PRESET A will fade in and
the scene on PRESET B will fade out in the
selected times.
Flashing Channels
1
Ensure that the FLASH FUNCTION is active (the
light in the FLASH ON/OFF button is on).
2
Press and hold down an individual CHANNEL
FLASH button. The channel is added to the scene
at the level set on the GRAND MASTER.
3
Release the CHANNEL FLASH button. The
channel returns to its previous level.
7371200P2/v1
PAGE 3
Desk Operation
Power supply
Level Plus desks can either be powered from an
External Power supply or from the Power Supply from
a Dimmer. One Zero 88 Beta pack supplies enough
power for a Level 24 Plus. Power supplied from a
dimmer via the Analogue connection will also power
the DMX output. Power from an External Power
Supply will power the Analogue and DMX Outputs.
Options Available:
External Power Supply UK Stock No 00-104-11
External Power Supply Schuko Stock No 00-104-21
Level Plus DMX Output Kit Stock No 00-616-00
Analogue Output:
0 to +10V via 8 pin ring locking DIN (6 channels per
DIN connector)
Short circuit proof.
All channels capable of 5mA,
Diode output.
Pins 1 to 6 = channels 1 to 6
Pin 7 = Power in, +20 Volts @ 200mA
Pin 8 = 0V signal ground
External Power Supply Unit:
Separate plug mounted transformer with 4 pin locking
DIN connector
Mains voltage 230V -18% to +10% (190V - 253V)
External PSU Connector:
Pin 1 = +9V DC (Unused on Level Plus desks)
Pin 2 = 0V
Pin 3 = +20V DC @ 200mA (used to power desk)
Pin 4 = not used
DMX Output:
5 pin XLR, not isolated, with voltage protection.
Pin 1 = 0V Signal ground
Pin 2 = 1- DMX drive compliment
Pin 3 = 1+ DMX drive true
Pin 4 & 5 = Not connected
PAGE 4
7371200P4/v1
Technical Specification
External Power Supply Connector.
Viewed from the rear of the desk.
Analogue connector
Viewed from the rear of the desk
DMX connector
Viewed from the rear of the desk

Other Zero88 Controllers manuals

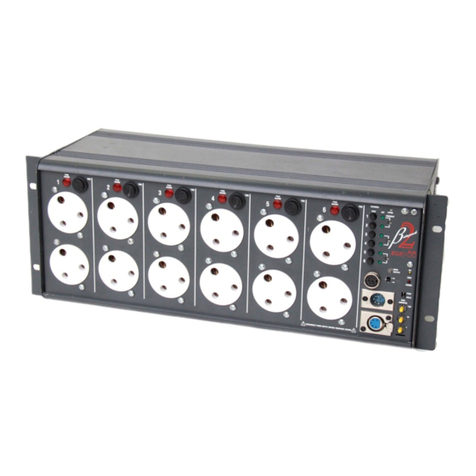
Zero88 Betapack 2 Instruction Manual

Zero88

Zero88 Betapack 2 Instruction Manual

Zero88 Lightmaster XL User manual

Zero88

Zero88 Lightmaster XL User manual

Zero88 Chilli Master User manual

Zero88

Zero88 Chilli Master User manual

Zero88 Solution User manual

Zero88

Zero88 Solution User manual

Zero88 ILLUSION 500 User manual

Zero88

Zero88 ILLUSION 500 User manual

Zero88 ORB Series User manual

Zero88

Zero88 ORB Series User manual

Zero88 Sirius 24 User manual

Zero88

Zero88 Sirius 24 User manual

Popular Controllers manuals by other brands

Rice Lake 880 Performance Series Operation manual

Rice Lake

Rice Lake 880 Performance Series Operation manual

Datapath VSN Series quick start guide

Datapath

Datapath VSN Series quick start guide

Apeks XL4 SECOND STAGE Maintenance manual

Apeks

Apeks XL4 SECOND STAGE Maintenance manual

Hydrovane Pro user manual

Hydrovane

Hydrovane Pro user manual

EasyIO FW-14 V3 instruction manual

EasyIO

EasyIO FW-14 V3 instruction manual

Texas Instruments TMS320C6000 DSP reference guide

Texas Instruments

Texas Instruments TMS320C6000 DSP reference guide

YOKOGAWA Vitesse FA-M3V user manual

YOKOGAWA

YOKOGAWA Vitesse FA-M3V user manual

KRAFTWERK RS1 manual

KRAFTWERK

KRAFTWERK RS1 manual

LuXout Shades Multi-Channel Controller instruction manual

LuXout Shades

LuXout Shades Multi-Channel Controller instruction manual

Vector TCI-W manual

Vector

Vector TCI-W manual

Skov DOL 278T Technical manual

Skov

Skov DOL 278T Technical manual

Oklatech OK310 quick start guide

Oklatech

Oklatech OK310 quick start guide

Rice Lake 1280 Enterprise Series Operation manual

Rice Lake

Rice Lake 1280 Enterprise Series Operation manual

D-M-E VCTB-4000 user manual

D-M-E

D-M-E VCTB-4000 user manual

NOVAK M2 DIG - FIELD GUIDE manual

NOVAK

NOVAK M2 DIG - FIELD GUIDE manual

Dutec I/O Plexer Hardware user manual

Dutec

Dutec I/O Plexer Hardware user manual

Vacon NX_ 0003 5 user manual

Vacon

Vacon NX_ 0003 5 user manual

Danfoss ECL Comfort 110 operating guide

Danfoss

Danfoss ECL Comfort 110 operating guide

manuals.online logo
manuals.online logoBrands
  • About & Mission
  • Contact us
  • Privacy Policy
  • Terms and Conditions

Copyright 2025 Manuals.Online. All Rights Reserved.