manuals.online logo
Brands
  1. Home
  2. •
  3. Brands
  4. •
  5. ZIMCO
  6. •
  7. Boat
  8. •
  9. ZIMCO 15 Quick start guide

ZIMCO 15 Quick start guide

Popular Boat manuals by other brands

Windworks 38' Catalina Reference notes

Windworks

Windworks 38' Catalina Reference notes

J 105 owner's manual

J

J 105 owner's manual

GELEX G500 light user manual

GELEX

GELEX G500 light user manual

Monterey Boats Sport Yacht 330 owner's manual

Monterey Boats

Monterey Boats Sport Yacht 330 owner's manual

PURSUIT OS 335 owner's manual

PURSUIT

PURSUIT OS 335 owner's manual

Boston Whaler CONQUEST 345 owner's manual

Boston Whaler

Boston Whaler CONQUEST 345 owner's manual

Jeanneau SUN ODYSSEY 41 DS owner's manual

Jeanneau

Jeanneau SUN ODYSSEY 41 DS owner's manual

Meridian 490 Pilothouse owner's manual

Meridian

Meridian 490 Pilothouse owner's manual

Advanced Elements AdvancedFrame Expedition AE1009 owner's manual

Advanced Elements

Advanced Elements AdvancedFrame Expedition AE1009 owner's manual

Robo Marine Indonesia GEOMAR user manual

Robo Marine Indonesia

Robo Marine Indonesia GEOMAR user manual

Swallow Boats BayRaider owner's manual

Swallow Boats

Swallow Boats BayRaider owner's manual

X SHORE EELEX 8000 owner's manual

X SHORE

X SHORE EELEX 8000 owner's manual

Crivit DINGHY Instructions for use

Crivit

Crivit DINGHY Instructions for use

Mercury Sport 220/240 manual

Mercury

Mercury Sport 220/240 manual

Marquis 720 FLY owner's guide

Marquis

Marquis 720 FLY owner's guide

Sportime Seestürmer user manual

Sportime

Sportime Seestürmer user manual

Sportime Seestürmer user manual

Sportime

Sportime Seestürmer user manual

Raymarine ST70 Instrument User reference handbook

Raymarine

Raymarine ST70 Instrument User reference handbook

manuals.online logo
manuals.online logoBrands
  • About & Mission
  • Contact us
  • Privacy Policy
  • Terms and Conditions

Copyright 2025 Manuals.Online. All Rights Reserved.

Zim 15 Rigging Guide
The Zim 15 comes ready to rig and sail. With all of the deck mounted fittings factory installed, all you
need to do is step the mast and go sailing. The goal of this guide is to take you, step-by-step, through
the rigging process to allow you to enjoy your new Zim 15. In addition, we go through the steps to easily
unrig the boat for proper trailering and storage. If you have any questions please send us an email at
[email protected]om or contact our office directly (401) 237-6117.
1. Install shrouds and forestay by turning the wide end of the shroud vertical to be inserted into
the slot on the mast.
a. The shroud keeper is already in the spreader, remove the clevis pin, remove the keeper,
insert shroud into the keeper, replace the keeper, replace the clevis pin ring ding side
down, and tape the spreader ends.
Note: the keeper should have the open side facing forward.
2. Step mast
a. The mast comes completely rigged and ready to be stepped into the boat.
b. Make sure that the Cunningham and vang controls are aft of the mast step.
i. The forward deck should be clear except for the forestay adjustment
c. Attach forestay as seen in the image by removing the clevis pin from the end of the
forestay and reinserting it through the plate on the forestay adjustment line.
d. Attach shrouds by removing the clevis pin, and reinserting it through the pad eye on the
rail.
3. Attach boom
a. Undo the pin on the gooseneck and put it through the universal on the boom.
Mind the metal washer on the gudgeons, it should rest on the bottom
gudgeon.
4. Attach gnav
a. Undo the pin on the gooseneck and put it through the end of the gnav.
b. Run control line from the end of the boom and tie a bowline to the becket of the block
from the blue gnav deck gear.
5. Attach the tack of the jib with the shackle and then bend on jib via the plastic hanks.
6. Attach jib halyard
7. Attach jib sheets and run them through the cars, to the turning block, and through the cam cleat
8. Insert dangle pole control line to the attachment point at the clew and secure with a stopper
knot.
a. Run control line down the port side of the mast,
through the small fairlead on the port side at the base of
the mast, through the cam cleat, and into the cockpit.
9. Rig main sheet. The block mounted on the deck is
a ratcheting block. Be sure to run the mainsheet
through so that the ratchet activates while trimming
in.
10. Slide main clew slug into opening in track and aft down the boom.
11. Secure the outhaul by not removing the knot and passing it through the clew of the main and
into the securing clip on the starboard side of the end of the boom. Or you can secure it by tying
a bowline around any fixed point on the end of the boom.
12. Slide boom protector around the mainsheet and into the track on the boom.
13. Attach main halyard
Note: when going to hoist the main, connect Cunningham hooks prior to
full hoist, one on either side.
14. Attach the tack of the main with the Velcro straps by taking the longer strap around the mast
and UNDER the traveler for the dangle pole. Pass it through the d-ring on the port side and
double it back securing it to itself. Finish it off by securing the top strap over bottom strap.
15. Put on rudder
a. Remove ring ding and pin.
b. Slide tiller under the main bridle.
c. The rudder gudgeons sit on top of the transom gudgeons.
d. Replace pin and ring ding.
Zim 15 Breakdown for transport
1. Begin by removing the rudder
a. Keep the pin with the rudder.
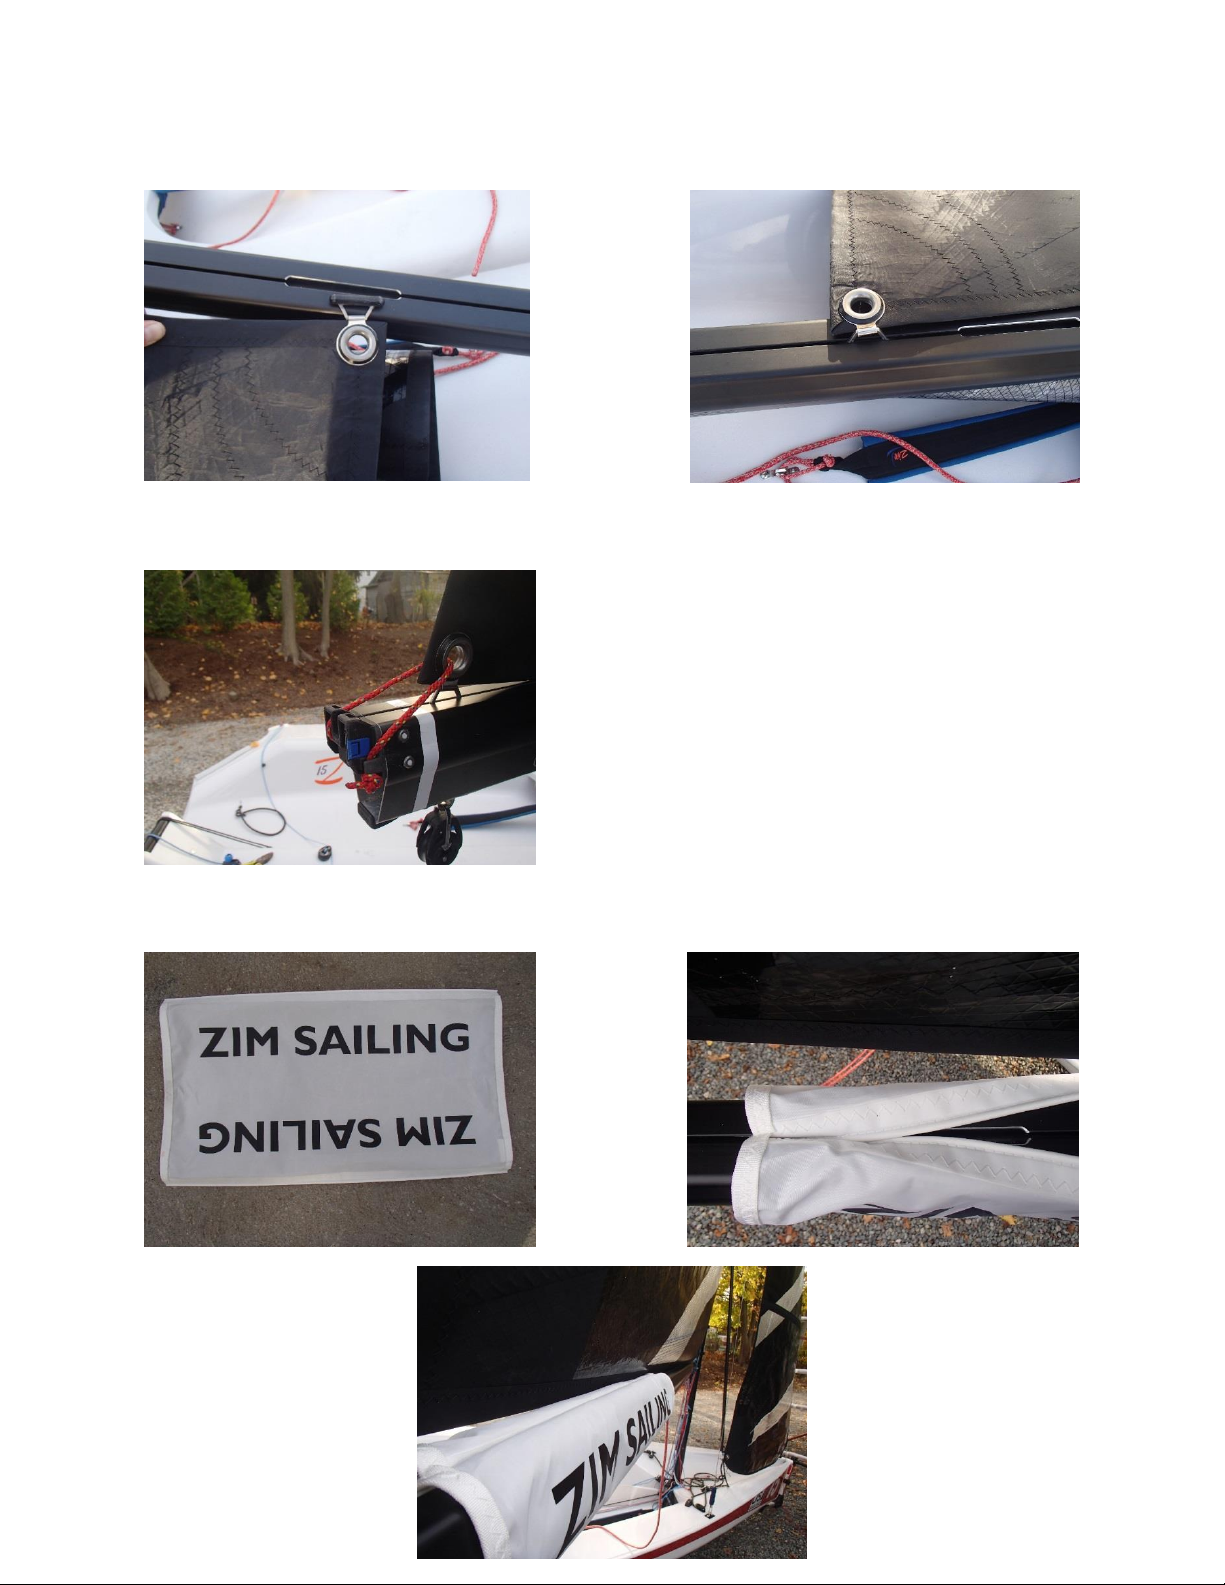
2. Mainsheet/ boom cover
a. Remove the mainsheet and the boom cover. Coil and stow.
3. Cunningham
a. De-rig the cunningham by removing the two hooks from either side of the mainsail.
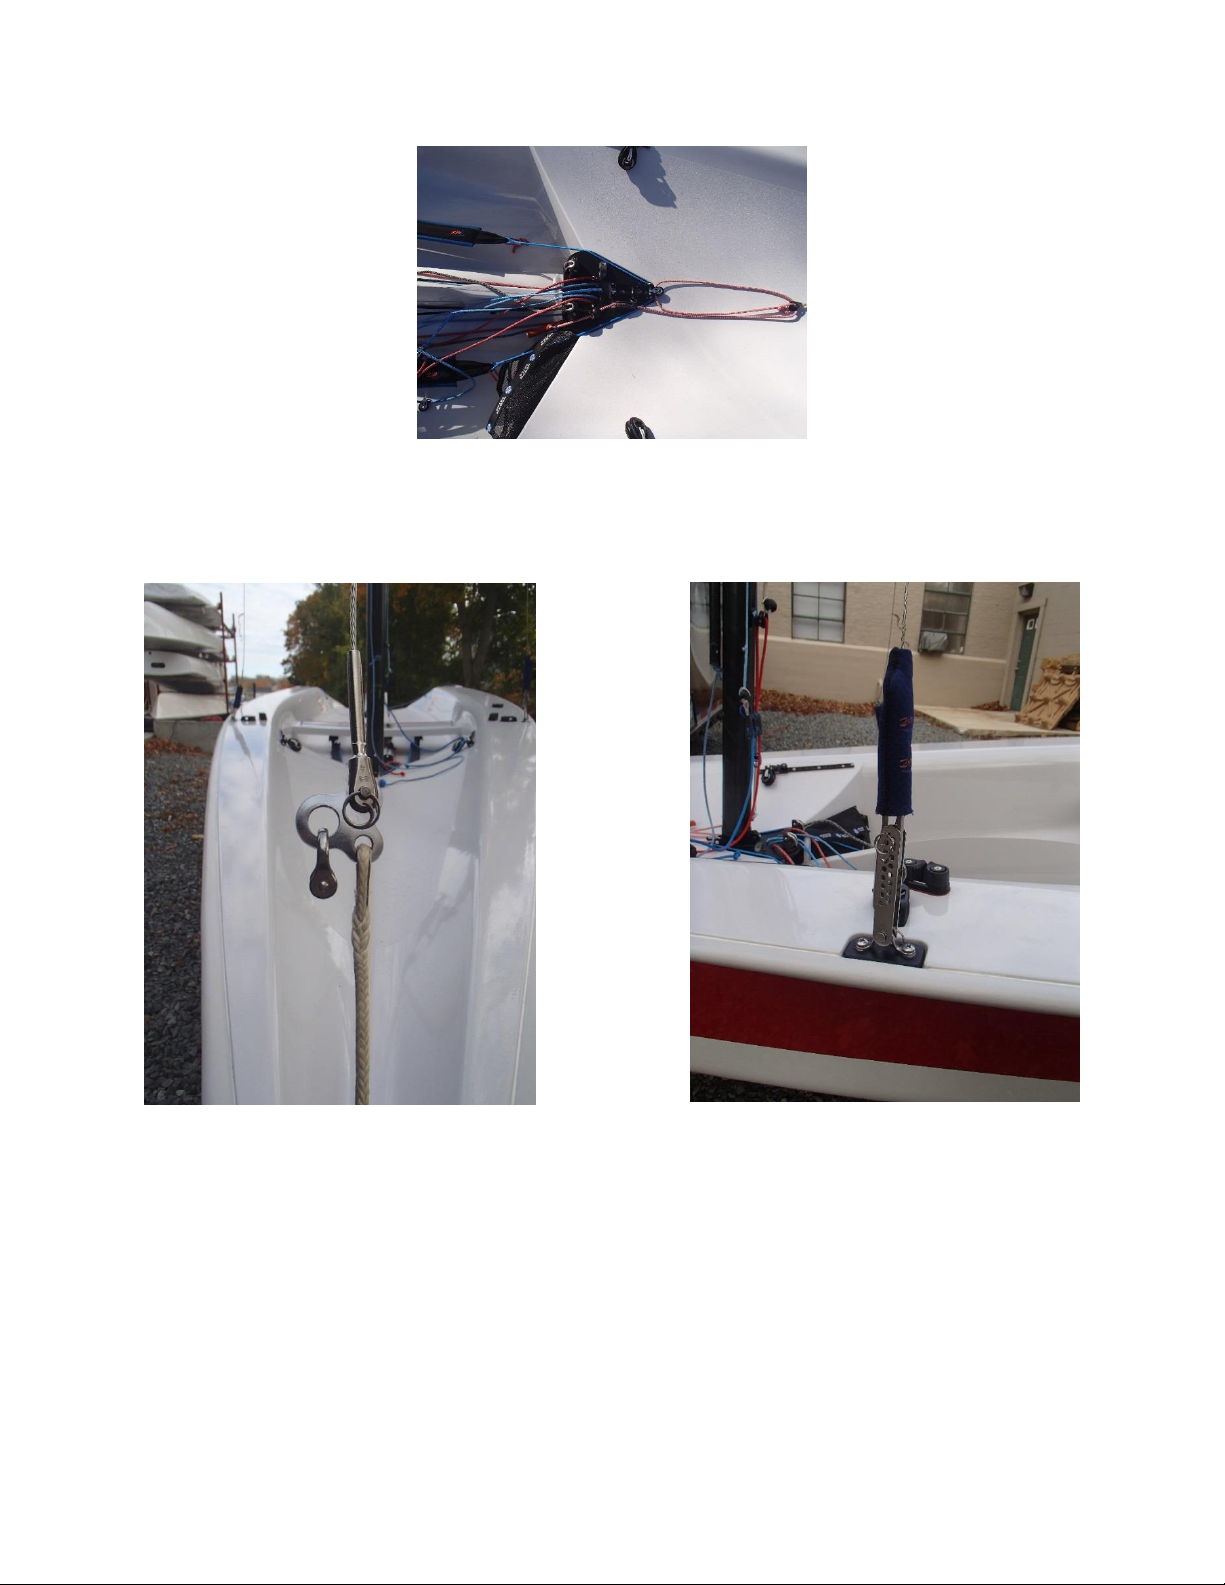
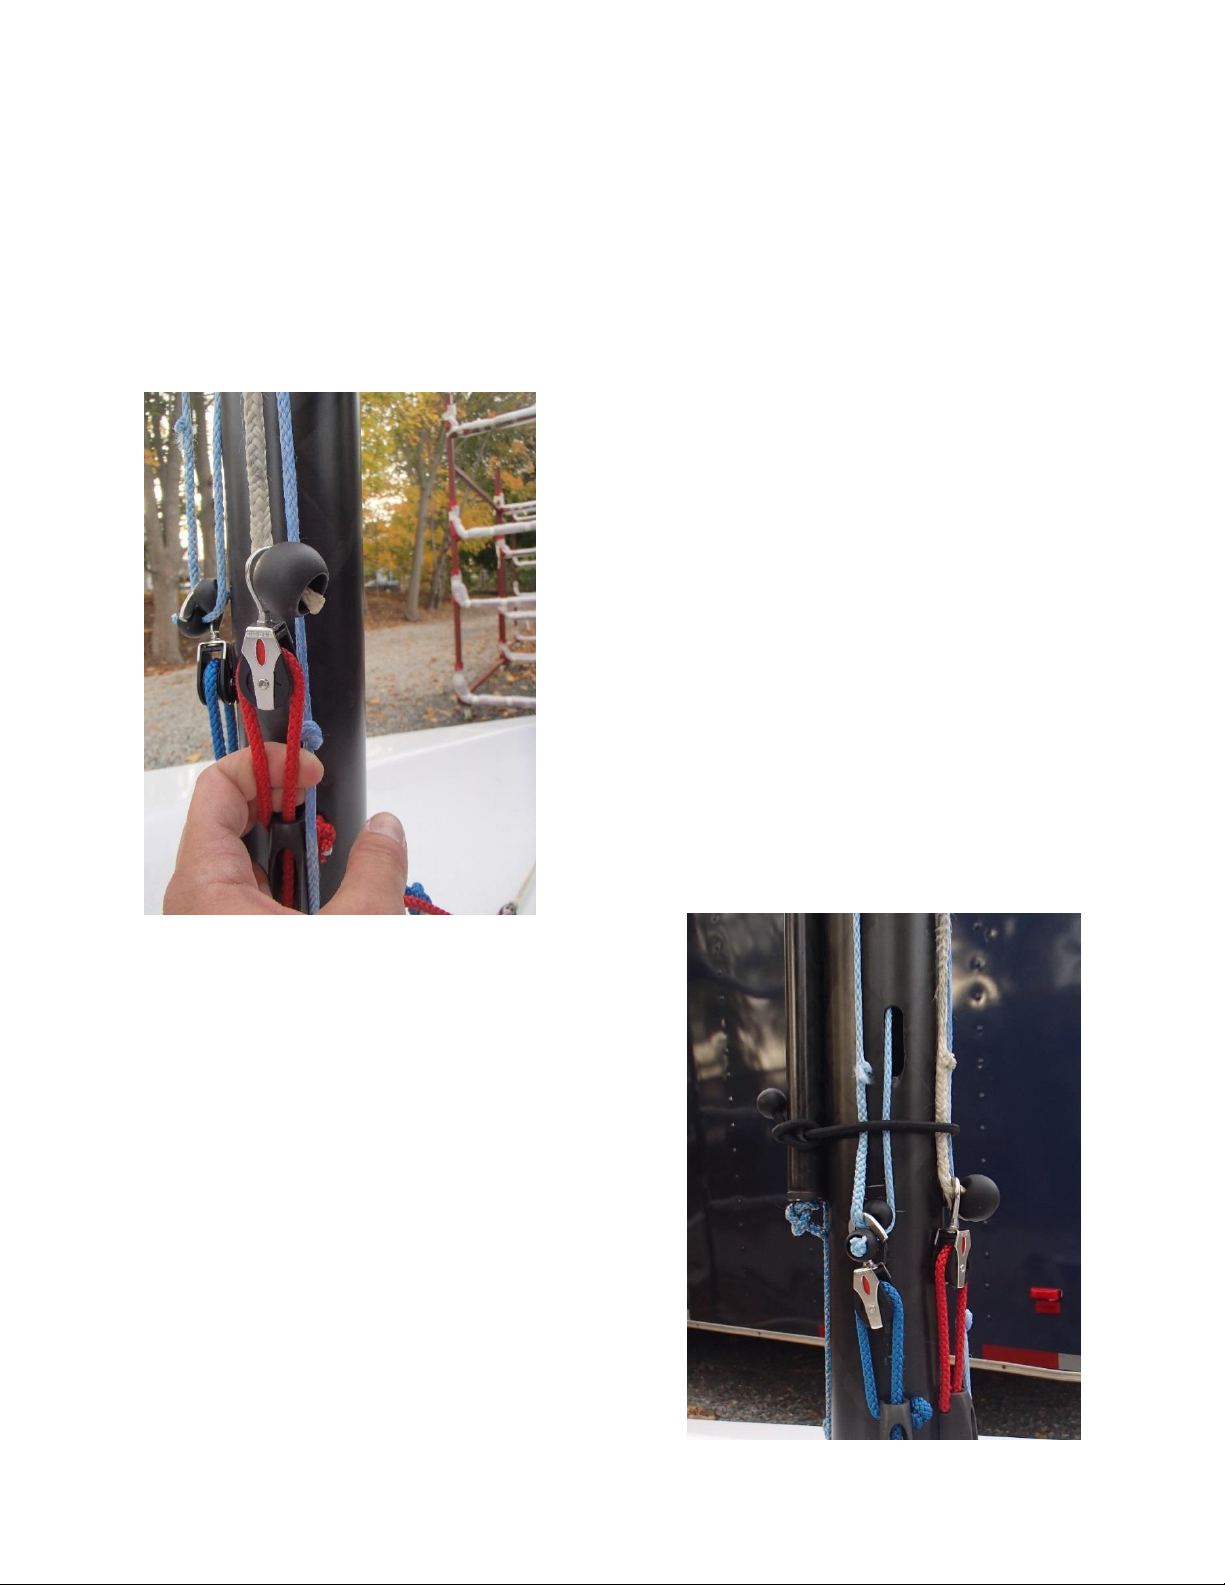
4. Mainsail
a. Lower the main sail by removing the downhaul hook
from the halyard, and easing while applying some
downward pressure on the luff of the sail.
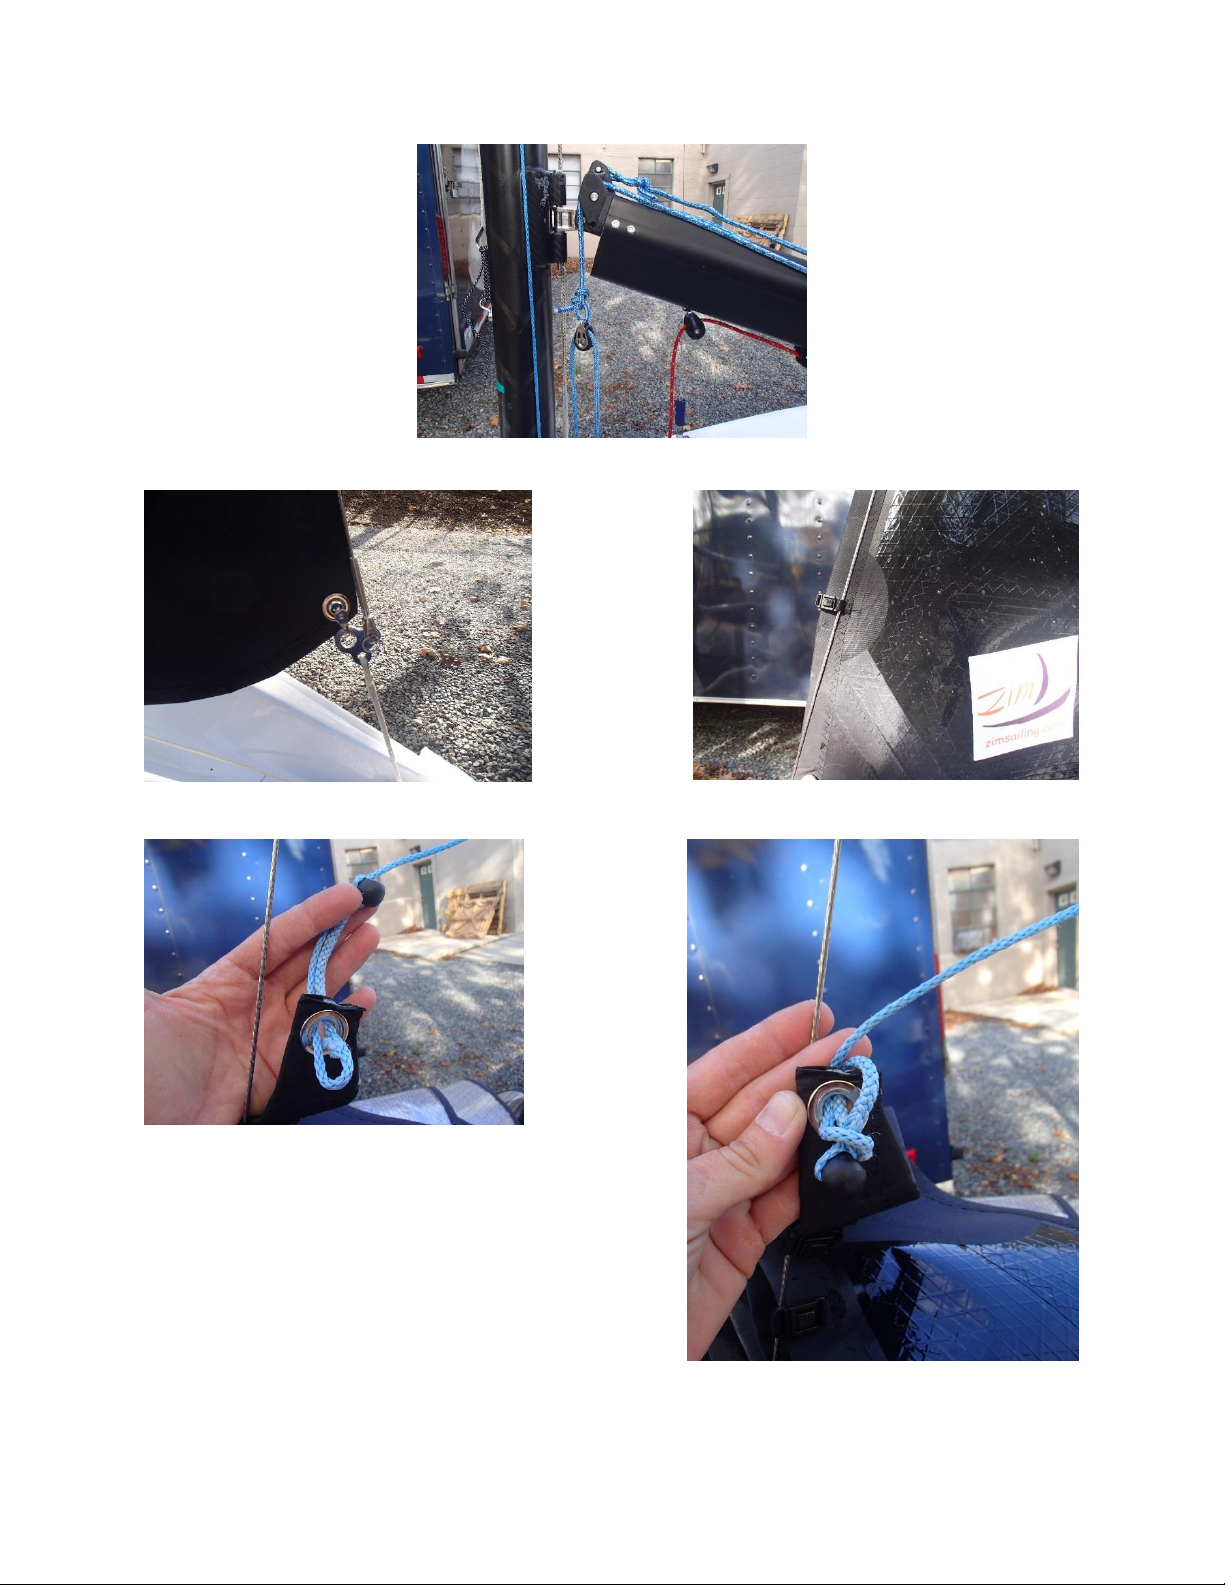
b. Untie the halyard from the head of the sail and use the
red main downhaul hook to secure the stopper ball on the
top of the halyard and tension from the jam cleat.
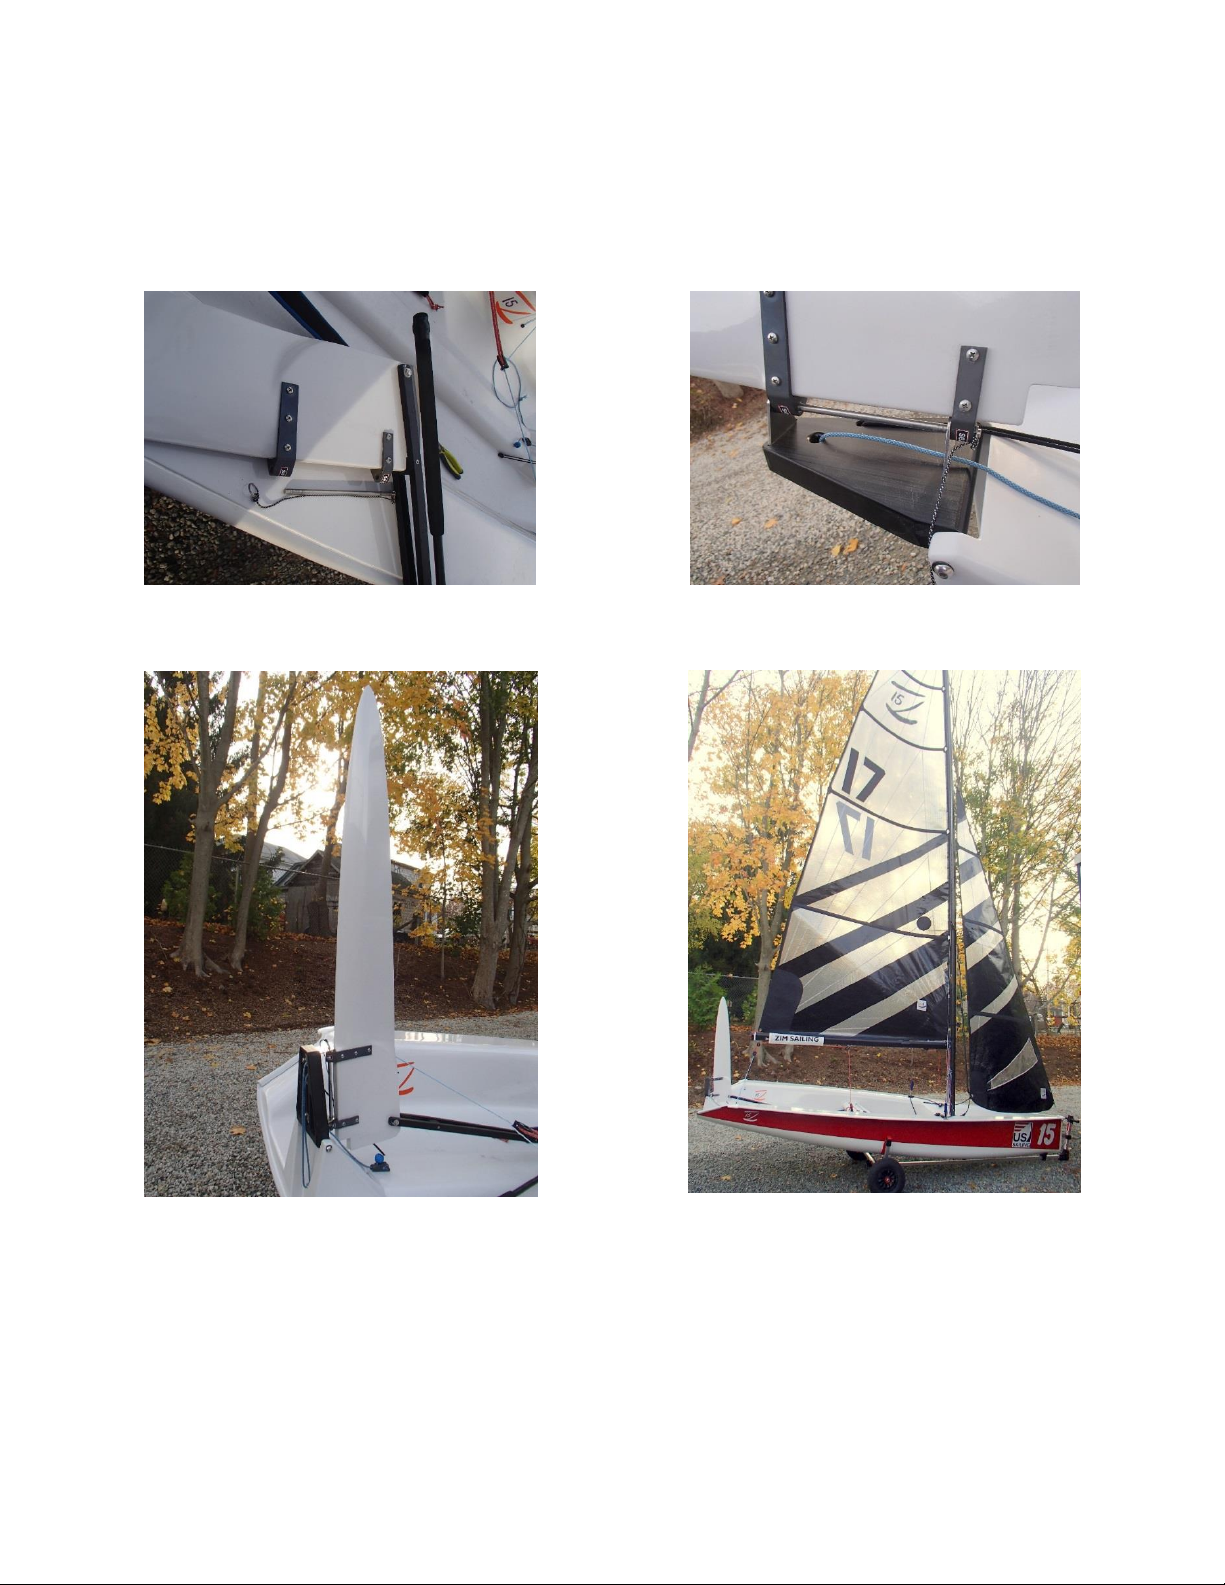
5. Jib/ dangle pole
a. Untie the dangle pole control line from
the clew of the jib.
i. Remove the control line entirely
from the deck gear on the port
side of the base of the mast.
ii. Secure the blue control line
around the base of the mast.
iii. Use the knotted end of the
bungee from the dangle pole to
secure the pole flat against the
mast.
b. Release the jib halyard from the jib cunningham and
lower sail.
c. Remove the hanks on the jib from the forestay and
release the tack of the sail.
d. Leave tack shackle on the boat.
e. Remove the halyard and secure both stopper balls, from
the top and bottom of the halyard, with the blue jib
cunningham hook and tension from the jam cleat.
6. Roll sails separately from the head
7. Boom/ gnav
a. Remove the gnav, first, by removing the clevis pin. Keep the pin in the gooseneck on the
mast.
b. Disconnect gnav control line from the
bowline tied around the becket on the
block.
c. Remove the boom by removing the pin
from the universal join. Keep the pin with
the mast.
8. Secure halyards
a. With the ends of the spectra halyards
already secured, take the excess red and
blue from the downhaul and the jib
cunningham and wrap and secure around
the base of the mast.
b. You are now ready to remove the mast
from the boat.