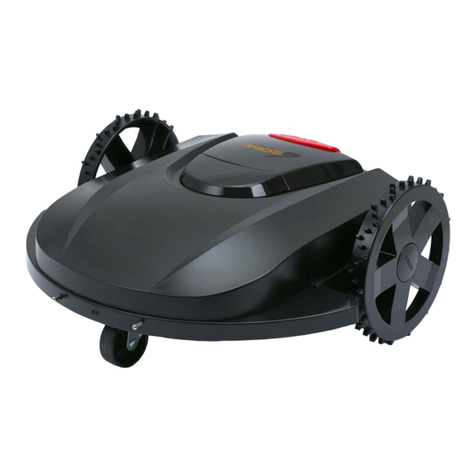
Zoef Robot Teun User manual

MT300Z & MT500Z
ROBOT LAWNMOWER
Teun & Katrien
Handleiding
Gebrauchsanweisung
User Manual
Manuel de l'Utilisateur
Zoef Robot BV
Snelliusweg 40-22
6827Dh Arnhem
service@zoefrobot.nl

2 3
English ........................................................................05
Francais ........................................................................31
Deutsch ........................................................................57
Nederlands ........................................................................83
Index

4 5
In order to speed up your enquiry, we would like you to provide your robotic
lawnmower model number and serial number before contact after sales service.
You can write the model number and serial number below:
How to find model number and serial number.
62
02
MANUAL
model number
Model
number:
Serial
number:
EN
After sales services
Serial Number

7
04
EN
EN
SAFETY INSTRUCTIONS
IMPORTANT
READ CAREFULLY BEFORE USE
KEEP FOR FUTURE REFERENCE
1. General
This annex presents safe operating practices for all machine types covered by this
standard. The instruction handbook should include, where appropriate, the substance
of the following clauses of this annex.
It should also include information concerning noise levels and any necessary
warnings, together with the following:
2. Safe operating practices
2.1 Training
a. Read the instructions carefully. Be familiar with the controls and the proper
use of the machine.
b. Never allow people unfamiliar with these instructions or children to use the
machine. Local regulations may restrict the age of the operator.
c. The operator or user is responsible for accidents or hazards occurring to other
people or their property.
2.2 Preparation
a. Ensure the correct installation of the automatic perimeter delineation system as
instructed.
b. Make sure your grass is no longer than 4" or 100mm, if longer, use a regular
lawnmower or grass trimmer to cut it.
c. Periodically inspect the area where the machine is to be used and remove all
stones, sticks, wires, bones, and other foreign objects.
d. Periodically visually inspect to see that the blades, blade bolts and cutter
assembly are not worn or damaged. Replace worn or damaged blades and bolts in
sets to preserve balance.
e. On multi-spindle machines, take care as rotating one blade can cause other
blades to rotate.
3. Operation
3.1 General
a. Never operate the machine with defective guards, or without safety devices,
for example, deflectors and/or grass catchers, in place.
b. Do not put hands or feet near or under rotating parts. Keep clear of the
discharge opening at all times.
c. Never pick up or carry on machine while the motor is running.
d. Remove (or operate) the disabling device from the machine:
- before clearing a blockage;
- before checking, cleaning or working on the machine.
3.2 Additionally when the machine is operating automatically
Do not leave the machine to operate unattended if you know that there are
pets, children or people in the vicinity.
3.3 Additionally when using the manual controller
a. Mow only in daylight or in good artificial light.
b. Avoid operating the machine in wet grass.
c. Do not operate the machine when barefoot or wearing open sandals. Always
wear substantial footwear and long trousers.
d. Always be sure of your footing on slopes.
e. Use extreme caution when reversing the machine towards you.
f. Always switch on the motor according to instructions with feet well away
from the blade(s).
4. Maintenance and storage
a. Keep all nuts, bolts, and screws tight to be sure the machine is in safe working
condition.
b. Check the grass catcher frequently for wear or deterioration.
c. Replace worn or damaged parts for safety.
d. Ensure that only replacement cutting means of the right type are used.
e. Ensure that batteries are charged using the correct charger recommended by
the manufacturer. Incorrect use may result in electric shock, overheating or
leakage of corrosive liquid from the battery.
f. In the event of leakage of electrolyte flush with water/neutralizing agent, seek
medical help if it comes into contact with the eyes, etc.
g. Servicing of the machine should be according to manufacturers’ instructions.
6

8 9
0
These symbols can be found on the product. Study them carefully
EN
SAFETY SYMBOLS
Battery Pack and Charger
Before charging, read the instruction. Ensure your charger is matching the local AC
supply, ensure the connection between the battery charger and battery pack is
right models. Longer life and better performance can be obtained
if the battery pack is charged when the air temperature is between 18°C and 25°C.
Do not charge the battery pack in air temperatures below 5°C, or above 40°C.
This is important as it can prevent serious damage to the battery pack.
SAFETY WARNINGS FOR BATTERY PACK INSIDE THE TOOL:
1. Do not dismantle, open or shred battery pack.
2. Do not short-circuit a battery pack. Do not store battery packs haphazardly in a box
or drawer where they may short-circuit each other or be short-circuited by
conductive materials. When battery pack is not in use, keep it away from other
metal objects, like paper clips, coins, keys, nails, screws or other small metal
objects, that can make a connection from one terminal to another. Shorting the
battery terminals together may cause burns or a fire.
3. Do not expose battery pack to heat or fire. Avoid storage in direct sunlight.
4. Do not subject battery pack to mechanical shock.
5. In the event of battery leaking, do not allow the liquid to come into contact with
the skin or eyes. If contact has been made, wash the affected area with copious
amounts of water and seek medical advice.
6. Seek medical advice immediately if a cell or battery pack has been swallowed.
7. Keep battery pack clean and dry.
8. Battery pack gives its best performance when it is operated at normal room
temperature (20 °C ± 5 °C).
9. Recharge only with the charger specified by manufacturer. Do not use any
charger other than that specifically provided for use with the equipment. A charger
that is suitable for one type of battery pack may create a risk of fire when used with
another battery pack.
10. Do not use any battery pack which is not designed for use with the equipment.
11. Keep battery pack out of the reach of children.
12. Retain the original product literature for future reference.
13. Dispose of properly.
14. Exhausted batteries are to be removed from the appliance and safely disposed
of.
15. If the appliance is to be stored unused for a long period, the batteries should be
removed.
16. do not use modified or damaged batteries
WARNING: Read the user instructions before
operating the product.
WARNING: Disable the product before working on
or lifting the machine.
WARNING: Keep a safe distance from the machine when
operating. Keep your hands and feet away from the rotating
blades.
WARNING: Do not ride on the machine. Never put
your hands or feet close to or under the machine.
Use a detachable power supply as defined on the
rating label next to the symbol.
CE conformity mark.
Noise emission to surroundings. The product’s emissions are
set out in technical data on page 14 and on the rating plate.
It is not permitted to dispose this product as normal
household waste. Ensure that the product is recycled in
accordance with local legal requirements.
The low voltage cable must not be shortened, extended or
spliced. Do not use a trimmer nearby the low voltage cable.
Be careful when trimming edges where the cables are placed.

10 11
S
on battery pack
on charger
EN
Read the user instructions.
Do not discard the battery into fire and do not expose
the battery to a heat source.
Do not immerse the battery into water.
Recyclable mark.
It is not permitted to dispose this battery pack as normal
household waste. Ensure that the battery pack is recycled
in accordance with local legal requirements.
Read the user instructions.
SMPS (Switch mode power supply unit)
Double insulation.
SMPS (Switch mode power supply unit) incorporating a
short-circuit-proof safety isolating switching power
supply.
It is not permitted to dispose this battery pack as normal
household waste. Ensure that the battery pack is recycled
in accordance with local legal requirements.

12
12
11
afet
12
EN
PACKAGING CONTENTS
Necessary tools
WARNING: Read all safety warning and all instructions, Failure to follow the
warnings and instructions may result in electric shock, fire and/or serious injury.
Carefully read the instructions for the safe operation of the machine, save all
warnings and instructions for future reference.
How to install your robotic lawnmower:
The installation of your robotic lawnmower is easy.
The entire process only takes a little time, depending on the size of your garden.
Robotic lawnmower mow
Your lawnmower is designed to mow regularly, maintaining a healthy and better
lawn than before. Depending on the size of your lawn, your lawnmower may be
programmed to operate at any time or frequency with no restrictions, it is here to
work for you.
Preparation
Before starting the installation process, read through this entire installation guide
carefully. Sketch the working area, including all obstacles, to make it easier to see
the ideal positions for the charging base and where the boundary wires should be.
Robotic lawnmower Charging Base
Wire pegs
Boundry wire reel
Base fitting nails
Power adapter Distance guide
Installation manual
Scissors Hammer Tape measure

14 15
1
14
EN
Model: Teun Katrien
Max. Cutting area 300m 500m
Voltage 20V
No load speed 2800rpm +/- 100rpm
Cutting diameter 100m / 130mm
Cutting height 20-60mm
Max. slope % 35%
Narrowest possible passage 0,8 meter
Battery type/ mode Lithium-ion /2.0Ah LBF202E
Charging time 120 min
Charger type Input: 100-240V 50/60Hz, 28W
Output: 20.5V - 1.1A
IPX7
Robot protection IPX5
Charger protection IPX4
Noise <55dB
(200/14/EG amended on 2005/88/EG, Appendix III)
APP Wifi - Bluetooth 4.0
Accessoires
Boundry wire 100 m 130 m
Wire pegs 130 pieces 180 pieces
Charging base 1 piece
Battery pack 1 (LBF202E)
Charger 1 piece
Technical data and noise data *Voltage measured at no load initial battery voltage reaches voltage maximum of 20
volts. Nominal voltage is 18 volts.
*a degree of noise from the machine is not avoidable. Route noisy work is to be
licensed and limits for certain periods. Keep rest periods, they may need
to restrict the working hours to a minimum. For their personal protection of
people working nearby, an appropriate hearing protection shall be worn.
*We recommend that you purchase genuine accessories listed in the above list from
www.zoefrobot.nl. Refer to the accessory packaging for further
details. Zoef Robot service can assist you and offer advice.

16 17
case 1
case 2
1
2
3
4
5
16
EN
Installation
Installation of charging base
1.1 The charging base can be placed against Near the tool house OR house, when
laying the boundary wire, leave at least 1m of straight wire with no obstacles front of the
charging base.
NOTE: Boundary wire front of the charging base should be straight for 1m without
corners or obstacles to ensure proper docking. The charging station must be positioned on
relatively level ground. It must not be positioned on an inclined surface or anywhere that
makes its plate bend.
1.2 We recommended the Power supply placed the wall at least 30cm height, and the
power supply cord is outside the lawnmower working area. If not, you may bury it if
desired.
1.3 Stripping boundary wire about 10mm one end
1.4 Boundary wire insert the wire terminal(RED)----it’s an OUT side, then the
boundary wire through the slot under the charging base plate.
1.5 When you laying boundary wire the working area loop, cut off unnecessary
wire, Stripping boundary wire about 10mm the other end, insert the other wire
terminal(Black)---it’s an IN side.
2. Installation boundary wire (NOTE)
2.1 When laying the boundary wire, use the distance gauge to keep a 30cm* space
between the wire and perimeter. Each wire peg should be placed around 80cm apart, use
the provided distance gauge to ensure proper installation. The ground is uneven area, the
peg density can be increased appropriately.
NOTE: the maximum permitted length for the boundary wire is 300m.
Services apres
Place the charging station correctly. The robot must drive to the right when you
are standing in the field and looking at the charging station.

18 19
6
7
11
12
13
35cm
MAX.35%slope
(20°)
100cm
Length
14
17
15
16
18
Elevation
EN
2.2 If the edge next to the lawn is level with the grass and is safe for the robotic lawnmower
to drive over, such as a driveway or sidewalk, only 8 cm of space is needed between
the obstacle and the boundary wire.
2.3 Island setting and narrow channel size requirements
NOTE: if you do not want lawnmower to go your lawn area. such as flowers, shrubs, tree
and so on, you can laying the boundary wire set island. As shown in the figure 8, the
lawnmower can pass through a narrow passage 0.8 m wide.
2.4 Ensure the boundary wire is perfectly straight in each corner, and all
angles formed by the boundary wire are 90°or larger
2.5 Slopes
NOTE: your lawnmower has the ability to safely climb slopes up to 35% (20°) so just
avoid areas steeper than this.
How to calculate the slope of your lawn:
The boundary wire on slopes as shown in the figure 12,13.
3. Connect charging base to the power source
The power supply Plug in the voltage socket, if you laying boundary wire is right
the charging base LED light turn on and it always bright green, LED status in the
grid below to make sure the connection is ok.
LED status Status Actie
Robot doesnt turn on There is no power Check with the network adapter properly
is connected to the charging station and
on the wall socket/socket.
Green LED on Boundry wire is N/A
connected right; mower
is fully charged
Green LED flashing Charging N/A
Red LED flashing The boundary wire Check if the two ends of the boundary wire
is not connected are connected coorectly to the base station.
or is broken/ Check if the boundary wire is not broken or
damaged damaged.

20 21
18
19
Bluetooth
icon
Times
setting
icon
Password
setting icon
Trun
on/off
Start
working/
Turn up
Wifi icon
88
88
HOME
Power icon
Comfirm
START
OK
Back to
statio
n
/Turn down
20
21
HO ME
START OK
4
HO ME
START OK
5
0- --
HO ME
START OK
X4
2
00 00
HOM E
START OK
3
88 88
HO ME
START OK
1
20
20
HOME
08
25
HOME
13
25
HOME
START
START
START
OK
OK
OK
0-
--
HOME
12
34
HOME
Id
lE
HOME
HOME
START
START
STARTSTART
OK
OK
OK
OK
EN
4. Test the installation
Adjust the cutting height to its maximum level (60mm) for first mow. Place
your lawnmower inside the working area, work for a while, then check boundary
wire properly, check whether the lawnmower go back to the charging station along
the boundary wire. When the lawnmower successfully returns to the charging base,
the installation has been completed successfully!
1) After the boundary wire installation, you can start the lawnmower
(Please refer to Installation Guide for boundary wire installation).
2) Press POWER ON/OFF until lawnmower turns on. For the first use,
input the default PIN code 0000 by pressing OK for four times when the number 0 is
blinking. (The PIN code can be changed, please refer to “Setting” in the Installation
Guide).
NOTE: lawnmower will turn off if it does not receive any input within 30
seconds after it is turned on.
If you enter wrong PIN code ten times, lawnmower will raise a beeping alarm
and then turn off.
3) Press START, then press OK to start mowing.
4) Press HOME then OK the robot will back to charging station.
lawnmower will work continuously until reaching low battery power level
and then it will return to the charging base. Once charging is completed,
lawnmower will automatically resume mowing or it stay in the charging.
6. Setting
6.1 Change PIN code
To change the PIN code, keep pressing START and HOME buttons at the same time
f or 3 seconds than “PIN 1” will flash, that means you have to enter the OLD PIN.
Use “START” and “HOME” buttons to select the numbers and press “OK” to confirm.
After you have confirmed your old PIN, “PIN2” will flash on the display. Use the same
method to input the new PIN and press one more time “OK” to confirm, if “IDLE” will
be on the display means that the new PIN is set correctly
6.2 Set year, date and time
Set year, date and time are compulsory setting items. If you don’t set these items, it
will influence the schedule time in the following setting. These items should be set
in the order of year, date and time. For year, date and time setting, keep pressing
“START” button for 5 seconds until a number will blinking on the display. Use
“START and “HOME” buttons to selects year, date and hour and press “OK” to
confirm. Once you input all information’s requested press “OK” one more time and
“IDLE” will appear on the display, it means that you have correctly set year, data and
hour.
Only for reference:
Only for reference:
5. Quick Start

22 23
13
25
HOME
id
lE
HOME
START
START
OK
OK
id
2
lE
HOME
06
H
HOME
START
START
OK
OK
EN
6.3 Change default start time
The default start time of 9:00 can be changed to anytime by keep pressing “START”
and “OK” buttons at the same time for 3 seconds. When the first number is flashing
on the display you can use “START” and “HOME” buttons to select the new start
time and press “OK” to confirm. If “IDLE” will
6.4 Change default Mowing time per day
The default cutting time is 8 hours per day, you can change it to 1-24 hours. Press
“OK” button for 3 seconds, when the first number will flashing on the display use
“HOME” and START” buttons to set a number from 1 to 24 and set how may hours
you want your lawnmower operate in your lawn. Press "OK" to confirm. If "IDLE"
appear on the display the new working time is correctly set.
6.5 Change default mowing time per week
The default cutting time per week 5 day, you can be change to 3 or 7 day, keep.
Press "HOME" and “OK” buttons for 3 seconds, when the first number will
flashing on the display use “HOME” and START” buttons to set a number
from 03 to 07 and set how may days per week you want your lawnmower
operate in your lawn. Press "OK" to confirm. If "IDLE" appear on the display
the new working time per week is correctly set.
7. Function and Error messages self-checking list
Display Status Action
F1 Rain delay activated No action required
E1 Lwanmower outisde 1. Check if the lawnmower is inside the
working area working area.
2.Check if the charging base is porpperly
connected to charger and to the boundary
wire. If yes, the wires are clamped in reverse.
E11 No Boundry signal If the robot is inside the working area and the
charging station light is RED, the wires are not
connected correctly. If it is connected correctly
check whether the wie is interrupted or not.
E2 Wheel motor blocked 1. Turn the mower off and take it to an obstacle
free area.
2. Turn the mower back ond and press OK.
3. If the error message is still displayed, turn the
mower off and check if there is something
preventing the wheels from moving.
4. Remove any obstruction, turn the mower
back upright. Press START then OK.
E3 Blade disc locked 1. Turn the mower off. Turn the mower upside
down and check if there is something
preventing the blades form rotating.
2. Remove any obstruction.
3. Turn the mower upright and take it to an area
with short grass, or adjust the cutting height.
4. Turn the mower on. Press START then OK.
E4 Obstruction sensors 1. Turn lawnmower off. Take it to an area free
are triggerd of obstacles.
2. Remove the floating cover and check the
cylindrical magnet. If there is no magnet,
replace the cover.
3. Turn power on. Press START then OK.
E5 The lawnmower is lifted 1. Turn the mower off. Take it to an area free
of obstacles.
2. Turn the mower on. Press START then OK.
3. If the error message is still displayed; turn
the power off, turn the mower upside down
and check if something prevents the front
wheel axle from moving.
4. Remove any obstruction, turn the mower
back upright. Turn the power on. Press START
then OK.

24 25
2
EN
Display Status Action
F1 Rain delay activated No action required
E1 Lwanmower outisde 1. Check if the lawnmower is inside the
working area working area.
2.Check if the charging base is porpperly
connected to charger and to the boundary
wire. If yes, the wires are clamped in reverse.
E11 No Boundry signal If the robot is inside the working area and the
charging station light is RED, the wires are not
connected correctly. If it is connected correctly
check whether the wie is interrupted or not.
E2 Wheel motor blocked 1. Turn the mower off and take it to an obstacle
free area.
2. Turn the mower back ond and press OK.
3. If the error message is still displayed, turn the
mower off and check if there is something
preventing the wheels from moving.
4. Remove any obstruction, turn the mower
back upright. Press START then OK.
E3 Blade disc locked 1. Turn the mower off. Turn the mower upside
down and check if there is something
preventing the blades form rotating.
2. Remove any obstruction.
3. Turn the mower upright and take it to an area
with short grass, or adjust the cutting height.
4. Turn the mower on. Press START then OK.
E4 Obstruction sensors 1. Turn lawnmower off. Take it to an area free
are triggerd of obstacles.
2. Remove the floating cover and check the
cylindrical magnet. If there is no magnet,
replace the cover.
3. Turn power on. Press START then OK.
E5 The lawnmower is lifted 1. Turn the mower off. Take it to an area free
of obstacles.
2. Turn the mower on. Press START then OK.
3. If the error message is still displayed; turn
the power off, turn the mower upside down
and check if something prevents the front
wheel axle from moving.
4. Remove any obstruction, turn the mower
back upright. Turn the power on. Press START
then OK.
Display Status Action
E6 Rollover sensor has Turn the mower upright. Press Start
been triggered then OK.
E7 Tilt sensors have been 1. Turn the mower off
triggered 2. Take the mower to a flat ground in
your lawn.
3. Turn the mower on. Press START
then OK.
E8 Charging docking 1. Check if the boundry wire is straight for 1m
unsuccesfull from the charging base.
2. The charging station must be positioned
on relatively level ground. It must not be
positioned on an inclined surface or anywhere
that makes the plate bend.
BP Battery pack 1. Check the battery temperature. Is the temperature
temperature protection to high, wait until it has cooled down. Is the
temperature too low, wait till it has reached 5 degrees.
2. Is the error message still displayed, replace the old
battery with a new one.
EE Error unknown 1. Restart lawnmower. Press START then OK.
2. Is the message still displayed, contact customer
support.
8. Software update
Katrien: Software updates can be performed via the app by going to settings/
Firmware update and tap 'check for updates'.
Teun:
The software can be updated when new versions are available.
Update via USB; The latest software can be sent via customer service.
See below for download and installation instructions:
(1) Send an email to service@zoefrobot.nl. You will receive a file. Save the file to an empty FAT32
formatted USB (flash drive). Delete any other files on the drive and check the format. If the drive
is not formatted in FAT32, reformat the drive.
(2) Place the mower on a safe and level surface. Press the ON/OFF button to turn off your
mower
(3) Insert the USB drive (flash drive) into the port. (See Fig. on the next page)
(4) Turn on the mower. The update starts automatically. Wait until OK appears on the display
appears, then remove the USB drive (flash drive) and close it firmly with
the protective cap.
(5) The manual supplied with your mower is based on the software version
during production. Some new features/functions in the new version exist
may not be the manual.
9 Maintenance
Your mower works hard and needs to be cleaned and checked from time to time.
Some parts need to be replaced when they are worn out. Switch off the machine before
performing service or maintenance. Here you can read how to best maintain the robotic
lawnmower.
9.1 Keep it sharp
WARNING: Before cleaning, adjusting or replacing the blades, turn your mower OFF and put
on protective gloves.
WARNING: When installing new blades, make sure that all blades are
replaces. It is not mandatory to replace all screws, but it is wise and
necessary if they are damaged.
It is important to ensure that the blade is properly secured and that the dial
of the knife is in balance.
Each mowing blade lasts up to 2 months when programmed to mow every day.
Always check if the blades are broken or damaged and replace them if necessary.
When the cutting blades become blunt and worn, they should be replaced
the spare blades that came with your mower.
Spare blades are also available from your nearest mower dealer or zoefrobot.nl.
Before attempting to replace the blades on your mower,
turn off the power and wear protective gloves.
IMPORTANT: After screwing the blade onto the blade disk, check
whether the blade is able to rotate freely
9.2 Keep it clean
WARNING: Turn OFF your mower before cleaning.
Put on protective gloves beforehand.
Cleaning the knife blade, you can clean with low pressure water (<1Mpa)

26 27
Q
1
25
26
EN
APPLICATION ET IOT (uniquement MT500Z)
9.3 Winter hibernation
Your lawnmower will live longer and healthier if it is allowed to hibernate. So
even though it is troublesome, we recommend storing your lawnmower in your
shed or garage during the winter. Before you prepare your lawnmower for winter
hibernation, we recommend you:
1. Thoroughly clean your lawnmower.
2. Fully charge the battery and remove it from lawnmower.
3. Turn power off.
4. To maximize the battery life, fully charge the battery and remove it from
lawnmower before storage during winter.
WARNING: Protect the underside of lawnmower from water. NEVER store
lawnmower upside down outdoors
9.4 Replacing the battery
WARNING: Power off before attempting any adjustment, replacement or
repair. Before replacing the blades, turn your lawnmower OFF and put on
protective gloves.
If you need to replace the battery, follow these steps:
1. Turn your lawnmower upside down.
2. Remove the screws on the battery cover. Remove the battery cover.
3. Lift out the old battery carefully.
4. Press the latch and release the connectors. NOTE: Do not pull by the cables. Hold
the connectors and release the latch. Connect a new original battery by attaching the
connectors until they click into position.
5. Fit the battery as shown, place the cover back in its position and tighten screws.
Why connect lawnmower
Robotic lawnmower is an IOT (internet of things) device. To get full functionality
out of your lawnmower and keep it always updated to the latest software, it must be
connected to the internet via your WIFI 2.4G or Bluetooth 4.0 (only for MT500Z)
Make sure you:
• Your WIFI network password has to be filled in.
• Have the serial number of the lawn mower with you, which can be found on
the label below tailgate of the robotic lawnmower.
• If you do not want to type the serial number, you can scan the QR code
with your phone's camera.

28 29
2
EN
3. Check your WIFI settings
• Lawnmower works only with 2.4GHz.
• Make sure your lawnmower and your phone are in the same router
environments.
• Make sure the distance between your lawnmower, phone and your router as
close as possible during connection.
NOTE: when lawnmower moves to an area of your lawn with poor or no
signal, instructions sent from the app will only be executed when it returns to
an area with good signal WIFI
HOW TO CONNECT LAWNMOWER TO THE INTERNET
Launch the app and follow these instructions.
LAWNMOWER APP NOT A SIMPLE REMOTE CONTROL
Don’t think at it as a remote control, the app is an integral part of the
lawnmower advanced ecosystem based on cloud computing, once connected the
lawnmower can access its unique auto scheduling instructions from the cloud and is
able to download the latest software to optimism its performance

30 31
Services apres-vente
Afin d'accélérer votre demande, nous vous demandons de fournir le numéro de
modèle et le numéro de série de votre tondeuse robotisée avant de contacter le
service après-vente.
Vous pouvez inscrire le numéro de modèle et le numéro de série ci-dessous :
Comment trouver le numéro de modèle et le numéro de série.
Max. 50Wh
62
IPX5
02
MANUEL
RMA501M20V
numéro de modèle
numéro de série
Numéro de
modèle
:
Numéro de
série
:
FR
LAWNMOWER APP NOT A SIMPLE REMOTE CONTROL
Don’t think at it as a remote control, the app is an integral part of the
lawnmower advanced ecosystem based on cloud computing, once connected the
lawnmower can access its unique auto scheduling instructions from the cloud and is
able to download the latest software to optimism its performance
service après-vente

32 33
INSTRUCTIONS DE
SÉCURITÉ
04
FR
1. Généralités
Cette annexe présente des pratiques d'exploitation sûres pour tous les types de
machines couverts par cette norme. Le manuel d'instructions devrait inclure, le cas
échéant, la substance des clauses suivantes de cette annexe.
Il doit également inclure des informations concernant les niveaux de bruit et les
avertissements nécessaires, ainsi que les éléments suivants :
IMPORTANT
READ CAREFULLY BEFORE USE
À CONSERVER POUR UNE RÉFÉRENCE FUTURE
2. Pratiques d'exploitation sûres
2.1 Formation
a. Lisez attentivement les instructions. Familiarisez-vous avec les commandes et
l'utilisation correcte de la machine.
b. Ne laissez jamais des personnes non familiarisées avec ces instructions ou des
enfants utiliser la machine. Les réglementations locales peuvent restreindre l'âge
de l'opérateur.
c. L'opérateur ou l'utilisateur est responsable des accidents ou des dangers
survenant à d'autres personnes ou à leurs biens.
a. Assurez-vous de l'installation correcte du système de délimitation automatique du
périmètre, conformément aux instructions.
b. Assurez-vous que votre herbe ne dépasse pas 100 mm de long. Si elle est plus
longue, utilisez une tondeuse à gazon ordinaire ou un coupe-herbe pour la couper.
c. Inspectez périodiquement la zone où la machine doit être utilisée et retirez toutes
les pierres, bâtons, fils, os et autres corps étrangers.
d. Effectuez périodiquement un contrôle visuel pour vérifier que les lames, les
boulons des lames et l'ensemble du dispositif de coupe ne sont pas usés ou
endommagés. Remplacez les lames et les boulons usés ou endommagés par jeux
pour préserver l'équilibre.
e. Sur les machines multibroches, faites attention car la rotation d'une lame peut
entraîner la rotation d'autres lames.
2.2 Préparation
3. Opération
3.1 Généralités
a. N'utilisez jamais la machine avec des protections défectueuses ou sans
dispositifs de sécurité, par exemple des déflecteurs et/ou des collecteurs d'herbe,
en place.
b. Ne pas mettre les mains ou les pieds à proximité ou sous les pièces en rotation.
Restez à l'écart de l'ouverture de décharge à tout moment.
c. Ne jamais soulever ou porter la machine lorsque le moteur est en marche.
d. Retirez (ou faites fonctionner) le dispositif de désactivation de la machine :
- avant d'éliminer un blocage ;
- avant de vérifier, de nettoyer ou de travailler sur la machine.
3.2En outre, lorsque la machine fonctionne automatiquement
Ne laissez pas la machine fonctionner sans surveillance si vous savez qu'il y a
des animaux domestiques, des enfants ou des personnes à proximité.
3.3 En outre, lors de l'utilisation du contrôleur manuel
4. Entretien et stockage
04
a. Ne tondez qu'en plein jour ou sous une bonne lumière artificielle.
b. Évitez d'utiliser la machine dans l'herbe mouillée.
c. N'utilisez pas la machine pieds nus ou avec des sandales ouvertes. Portez
toujours des chaussures solides et des pantalons longs.
d. Soyez toujours sûr de votre pied sur les pentes.
e. Faites preuve d'une extrême prudence lorsque vous faites reculer la machine vers
vous.
f. Mettez toujours le moteur en marche conformément aux instructions, les pieds
bien éloignés de la ou des lames.
a. Maintenez tous les écrous, boulons et vis serrés afin de vous assurer que la
machine est en bon état de marche.
b. Vérifiez fréquemment l'usure ou la détérioration du bac de ramassage.
c. Remplacez les pièces usées ou endommagées pour plus de sécurité.
d. Veillez à n'utiliser que des moyens de coupe de rechange du bon type.
e. Assurez-vous que les batteries sont chargées en utilisant le chargeur correct
recommandé par le fabricant. Une utilisation incorrecte peut entraîner un choc
électrique, une surchauffe ou une fuite de liquide corrosif de la batterie.
f. En cas de fuite d'électrolyte, rincer avec de l'eau/un agent neutralisant, consulter
un médecin en cas de contact avec les yeux, etc.
g. L'entretien de la machine doit se faire conformément aux instructions du
fabricant.

34 35
FR
Avant de charger, lisez les instructions. Assurez-vous que votre chargeur est adapté au courant
alternatif local.
d'alimentation, assurez-vous que la connexion entre le chargeur de batterie et le bloc
de batteriesest les bons modèles. Une durée de vie plus longue et de meilleures performances
peuvent être obtenues si le bloc de batteries est chargé lorsque la température de l'air
est comprise entre 18°C et 25°C. Ne chargez pas le bloc-piles lorsque la température de l'air
est inférieure à 5°C ou supérieure à 40°C. Cette précaution est importante
car elle permet d'éviter d'endommager sérieusement le bloc-piles.
AVERTISSEMENTS DE SÉCURITÉ POUR LE BLOC-PILES À L'INTÉRIEUR DE
L'OUTIL :
1. Ne pas démonter, ouvrir ou déchiqueter le bloc-piles.
2. Ne court-circuitez pas un bloc-piles. Ne rangez pas les blocs de piles au hasard dans
une boîte ou un tiroir où ils pourraient se court-circuiter entre eux ou être courtcircuités par
des matériaux conducteurs. Lorsque le bloc-piles n'est pas utilisé,
tenez-le à l'écart d'autres objets métalliques, comme des trombones, des pièces de
monnaie, des clés, des clous, des vis ou d'autres petits objets métalliques, qui
peuvent établir une connexion d'une borne à l'autre. La mise en court-circuit des
bornes de la batterie peut provoquer des brûlures ou un incendie.
3. N'exposez pas le bloc-piles à la chaleur ou au feu. Évitez de le stocker à la lumière
directe du soleil.
4. Ne soumettez pas le bloc-piles à des chocs mécaniques.
5. En cas de fuite de la batterie, ne laissez pas le liquide entrer en contact avec la peau
ou les yeux. En cas de contact, lavez la zone affectée avec de grandes quantités
d'eau et consultez un médecin.
6. Consultez immédiatement un médecin si vous avez avalé une cellule ou une
batterie.
7. Gardez le bloc-piles propre et sec.
8. Le bloc-piles donne ses meilleures performances lorsqu'il est utilisé à une
température ambiante normale (20 °C ± 5 °C).
9. Rechargez uniquement avec le chargeur spécifié par le fabricant. N'utilisez pas de
chargeur autre que celui spécifiquement prévu pour l'équipement. Un chargeur
adapté à un type de batterie peut créer un risque d'incendie lorsqu'il est utilisé avec
un autre type de batterie.
10. N'utilisez pas de batterie qui n'est pas conçue pour être utilisée avec
l'équipement.
11. Gardez le bloc-piles hors de portée des enfants.
12. Conservez la documentation originale du produit pour toute référence ultérieure.
13. Éliminer correctement.
14. Les piles épuisées doivent être retirées de l'appareil et éliminées en toute
sécurité.
15. Si l'appareil doit être stocké sans être utilisé pendant une longue période, les
piles doivent être retirées.
16. do not use modified or damaged batteries
Pack batterie et chargeur
Ces symboles se trouvent sur le produit. Étudiez-les attentivement
SYMBOLES DE SÉCURITÉ
AVERTISSEMENT : Lisez les instructions d'utilisation
avant d'utiliser le produit.
AVERTISSEMENT : désactivez le produit avant de
travailler sur la machine ou de la soulever.
AVERTISSEMENT : Gardez une distance de sécurité avec
la machine lors de son utilisation. Gardez vos mains et vos
pieds à l'écart des lames en rotation.
AVERTISSEMENT : Ne montez pas sur la machine. Ne
mettez jamais vos mains ou vos pieds à proximité ou
sous la machine.
Utilisez un bloc d'alimentation amovible tel que défini
sur la plaque signalétique à côté du symbole.
Marque de conformité CE
Émission de bruit dans l'environnement. Les émissions du
produit sont indiquées dans les données techniques à la page 40
et sur la plaque signalétique.
Il est interdit d'éliminer ce produit avec les déchets ménagers
normaux. Assurez-vous que le produit est recyclé
conformément aux exigences légales locales.
Le câble basse tension ne doit pas être raccourci, rallongé ou
épissé. N'utilisez pas de coupe-bordure à proximité du câble
basse tension. Faites attention lorsque vous coupez les bords où
les câbles sont placés.

36 37
S
-
-piles
FR
Lisez les instructions d'utilisation
Ne jetez pas la batterie dans le feu et n'exposez pas la
batterie à une source de chaleur.
Ne plongez pas la batterie dans l'eau
Marque recyclable.
Il n'est pas permis de jeter ce bloc-piles avec les déchets
ménagers normaux. Assurez-vous que le bloc-piles est
recyclé conformément aux exigences légales locales.
Lisez les instructions d'utilisation
SMPS (unité d'alimentation à découpage)
Double isolation.
SMPS (Switch mode power supply unit) incorporant une
alimentation à découpage de sécurité résistant aux courtscircuits.
Il n'est pas permis de jeter ce bloc-piles avec les déchets
ménagers normaux. Assurez-vous que le bloc-piles est
recyclé conformément aux exigences légales locales.

38 39
FR
AVERTISSEMENT : Lisez tous les avertissements de sécurité et toutes les
instructions, le non-respect des
Le non-respect des avertissements et des instructions peut entraîner un choc
électrique, un incendie et/ou des blessures graves.
Lisez attentivement les instructions pour une utilisation sûre de la machine,
conservez toutes les informations relatives à l'utilisation de la machine.
les avertissements et les instructions pour référence ultérieure.
Comment installer votre robot tondeuse à gazon :
L'installation de votre robot tondeuse est facile.
L'ensemble du processus ne prend qu'un peu de temps, en fonction de la taille de
votre jardin.
Tondeuse à gazon
robotisée
Votre tondeuse à gazon est conçue pour tondre régulièrement et maintenir une pelouse
saine et de meilleure qualité qu'auparavant. En fonction de la taille de votre
pelouse, votre tondeuse peut être programmée pour fonctionner à n'importe quelle
heure ou fréquence, sans aucune restriction, elle est là pour travailler pour vous.
Préparation
Avant de commencer le processus d'installation, lisez attentivement l'ensemble de ce
guide d'installation. Faites un croquis de la zone de travail, y compris de tous les
obstacles, afin de voir plus facilement les positions idéales pour la base de
chargement et l'emplacement des câbles de délimitation.
Tondeuse à gazon robotisée Base de chargement
Clous de fixation de la base
Bobine de fil d'antenne
Pinces à linge Adaptateur secteur Guide de distance
Manuel d'installation
Ciseaux Marteau. Ruban adhésif.
Outils nécessaires
DANS L'EMBALLAGE
This manual suits for next models
3
Table of contents
Languages:
Other Zoef Robot Lawn Mower manuals