ZoneVu ZoneVu ZVK-77D Instruction sheet

USER AND CONFIGURATION MANUAL
ZVK-77D
System Keyboard

SAFETY PRECAUTIONS ..............................................................................................................................................................................2
INTRODUCTION............................................................................................................................................................................................3
ZVK-77D MENU STRUCTURE......................................................................................................................................................................4
LOG-ON AND LOG-OFF PROCEDURE........................................................................................................................................................5
Log-on.............................................................................................................................................................................................................................5
Log-off............................................................................................................................................................................................................................5
MODE SELECTION.......................................................................................................................................................................................5
Info Screen......................................................................................................................................................................................................................6
PCI Mode.......................................................................................................................................................................................................................6
Site Mode........................................................................................................................................................................................................................6
Mux Mode.......................................................................................................................................................................................................................9
VCR Mode....................................................................................................................................................................................................................10
CONFIGURATION.......................................................................................................................................................................................11
Program / Setup.............................................................................................................................................................................................................11
Keyboard.......................................................................................................................................................................................................................11
The information in this manual is believed to be accur
ate and reliable. However,
Meyertech Limited assumes no responsibility or liability for its use, or for any
infringement of patents or other rights of third parties, which may result from its
use. No license is granted by implication or otherwise under any
patent or other
rights of Meyertech. All specifications are subject to change without prior notice.

22
Safety Precautions
1. Carefully read this Product Manual prior to commencing installation and configuration.
2. Before working on this product power it down and remove the power leads. Removing panel’s
modules or PCB’s may cause damage to the product and present an electric shock and fire
hazard.
3. To reduce the risk of electric shock and fire hazard do not operate this product with panels or
covers removed.
4. Do not install or operate the product near water.
5. Do not install or operate this equipment outdoors.
6. If work is carried out on the product with panels and covers removed ensure full electrostatic
handling procedures are adhered to.
7. Louvers and openings are provided in the product enclosures for ventilation purposes to
protect it from overheating. Under no circumstances block or cover these openings.
8. Ensure the product is operated in a suitably temperature controlled environment within the
specification limits.
9. Do not operate the product in humidity greater then 90%.
10. Do not drop objects of any kind through the product louvers and openings. This may cause
electric shock and fire hazard and product malfunction.
11. Avoid liquid spillages on the product. This may cause electric shock and fire hazard as well
as product malfunction.
12. Never attempt to service this product yourself. This product contains no serviceable parts
Refer all servicing requirements to the Meyertech Service Centre or appointed Meyertech
Service Agent
13. Do not operate this product if
13.1. Any product power leads are damaged.
13.2. If the product has been exposed to rain.
13.3. If the product has been dropped or the enclosure has been damaged.
13.4. If liquid has been spilt on the product.
13.5. If the appliance has malfunctioned or is not operating to its functional specification.
13.6. If the products cooling fans fail to operate.
14. This product must only be operated with the power supply provided or if supplied without a
power supply, by the type of power source indicated in the specification.
15. Follow all warnings and instructions marked on the product and in this manual.
16. To clean the enclosure of the product use a cloth. Do not use liquid solvent-based cleaners.
.

Introduction
Thank you for purchasing this product. The following instructions will guide you through operation and configuration of
the ZoneVu ZVK-77 System Keyboard. Please carefully read the rest of this manual before attempting to operate the
product. This will ensure that the best performance is obtained.
Meyertech’s new ZVK-77D system keyboard is the latest in the range of next generation ZoneVu products. Designed
to provide maximum functionality the ZVK-77D is capable of controlling multiple independent sites, performing system
configuration and integrating CCTV peripheral devices including VCR’s and Multiplexers.
•ZoneVu System Keyboard
•Ergonomic design to minimize RSI
•3-axis proportional joystick camera control
•Menu-driven ‘soft-key’ navigation incorporating
user configurable menus
•Large area LCD combining text and graphic
information
•16-bit embedded processing power
•Multiple user support with independent log-on
•PCI mode operation
•Site mode operation
•Full hierarchal priority camera control
•Compatible with the ZoneVu product range
•Remote configuration and backup via
Meyertech’s Mpower software
The design of the ZoneVu
ZVK-77D System
Keyboard uses the latest
materials and technology
available to bring superior
levels of functionality and
integration to the CCTV
control room.
The ZVK-77D offers users three modes of operation; Site mode permits both local and intersite selection and
control of cameras; PCI mode provides camera control facilities only when used in conjunction with
Meyertech’s FUSION workstation, a PC based GUI application running under Windows; Standalone mode, a
mode used exclusively to control cameras and domes directly without the requirement of for a matrix.

4
4
ZVK-77D MENU STRUCTURE
SELECT MODE MENU
LOGGED OFF
USER
LOG-ON
ENGINEER
MANAGER
LOG-OFF
INFO SCREEN
MODE
KEYBOARD SETUP
PROGRAM SETUP
LOG-OFF
INFO SCREEN
MODE
LOG-OFF
INFO SCREEN
MODE
CAMERA SETUP
ZVR CONFIG
MATRIX CONFIG
NETWORK
SETUP JOYSTICK
SETUP LOG-IN
ACCOUNT
SETUP
REVERT TO
FACTORY
SETTING
MISC.
OPTIONS
USER I/F
SETUP CUSTOM
MENU
SETUP
MAC
ADDR-
ESS
MODE
LINE
TERMI-
ATION
CENTRE
STICK
SPEED
MODE
ADVA-
NCE
INSERT
NEW
USER
EDIT
USER
LOG-IN
LOCK-
OUT
DELETE
USER
SCREEN
COLOUR
SCRE-
EN
TIME-
OUT
MODE
MENU
SITE
MODE
MENU
PCI
MODE
MENU
MUX
MODE
MENU
PERIPH
TYPE
POLICE
MON
SPOT
MON

5
5
Log-on and Log-off Procedure
Log-on
Before the keyboard can be used an operator has to log-on by selecting their user name and entering a PIN. To log-on follow
the procedure below.
01. Press the Softkey directly adjacent to the menu option, LOG-ON.
02. Use the Next key to highlight your user name and press Enter.
03. Now enter your PIN using the Numeric Keypad and press Enter.
04. You should now be Logged onto the keyboard. However the error message LOG-IN INCORRECT, simply repeat
steps 01 to 03.
Log-off
Logging-off the ZVK-77D keyboard is achieved from the Select Mode Menu. To get back to this menu it does not matter
which menu you are currently in, simply press and hold down the Back key until the message:
Every time you exit a menu you will hear a confirmation beep from the keyboard. Press the Enter key to log yourself off the
ZVK-77D or press the Cancel key to remain logged-on.
Mode Selection
Once logged onto the ZVK-77D the Select Mode Menu will be displayed. Depending on how the keyboard has been
configured for a particular user will determine which modes of operation are available. Below is a description of each mode
available and how to access them.
LOG OFF ?
[Enter] = Confirm
[Clear] = Cancel

6
6
Info Screen
The Info Screen displays information about the ZVK-77D you have. This includes the version of firmware E.G. 1.3.2.0, the
network status, (not detected means that the ZVK-77D is not currently connected to a ZoneVu network), and the keyboard
Module Access Code (MAC). If you request technical support you maybe asked for this information.
The Info Screen is accessed from the Select Mode Menu by pressing the softkey directly adjacent to the menu option INFO
SCREEN.
PCI Mode
PC Interactive or PCI mode is a special interactive mode of operation when the ZVK-77D is operated in tandem with a
Meyertech FUSION workstation. In this mode only the camera control facilities of the ZVK-77D are available to the operator.
Selection of the system cameras is performed exclusively by the FUSION workstation. The interactive nature of FUSION and
the ZVK-77D ensures that the camera displayed on an operators spot monitor is the one controllable from the ZVK-77D.
Site Mode
What you can do in Site Mode.
You can select a Monitor.
01. Press the Softkey directly adjacent to the menu option, CHANGE MONITOR.
02. Now enter a monitor in the range 1 –999 using the Numeric Keypad followed by Enter.
You can select a Site.
01. Press the Softkey directly adjacent to the menu option, SELECT SITE.
02. Now enter a site in the range 0 –999 using the Numeric Keypad followed by Enter.
03. Input a camera in the range 0 –999 using the Numeric Keypad followed by Enter.
Note that Site 0 is always the site you are at, it is your local site and is equivalent to operating the keyboard in Clasik mode.
You can select a Camera.
01. Press the Softkey directly adjacent to the menu option, SELECT CAMERA.
02. Now enter a camera in the range 0 –999 using the Numeric Keypad followed by Enter.
There is an alternative method to select a camera.
01. Using the Numeric Keypad directly enter the camera number you require in the range 0 –999 followed by Enter.

7
7
02. Input a camera in the range 0 –999 using the Numeric Keypad followed by Enter.
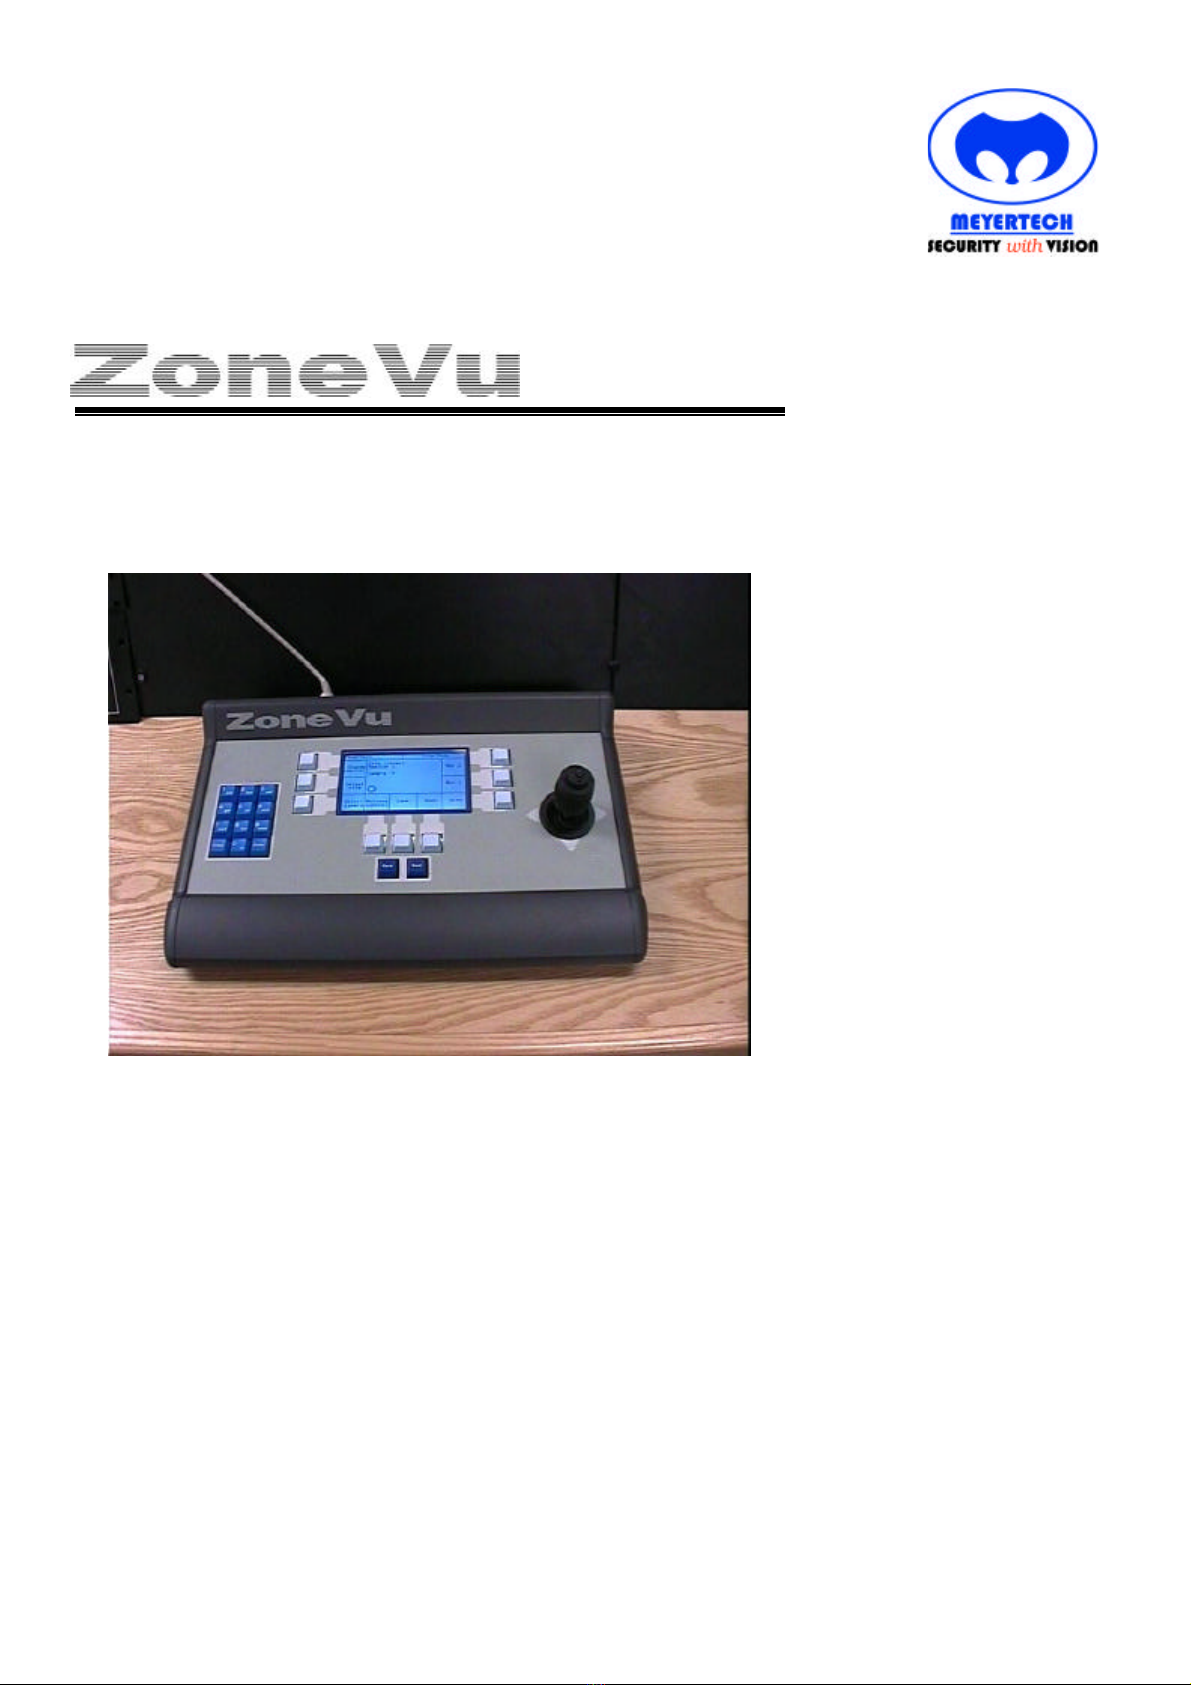
You can Control Camera Functions.
Camera functions such as Pan, Tilt, Zoom and Focus can be controlled via the proportional joystick and other functions
including Lamp, Wash, Wipe controlled using the Softkeys directly adjacent to each of the menu options.
Camera control is automatically requested whenever you select or try to operate any of the camera functions described
above. Control of a camera is granted to a user based on Meyertech’s heirarachal camera control priority the rules of which
are:
01. Only one operator can be in control of any particular camera at any one time.
02. Control of a camera is granted based on the priority level of the requesting operator. The priority level is a
configuration option. Level settings are in the range 1-9, nine being the highest level of priority available.
03. If the camera requested is not currently under control by any other use, control will be granted to the requesting user.
04. If the camera is currently being controlled by another user, and both users have equal priority levels, control will be
denied to the requesting operator.
05. If the camera is currently being controlled by another user, and the requesting user has a lower level of priority than
the current user, control will be denied to the requesting operator.
06. If the camera is currently being controlled by another user, and the requesting user has a higher level of priority than
the current user, control will be granted to the requesting operator and the current user will automatically be forced to
submit control.
You can Release Control of a camera.
Camera control is automatically released every time you select a new camera, but on occaision you may want to release
control of the camera to another user whilst maintaining the picture on your spot monitor.
01. Press the Softkey directly adjacent to the menu option, RELEASE CONTROL.
You can select Camera Presets or Camera Home position.
Camera presets are ‘preset’ camera positions of Pan, Tilt, Zoom and Focus which the camera automatically returns to when
requested by either the user or ZoneVu system. Home is a special preset position usually set by the system administrator as
the position the camera should be at when not being controlled by a user.
To select the Home position:
01. Press the Softkey directly adjacent to the menu option, HOME.
02. If the menu option, HOME is not currently displayed, use the Next key to find it.
To select a Preset position:
01. Press the Softkey directly adjacent to the menu options PRESET 1 to PREST 4. The first four presets are directly
available from the menu.
02. If the preset number you require is higher than four, first press the Softkey directly adjacent to the menu option,
SELECT PRESET.

8
8
03. Now enter a PRESET in the range 0 –999 using the Numeric Keypad followed by Enter
You can select a Camera Preset Patrol
Placing a camera into a Preset Patrol means the camera will continuously execute a series of Camera Presets over a set
period of time. Preset Patrols are generally configured and stored by each particular camera in the system. Various types of
camera Preset Patrols exist E.G. Random, Ordered, Mimic. Suffice to say the task of the ZVK-77D is just to select them.
01. Press the Softkey directly adjacent to the menu option, SELECT PRESET PATROL.
02. Now enter a PATROL in the range 0 –999 using the Numeric Keypad followed by Enter
You can store a Camera Preset Preset
Placing a camera into a Preset Patrol means the camera will continuously execute a series of Camera Presets over a set
period of time. Preset Patrols are generally configured and stored by each particular camera in the system. Various types of
camera Preset Patrols exist E.G. Random, Ordered, Mimic. Suffice to say the task of the ZVK-77D is just to select them.
01. Position the camera to the position you require using camera controls Pan, Titl, Zoom and Focus. Other camera
functions E.G. Lamps may be available dependent on the type of camera installed.
02. Press the Softkey directly adjacent to the menu option, STORE PRESET.
03. Now enter a PRESET in the range 0 –999 using the Numeric Keypad followed by Enter
You can Copy an Image to the Police Monitor
Images displayed on your spot monitor can be copied directly to a nominated monitor designated the Police Monitor which is
a common requirement in town and city centre schemes.
01. If the menu option, COPY TO POLICE MONITOR is not currently displayed, use the Next key to find it.
02. Press the Softkey directly adjacent to the menu option, COPY TO POLICE MONITOR
You can select a Trunk
Trunks are video trunks linking one site to another site. Both sites would normally incorporate a video matrix with a number of
the remote sites video outputs being designated trunks. At the local site these trunks connect as inputs into the local video
matrix. The select Trunk function is used to select specifically one of these trunks so that cameras at the remote site can be
viewed locally via the video matrix.
01. Press the Softkey directly adjacent to the menu option, SELECT TRUNK
02. Now enter a TRUNK in the range 1 –999 using the Numeric Keypad followed by Enter
You can select Next Trunk
Next Trunk operates in a similar manner to Select Trunk. The difference being that Next Trunk selects the next available
trunk rather than a specific trunk.

9
9
01. Press the Softkey directly adjacent to the menu option, NEXT TRUNK
Mux Mode
Mux mode allows the user to take control of Multiplexers connected to the ZoneVu system.
01. Press the Softkey directly adjacent to the menu option, MUX MODE to enter the Multiplexer Control menu.
Once in the Multiplexer Control Menu you can:
Select a multiplexer to control
01. Press the Softkey directly adjacent to the menu option, CHANGE MUX.
02. Now enter a MUX in the range 1 –999 using the Numeric Keypad followed by Enter
Select a multiplexer camera input to the multiplexer spot output, normally referred to as the analogue output.
01. Press the Softkey directly adjacent to the menu option, SPOT MONITOR.
02. Now enter a CAMERA in the range 1 –999 using the Numeric Keypad followed by Enter
Select a multiplexer camera input to the multiplexer MSC output, normally referred to as the digital output.
01. Press the Softkey directly adjacent to the menu option, MULTI-SCREEN MONITOR
02. Now enter a CAMERA in the range 1 –999 using the Numeric Keypad followed by Enter
Step through the various multiplexer multi-screens
01. Press the Softkey directly adjacent to the menu option, NEXT MULTI-SCREEN to select the next MSC.
Select Multiplexer modes of operation Live mode, Decode mode and Encode mode.
01. Press the Softkey directly adjacent to the menu options, LIVE MODE, DECODE MODE or ENCODE MODE
You can also control Multiplexers on other sites by using the Change Site function.
01. Press the Softkey directly adjacent to the menu option, CHANGE SITE.
02. Now enter a SITE in the range 0 –999 using the Numeric Keypad followed by Enter. Note that no site number is
displayed when accessing Local multiplexers.

1010
VCR Mode
VCR mode allows the user to take control of VCR’s connected to the ZoneVu system.
01. Press the Softkey directly adjacent to the menu option, VCR MODE to enter the VCR Control menu.
Once in the VCR Control Menu you can:
Select a VCR to control
01. Press the Softkey directly adjacent to the menu option, CHANGE VCR.
02. Now enter a VCR in the range 1 –999 using the Numeric Keypad followed by Enter.
Play a video tape.
01. Press the Softkey directly adjacent to the menu option, PLAY.
Stop a video tape playing or recording.
02. Press the Softkey directly adjacent to the menu option, STOP
Pause a video tape which is playing.
01. Press the Softkey directly adjacent to the menu option, PAUSE.
Rewind a video tape.
01. Press the Softkey directly adjacent to the menu option, REWIND.
Forward a video tape.
01. Press the Softkey directly adjacent to the menu option, FORWARD
Record a video tape.
01. Press the Softkey directly adjacent to the menu option, RECORD
You can also control VCR’s on other sites by using the Change Site function.
01. Press the Softkey directly adjacent to the menu option, CHANGE SITE.
02. Now enter a SITE in the range 0 –999 using the Numeric Keypad followed by Enter. Note that no site number is
displayed when accessing Local VCR’s.

1111
Configuration
Program / Setup
The ZVK-77D keyboard has many user features which maybe configured as well as the usual system engineering
parameters which, are normally configured by the engineer during commissioning. To access the Configuration menus
02. Press the Softkey directly adjacent to the menu option, PROGRAM / SETUP
Once in the Configuration menu you will find options to program other ZoneVu equipment including camera control receivers
and video matrices, other manufacturers cameras and domes as well as the ZVK-77D keyboard.
Keyboard
Network Setup
Network setup contains system-engineering parameters that should only be changed by a Meyertech trained engineer.
Module Access Code (MAC)
The module access code is the ZoneVu network address of ZVK-77D. Each item of equipment on the network requires a
unique address to function correctly.
01. Press the Softkey directly adjacent to the menu option, MAC address.
02. Now enter a VCR in the range 1 –32 using the Numeric Keypad followed by Enter.
Line Termination
Line termination relates to the RS422 network. On a RS422 network system one item of equipment should be terminated into
120R impedance, normally the last item of equipment on the network. Note that only one item of equipment should be
terminated.
The ZVK-77D network termination can be accessed from the menu.
01. The Line term. Menu displays the current state, OFF or ON.
02. Press the Softkey directly adjacent to the menu option, Line term. To toggle the state.
Mode
The ZVK-77D can be operated in three Modes:
01. Stand-alone, when there is no video matrix or site controller present on the system. This mode gives you the
ability to control cameras directly from the ZVK-77D.
02. Network. In this mode the keyboard should be connected to either a ZoneVu video matrix or a site controller

1212
03. PC Mode is a special non-ZoneVu mode of operation use to connect to a third party control system. In this
instance the RS232 port is utilised in place of the ZoneVu port.
Joystick Setup
The joystick employed in the ZVK-77D is a fully proportional X,Y,Z joystick providing the operator with independent variable
speed control of Pan, Tilt, Zoom, Focus and Iris functions.
Centre Stick
The joystick is a fully proportional type and, as such may require re-calibrating from time to time. To calibrate the joystick.
01. Press the Softkey directly adjacent to the menu option, Centre stick. A pop-up window will say ‘Push any key to
begin’
02. Press any key and follow the menu instructions. You will be asked in sequence to Pan the joystick fully right,
Left, Up, Down followed by Zoom In and Out via the joystick twist grip.
03. Finally you will be asked to release the joystick to determine its centre position.
Speed mode
Since the original ZoneVu system was introduced over 10 years ago development of Meyertech products has continued at a
pace to bringing you the latest technology and ideas. To manage this technology effectively Meyertech have always
promoted the concept of backward compatibility, ensuring new products work when installed into older systems. This concept
is vital to customers who do not have the budget to entirely replace their system every time they want to take advantage of
some new technology. Speed mode is an example of how Meyertech are managing that concept. The Basic speed mode
option is to maintain compatibility with older and existing ZoneVu products EG ZVR-510 receiver. The Advance speed mode
is an enhanced version of the Basic providing the operator with improved speed control.
Login Account Setup
Operators of the ZVK-77D are required to log-on and log-off the keyboard to operate it. There are three levels of operator,
User, Manager and Engineer. Each level can have a set of access rights configured to suit. New operators can be easily
added through the Login account setup menu.
01. From the Keyboard programming menu press the Softkey directly adjacent to the menu option, Login account
setup.
02. Press the Softkey directly adjacent to the menu option, Insert new user.
03. Enter the operators name using the alphanumeric keypad and press Enter.
04. Press the Softkey directly adjacent to the menu option, PIN, to set a Personnel Identification Number for the new
user.
05. Press the Softkey directly adjacent to the menu option, Priority to set the new operators hierarchal camera
control priority level
06. Now enter a level in the range 1 –9 using the Numeric Keypad followed by Enter. Nine is the highest priority.
07. Press the Softkey directly adjacent to the menu option, Access level to cycle round and assign the options of
User, Manager and Engineer to the new operator.

1313
User Interface Setup
The User interface menu provides the option to select a screen timeout period and to set the display as either black
characters on a white background or white characters on a black background.
Screen colour
01. Press the Softkey directly adjacent to the menu option, Screen colour to toggle between either black characters
on a white background or white characters on a black background.
02. Press the Softkey directly adjacent to the menu option, Screen timeout.
03. Now enter a time in the range 1 –99 minutes using the Numeric Keypad followed by Enter. Nine is the highest
priority.
Custom Menu Setup
Custom menu setup is an option, which configures the look and feel of each operational menu by login level type IE User,
Manager or Engineer. This is a useful feature as it allows both the access and priority to be set by operator type. Custom
menus can be setup for each of the modes of operation, namely PCI, Site, Mux, VCR and also the Mode menu itself can be
configured. To configure a menu:
01. Press the Softkey directly adjacent to the required Mode Menu option.
02. Press the Softkey directly adjacent to the menu option, Login level to set the level.
03. Press the Softkey directly adjacent to the menu option, Insert new item
04. Use the Next and Back keys to select the item and press Enter.
Items can also be deleted from a menu. Follow the on-screen options.
Misc. Options
Peripheral Type
Peripheral type is another example of maintaining compatibility with older and existing ZoneVu products and refers to
ZoneVu drivers, which interface CCTV components such as VCR’s and Multiplexers to the system.
01. Press the Softkey directly adjacent to the menu option, Perip. Type to toggle between Old and New.
Spot monitor
Sets the operators Spot monitor.
01. Press the Softkey directly adjacent to the menu option, Spot monitor
02. Now enter a monitor in the range 1 –999 using the Numeric Keypad followed by Enter.
Police monitor
Sets the operators Police monitor.
01. Press the Softkey directly adjacent to the menu option, Police monitor
02. Now enter a monitor in the range 1 –999 using the Numeric Keypad followed by Enter.

1414
Revert to Factory Setting
To set the ZVK-77D configuration to the factory settings use this option. Note that if this option is chosen all recent
configuration data will be lost.
01. Press the Softkey directly adjacent to the menu option, Revert to factory setting.
02. Choose Enter to carry out the action or Clear to cancel the action.
Other manuals for ZoneVu ZVK-77D
2
Table of contents
Other ZoneVu Keyboard manuals