1. Cutting Zurn PEX®Tubing
Using a blade type cutter, cut
tubing to desired length.
2. Install QickClamp
Push tubing into the QickClamp
until the tubing stops and is visible
in the sight hole. Be sure that the
tab inside the QickClamp stays on
the outside of the tubing.
3. Install Fitting
Push tting into the tubing
until the tting shoulder touches
the QickClamp.
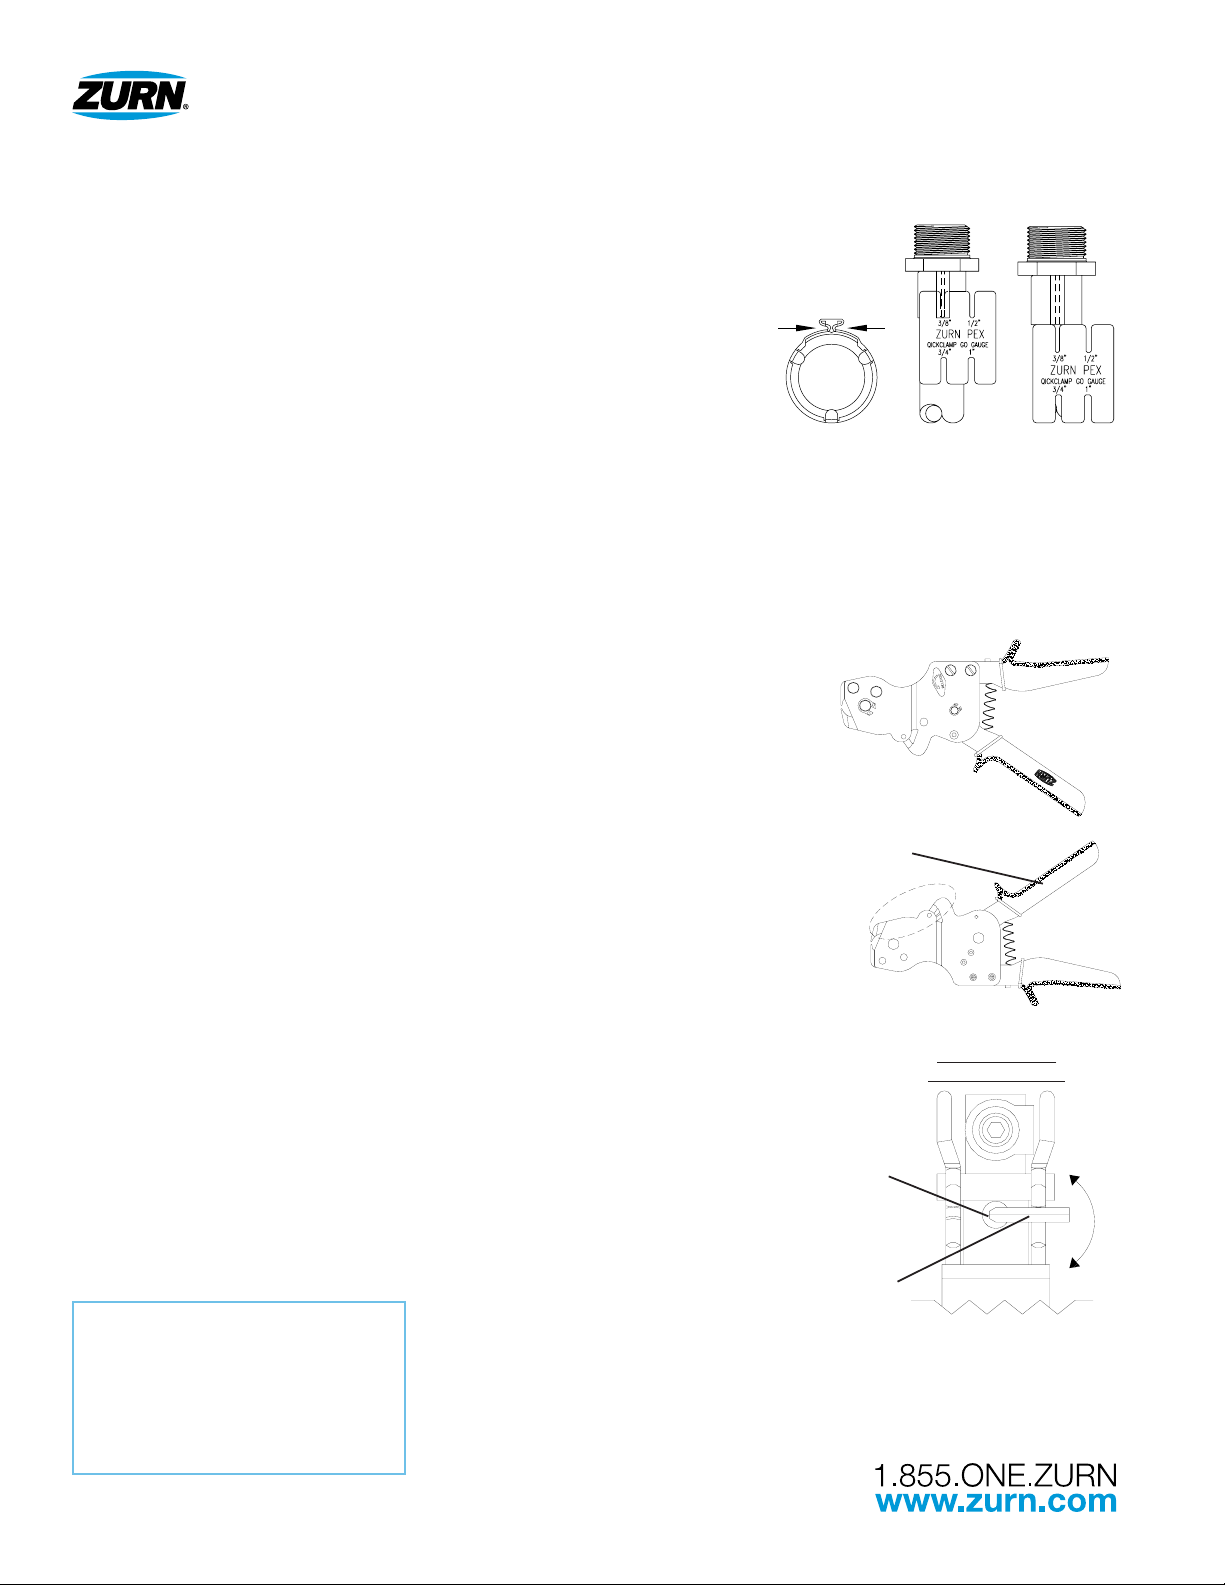
4. Crimp QickClamp
Open the QCRTQCRM tool by
turning the Release Knob counter-
clockwise (Figure 1). Place the jaws
completely over the QickClamp
pinch ear. With the tool at a 90°
angle to the tube (Figure 2), close
the tool by squeezing the handles
together repeatedly until the LED
light comes on. This may take 6-8
squeezes (Figure 3).
Important! Be sure the tool
jaws cover the entire ear of the
QickClamp before crimping;
failure to do so will result in an
improper crimp and may void
the warranty.
5. It is very important to complete the
crimping process before releasing
the tool. Open the QCRTQCRM
tool by turning the Release Knob
counter-clockwise. Visually verify
that a secure connection has
been made. If the entire ear did
not crimp, DO NOT recrimp. The
QickClamp must be cut out
and replaced.
OPERATION INSTRUCTIONS
Medium Ratcheting QickClamp®Tool
QCRTQCRM
Incorrect
Assembly
Correct
Assembly
Form No. ZPFN185 Date: 6/11/09
C.N. No.120064 Rev.
Medium Ratcheting QickClampTM Tool - QCRTQCRM
Operating Instructions
Step 4: Open the QCRTQCRM tool by turning the Release Knob
counter-clockwise (Figure 1). Place the jaws completely
over the QickClamp pinch ear. With the tool at a 90° angle
to the tube (Figure 2), close the tool by squeezing the
handles together repeatedly until the LED light comes on.
This may take 6-8 squeezes (Figure 3).
Important ! Be sure the tool jaws cover the entire ear
of the QickClamp before crimping; failure to do so will
result in an improper crimp and may void the war-
ranty.
Dimensional Data: Inches and [mm] are subject to manufacturing tolerances and change without notice.
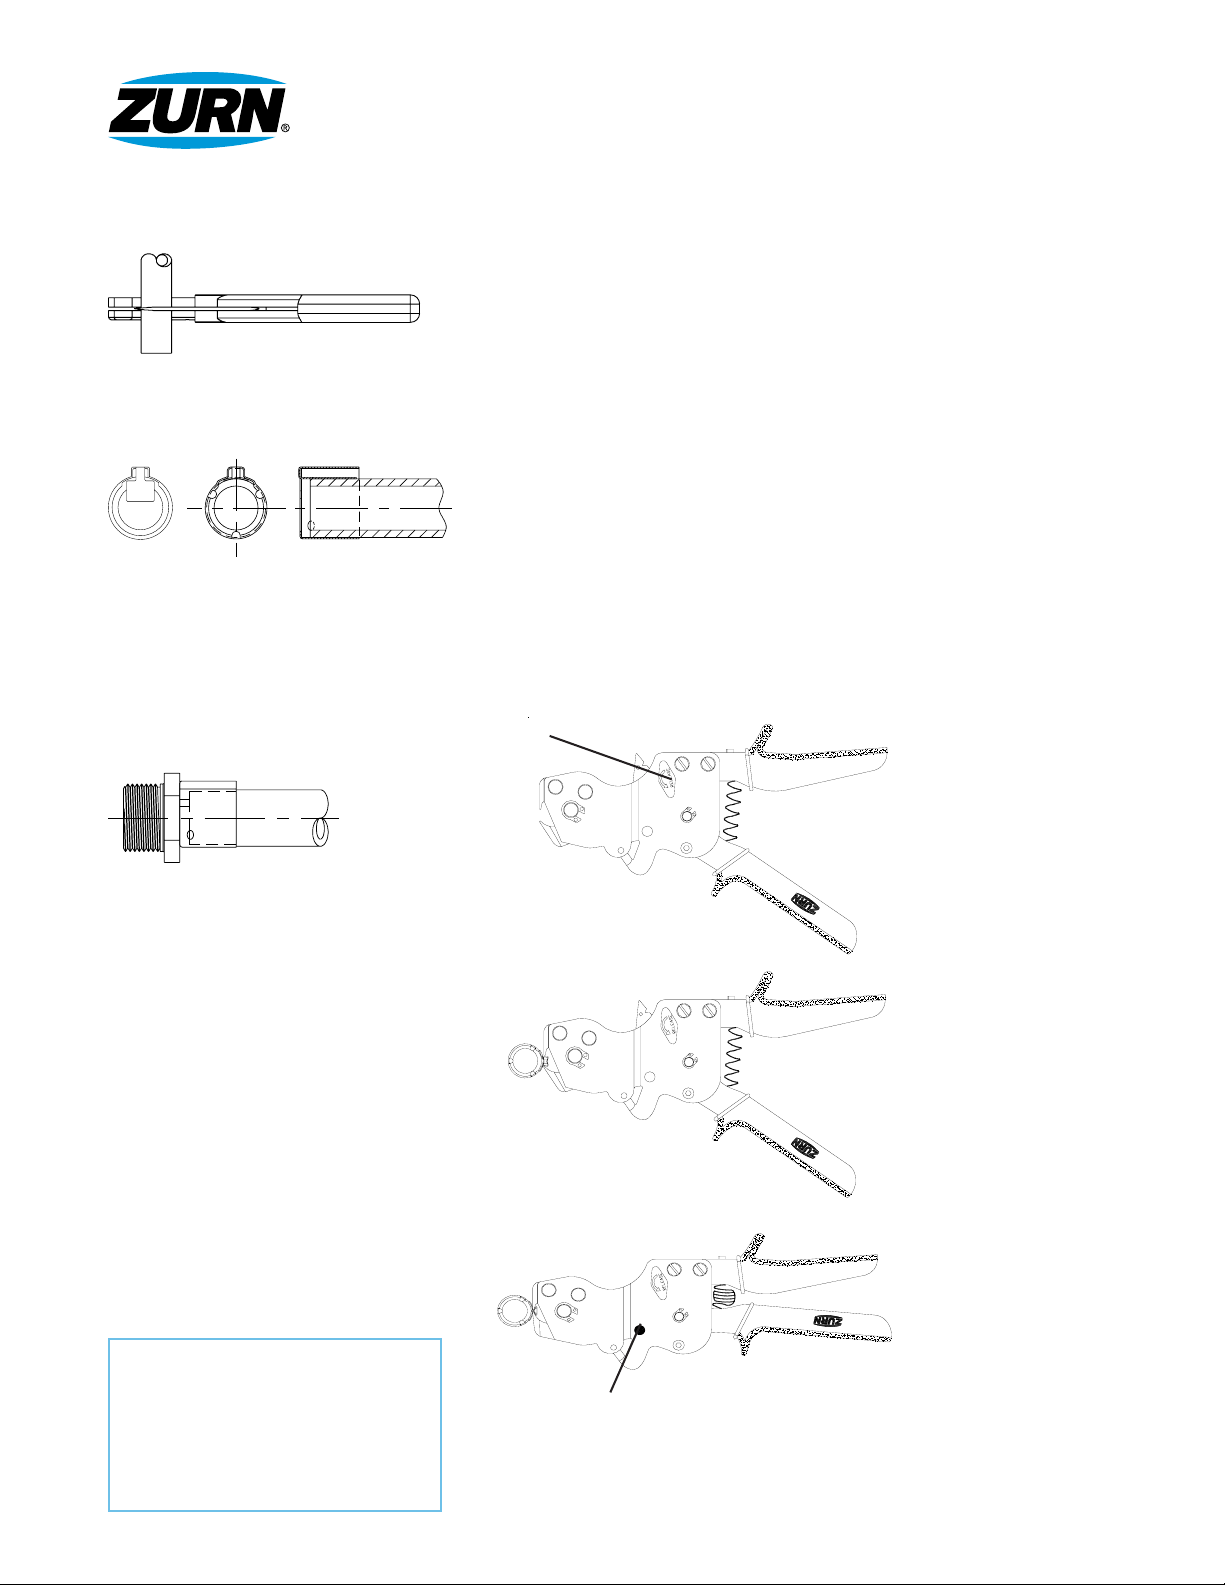
Cutting Zurn PEX Tubing
Step 1: Using a blade type cutter, cut tubing to desired length.
Step 2: Push tubing into the QickClamp until the tubing stops and is
visible in the sight hole. Be sure that the tab inside the
QickClamp stays on the outside of the tubing.
Install QickClamp
Incorrect
Assembly
Correct
Assembly
Step 3: Push fitting into the tubing until the fitting shoulder touches
the QickClamp.
Install Fitting
Release
Knob
Figure 1
Figure 2
Figure 3
Crimp QickClamp
Step 5: It is very important to complete the crimping process
before releasing the tool. Open the QCRTQCRM tool by
turning the Release Knob counter-clockwise. Visually
verify that a secure connection has been made. If the
entire ear did not crimp, DO NOT recrimp. The QickClamp
must be cut out and replaced.
ZURN PEX
®
PLUMBING AND RADIANT HEATING SYSTEMS HWY 11 EAST, COMMERCE, TX, U.S.A. 75429 PHONE: 800/872-7277 FAX: 800/209-2148 WEBSITE: www.zurn.com
IN CANADA: ZURN INDUSTRIES LIMITED 3544 NASHUA DRIVE, MISSISSAUGA, ONTARIO L4V 1L2 PHONE: 905/405-8272 FAX: 905/405-1292
Form No. ZPFN185 Date: 6/11/09
C.N. No.120064 Rev.
Medium Ratcheting QickClampTM Tool - QCRTQCRM
Operating Instructions
Step 4: Open the QCRTQCRM tool by turning the Release Knob
counter-clockwise (Figure 1). Place the jaws completely
over the QickClamp pinch ear. With the tool at a 90° angle
to the tube (Figure 2), close the tool by squeezing the
handles together repeatedly until the LED light comes on.
This may take 6-8 squeezes (Figure 3).
Important ! Be sure the tool jaws cover the entire ear
of the QickClamp before crimping; failure to do so will
result in an improper crimp and may void the war-
ranty.
Dimensional Data: Inches and [mm] are subject to manufacturing tolerances and change without notice.
Cutting Zurn PEX Tubing
Step 1: Using a blade type cutter, cut tubing to desired length.
Step 2: Push tubing into the QickClamp until the tubing stops and is
visible in the sight hole. Be sure that the tab inside the
QickClamp stays on the outside of the tubing.
Install QickClamp
Incorrect
Assembly
Correct
Assembly
Step 3: Push fitting into the tubing until the fitting shoulder touches
the QickClamp.
Install Fitting
Release
Knob
LED Light
Figure 1
Figure 2
Figure 3
Crimp QickClamp
Step 5: It is very important to complete the crimping process
before releasing the tool. Open the QCRTQCRM tool by
turning the Release Knob counter-clockwise. Visually
verify that a secure connection has been made. If the
entire ear did not crimp, DO NOT recrimp. The QickClamp
must be cut out and replaced.
ZURN PEX
®
PLUMBING AND RADIANT HEATING SYSTEMS HWY 11 EAST, COMMERCE, TX, U.S.A. 75429 PHONE: 800/872-7277 FAX: 800/209-2148 WEBSITE: www.zurn.com
IN CANADA: ZURN INDUSTRIES LIMITED 3544 NASHUA DRIVE, MISSISSAUGA, ONTARIO L4V 1L2 PHONE: 905/405-8272 FAX: 905/405-1292
Note: Using this tool for anything other than its
intended use will void the warranty.
For troubleshooting and repair assistance,
do not return tool directly to wholesaler.
Call Zurn Customer Care for assistance
at 1-855-ONE-ZURN.
See www.zurn.com for warranty information.