Daily use
We have divided this book into separate
sections, so that you can nd the information
you are looking for more easily. This section
covers the day to day functions that you will
use most often.
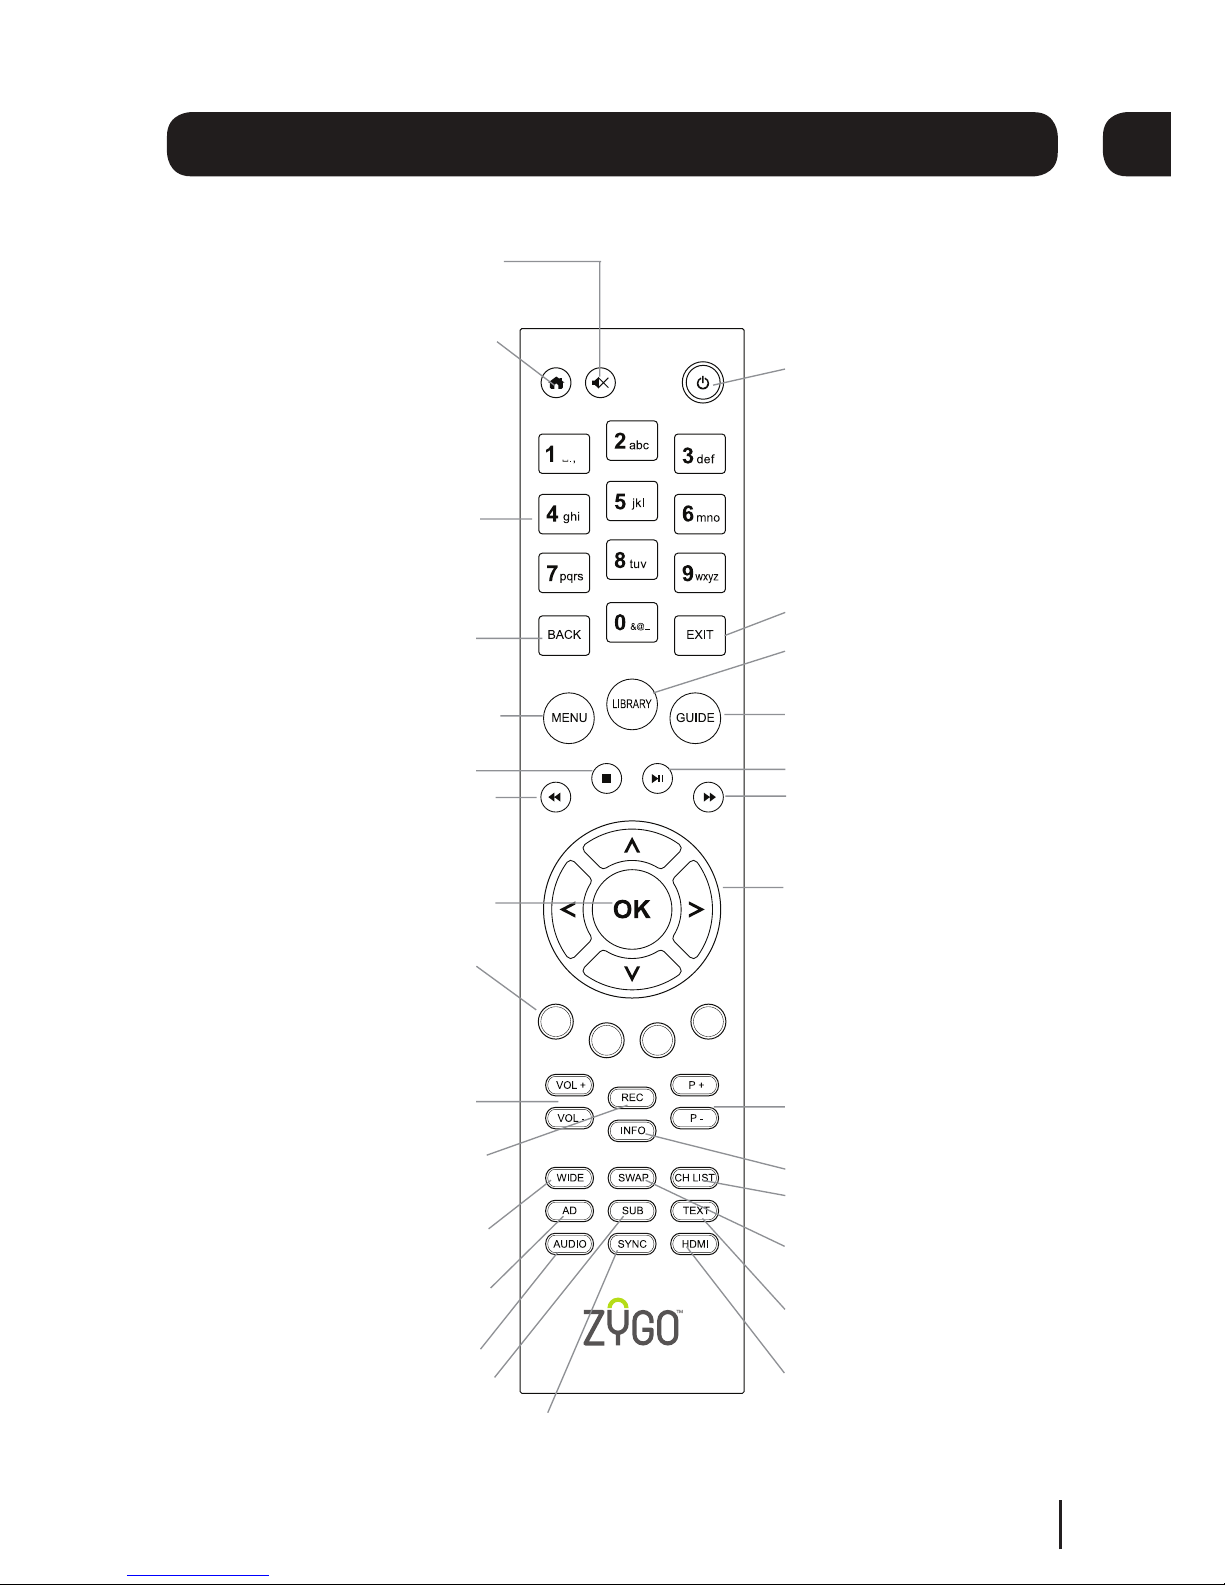
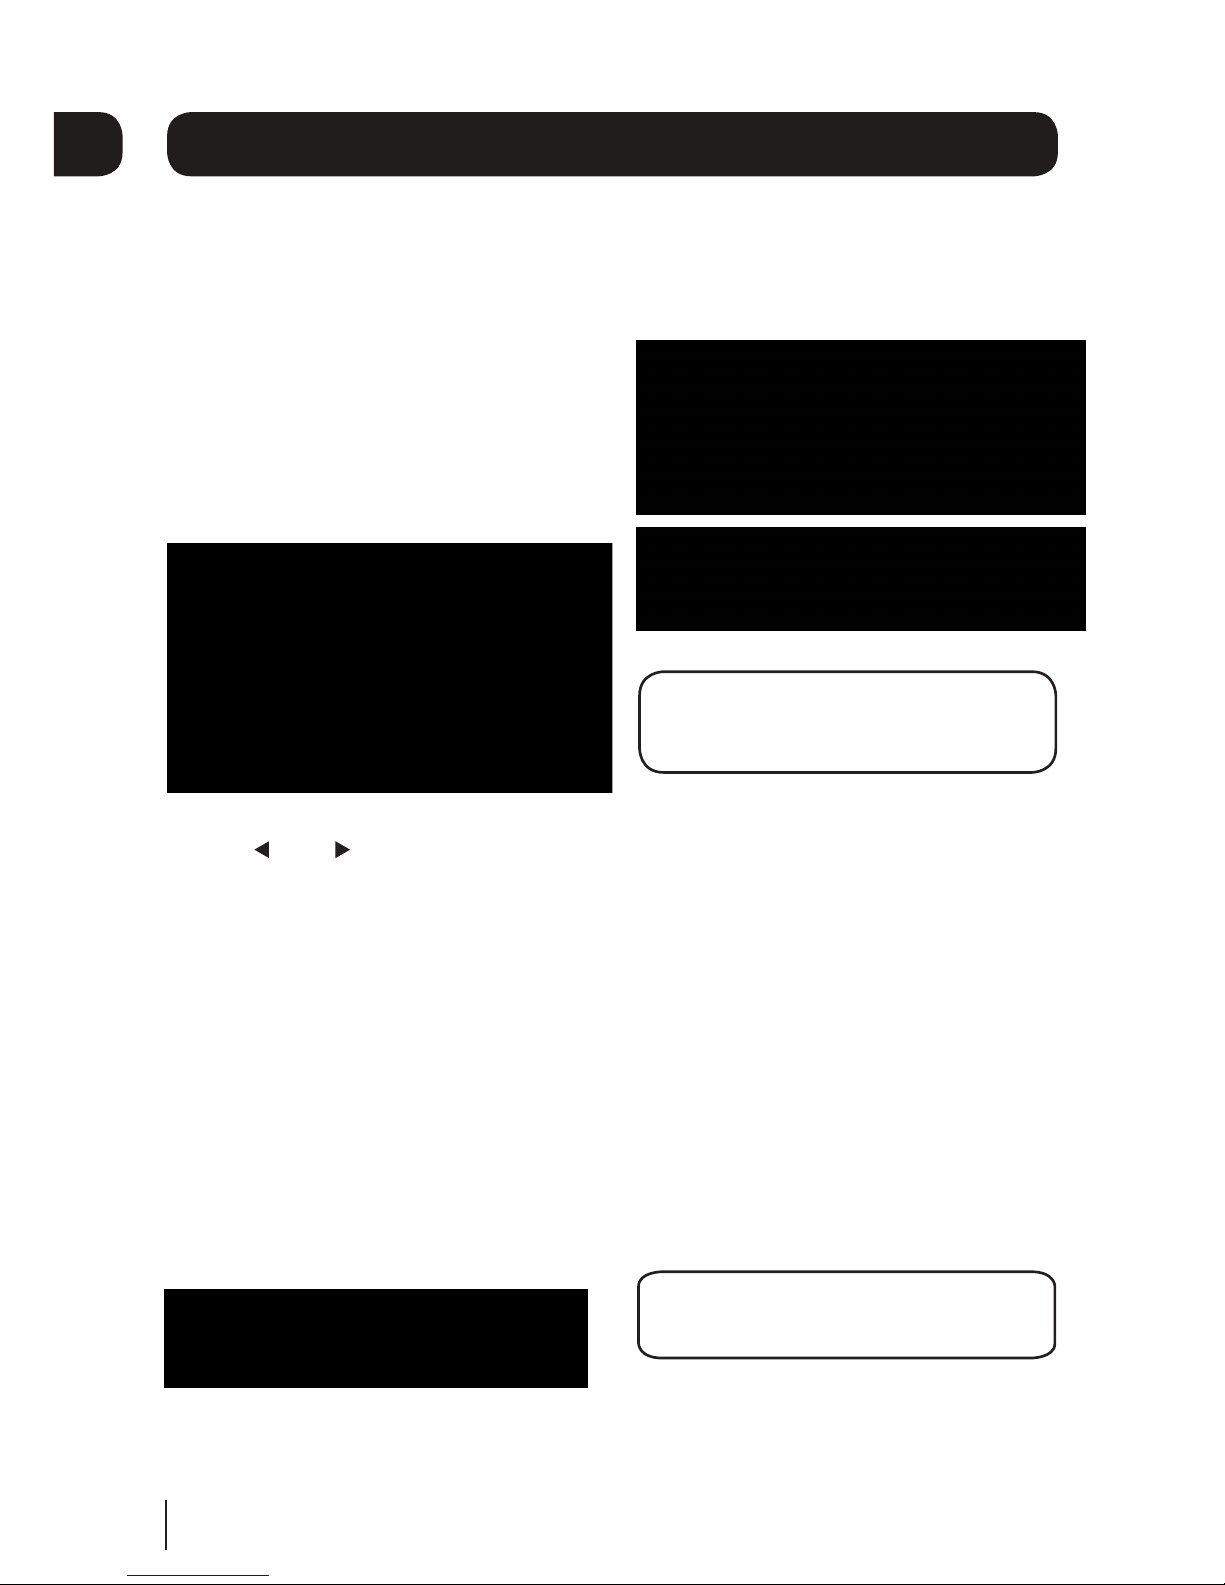
Changing the channel
Press the [GUIDE] button on the remote
control to open the Electronic Programme
Guide.
Use the [ ] and [ ] buttons to select dierent
channels.
When you have chosen your channel, press
the [OK] button to watch it.
You can also select the channel you want
to watch by using the [P+] and [P-] buttons
on the remote control. Alternatively you can
use the number buttons to key in the
channel number.
When you change the channel the
information banner will be displayed for a
few seconds.
This shows the details of the current show.
The information bar
If you want to see information about the
programme you are watching, you can press
the [INFO] button.
DON’T FORGET! If you want to record
a programme, you can just press the
[REC] button.
05
8
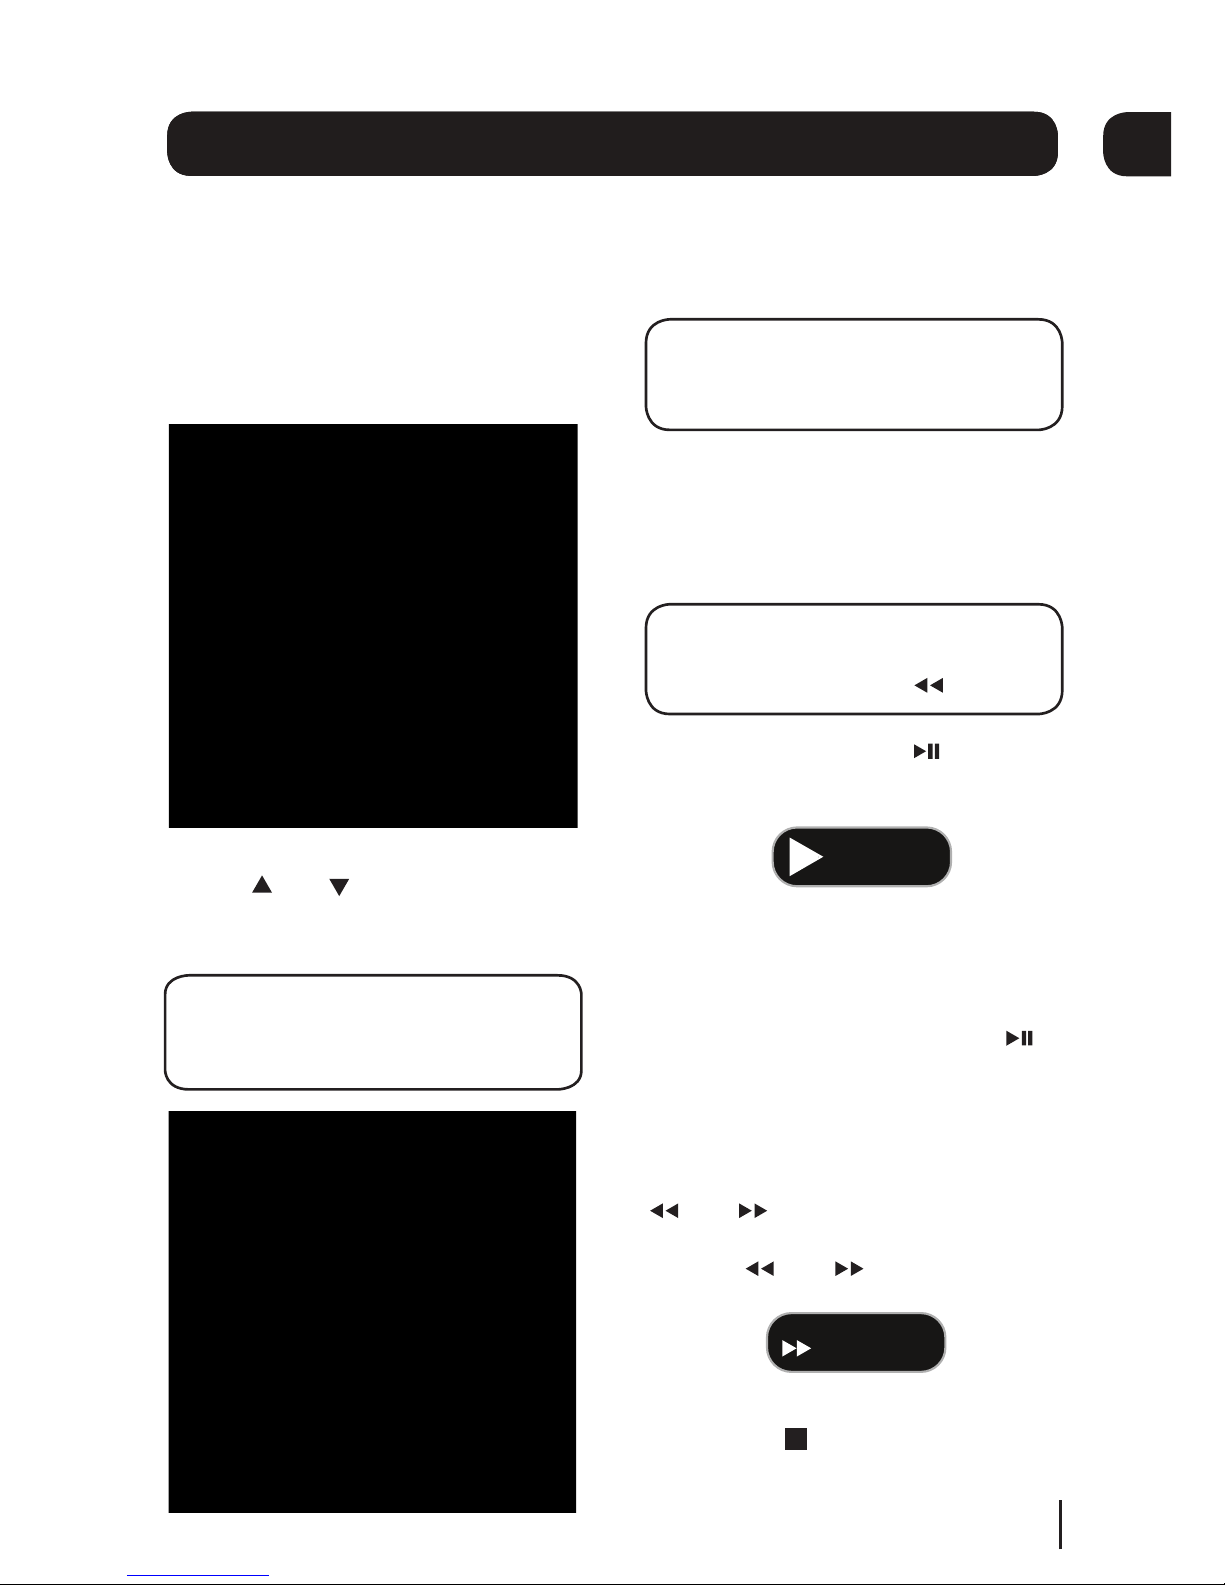
Changing the volume
You can change the volume using the [VOL+]
and [VOL-] buttons on the remote control.
You can turn o the audio by pressing the
[MUTE] button, to turn it back on press the
[MUTE] button again.
Audio description
Audio description is an additional narration that
describes all signicant visual information such
as body language, facial expression, scenery,
costumes - anything that is important to the plot
of the story, event or image.
Press the [AD] button to use this setting or not.
DON’T FORGET! Not all programmes
have audio description available.