9
EN
Disinfection, Cleaning,
and Sterilization
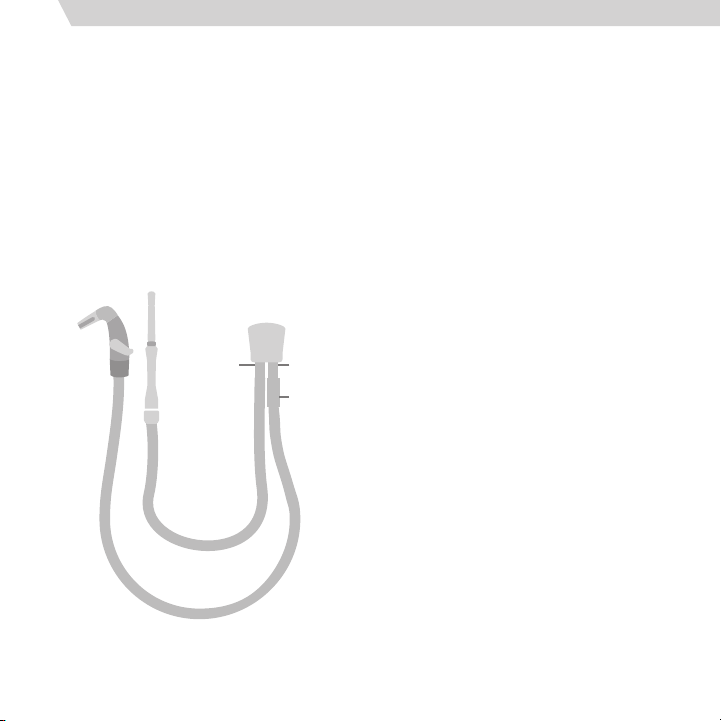
Surface Disinfection
of the Titanium Control Base
Zyris recommends performing a surface
disinfection of the Titanium Control Base
between each patient. To disinfect the
Titanium Control Base, first remove the
Vacuum Pipe.
If the Titanium Control Base is visibly
soiled with biomatter or blood, use an
intermediate level disinfectant wipe
with a claim to inactivate Mycobacterium
tuberculosis. Otherwise, use a hospital grade
disinfectant and follow the manufacturer’s
instructions for contact time.
Surface Disinfection
of the Vacuum Hose
Zyris recommends performing a surface
disinfection of the Vacuum Hose between
each patient.
Use a hospital grade disinfectant per
manufacturer’s instructions. If the
components are visibly soiled with
biomatter or blood, use an intermediate
level disinfectant wipe with a claim to
inactive Mycobacterium tuberculosis.
Barrier Sleeves may also be used and
changed between patients.
Cleaning and Sterilization
of the Vacuum Pipe
Zyris recommends sterilization of the Vacuum
Pipe between each patient.
Remove biomatter and other debris from
the suction channels using the provided
Double End Tube Brush with a neutral
pH (6.5-7.5) enzymatic cleaning solution.
Do not use solution to hold parts. After
cleaning, rinse with tap water, dry, and
place components in an autoclave pouch
to be sterilized in a steam autoclave. Use
validated sterilization cycles (Table 2).
Cleaning and Sterilization
of the Titanium Control Base
Zyris recommends following normal
infection control protocol for dental devices.
Users may sterilize the Titanium Control
Base at their discretion.
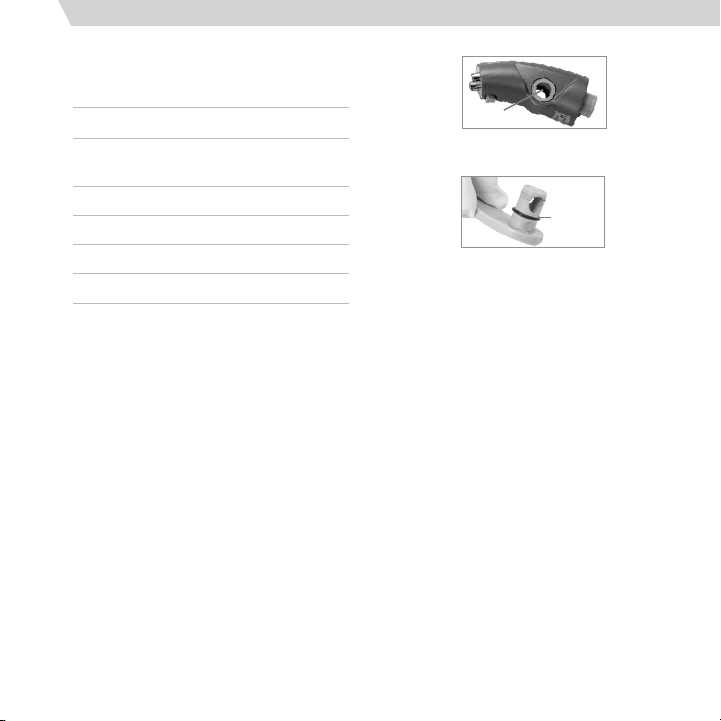
Remove Vacuum Levers from the Titanium
Control Base. Remove biomatter and other
debris from the suction channels using
the provided Double End Tube Brush with
a neutral pH (6.5-7.5) enzymatic cleaning
solution. Do not hold parts in cleaning
solution or use ultrasonic cleaners. After
cleaning, rinse with tap water, dry, and place
components in an autoclave pouch to be
sterilized in a steam autoclave. Use validated
sterilization cycles (Table 2).
After sterilization, lubricate the Vacuum Lever
O-rings with the Dow 111 O-ring lubricant