ZyXEL Communications Prestige 650M-6X User manual

Prestige 650M-6x Quick Start Guide
P
Pr
re
es
st
ti
ig
ge
e
R
Re
ea
ar
r
P
Pa
an
ne
el
l
C
Co
on
nn
ne
ec
ct
ti
io
on
ns
s
PORT CONNECTION
DSL Connect the DSL port on the Prestige to the wall jack using the included DSL cable (telephone wire).
Connect the micro filter(s) (optional – see the appendix in your User’s Guide for details) between the wall
jack and your telephone(s).
Be careful not to insert an RJ-11 connector into the RJ-45 port.
LAN 10/100M Use an Ethernet cable to connect this port to a computer (with an Ethernet card) or a hub (if your network
has more than one computer). The port is auto-negotiating (can connect at 10 or 100Mbps) and auto-
crossover (automatically adjust to straight-through or crossover Ethernet cable).
RESET You only need to use this button if you have forgotten the Prestige’s password or IP address. It returns the
Prestige to the factory defaults.
POWER Connect the end of the included power adaptor for your region to this power socket.
After you’ve made the connections, connect the power adaptor to a power supply and push in the power button to turn on the
Prestige.
P
Pr
re
es
st
ti
ig
ge
e
F
Fr
ro
on
nt
t
P
Pa
an
ne
el
l
L
LE
ED
D
D
De
es
sc
cr
ri
ip
pt
ti
io
on
n
LED COLOR STATUS DESCRIPTION
On The Prestige is receiving power and functioning properly.
Blinking The Prestige is rebooting.
Green
Off The Prestige is not ready or has malfunctioned.
PWR/SYS
Red On The power to the Prestige is too low.

P
Pr
re
es
st
ti
ig
ge
e
F
Fr
ro
on
nt
t
P
Pa
an
ne
el
l
L
LE
ED
D
D
De
es
sc
cr
ri
ip
pt
ti
io
on
n
LED COLOR STATUS DESCRIPTION
On The Prestige has a successful 10Mbps Ethernet connection.Green
Blinking The Prestige is receiving or sending data.
Amber On The Prestige has a successful 100Mbps Ethernet connection.
Blinking The Prestige is receiving or sending data.
10/100M
Off The LAN is not connected.
On The Prestige is linked successfully to a DSLAM.
Blinking The Prestige is initializing the DSL line.
DSL Green
Off The DSL link is down.
Blinking The Prestige is sending or receiving traffic.ACT Green
Off The Prestige is ready but not sending or receiving data.
Press the power switch in. The PWR/SYS LED blinks and turns steady on. The 10/100M and DSL
LEDs turn on, if they are properly connected.
P
Pr
re
es
st
ti
ig
ge
e
F
Fa
ac
ct
to
or
ry
y
D
De
ef
fa
au
ul
lt
ts
s
LAN IP Address 192.168.1.1 Default Password 1234
Subnet Mask 255.255.255.0
I
In
nt
te
er
rn
ne
et
t
A
Ac
cc
co
ou
un
nt
t
I
In
nf
fo
or
rm
ma
at
ti
io
on
n
Your ISP (Internet Service Provider) or telephone company should give you most of the following information or pre-
configured the Prestige with it when you signed up for your Internet access account. You do not need to know every field.
REQUIRED INFORMATION
Virtual Path Identifier (VPI): ____________
Virtual Channel Identifier (VCI): ____________
Multiplexing (VC-based or LLC-based): VC LLC
P
Pr
re
ep
pa
ar
ri
in
ng
g
Y
Yo
ou
ur
r
N
Ne
et
tw
wo
or
rk
k
All computers must have a 10M or 100M network card and TCP/IP installed. TCP/IP should already be installed on computers
using Windows NT/2000/XP, Macintosh OS 7 and later operating systems. See your User’s Guide for information on
configuring static IP address for your computer.
These procedures are for dynamic IP address assignment.
Setting up Your Windows 95/98/Me Computer
Installing TCP/IP Components
1. Click Start,Settings,Control Panel and double-click the Network icon.
2. The Network window Configuration tab displays a list of installed components.
To install TCP/IP:
a. In the Network window, click Add.

b. Select Protocol and then click Add.
c. Select Microsoft from the list of manufacturers.
d. Select TCP/IP from the list of network protocols and then click OK.
Configuring TCP/IP
1. In the Network window Configuration tab, select your network adapter’s TCP/IP entry and click Properties.
2. Click the IP Address tab. Click Obtain an IP address automatically.
3. Click the DNS Configuration tab. Select Disable DNS.
4. Click the Gateway tab. Highlight any installed gateways and click Remove until there is none listed.
5. Click OK to save and close the TCP/IP Properties window.
6. Click OK to close the Network window.
7. Turn on your Prestige and restart your computer when prompted. Insert the Windows CD if prompted.
Verifying TCP/IP Properties
1. Click Start and then Run. In the Run window, type "winipcfg" and then click OK to open the IP Configuration window.
2. Select your network adapter. You should see your computer's IP address, subnet mask and default gateway.
Setting up Your Windows NT/2000/XP Computer
Configuring TCP/IP
1. Click Start, Settings, Network and Dial-up Connections and right-click Local Area Connection or the connection you
want to configure and click Properties. For Windows XP, click start, Control Panel, Network and Internet
Connections and then Network Connections. Right-click the network connection you want to configure and then click
Properties.
2. Select Internet Protocol (TCP/IP) (under the General tab in Win XP) and
click Properties.
3. The Internet Protocol TCP/IP Properties window opens. Click Obtain an IP
address automatically.
4. Click Obtain DNS server automatically.
5. Click Advanced, IP Settings tab and remove any installed gateways, then click OK.
6. Click OK to save and close the Internet Protocol (TCP/IP) Properties window.
7. Click OK to close the Local Area Connection Properties window.
8. Turn on your Prestige and restart your computer (if prompted).
Verifying TCP/IP Properties
1. Click Start, Programs, Accessories and then Command Prompt.
2. In the Command Prompt window, type "ipconfig" and then press ENTER. The window displays information about your
IP address, subnet mask and default gateway.

Setting up Your Macintosh Computer
Configuring TCP/IP Properties
1. Click the Apple menu, Control Panel and double-click TCP/IP to open the TCP/IP Control Panel.
2. Select Ethernet from the Connect via list.
3. Select Using DHCP Server from the Configure list.
4. Close the TCP/IP Control Panel.
5. Click Save if prompted, to save changes to your configuration.
6. Turn on your Prestige and restart your computer (if prompted).
Verifying TCP/IP Properties
Check your TCP/IP properties in the TCP/IP Control Panel.
A
Ac
cc
ce
es
ss
si
in
ng
g
t
th
he
e
P
Pr
re
es
st
ti
ig
ge
e
Access the Prestige using the command line interface via a telnet session.
1. Launch a Telnet program. In Windows, click Start and then Run.
2. Type “Telnet” followed by a space and the IP address of the Prestige,
(192.168.1.1 is the default) and click OK to display the password screen.
3. Enter “1234”, the default password, to access the command line interface main
menu. As you type a password, the screen displays an asterisk “ * ” for each
character you type.
I
In
ni
it
ti
ia
al
l
C
Co
on
nf
fi
ig
gu
ur
ra
at
ti
io
on
n
You can configure two PVCs, node 1 or node 2 by using the following commands. See your User’s Guide for detailed
information.
COMMAND DESCRIPTION
wan node index [1-2] Set a node as the current node to apply node commands.
wan node ispname Identify the ISP used by this node.
wan node vpi <vpi> Configure the Virtual Path Identifier from 0 to 255
wan node vci <vci> Configure the Virtual Channel Identifier from 32 to 65535.
wan node mux <llc|vc> Configure the multiplexing method used by the Prestige.
wan node save Save your current node settings.
wan node disp Display the settings for the current node.
An example is shown next.
Password: ****
Copyright (c) 1994 - 2004 ZyXEL Communications Corp.
ras>
ras> wan node index 1
ras> wan node vpi 100
ras> wan node vci 32
ras> wan node mux vc
ras> wan node save

S
Sa
af
fe
et
ty
y
W
Wa
ar
rn
ni
in
ng
gs
s
For your safety, be sure to read and follow all warning notices and instructions.
To reduce the risk of fire, use only No. 26 AWG or larger telephone wire.
Do NOT open the device or unit. Opening or removing covers can expose you to dangerous high voltage points or other
risks. ONLY qualified service personnel can service the device. Please contact your vendor for further information.
Use ONLY the dedicated power supply for your device. Connect the power cord or power adaptor to the right supply
voltage, that is, 110V AC for North America or 230V AC for Europe.
Do NOT use the device if the power supply is damaged as it might cause electrocution.
If the power supply is damaged, remove it from the power outlet.
Do NOT attempt to repair the power supply. Contact your local vendor to order a new power supply.
Place connecting cables carefully so that that no one will step on them or stumble over them. Do NOT allow anything to
rest on the power cord and do NOT locate the product where anyone can walk on the power cord.
If you wall mount your device, make sure that no electrical, gas or water pipes will be damaged.
Do NOT install nor use your device during a thunderstorm. There may be a remote risk of electric shock from lightning.
Do NOT expose your device to dampness, dust or corrosive liquids.
Do NOT use this product near water, for example, in a wet basement or near a swimming pool.
Make sure to connect the cables to the correct ports.
Do NOT obstruct the device ventilation slots, as insufficient airflow may harm your device.
Do NOT store things on the device.
Connect ONLY suitable accessories to the device.
T
Tr
ro
ou
ub
bl
le
es
sh
ho
oo
ot
ti
in
ng
g
PROBLEM CORRECTIVE ACTION
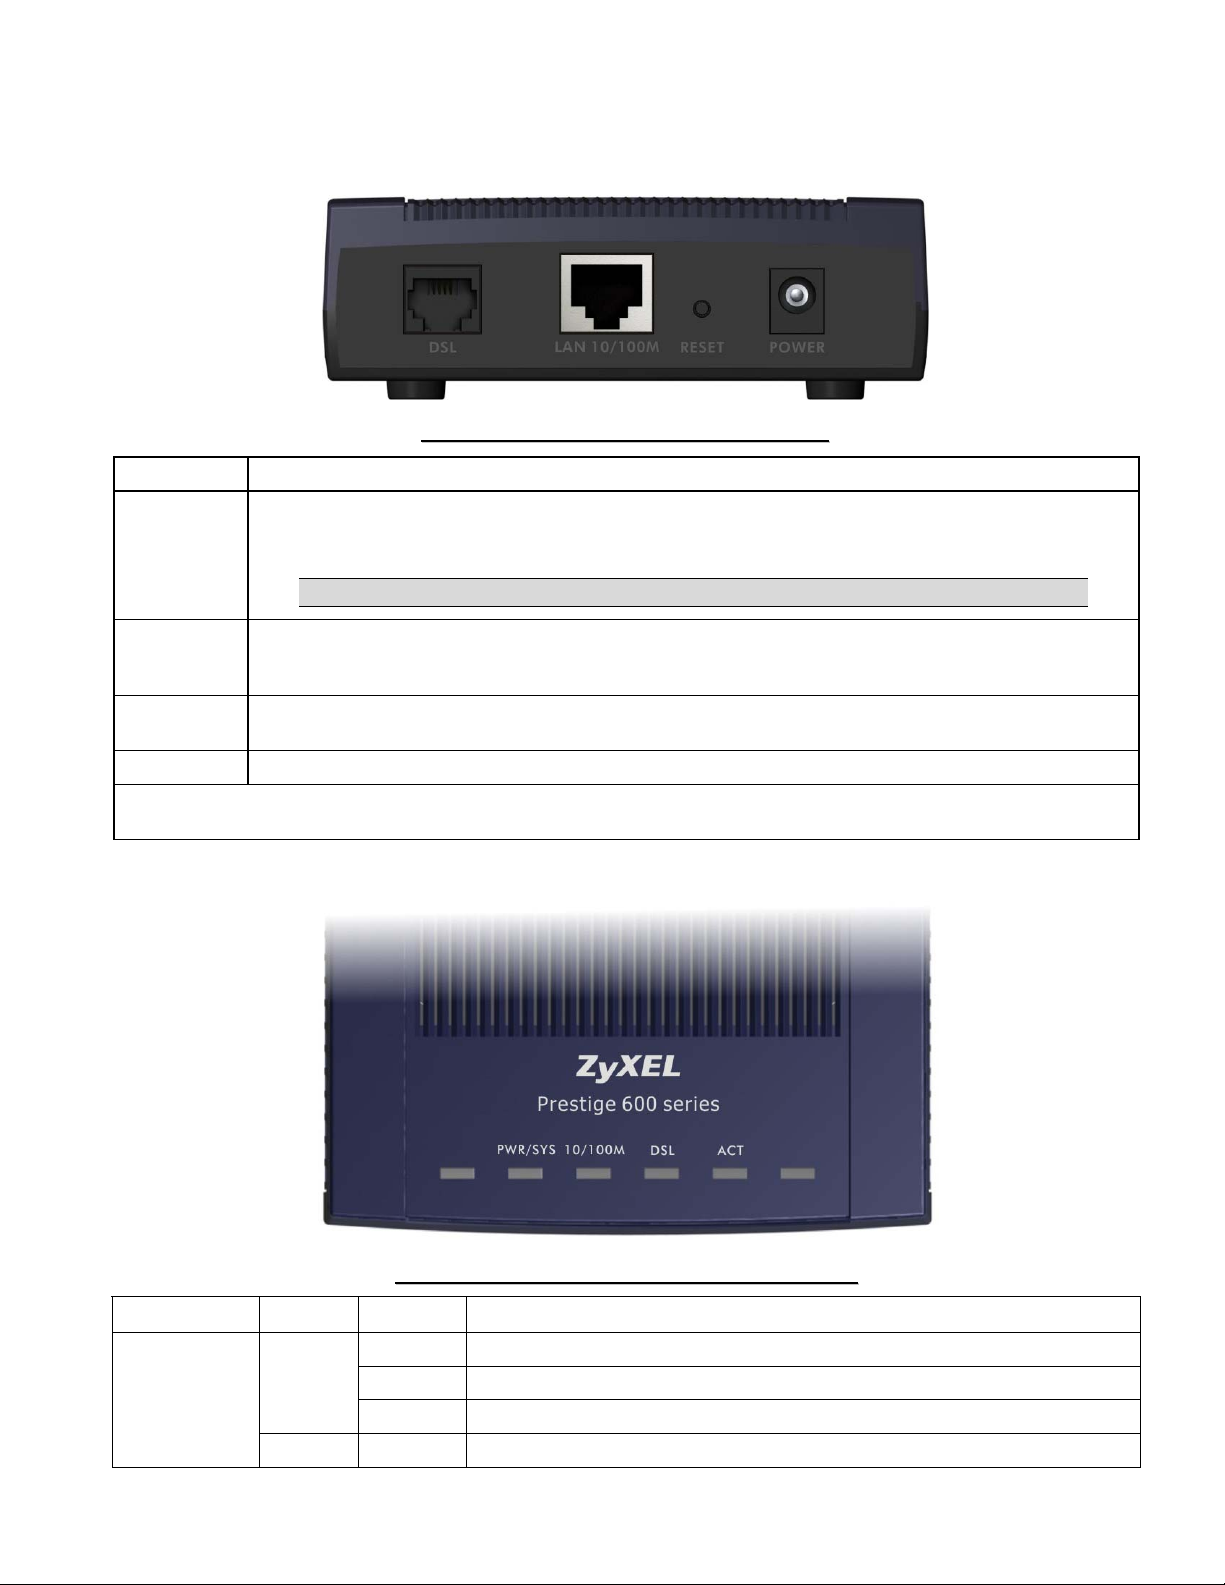
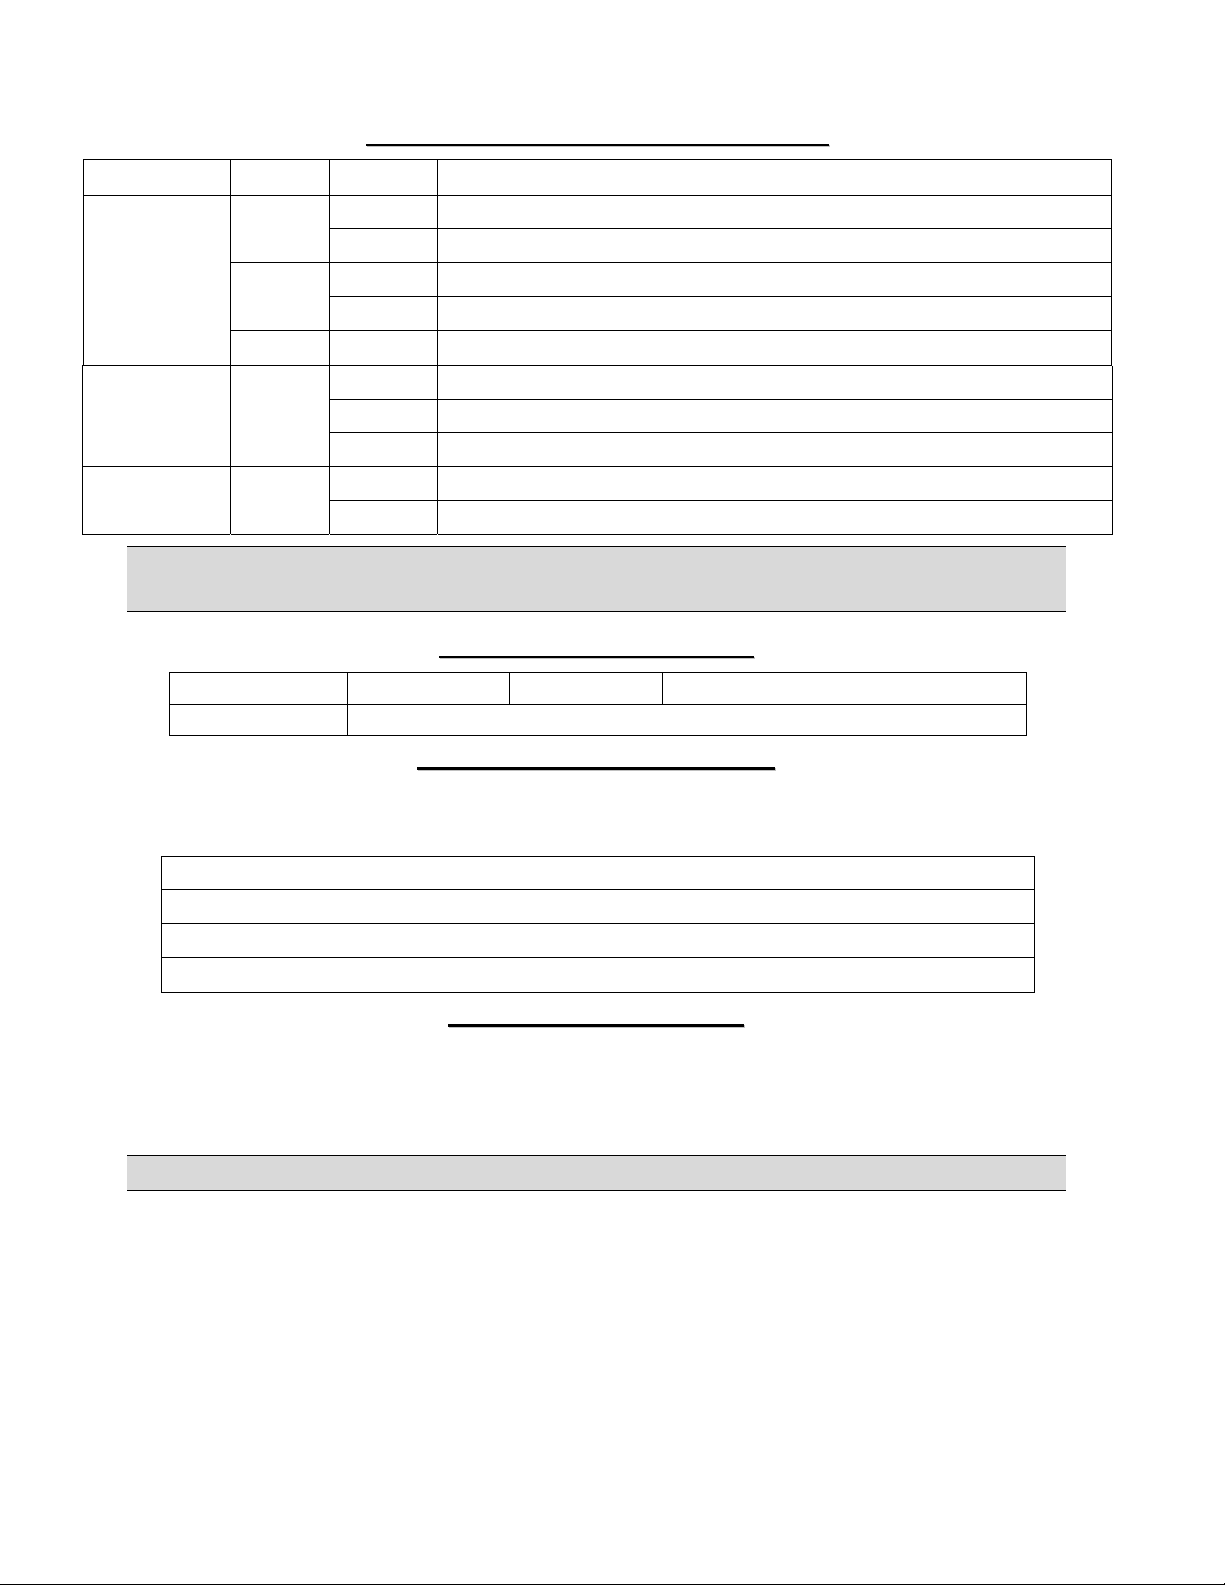
The PWR/SYS LED is off. Make sure the Prestige’s power adaptor is connected to the Prestige and plugged into an
appropriate power source. Check that the Prestige and the power source are both turned on.
Turn the Prestige off and on. If the error persists, you may have a hardware problem. In this
case, you should contact your vendor.
The LAN LED won’t turn on. Check the cable connection to the Prestige LAN port.
Make sure your computer network card is working properly.
The DSL LED is off. Check the connection between the Prestige DSL port and the wall jack.
I cannot ping any computer
on the LAN.
If the 10/100M LAN LED is off, check the cables between the Prestige and your computer or
hub.
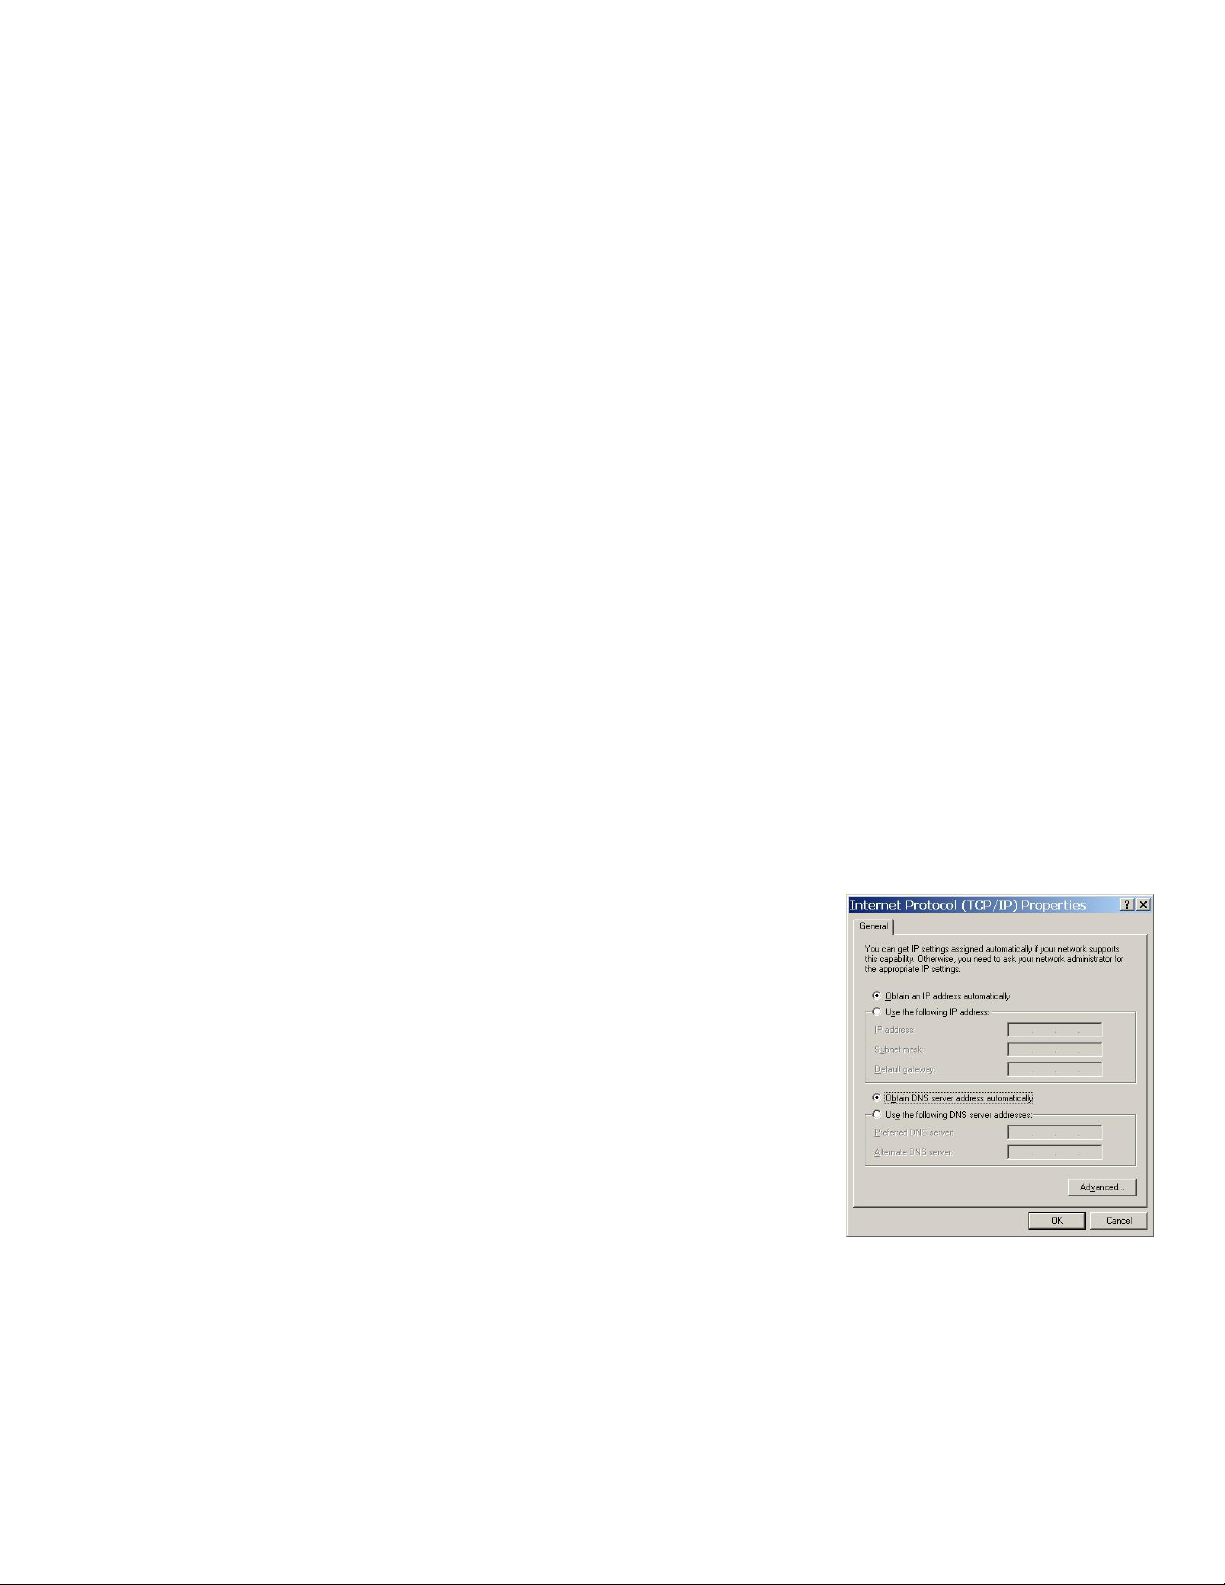
Check the TCP/IP configuration on your computer. Make sure that the IP address and the
subnet mask of the Prestige and the computers are on the same subnet.
I cannot access the Internet. Make sure the Prestige is turned on and connected to the network.
If the Prestige’s DSL LED is off, check the cable between the Prestige and the telephone wall
jack.
Make sure you entered your user name correctly. Your user name may be case-sensitive.
Other manuals for Prestige 650M-6X
1
Table of contents
Other ZyXEL Communications Telephone manuals