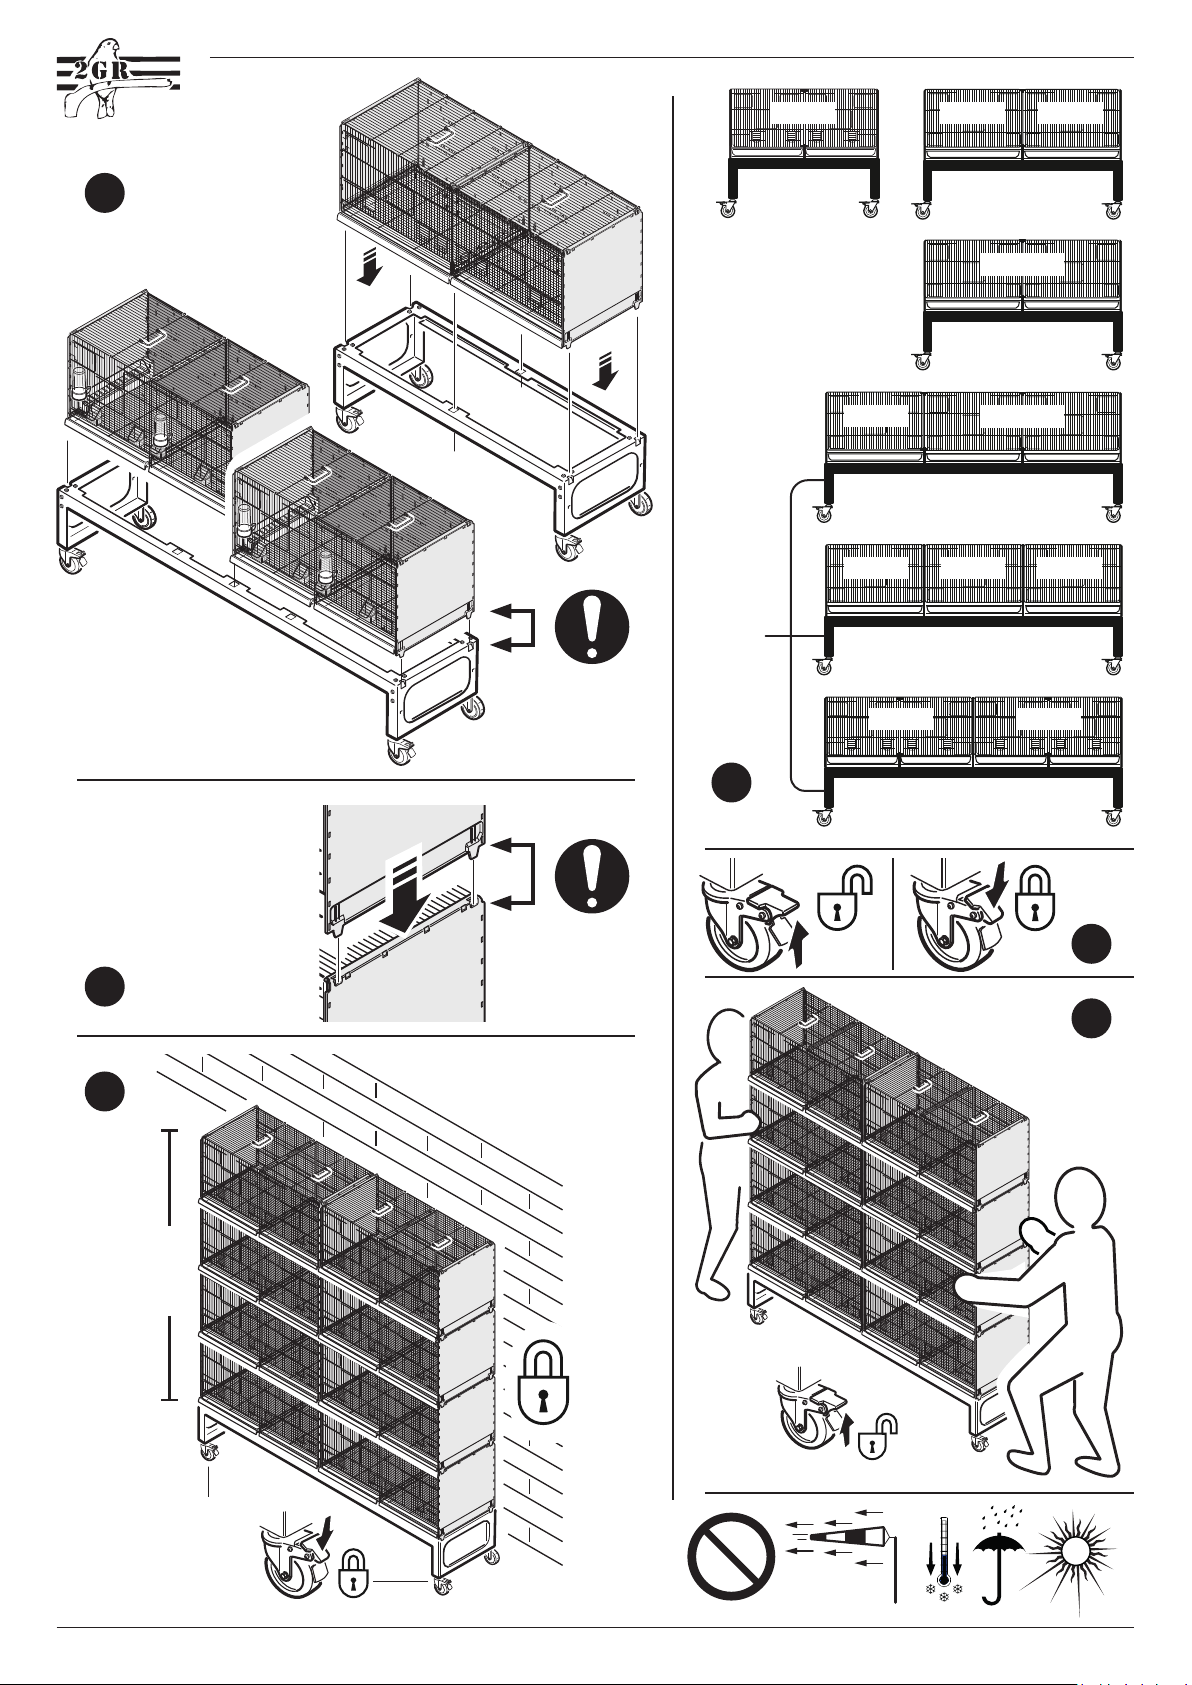
ones on top must coincide with the slots on the cages below. Make sure that
the feet are inserted correctly in the slots to avoid any dangerous movement
or prevent them from falling - g. 6.
ALWAYS ENSURE MAXIMUM STABILITY AND SAFETY - g. 7.
Always move the trolley slowly and carefully and hold onto it.
Risk of tipping over when moving, especially when cages are stacked on top
of one another. The trolley should be moved by two people.
Park the trolley so that it does not create an obstacle or hazard and cannot
be knocked into.
Do not leave the trolley in windy places and avoid draughts which could tip
it over (sail-effect caused by stacked cages).
Do not leave cages containing animals in the sun.
Block the wheels with the brake to stop the trolley from moving - g. 8.
If not in use, store the trolley in a safe, dry, clean and protected place.
CLEANING AND SANITISING
Before cleaning and sanitising the trolley, always put on
personal protective equipment:
protective gloves, mask and suitable clothing.
Use hot water and non-aggressive products for cleaning.
Do not use acids.
MAINTENANCE
Check frequently that the trolley is intact and working properly.
Lubricate the wheels, when necessary.
Periodically check that the screws and nuts are correctly tightened.
SAFETY WARNINGS
Keep children away and prevent them from playing with the trolley.
Never stand on or climb onto the trolley.
Risk of crushing/impact when handling:
- risk of crushing feet by the wheels
- risk of crushing hands/body between the trolley and nearby objects
- do use and/or move the trolley on sloping surfaces
- block the wheels of the trolley to prevent dangerous movement
- always hold onto the trolley when moving it
- do not push and then, let go of the trolley.
Risk of the trolley and the cages loaded on it tipping over:
- stack MAX. 4 cages and ensure that they are stable
- make sure that nothing knocks into the trolley and the cages
loaded on it
- do not park/move the trolley in areas of transit and make sure it
does not block the way
- do not park/move the trolley in windy places.
USE THE TROLLEY WITH EXTREME CARE AND COMMON SENSE.
Do not use the trolley:
- for any uses other than the ones intended and indicated in these instructions
- as a place to sit, as a means of transport or to transport items other than
2GR cages with feet
- in conditions of poor lighting and visibility
- in adverse weather conditions (wind, rain, wet/slippery oor)
- on slopes or uneven ground
- if not intact or working incorrectly.
In the event of faults/malfunctions or to request spare parts, please contact
2GR s.n.c. If necessary, the trolley must be disposed of in compliance with
the relevant laws in force. Do not abandon it in the environment.
TECHNICAL DATA
mod. 429 439 418 419
Length (L) mm 918 1190 1225 1840
Height from ground (H) mm 360 360 360 360
Depth (P) mm 440 330 440 440
Weight kg 8.2 10 10.2 14
Maximum load kg 40 65 65 80
Materials:
- Sides and crossbar ................................ painted steel sheet (thick. 2 mm)
- Screws ................................ no. 16 with rounded hex head - M6 x 15 mm
- Nuts (and washers) ................................................................. no. 16 - M6
- Caster wheels .................. no. 4 rubber Ø 70 mm of which two with brake
- Wheel fastening ............................................. no. 4 nuts M12 + 8 washers
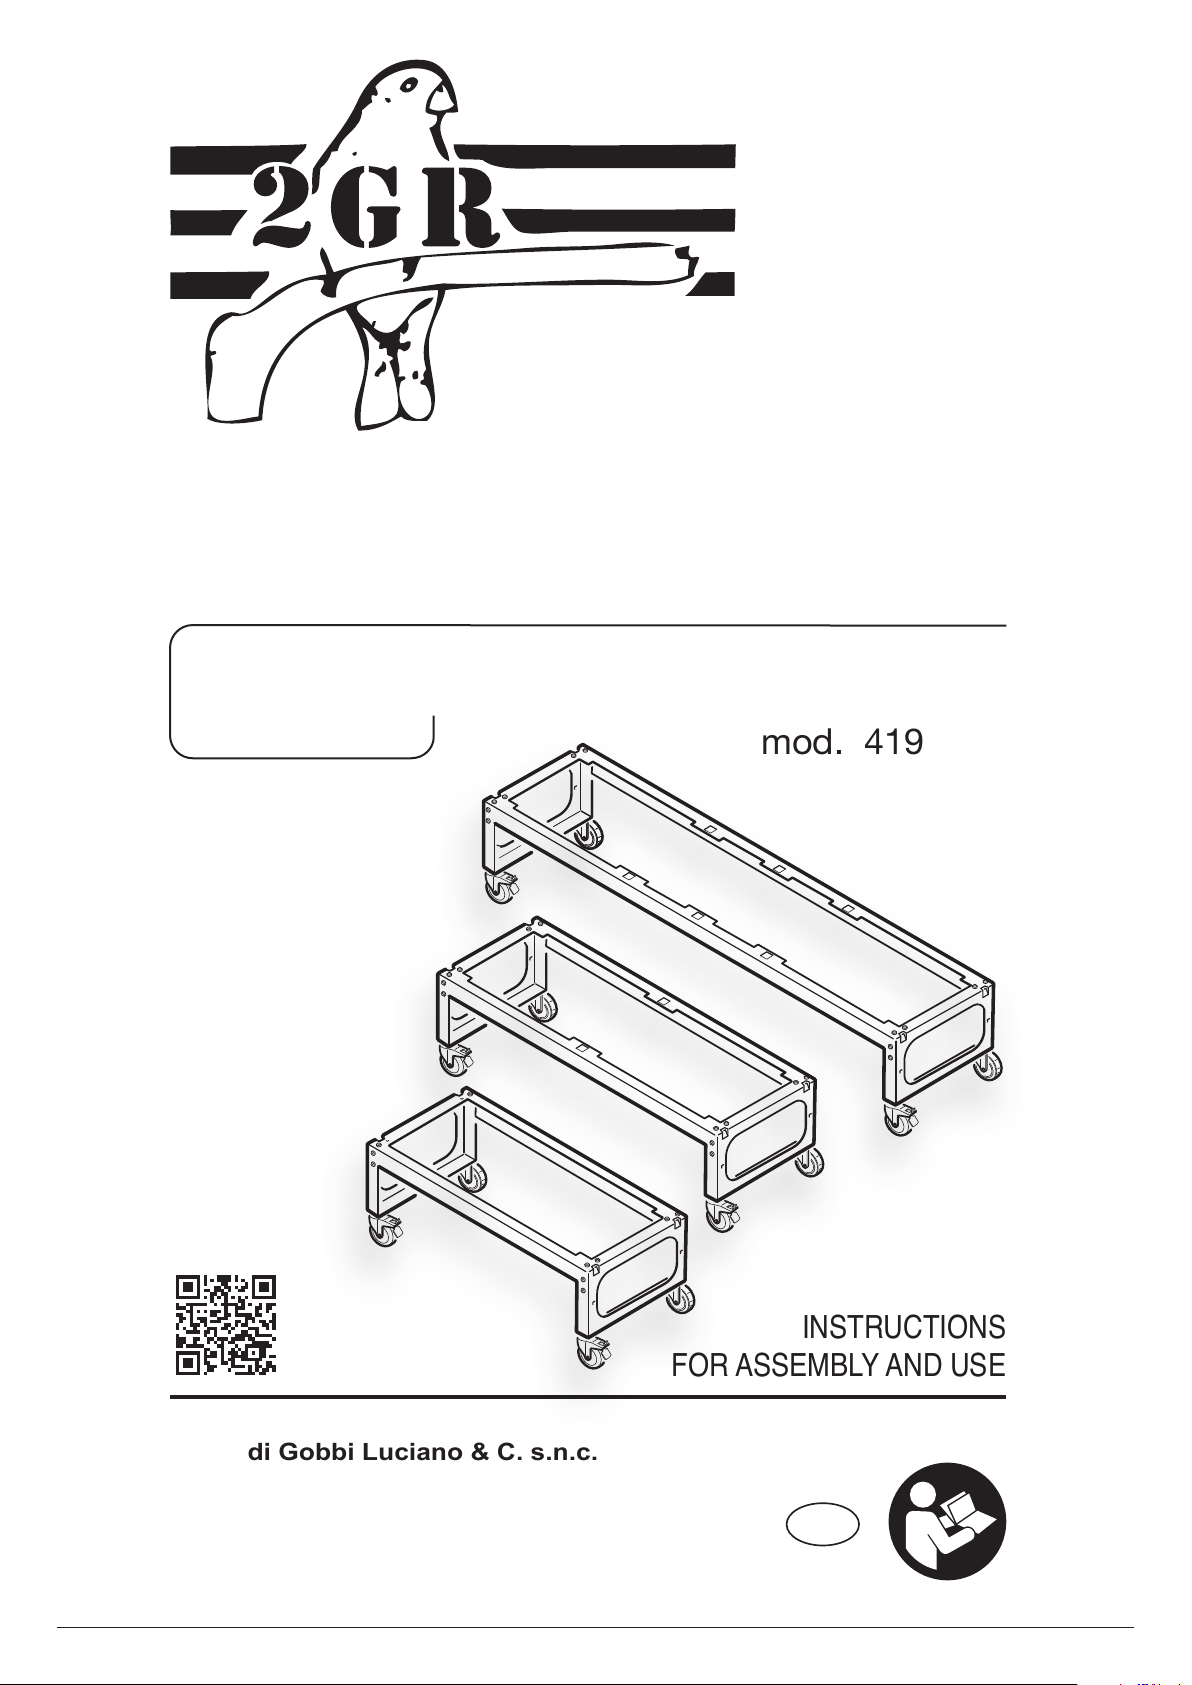
INSTRUCTIONS FOR ASSEMBLY AND USE - mod. 429 - 439 - 418 - 419
2 / 4
ed. 29.10.2021
If any items are missing, contact 2GR s.n.c. immediately.
DESCRIPTION AND INTENDED USE
The products, described in these instructions, are metal trolleys for holding
and handling bird cages. The trolleys consist of two side panels (A) and 2
lengthwise connecting crossbars (B).
Each side is joined to the crossbars by 8 screws and self-locking nuts.
The trolley has 4 caster wheels, 2 of which have a brake.
The trolley is realized in many models with different dimensions.
These trolleys are intended for use to hold and handle cages, produced by
2GR s.n.c., housing small birds.
Any other use is deemed unsuitable and is forbidden.
The 2GR transportable cages must be “breeding” type cages with feet to be
tted into the relevant slots featured on the trolley - g. 4.
Breeding cages that can be used according to their respective trolleys:
“BREEDING” CAGES TROLLEY model nr.
MODEL. (Length of the cage)
429 439 418 419
326/B - 326/Z. (L=60 cm) ✔
420-421-422. (L=90 cm) ✔ ✔
400-401-402-403. (L=120 cm) ✔ ✔
Cages which can be transported by the trolley (positioned only
lengthwise on it - fig. 4):
TROLLEY model nr.
MAX. No. “breeding” cages 429 439 418 419
2 x L=60 cm ✔✔ ✔
3 x L=60 cm ✔
1 x L=90 cm ✔✔
2 x L=90 cm ✔
1 x L=120 cm ✔ ✔
1 x L=120 cm + 1 x L=60 cm ✔
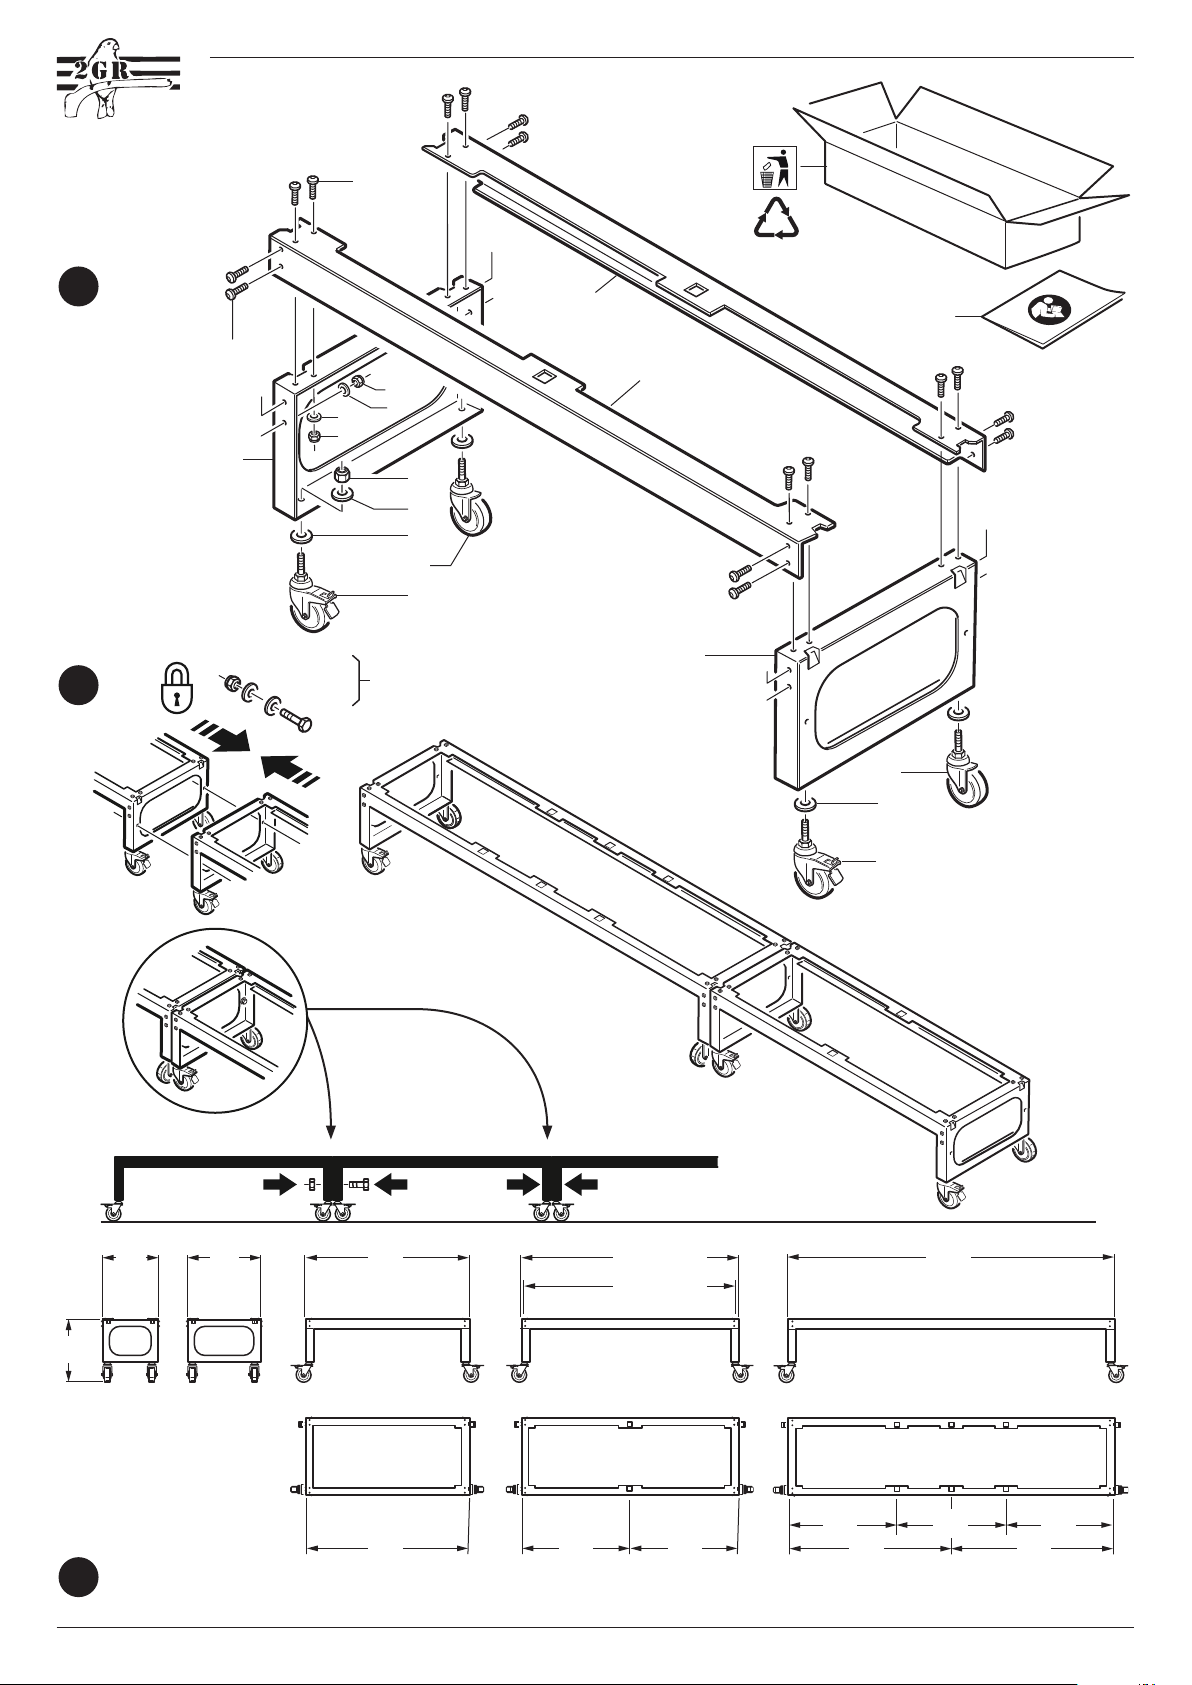
HOW TO ASSEMBLE THE TROLLEY
Two people are needed to assemble the trolley.
Tools required: - male hex key (Allen) 4 mm
- spanner 10 mm and 19 mm for wheel nuts.
1 - Fasten the wheels to the side panels (A) using the nuts and washers
(tightening torque = 60 Nm).
The 2 wheels (G) with the brake must be fastened to the same crossbar.
2 - Fasten the crossbar (B) to the side panels using the screws and nuts
(tightening torque = 20 Nm).
Once assembled, multiple trolleys can be joined together lengthwise, using
the 2 holes provided on the side panels - g. 2.
USE AND POSITIONING OF THE TROLLEY
The trolley must be parked or moved on horizontal, at and level surfa-
ces which can support its weight plus the weight of the load which it holds
(always within the MAX. limits allowed).
The cages must be positioned lengthwise on the trolley - g. 4/5.
The feet of the cages must be inserted in the relevant slots (Z) on the sides
and crossbars of the trolley - g. 4.
A MAX. of four cages can be placed on the trolley provided that they are all
the same size. If cages are stacked on top of one another, the feet of the
Q.ty
A sides 2
B crossbars 2
C screws 16
D M6 nuts 16
E M12 nuts for wheels 4
Q.ty
F
galvanised washers for wheels
8
G casters 2
H casters with brake 2
I
instructions for assembly and use
1
L washers 16
These instructions should be read carefully.
They should be stored in a safe location and, if lost, another copy may be
requested. For further information, contact 2GR s.n.c.
2GR s.n.c. is not liable for any harm to persons, property or animals in the
event of improper or incorrect use of the trolley and for any failure to comply
with the content of these instructions.
RECEIPT OF GOODS
Upon receipt, check that the packaging is intact and undamaged.
Dispose of packaging in accordance with applicable laws. Place the packa-
ging on the oor, open it and check that there are two cages containing the
following items: