|Honeycomb Shade Arches2
• Open the arch to it’s fully
fanned position and gently
insert the remaining half of
the arch into the bottom rail.
Only the very last cell which
encases the adhesive strip
should be inserted into the
bottom rail.
• For MidCell, TwinCell and
Grand Cell only: Gently
remove the protective
covering from the last 2" of
the adhesive strip. Gently
press the cellular arch fabric
against the adhesive
to hold your arch securely
in place.
• Replace the end cap on the
bottom rail of your fully
assembled arch.
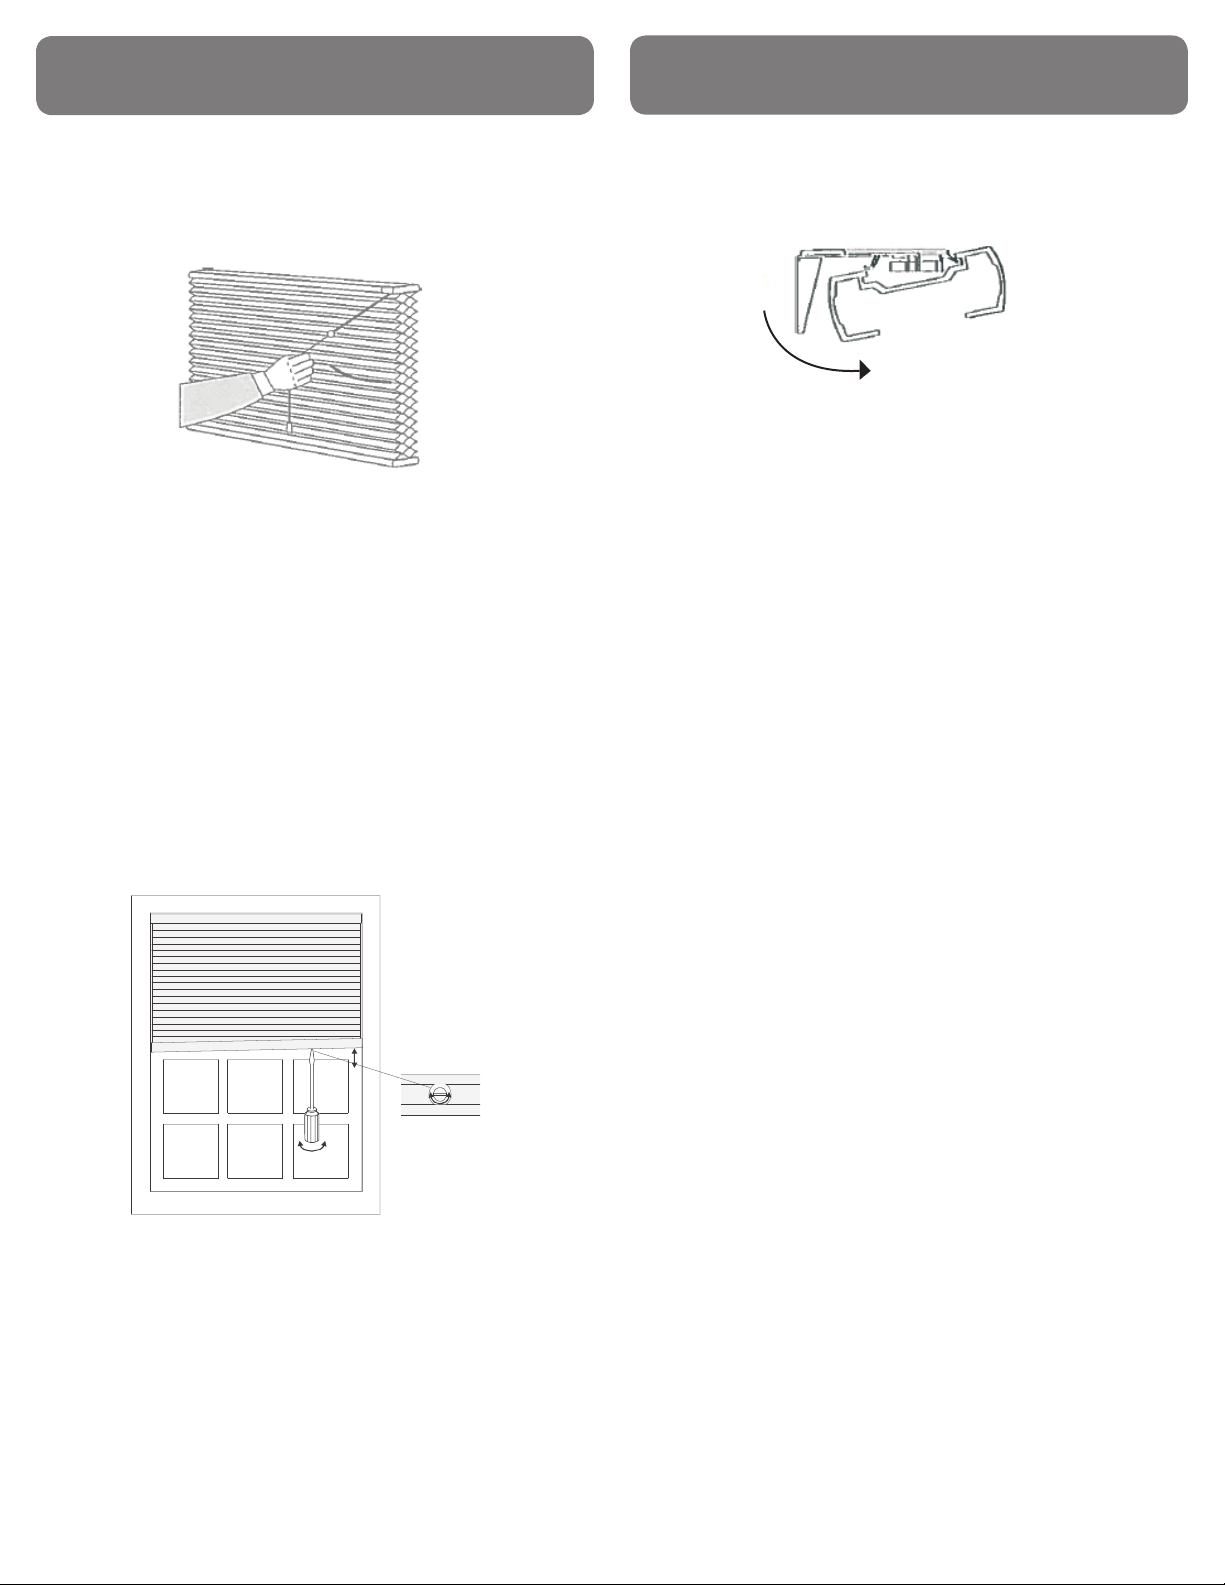
• Install brackets 1/4" in from
the front edge of the sill and
equally spaced as shown.
• One side of the arch has
already been attached to an
adhesive trip which has been
inserted into the bottom rail.
Slide the strip with the arch
attached out of the bottom
rail until the arch is even with
the end of the bottom rail.
• For MidCell, TwinCell and GrandCell Honeycomb Shades:
Insert the loose end of the adhesive strip into the top
cell of the arch. DO NOT remove the protective covering.
Continue inserting the strip into the arch until there is no
remaining slack.
• For MiniCell Shades:
The top cell has been slit to accommodate the adhesive
strip. Remove the protective covering on the loose end of
the adhesive strip. Fold the strip over so that it adheres to
the top of the slit cell.
• For Micro and 1" Pleated Shades:
Remove the protective covering on the remaining adhesive
strip. Fold the strip over so that it adheres to the top pleat
on the stack.
Your arch top shade has been shipped in the closed position
and inserted into it’s own bottom rail. Remove the end cap
located opposite the arch stack.
FULL ARCH INSTALLATION
• Open the arch to it’s fully
fanned position and gently
insert the remaining half of
the arch into the bottom rail.
Only the very last cell which
encases the adhesive strip
should be inserted into the
bottom rail.
• For MidCell, TwinCell and
Grand Cell only: Gently
remove the protective
covering from the last 2" of
the adhesive strip. Gently
press the cellular arch fabric
against the adhesive
to hold your arch securely
in place.
• Replace the end cap on the
bottom rail of your fully
assembled arch.
• One side of the arch has
already been attached to an
adhesive trip which has been
inserted into the bottom rail.
Slide the strip with the arch
attached out of the bottom
rail until the arch is even with
the end of the bottom rail.
• For MidCell, TwinCell and GrandCell Honeycomb Shades:
Insert the loose end of the adhesive strip into the top
cell of the arch. DO NOT remove the protective covering.
Continue inserting the strip into the arch until there is no
remaining slack.
• For MiniCell Shades:
The top cell has been slit to accommodate the adhesive
strip. Remove the protective covering on the loose end of
the adhesive strip. Fold the strip over so that it adheres to
the top of the slit cell.
• For Micro and 1" Pleated Shades:
Remove the protective covering on the remaining adhesive
strip. Fold the strip over so that it adheres to the top pleat
on the stack.
You will be using your assembled arch top with mounting
brackets attached to the bottom rail to mark the position of
the brackets on your wall or molding.
An inside mount shade with an arch top requires a special
type of installation to keep the shade and the arch in close
proximity to each other. This type of installation requires an
end mount bracket system.
SHADE WITH ARCH INSTALLATION
Arch assembly