manuals.online logo
Brands
  1. Home
  2. •
  3. Brands
  4. •
  5. 3d-printz
  6. •
  7. Toy
  8. •
  9. 3d-printz Naughty 2000 User manual

3d-printz Naughty 2000 User manual

Naughty 2000
3d-printz Original
AUW: 1500 - 1800g
Span: 2000mm
Airfoil: RG15
CG: 55 – 58mm
S rface: 34,5 dm²
Wingload: from 43g/dm²
additional Material:
RC-eq ipment
Bowden 2x
CA medi m & thick
C tterknife
Sanpaper (120)
please check the Table for f rther vitamins:
part diameter length pcs
horstab 4mm 285mm 1
fuselage 8mm 800mm 1
flaps 2mm 350mm 2
2mm 430mm 2
wingspars 10mm 1000mm 1
8mm 380mm 2
8mm 145mm 1
screws M6 20mm 2, N lon
M5 20mm 1, N lon
M3 20mm 1, N lon
nuts M6 2
M5 1
M3 1
Self tapping screws M2 4mm – 6 mm 30
Round Magnets 10mm 4mm 10
electronics
RC RX
Battery (fe 3S Lipo 2200mah for Motorversiom)
6x Microservos fe Savöx SH-0264MG
optional Motor – fe HK NTM Prop-Drive 28-36 1200KV / 530W
S ggestion for Wingl g:
first solder the pl gs and afterwards gl e them in the bays with CA.
M ltiplex Stecker, 6 polig:
foreword
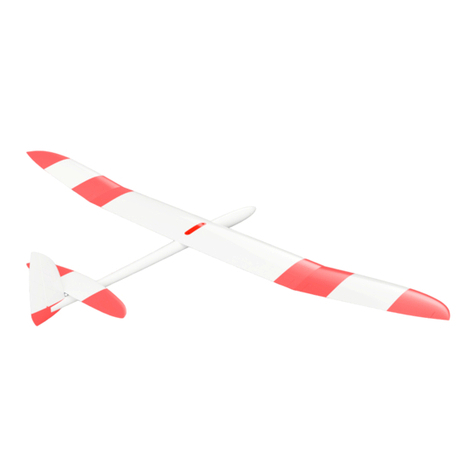
Na ghty - the name says it all - as the "evil twin brother" of the Nice, it shares the
shape with the thermal glider, b t that's of co rse the only m t ality. The Na ghty
is designed as a slope racer and comes p with a significantly higher wing load, a
faster airfoil (the RG15 is a tr e benchmark since a long time) and a solid
constr ction. The F3F-inspired sloper can easily be motorized and therefore is also
a tr e rocket in the flat. Thanks to the 4 flapwing, the Na ghty can also be landed
well on neven terrain and can be adapted to different flight sit ations.
Build
Wing
The middle of the wing is gl ed first – to do this, join the parts WingCR, WingCL and
Centerjoiner together with s pergl e. The 10mm and the 8mm carbon t be serve as
a g ide rail (ca tion – do not gl e the carbon t bes!).
Then the left and right wing and the flaps (aileron, flaps) can be assembled. The
10mm carbon t be and the 8mm carbon t be serves as a g ide rail again. The flaps
can be reinforced with a carbon rod (2mm) if req ired, b t this is optional. Never
gl e the center of the wing to the rest of the wing if it sho ld remain divisible!
The flaps are attached with TPU hinges in the slots provided sing CA. First check
whether all slots are free and the TPU hinges can be inserted witho t problems.
Then insert the hinges into the slots with a little s pergl e, witho t accelerator, so
that the position can still be corrected if necessary (thick s pergl e dries more
slowly). Use the accelerator only when everything fits perfectly and can be moved
freely!
f selage
The f selage parts F sLW 1-4 can be gl ed sing CA, the 8mm carbon t be serves
as a g ide rail. Do not gl e the carbon t be to the f selage yet! Insert an M6 n t in
the recess provided (at the wingjoint) and gl e it if necessary, then gl e the entire
s rface of the f splate to the f selage.
Now the frontpart of the f se can be assembled, first the cockpit – gl e with CA:
Then gl e the motor holder into F sfront_front, and p sh the cockpit into
F sfront_front as far as it will go and gl e it - make s re that it is straight:
Now the f selage servos can be installed. Later, they are harder to access! When
the servos are screwed in, slide the front f selage section into the rear one
(F sfront_rear) and gl e – make s re it is straight again!
P t an M6 n t into the F sfront_rear (where the wingscrew front comes in) - the n t
sho ld be heated with a lighter to slide into the recess by the wing mo nt. After
that, F sspar_rear can be gl ed in.
Finally gl e the front f selage part to the rear one. To do this, insert the 8mm
carbon t be into the rear f selage, attach the skid as a test, p sh it into the front
f selage section and shorten the 8mm carbon t be to the correct length (800mm
sho ld fit). Then the t be can be gl ed to the rear part of the f selage - yo sho ld
make s re that the t be reaches into the recess in the skid (b t don't gl e the skid
yet!) . The f selage parts are best gl ed with thick CA witho t accelerator or epoxy
resin, so that there is eno gh time for the alignment of the t be. Finally, the front
can be connected to the back.
For the canopy gl e together canopy_front and canopy_rear, mo nt the
magnetholder with 2x M2 Screws to the f selage (above the servos), and gl e in the
magnets to the canopy and magnetholer (keep polarization in mind)
stab
Gl e the parts El_right, El_middle and El_left and the corresponding r dder
s rfaces together (4mm carbon t be obligatory!)
Then screw the entire horizontal stab to the pylon sing M5 and M3 screws and the
associated n ts (these are p shed into the slots in the pylon). The tailplane m st be
parallel to the wing - therefore, as a g ide, mo nt the wing center section on the
f selage with 2x M6 screws, apply adhesive to the pylon (the tailplane is already
screwed on) and gl e the pylon to the f selage so that the tailplane is parallel to
the wing.
Then the vertical stabilizer, the r dder (TPU hinges) and the skid can be aligned
and gl ed in the same way.
electronics
Na ghty is made for servos in the 12mm class. These fit perfect: Savöx SH-0264MG
or SG 90 or similar. Yo ´ll ned 6 pcs. If yo want to modify the servofittings to yo r
needs in the CAD yo can se the Stepfiles that come with the Download.
batterys ggestion: 3S Lipo, 2200mah, 25C
Motor:
HK NTM 2836 (available in different KV)
...or similar
ESC: ESC with BEC, 40-50 A
Prop: please choose a foldingprop corresponding to yo r motor/esc combo!
throws
Using the s ggested CG of 55mm behind leading edge following throws are a good
starting point:
Aileron: +/- 20mm
Elevator: +/- 10mm
R dder: Maxim m
Camber (Thermal): -3mm
Speed: +2mm
B tterfly/Crow:
Flaps -30mm
Ailerons +25mm
Elevator -2mm
Please try the Crowmode at s fficient height before yo se it to land yo r
Na ghty!
CG
The right center of gravity is essential for comfortable flight behavior. This is
precisely why it sho ld be dialled in individ ally. The initial val e can be ass med
to be approx. 55 mm behind the leading edge. If more power and more agile flight
behavior is desired, the center of gravity can be shifted f rther back, b t the
throws sho ld then also be adj sted.
Please note that the center of gravity and the throws m st be dialled in by the pilot
himself for each Na ghty b ilt - the val es given here are only g ide val es.
We wish yo a lot of f n with yo r Na ghty!

Other 3d-printz Toy manuals

3d-printz Nice 2000 User manual

3d-printz

3d-printz Nice 2000 User manual

3d-printz Mini Sinbad 1200 User manual

3d-printz

3d-printz Mini Sinbad 1200 User manual

Popular Toy manuals by other brands

Chicco AUTO SAFARI instruction manual

Chicco

Chicco AUTO SAFARI instruction manual

LEGO CHIMA 70200 instructions

LEGO

LEGO CHIMA 70200 instructions

Eduard B-25J bomber front interior S.A. manual

Eduard

Eduard B-25J bomber front interior S.A. manual

Hobbico Flyzone DC-3 Airliner manual

Hobbico

Hobbico Flyzone DC-3 Airliner manual

CIC Solar Rover Assembly & instruction manual

CIC

CIC Solar Rover Assembly & instruction manual

Fisher-Price CATERPILLAR 78656 Owner's manual & assembly instructions

Fisher-Price

Fisher-Price CATERPILLAR 78656 Owner's manual & assembly instructions

Toysrus Imaginarium Assembly & instruction manual

Toysrus

Toysrus Imaginarium Assembly & instruction manual

Aviation Design SPITFIRE MK IX Assembly manual

Aviation Design

Aviation Design SPITFIRE MK IX Assembly manual

THUNDER TIGER INNOVATOR - parts catalog

THUNDER TIGER

THUNDER TIGER INNOVATOR - parts catalog

Chicco Baby Space Instruction guide

Chicco

Chicco Baby Space Instruction guide

Faller Racing building Conti Tower 141070 Assembly instructions

Faller

Faller Racing building Conti Tower 141070 Assembly instructions

Auhagen H0/TT 12 215 Assembly manual

Auhagen

Auhagen H0/TT 12 215 Assembly manual

marklin 7548 instruction manual

marklin

marklin 7548 instruction manual

Faller 120501 manual

Faller

Faller 120501 manual

Eduard TBM-3 Avenger quick start guide

Eduard

Eduard TBM-3 Avenger quick start guide

FGA Little Moppet LMFT-09 Guide

FGA

FGA Little Moppet LMFT-09 Guide

LEGO Cars 2 8201 Assembly guide

LEGO

LEGO Cars 2 8201 Assembly guide

AeroWorks 75cc YAK-54 ARF-QB Assembly manual

AeroWorks

AeroWorks 75cc YAK-54 ARF-QB Assembly manual

manuals.online logo
manuals.online logoBrands
  • About & Mission
  • Contact us
  • Privacy Policy
  • Terms and Conditions

Copyright 2025 Manuals.Online. All Rights Reserved.