manuals.online logo
Brands
  1. Home
  2. •
  3. Brands
  4. •
  5. 3M
  6. •
  7. Monitor
  8. •
  9. 3M Wall Display User manual

3M Wall Display User manual

Other manuals for Wall Display

3

Other 3M Monitor manuals

3M ChassisTouch 450 User manual

3M

3M ChassisTouch 450 User manual

3M QUESTempo II User manual

3M

3M QUESTempo II User manual

3M Dynapro 400 User manual

3M

3M Dynapro 400 User manual

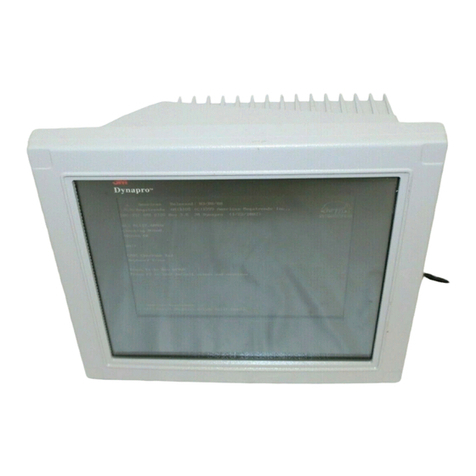
3M Dynapro ET 350 Monitor User manual

3M

3M Dynapro ET 350 Monitor User manual

3M Dynapro ET 350 Monitor User manual

3M

3M Dynapro ET 350 Monitor User manual

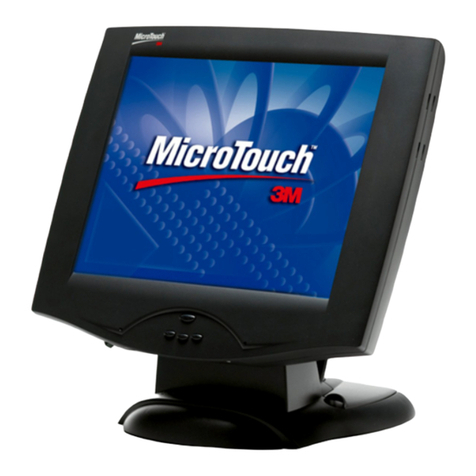
3M MicroTouch M150 User manual

3M

3M MicroTouch M150 User manual

3M MicroTouch M150 User manual

3M

3M MicroTouch M150 User manual

3M M1866PW User manual

3M

3M M1866PW User manual

3M MicroTouch CT150 User manual

3M

3M MicroTouch CT150 User manual

3M M2256PW User manual

3M

3M M2256PW User manual

3M Dynapro ET 350L3 User manual

3M

3M Dynapro ET 350L3 User manual

3M C3266PW User manual

3M

3M C3266PW User manual

3M Dynapro ET 3170 Terminal Series B User manual

3M

3M Dynapro ET 3170 Terminal Series B User manual

3M MicroTouch Display C1700SS User manual

3M

3M MicroTouch Display C1700SS User manual

3M M170 - MicroTouch - 17" LCD Monitor User manual

3M

3M M170 - MicroTouch - 17" LCD Monitor User manual

3M C1510PS User manual

3M

3M C1510PS User manual

3M Multi-Touch C2167PW User manual

3M

3M Multi-Touch C2167PW User manual

3M M1500SS MicroTouch User manual

3M

3M M1500SS MicroTouch User manual

3M MicroTouch M150 User manual

3M

3M MicroTouch M150 User manual

3M Touch Screen Controller RX141 User manual

3M

3M Touch Screen Controller RX141 User manual

3M MicroTouch M150 Guide

3M

3M MicroTouch M150 Guide

3M WS Aware CTC061 User manual

3M

3M WS Aware CTC061 User manual

3M MicroTouch M150 User manual

3M

3M MicroTouch M150 User manual

3M Dynapro ET 350R User manual

3M

3M Dynapro ET 350R User manual

Popular Monitor manuals by other brands

Samsung ME32C user manual

Samsung

Samsung ME32C user manual

ViewSonic VA926-LED user guide

ViewSonic

ViewSonic VA926-LED user guide

Furuno Mu 120c Operator's manual

Furuno

Furuno Mu 120c Operator's manual

Asus VB171D - 17" LCD Monitor Service manual

Asus

Asus VB171D - 17" LCD Monitor Service manual

AOC 9GLR Technical specifications

AOC

AOC 9GLR Technical specifications

DMG RAFFAELLO manual

DMG

DMG RAFFAELLO manual

AOC LM720 - 17" Technical specifications

AOC

AOC LM720 - 17" Technical specifications

Sony Trinitron GDM-F500 Service manual

Sony

Sony Trinitron GDM-F500 Service manual

Memorex MT1701 user guide

Memorex

Memorex MT1701 user guide

ViewSonic VE510s-4 Service manual

ViewSonic

ViewSonic VE510s-4 Service manual

Farenheit T-1503CM instruction manual

Farenheit

Farenheit T-1503CM instruction manual

Ditel DINOS DN129/AT Quick installation guide

Ditel

Ditel DINOS DN129/AT Quick installation guide

Sony SDM-S51 Specifications

Sony

Sony SDM-S51 Specifications

Kenwood DMX1025BT quick start guide

Kenwood

Kenwood DMX1025BT quick start guide

Dell S2409WFP user guide

Dell

Dell S2409WFP user guide

EverFocus EN-7517E instruction manual

EverFocus

EverFocus EN-7517E instruction manual

Dell P3222QE user guide

Dell

Dell P3222QE user guide

Panasonic TH152UX1 - 152" PLASMA TV Service manual

Panasonic

Panasonic TH152UX1 - 152" PLASMA TV Service manual

manuals.online logo
manuals.online logoBrands
  • About & Mission
  • Contact us
  • Privacy Policy
  • Terms and Conditions

Copyright 2025 Manuals.Online. All Rights Reserved.

SHUTDOWN
STARTUP
1
2
3
Make sure the Master Power
Switch is On. It is located underneath
the Wall Display on the right side of
the power cord. (Leave this switch On.)
The On/Off button will turn amber in
approximately 5 seconds.
Plug power
cord into
outlet.
Press the
On/Off button.
• After pressing, the On/Off button blinks green, then stays green.
• The projection arm extends out from the top of Wall Display.
• The fan motor starts.
• The lamp comes on. (Allow approximately 1 minute for full illumination.)
WALL DISPLAY QUICK START GUIDE
2
00:05:0000:00:00
The On/Off button blinks
red for 30 seconds. The
projection arm closes. The
fan runs for 5 minutes.
“Wherever there's a great meeting, you’ll find 3M.”™
www.3M.com/walldisplay
Innovation
Note: After the On/Off button
is pressed, the unit will not
respond to any other commands
for 30 seconds.
fold
1
(Leave the Master Power Switch turned On.)
Press the On/Off button.
QUICK START GUIDE
WALL DISPLAY QUICK START GUIDE
78-6970-9075-7
Page 1 of 2
QUICK START GUIDE
fold
CONNECTION
STANDARD CABLE KIT
Wall Display Connector Panel
WALL DISPLAY QUICK START GUIDE
PC
AUDIO
USB
MOUSE
SERIAL
MOUSE
RS-232AUDIO VIDEO COMPUTERROW
1
2 (THIS ROW FOR DIGITAL WHITEBOARD OPTION ONLY) PRINTER COMPUTER
S-VIDEO RCA VGADVI-D
OUT IN
FRONT OF PANEL
BOTTOM OF PANEL
PC
Audio
USB
Mouse
Serial
Mouse RS-232
Audio
Printer
(This row for Digital
Whiteboard option only)
Computer
Video Computer
Out S-Video RCA VGADVI-D
In
Remote control Trigger Button
performs as left mouse click.
Power
Connects unit to power
outlet on wall.
PC AUDIO
Connects audio from
computer to Wall Display.
Serial Mouse
Connects from computer to Wall
Display.This is another way to make
the mouse function on the remote control
work. Please note that this cable and
the USB mouse cable perform the same
function. You do not need to have them
both plugged in.
USB
Connects from computer to Wall
Display. This allows the mouse function
on the remote control to work.
RCA
This allows you to bring in the video
signal from an RCA source. RCA
video is typically used for VCRs,
Cameras, DVDs and any video
device that uses composite or RCA
video.
DVI-D
Connects from Computer to Wall
Display. This stands for Digital Video
Interface. This is a computer type of
input that is mostly used for desktops
that use a higher quality image
reproduction. Activate the video port
on your PC to display images.
AUDIO OUT
This allows you to place the sound
from the Wall Display to another
speaker source.
RS-232 CONNECTION
This enables you to control the Wall
Display with a specific control device
or computer.
AUDIO IN
This allows you to bring audio sound
from another source such as a VCR or
DVD player.
VGA
Connects from computer to Wall Display.
This is the cable that you plug into your
computer to get images from your
computer into the Wall Display. Most
standard PCs use this connection.
Activate the video port on your PC to
display images.
MENU KEYPAD
1
2
3
4
For Technical Support
1-800-328-1371
If you lose the remote,
you can still access the
menu system using the
Wall Display Menu
Keypad button under
the lower right door.
S-VIDEO
Connects S-Video to Wall Display. This
allows you to bring in the video signal
from S-Video source to the Wall Display.
©2002 3M IPC 78-6970-9075-7
Page 2 of 2