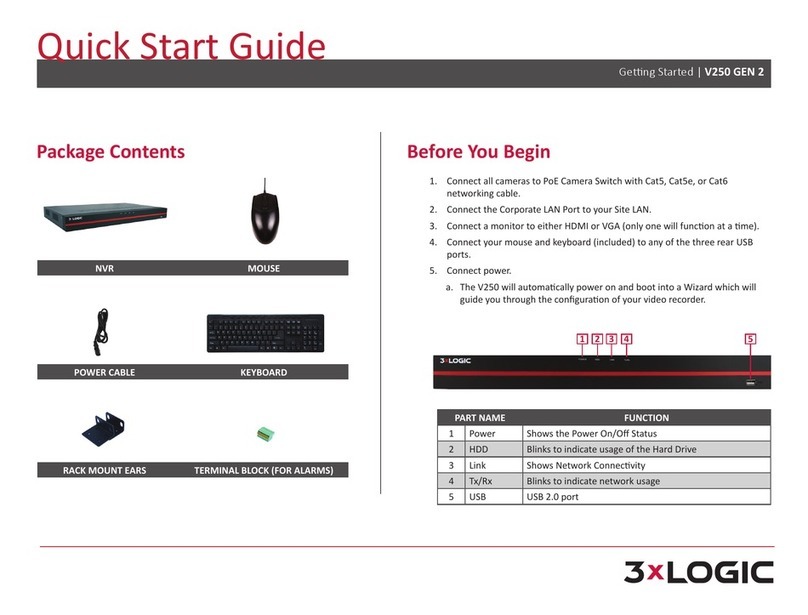
3xLogic VIGIL NVR-2U-64CH User manual

3XLOGIC, INC. | USA: 11899 EXIT 5 PARKWAY, SUITE 100 FISHERS, IN 46037 | UK: 15 COFTON RD, EXETER, EX2 8QW, UK |
EU: ELIMAENKATU 13B, 00520 HELSINKI, FINLAND
©2023 3XLOGIC, INC. ALL RIGHTS RESERVED. INFORMATION IN THIS DOCUMENT IS SUBJECT TO CHANGE WITHOUT
NOTICE. 3XLOGIC AND THE 3XLOGIC AND VIGIL LOGOS ARE TRADEMARKS OF 3XLOGIC, INC. ALL OTHER TRADE-MARKS
ARE THE PROPERTY OF THEIR RESPECTIVE OWNERS.
VIGIL VIDEO SOLUTIONS | QUICK START GUIDE
VIGIL NVR-2U-64CH
64-CHANNEL NETWORK VIDEO RECORDER
QUICK START GUIDE -V1.0.0

©2023 3xLOGIC All Rights Reserved
QUICK START GUIDE | NVR-2U-64CH COMPLIANCE
62368-1 CAN ICES-003 (A) / NMB-003(A)
1. This device complies with Part 15 of the FCC Rules. Operation is subject to the following two conditions
i. This device may not cause harmful interference.
ii. This device must accept any interference received, including interference that may cause undesired operation.
Note: This equipment has been tested and found to comply with the limits for a Class A digital device, pursuant to part 15 of the FCC Rules.
These limits are designed to provide reasonable protection against harmful interference when the equipment is operated in a commercial envir-
onment. This equipment generates, uses, and can radiate radio frequency energy and, if not installed and used in accordance with the instruc-
tion manual, may cause harmful interference to radio communications. Operation of this equipment in a residential area is likely to cause
harmful interference in which case the user will be required to correct the interference at his own expense.
2. This Class A digital apparatus complies with Canadian ICES-003. Cet appareil numérique de la classe A est conforme à la norme NMB-003 du Canada
3. This device is UL and ULC E467564 (Safety) certified.
4. This device complies with CE - EMC Directive 2014/53/EU – Class A, ROHS Directive 2011/65/EU with Addendum 2015/863/EU, WEEE Regulation
2012/19/EU. Declaration of Conformity is available upon request.
5. WEEE - Do not discard this product along with other household waste, it must be collected and treated separately.
Caution: User-Replaceable Battery - Danger of explosion if battery is incorrectly replaced. Replace only with the same or
equivalent type
ATTENTION: Remplacement des piles par l'utilisateu: Danger d'explosion si la batterie est remplacée de façon incorrecte.
Remplacer uniquement avec le même type ou équivalent
2/9

©2023 3xLOGIC All Rights Reserved
QUICK START GUIDE | NVR-2U-64CH
1 PRE-INSTALL AND SAFETY GUIDELINES
1.1 INTRODUCTION
Note: Read all instructions before beginning any installation.
The information in this manual outlines the recommended “Best Practices” for the installation of a server.
Although this document is a guideline, failure to follow these recommendations, especially for environmental con-
ditions, can cause unnecessary and costly problems. It is in the customer’s best interest to adhere to all points in
this guide during the initial stages of system design and installation.
If the installation area does not properly support these requirements, failure of the unit is likely to occur due to
excessive heat, poor power conditions and poor cabling.
Warning: Please note the following points prior to reading this document.
1. This is sensitive computer equipment. DO NOT stack, drop, or otherwise mishandle. Failure to properly
handle this unit will result in unit damage.
2. Only use the appropriate power earth-ground cord provided with the server to the properly earth-groun-
ded, 3-prong receptacles.
3. This system should only be installed by a qualified technician using approved materials in accordance with
national, state, and local wiring codes.
4. This system should only be setup by a qualified technician with a basic understanding of the Windows oper-
ating system and intermediate networking skills.
5. This system requires proper shutdown to ensure system integrity. Failure to properly shutdown the system
can result in data loss and lengthy file rebuilding upon next boot.
6. To remove power from system, you must unplug the power cord from the equipment. Make sure the AC
power cord is unplugged before you open the chassis, add, or remove any components.
7. Removal of the top cover or any other attempted unit dis-assembly, should only be attempted by a qual-
ified technician with the express permission of Technical Support.
8. This system relies on the building’s electrical service for short-circuit (over-current) protection. Ensure that
a suitable fuse or circuit breaker is present in the service.
9. It is not recommended to operate this system in a dusty environment. Failure to periodically inspect and
clean the unit may result in shutdown of the unit and eventual permanent failure requiring factory repair.
10. This equipment is not suitable for use in locations where children are likely to be present.
Warning: Failure to periodically inspect and clean the device may result in shutdown of
the unit and eventual factory repair
Caution - User-Replaceable Battery: Risk of explosion if battery is replaced by an
incorrect type. Dispose of used batteries according to the instructions.
Attention - Remplacement des piles par l'utilisateu: Danger d'explosion si la batterie
est remplacée de façon incorrecte. Remplacer uniquement avec le même type ou équi-
valent
3/9

©2023 3xLOGIC All Rights Reserved
QUICK START GUIDE | NVR-2U-64CH
1.2 POWER SOURCE
A stable power source is essential for reliable and uninterrupted operation of the Point of Service Personal Com-
puter (PC). The power supply is designed to support 100-240VAC @ 50-60Hz. Use an electrical outlet that is ded-
icated to the PS and has the correct rating.
1.3 PROPER STARTUP / SHUTDOWN
The computer must be started and shutdown properly. To start and shutdown the server, a proper procedure
must be followed, just like in any other PC-based system.
STARTUP
To startup the server
1. Ensure the power cable is fully installed in the power supply
2. Press the toggle switch on the front of the chassis with the symbol on it.
Switch provided at front of equipment is not ‘stand-by’:
SHUTDOWN
To shut down the server
1. Close all running applications and save all work
2. Navigate to Start -> Shut Down and follow the on-screen message prompts
Warning: Failure to properly shutdown the desktop can result in data loss.
3. Fully disconnect all power cables before servicing system.
1.4 ENVIRONMENTAL REQUIREMENTS
The environmental conditions for a server are essential for reliable and uninterrupted operation. The servers are
PC-based systems equipped with the proprietary hardware that make it a powerful system. Just like a consumer
PC, it must be operated under proper environmental conditions.
MOUNTING
1. Appropriate mounting / slide rails should be used to mount the server into a standard-width rack.
Warning: Rack mounted devices are not to be used as shelves or workspaces. Do not
place objects on top of rack-mounted devices.
Stability Hazard:
■The rack may tip over causing serious personal injury
■Before extending the rack installation position, read the installation instructions
■Do not put any load on the slide rail mounted equipment mounted in the installation position
■Do not leave the slide-rail mounted equipment in the installation position
■Equipment is not intended to be serviced while extended on slide-rails.
2. In addition, the lack of free air flow around the units can cause overheating.
4/9

©2023 3xLOGIC All Rights Reserved
QUICK START GUIDE | NVR-2U-64CH
TEMPERATURE, HUMIDITY, AND ELEVATION
1. A well-maintained temperature and humidity is essential for proper operation. An environmentally con-
trolled area is recommended.
2. Recommended operating temperature of the device is 4.5-35°C.
3. The ideal room humidity should not exceed 90% non-condensing relative.
4. The equipment is rated for a maximum altitude of 2000m above sea level.
DUSTY ENVIRONMENTS
The computer should not be installed or operated in a dusty or otherwise unclean environment.
Warning: Failure to periodically inspect and clean the device may result in shutdown of the
unit and eventual factory repair
1.5 ZB SPECIAL NATIONAL CONDITIONS
This equipment is specified as “Class I pluggable equipment type A”.
In Denmark: “Apparatets stikprop skal tilsluttes en stikkontakt med jord som giver forbindelse til stikproppens
jord.”
In Finland: "Laite on liitettävä suojakoskettimilla varustettuun pistorasiaan"
In Norway: “Apparatet må tilkoples jordet stikkontakt”
In Sweden: “Apparaten skall anslutas till jordat uttag”
5/9

©2023 3xLOGIC All Rights Reserved
QUICK START GUIDE | NVR-2U-64CH
2 PRODUCT OVERVIEW
2.1 PACKAGE CONTENTS
NVR MOUSE
POWER CABLE KEYBOARD
Note: Analog Video Cable Adaptor for use w/ the Capture Card's DVI-D Out is also included
with Hybrid models.
2.2 OPERATING INFORMATION
SPEC VALUE
Voltage 115VAC/60Hz; 230VAC/50Hz
Operating Environment Indoor Equipment Only
Operating Temperature 40° to 95° Fahrenheit / 4.5° to 35° Celsius
Humidity 20-90% RH
2.3 BEFORE YOU BEGIN
Note: This product is to be used by an instructed person in a professional environment
1. Connect all cameras to an appropriate network switch with Cat5, Cat5e, or Cat6 networking cable then
interface the switch with the Camera LAN on your recorder.
2. Connect the Corporate LAN Port to your Site LAN.
3. Connect a monitor to either HDMI, DisplayPort and / or VGA.
4. Connect your mouse and keyboard (included) to the rear USB ports.
6/9

©2023 3xLOGIC All Rights Reserved
QUICK START GUIDE | NVR-2U-64CH
5. Connect power:
i. The NVR will automatically power on and boot into a Wizard which will guide you through the con-
figuration of your video recorder.
■A USB drive containing the 3xLOGIC Support Environment is connected within the chassis. To access the
Support Environment, simply boot to the drive.
■The Support Environment allows for Windows images to be taken or applied as well as providing access to
multiple diagnostic tools.
FRONT
PART NAME FUNCTION
1 USB 2.0 USB 2.0 Port
2 CHASSIS LOCK Chassis front gate lock
3 POWER SWITCH On / Off Switch
4 HDD Bays Swappable HDD Bays
7/9

©2023 3xLOGIC All Rights Reserved
QUICK START GUIDE | NVR-2U-64CH
BACK
PART NAME FUNCTION
1 Serial Port* DB9
2 2x Analog Audio Inputs** Analog Audio In
3 1x Capture Card HDMI Out*** Analog Capture Card HDMI Video Out for use with
PVM / Spot Monitors.
4 1x Analog Video In**
DVI-D (must use included analog video cable adat-
por**)
5 VGA (D-Sub) VGA Video Out
6 4x USB 3.0 USB 3.0 Ports
7 2x RJ-45 / LAN Connect to Site LAN and IP Cameras
8 Display Port/ HDMI Out Display Port / HDMI Video Out
9 AUDIOIN/ OUT Audio In and Out, Mic Ports (3.5mm)
10 PSU Power Supply
* Serial Port Located with Motherboard Outputs on Certain Variants
**Hybrid Recorder Models Only
***Only Available with HV Model Capture Cards.
Be sure to read the pre-install and safety guidelines in the previous section of this guide before proceeding.
8/9

3xLOGIC.com
helpdesk@3xlogic.com
©2023 3xLOGIC All Rights Reserved
3 CONTACT INFORMATION
3xLOGIC has offices in Fishers, Indiana, USA and Exeter, UK. Please visit our 3xLOGIC website at www.3x-
logic.com. Please contact us by e-mail at [email protected] (technical support), or using the following con-
tact information:
3XLOGIC TECHNICAL SUPPORT:
Toll Free:(877) 3XLOGIC
(877) 395-6442
Email:[email protected]
Website:www.3xlogic.com
3XLOGIC NORTH AMERICAN OFFICE:
11899 Exit 5 Parkway, Suite 100
Fishers, IN 46037
United States. (303) 430-1969
3XLOGIC EUROPEANOFFICE:
Signal House
15 Cofton Rd
Exeter
EX2 8QW
United Kingdom, +44 (0) 333 789 3300
9/9
QUICK START GUIDE |NVR-2U-64CH
Table of contents
Other 3xLogic Network Hardware manuals
Popular Network Hardware manuals by other brands

HPE
HPE FF 12500E MPU Product End-of-Life Disassembly Instructions

AJA
AJA OG-12GM Installation and operation guide

ADDER
ADDER Case Study - Solid State Logic Information sheet

Brovision
Brovision WH-N5204-P4 Quick operation guide

Trend Micro
Trend Micro Network VirusWall Enforcer 3600i quick start guide

Advantech
Advantech FWA-6500 Startup manual