4ms Company STS User manual

Stereo Triggered Sampler
4ms Company
User Manual 1.0 – August 16, 2017
for firmware v1.0
The Stereo Triggered Sampler is a high fidelity, two-channel stereo audio recorder and playback module. The
STS can record high quality stereo WAV files while simultaneously playing two different stereo files. A maximum of
600 samples can be loaded at one time from the removable/swappable microSD card, in a variety of formats up to
96kHz/32-bit/stereo WAV. All sample parameters (1V/oct pitch, sample file selection, length, and start position) are
CV controllable, and trigger jacks for play, record, and reverse allow for synchronization. On-board editing tools
allow you to set loop/trim points and gain, as well as assigning samples to banks and slots.
•Two independent stereo playback channels can play any of 600 samples simultaneously
•Recording channel creates stereo WAV files directly onto microSD Card for immediate use
•Extremely low noise, high fidelity design
•Plays a variety of WAV files up to 32-bit/96kHz
•Intelligent file system makes loading large sample libraries easy by organizing banks into folders
•CV and controls for 1V/oct tracking, Start Position, Length, Sample selection, Reverse and Play
•Trim samples and set Loop points, adjust gain, and re-organize banks and sample slots on the fly.
•Includes microSD card with Sample Pack, SD adaptor, 10-to-16 pin power cable and M3 screws

Table of Contents
Setting up your Stereo Triggered Sampler
1. Remove the Stereo Triggered Sampler (STS) from the box and anti-static bag. The RAM chip on the STS may
be damaged by static electricity; take care not to touch the circuit board.
2. Connect the free end of the power cable to a 16-pin Eurorack power header on your power supply distribution
system, with the red stripe towards to the -12V. The other end of the power cable is a
10-pin connector which should already be connected to the STS so the red stripe on
the power cable is orientated towards the bottom of the module (the bottom is marked
by a white stripe and the word “POWER”). Note: The STS is reverse-polarity
protected, but other modules being incorrectly connected could damage anything on
the power bus.
3. Backup your microSD card before you first power the STS on! We recommend
you perform a full backup of the microSD card by using a computer (use the included
SD card adaptor if needed). This will be useful if the card ever becomes damaged or
you wish to restore the STS to the original factory settings and samples.
4. Securely screw the STS to the rails of your case. Power the system on.
5. Begin with Tutorial 1: Basic Playback on page 5 of this manual.
Never remove the microSD card when the Busy light is on!!
Setting up your Stereo Triggered Sampler!2".............................................................
Overview!3"................................................................................................................
Electrical and Mechanical Specifications!4"..............................................................
Tutorial 1: Basic Playback!5"......................................................................................
Tutorial 2: Navigating Banks!6"..................................................................................
Stereo/Mono Mode!8"................................................................................................
Channel Playback Volume!8".....................................................................................
Tutorial 3: Recording Samples!9"...............................................................................
Tutorial 4: Loading Files onto the microSD Card!10".................................................
Sample List HTML file!12"..........................................................................................
Edit Mode: Gain, Loop/Trim points!13"......................................................................
Saving and Reverting!14"...........................................................................................
Copying!14"................................................................................................................
Tutorial 5: Creating Slices!15"....................................................................................
Example Patch: Sequencing the STS!16"..................................................................
Example Patch: Granular Scrubbing!17"...................................................................
Recording the STS Output as a New Sample!18".....................................................
Example Patch: Clock Sync and Shifting Ping-Pong Loops!18"...............................
Assigning Samples to Banks and Slots!19"...............................................................
System Mode!21".......................................................................................................
1V/OCT Tracking Compensation!21".........................................................................
Rebuilding the Index File!21".....................................................................................
Updating Firmware (Audio Bootloader)!22"...............................................................
microSD Card Specifications!23"...............................................................................
File Formats!23".........................................................................................................
Chart of All Button Features!24................................................................................
Page of 2 24

Overview
• Up to 600 samples loaded at one time (10 samples per bank)
• Includes a microSD card with over 200 samples
• Extremely quiet, low noise and low jitter design
• Stereo or Mono operation:
•Stereo mode: Two stereo files are mixed and played through the L and R output jacks (L+L and R+R)
•Mono mode: Each file is mixed to mono and output through the channel's output jack (L+R and L+R)
• Firmware can be updated by playing an audio file into the STS
Two independent playback channels:
• Each channel outputs in mono or stereo through the shared L/R jacks
•Play button/trigger jack: Tapping the button or receiving a trigger starts/re-starts the sample
•When Length is set to “All”, the Play button starts/stops the sample (set in System Mode, see p.21)
•Sample CV/knob: select which sample within the channel's bank
•1V/OCT CV and Pitch knob: playback pitch (-10 to +4.3 octave range)
•Start Pos CV/knob: position in the sample to begin playback (loop start point)
•Length CV/knob: playback time (loop end point)
•Length knob at max: entire file is played
•Length knob 50%-99%: 200ms - 5s of the sample is played (beginning at the Start Position)
•Length knob <50%: Percussive decay envelope is applied to the playback (attack-only envelope if
playing Reverse)
•Length <1%: Tiny grains are played (can be used to sweep through sample file data manually)
•Reverse button/jack: toggles forward/backwards
•Bank button: selects channel's bank
Tip: Hold Bank and turn the Sample knobs for fast selection of bank
•Edit button allows basic on-board editing features:
•Set loop/trim points with Scrub Start and Scrub End
•Set Gain (boost/cut from 10% to 500%)
•Re-organize samples with Next File
•Move samples around within a bank
•Assign files from any folder on the microSD card into any sample slot (sub-folders are ignored)
•Copy sample to multiple slots, each with their own loop/trim/gain settings
•Reverse+Start Pos button/knob combo allows for setting volume of each channel independently.
• Maximum file size for playback: 4GB per file (6.7 hours per file at 44.1kHz/16b/stereo)
• microSD Card is hot-swappable when Busy light is off: no power-down required to change cards
•Samples that are pre-loaded into memory can continue playing while card is removed
Recording channel:
• Stereo recording can be simultaneous to operation of playback channels
•Easily record output of sample playback, “bouncing” a play session into a new sample file
• Recording initiated by button or trigger
• Monitor mode lets you check the signal before starting a recording
• Record into any sample slot in any bank
•Every recording is saved as a WAV file on the microSD Card and can be played back instantly
•Edit features allow you to manually browse all the takes, and assign them to banks/sample slots
• Recording can be disarmed to prevent accidental recordings
• 44.1kHz/24-bit stereo or 16-bit stereo recording, selectable in System Mode
• “Unlimited” recording time (records continuously until card is full)
•256GB card = 18 days of continuous recording (432.9 hours)
•Long recordings are split into 4GB WAV files
Page of 3 24

File Organization:
• Includes a high-speed 16GB microSD card, loaded with over 200 samples from musicians such as
•Richard Devine
•Wobbly
•Moor Mother
•Robert Aiki Aubrey Lowe
•Joseph Pailo
•Russell E.L. Butler
•Hugo Paris & Marc Kate
•Paul Barker
•Baseck
•…and more!
•Record new samples directly to banks with the RECORD input jacks
• Load WAV files using a computer and the intuitive bank/color organization system
•Drag folders of WAV files onto the microSD card, and each folder will become a bank
•No need to rename WAV files
•Folders starting with a color name will be loaded into that color bank
•Example "Blue - Frooty Loops" will load into the Blue bank
•Sub-folders are ignored, only folders in the root directory are scanned for WAV files
• Works best with “UHS Speed Class 3” cards with this symbol printed on the card:
Electrical and Mechanical Specifications
• 20HP Eurorack format module
• 0.98” (25mm) maximum depth
• 10-pin Eurorack power header
• Power consumption (maximums): +12V@145mA; -12V@39mA; +5V rail not used
• Audio OUT jacks
•Out:File = -1.8dB max deviation at 0Hz (DC) - 22kHz
•21V peak-to-peak = full scale
•Audio Record jacks
•Out:In = max -1.0dB 3Hz-6kHz, -3dB 6k-11k, -7.6dB 11k-20k
•21V peak-to-peak maximum before clipping
•End Out jack
•+10V trigger pulse
•13ms pulse width, typical (sample loop time > 17ms)
•2.75ms pulse width, minimum (at fastest sample loop time = 8ms)
•1V/OCT CV jack
•-5V to +5V range, for -5 to +5 octave shift
•Note: 1V/oct jack combines with Pitch knob and sample file’s sample rate, and the resulting pitch shift
is limited to -9 octaves down and +4.3 octaves up
•CV jacks (Start Pos CV, Sample CV, Length CV)
•0 to +5V range
•Add to the position of the corresponding knob
•Reverse, Play !, Rec jacks
•Incoming trigger toggles state or starts/restarts feature
•Trigger voltage must be > 1.6V, rising edge is detected
•microSD card slot accessible from front panel
•Edit button accesses editing/organizational alternative features of some controls (printed in gold lettering)
Page of 4 24

Tutorial 1: Basic Playback
The Stereo Triggered Sampler has two playback
channels. Each channel has a PLAY button."
Tap the PLAY button to play the currently selected
sample in the currently selected bank for that channel.
Tap it multiple times to re-trigger the sample."
Try it now! Set the left channel controls as shown:"
•Pitch knob to center"
•Start Pos to 0%"
•Length to 100%"
•Patch the OUT(L) and OUT(R) jacks to the$
left and right channels of your output mixer.$
If you only have a mono speaker, just use OUT(L)"
The Sample knob selects which sample
in the current bank to play. There are 10
slots for samples per bank. Try turning
the knob now. Notice that when you turn it to a new
slot number (1–10), the PLAY button flickers. This indicates you selected a new sample.
Hit the PLAY button again to play the new sample."
The Bank button changes banks. Tap the button to go to the next bank and notice that the
Bank button’s color changes. Each bank contains 10 samples. Go ahead and listen to all the
samples in this bank using the Sample knob to select a sample and the PLAY button to play
it. Take a moment to explore a few banks, tapping the Bank button to go to the next bank
(you can go back a bank by holding Reverse while tapping Bank). For the next step, we’re going to
want a sample that will loop nicely, so pick a sample that's at least a couple seconds long.
Looping"
The STS is also great for looping samples. Go
to a sample that’s at least a couple seconds."
Press and hold the PLAY button for half a
second and the button will turn blue to
indicate it’s looping (blue = loop). You can let
go of the PLAY button and it’ll keep repeating the sample
over and over. At any time if you want to stop looping, hold PLAY down again for about a second and
it’ll turn green or yellow-green to indicate the channel is not looping."
Now let’s play with Pitch. Turn this knob up to make the sample play back faster and at a
higher pitch. Turn it down to play back slower and lower in pitch. The Pitch knob has a
range of 8 octaves (4 octaves up, 4 octaves down). Note that the 1V/OCT jack lets you go
a bit farther (-9 to +4.3 octaves)"
Next, let’s try shortening the loop: turn the Length knob down a bit. As you turn Length
down from 100% to 50%, the length/tempo will go from the full sample file length to under
a second. From 50% to 0%, the length/tempo gets very short (~250ms down to ~8ms),
and a decay envelope is applied to make it percussive. "
By now you should see how changing the Length changes the end point of the loop. The
starting point of the loop is set by the Start Pos. Try turning this knob to different places to
see how this changes your loop. The knob works by percentage of sample file time: so
setting Start Pos to 50% will make the sample start playing from the half-way point. Setting
Start Pos to 100% doesn't give you much sample left to play, so you’ll hear a short blip.%
Page of 5 24
Bank
PLAY
Sample
110
2 9
3 8
4 7
5 6
PLAY
Pro tip: !When looping, if you move the
Sample knob it’ll immediately start
playing the new sample (as
opposed to when not looping, you
have to hit PLAY to hear the new
sample)
Length All
To speaker
(left)
To speaker
(right)
Start Pos.
Pitch
Hold 0.5 sec.

"
Notice that changing Start Pos does not change your tempo; it shifts the
starting and ending points of the loop together, keeping a constant time.
On the other hand, Length changes the total time by changing the end
position and keeping the starting point constant."
Let’s do an experiment and see how Pitch and Length are related to the
tempo of a loop. Set Length to 75% and turn Pitch to a few different
settings while you loop a sample. Do you see how the tempo of the loop
changes as you change Pitch? It should get shorter as Pitch gets higher. "
Now set Length to about 40% and play with Pitch. Do you see how the
tempo of the loop does not change? That’s because with Length under
50% the playback time is constant (regardless of Pitch). With Length over
50%, the audio sample data that's played is constant, even though it's
stretched or shrunk. So if you set Start Pos and Length to capture a
particular part of a sample (let’s say it’s a human voice saying the word
“hello”), then as long as Length is over 50%, it will always play the word
“hello” even as you adjust the Pitch."
"
Reverse
The STS can also play samples
backwards. Simply tap the
Reverse button to toggle reverse
or forward playback. The button
will be blue when it's in reverse mode, and
off when it's in forward mode. In reverse
mode, it plays from the ending position
towards the starting position."
Try this: hit Reverse while a long sample is
playing forwards. The sound will reverse immediately and start playing backwards towards the start
position. You can even keep hitting Reverse rapidly to keep a sample “up in the air”. "
When reversing and Length is less than 50%, an attack-only envelope will be applied to the playback
(as opposed to the decay-only envelope applied to forward playback with Length under 50%)"
Tutorial 2: Navigating Banks
In the first tutorial you learned that tapping the Bank button moves you to the next bank. What if you
went too far and want to go back a bank?"
Go to Prev. Bank
To move backwards by one bank, hold down that channel’s Reverse button while
you tap the Bank button. Try it now. Note that for the Bank button on the right side,
you have to hold the Reverse button on the right side (and the same for the left
Bank and left Reverse). Watch how when you go past the first bank (solid white), it
wraps around to the last bank (green with two blinks in the default STS sample
pack). What do these flashes mean? Let’s find out!"
Bank Organization
The banks on the STS are arranged by colors. The color are arranged similar to a rainbow:"
White Red Orange Yellow Green Cyan Blue Magenta Lavender Pearl"
Page of 6 24
Pro tip: !The tempo of a loop can be harnessed by using
the End Out jack. This jack will fire a trigger
whenever the sample loops, restarts, or stops
playing. Try patching the End Out of the left side
to the Play Trig jack of the right side, and looping
the left or both sides. Now try patching End Out to
a clock divider (or QCD) for a sample-based master
clock!
Reverse
Start Pos shifts entire sample
window (start and end points)
Length changes end point
Pitch stretches window when
Length > 50%
Bank
Reverse
and tap
Hold…
+

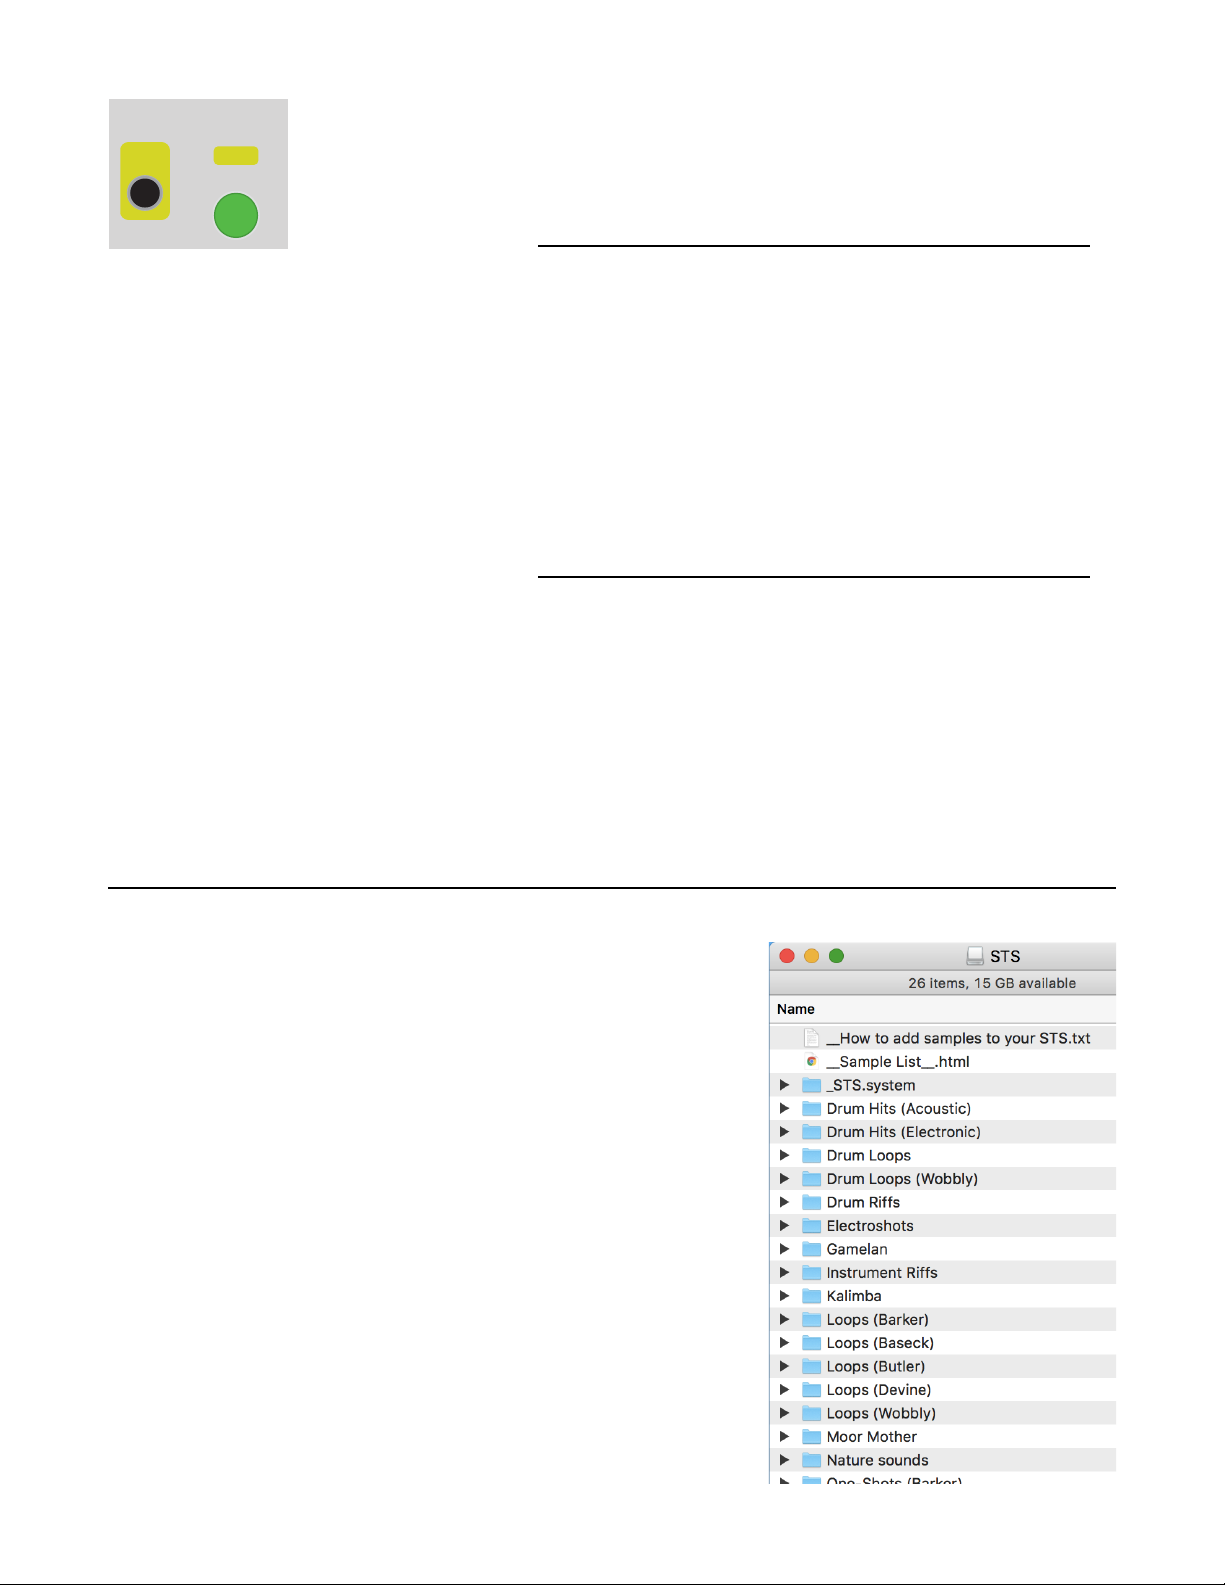
As you tap the Bank button, you move
through banks in order from White to
Pearl. When you reach Pearl, it loops
back around to White, but this White is
different—it blinks off every second or
so. If you keep going, you’ll see
another White bank that blinks off
twice every second. If you’re using a
new STS with the default sample
pack, the banks are only full up until
Green with two flashes (we call this
“Green 2 blinks” or “Green-2” for
short). After that, it wraps back around
to solid White. "
As you add samples to your card, you
can fill up a maximum of 60 banks.
Since there are 10 colors, that means
each color can have 0 (solid) to 5
flashes. At 5 flashes, the bank button
is flashing almost constantly. Empty
banks will be skipped as you cycle
through banks with the Bank button."
What if you’ve filled up your banks
with samples and you want to go from
the solid Red bank to Blue-3 (blue with
3 blinks)? Well, you could tap the Bank button a few dozen times, but there’s a faster way."
Quick Bank Select"
To quickly change to a particular bank, just hold down the Bank
button while you turn the Sample knobs. The left Sample knob
selects the bank color, and the right Sample knob selects the bank
blinks. The bank button will change colors and blinks as you turn
the knob, but the bank won’t actually change until you release the
Bank button."
For example, to go directly to Yellow-2 on the left side of the STS,
hold down the left Bank button and turn the left Sample knob to until the light is yellow. Then turn the
right Sample knob until the left Bank button is blinking 2 times. Release the left Bank button and it’ll
jump to Yellow-2. If Yellow-2 didn’t exist, then you’ll end
up in the last valid bank that the knobs pointed to."
If you want the right side’s bank to change to a specific
bank, do the same procedure but hold down the right
side Bank button. "
A quick way to go back to the first bank is to hold the
Bank button and spin both Sample knobs to 0%."
Empty Banks"
Tapping Bank moves you to the next bank that has
samples in it, skipping empty banks. If you hold Edit while tapping Bank, you can browse all banks
including the empty banks. Another way to go to an empty bank is with the Bank Rec+Bank trick (see
Tutorial 3). Since the STS boots up with the Bank Rec button set to the first empty bank, this is a fast
way to immediately jump to an empty bank. See the Copying, Creating Slices, and Assigning Samples
sections for examples of why you might want to go to an empty bank.!
Page of 7 24
Starting
bank
Solid
1 blink
2 blinks
3 blinks
4 blinks
constant
blinking
Bank
+
Sample
(Left side)
110
2 9
3 8
4 7
5 6
and turn…
Sample
(Right side)
110
2 9
3 8
4 7
5 6
…and/or turn
Hold…
/
Gotcha! !While holding down a Bank button,
the left Sample knob always selects
the bank color, and right Sample knob
always selects the bank blink number
— this can be a bit confusing at first
when you switch between changing
the left and right side’s banks.

Stereo/Mono Mode
The STS can operate in stereo or mono mode. "
Mono mode: Each sample that you play is mixed to mono
and outputs through its own jack. So if you hit the left PLAY
button, sound will come out of the OUT(L) jack only.
Likewise for the right PLAY button, it only comes out the
OUT(R) jack."
Stereo mode: Both the left and right PLAY channels play out
of both OUT jacks. So if you hit the left PLAY button, you’ll
hear the left channel of your file on the OUT(L) jack, and the
right channel on the OUT(R) jack. If the file is mono, you’ll
still hear the sample play on both jacks."
Toggle Stereo/Mono mode
To switch stereo/mono modes, hold
down both Bank buttons for about half a
second. If you look carefully at the
module, you’ll see the word “Stereo”
printed there to remind you."
When you switch to stereo, the PLAY buttons pulse yellow in
sync (sync=stereo). They will stay yellow every time you play
a sample to show you’re in stereo mode."
When you switch to mono mode, the PLAY buttons will
independently flash green (independent=dual mono). They’ll
be stay green while playing to show you’re in mono mode."
The stereo/mono mode is saved to the microSD card as soon
as you switch, so the next time you power on, it’ll be in the
same mode."
Channel Playback Volume
Adjust Channel Playback Volume
There’s a hidden feature in the STS that
lets you control the volume of each
playback channel. This is especially
important in stereo mode because the
two channels get mixed together before
reaching the output jacks. There would
be no way to use an external mixer to control the relative level
of each sample."
To set the channel volume, hold down Reverse while you turn the Start Pos knob directly above it. The
volume will not change until you turn Start Pos to the current volume setting. When you power-on the
STS, the volumes are automatically set to 100%, so that means you have to turn Start Pos all the way
up to 100% before the volume feature engages. After that, you can turn the knob down to reduce the
volume."
Try it now: get a sample looping on both channels. Hold the left Reverse and turn the left Start Pos all
the way up, then slowly bring it down. Here how the volume of the left channel decreases? Now adjust
the volume for the right channel using the right Reverse and Start Pos… you can even do both sides at
once!"
The Reverse button will not toggle reverse/forward mode when you use this feature. Also, the Start Pos
won’t be adjusted until/unless you move the Start Pos knob without the Reverse button being down."
Page of 8 24
PLAY
(CHANNEL 1)
Stereo .wav file
left right
Channel 1 L+R Channel 2 L+R
OUT (L)
PLAY
(CHANNEL 2)
Stereo .wav file
left right
OUT (R)
+ +
Mono
Mode
Bank
Bank
Stereo
Hold 0.5 second
PLAY
(CHANNEL 1)
Stereo .wav file
left right
Both left channels Both right channels
OUT (L)
PLAY
(CHANNEL 2)
Stereo .wav file
left right
OUT (R)
+ +
Stereo
Mode
Reverse
Start Pos.
Hold…
and turn
+

Tutorial 3: Recording Samples
Enabling Recording
To use the RECORD section, you first have to enable (or
“arm”) recording by holding down the REC button for 2
seconds. This is to prevent accidental recording. When
recording is armed, the REC button will flash. "
Notice the blue Monitor light turns on. This means whatever signal is present
on the RECORD inputs will be routed to OUT(L) and OUT(R)."
If you have a mono signal, patch it into the Left RECORD jack. If you have a
stereo signal, patch into the Left and Right RECORD jacks. The STS always
records in stereo—the Left signal will be copied to the Right if nothing is
plugged into the Right jack. You should be hearing your input sound coming
out the OUT jacks, but it’s not recording yet— just monitoring."
Start/Stop Recording
Tap the REC button to begin recording (or fire a trigger into the Rec jack). See
how the Busy light turns on and starts flashing a lot? That means it’s actively
recording your audio to the microSD card. "
Tap the REC button again (or
fire another trigger) and wait
a moment until the Busy light
goes off. Congratulations! You
just made a sample! If you were to put the
microSD card into a computer now, you’d see a
new stereo WAV file with your sounds on it. But
let’s try playing it back first."
Where is my recording?
The sample you recorded is automatically loaded
into whatever bank the REC Bank button was set
and whatever slot the RECORD Sample knob was pointing to when you started recording. By default,
the STS boots up with the REC Bank set to the first empty bank— this way it won’t change your
existing banks when you start recording."
Teleport to the Rec Bank
To hear the sample you just recorded, we need to go to that bank in one of the
play channels. You already know a couple ways to browse banks (tapping Bank, or
holding Bank while the turning the Sample knob), but let’s learn a new trick for this:
Hold down the REC Bank button and a play channel’s Bank button for half a
second. The play channel Bank will teleport to the REC Bank. You should see the
play Bank button change color/blink to match REC Bank."
"
Now that you’re in the right bank, turn the play Sample knob to match the RECORD Sample knob, and
hit the PLAY button. You should hear your sample play
back! Notice that when you turn the Sample knob on
the play channel the play light blinks either red or white.
Red means the slot is empty, and white means the slot
has a sample."
Before you hit REC again, move the RECORD Sample
knob to a new slot. Otherwise you’ll record over the slot
(the file will still be there, just not assigned to any slot).
Page of 9 24
Bank
Bank
+
Jump to Rec Bank:
Hold both 0.5 sec
REC
Arm Recording:
Hold 0.5 sec
Monitor
Sample
REC Bank
Rec
BusyMonitor
RECORD
110
2 9
3 8
4 7
5 6
Left Right
REC
Start/Stop Recording:
Tap button
Busy
Monitoring:!When you hit a PLAY button,
Monitoring is disabled (the blue
Monitor light will go off, and the
REC button will turn purple). To
turn Monitoring back on, hold
the REC button for half a
second.
Monitor
Levels:!The STS is made for modular-level signals,
but it does a decent job with line-level
signals. (You can boost line-level to modular
level digitally later using the Edit+Gain
feature). However, for the best quality, use a
suitable line-to-modular level converter
module. Even a low-cost “input” module will
greatly increase the quality of line-level
recordings from your phone, computer,
guitar pedals, etc

Saving after power-down"
By now you should have a few different new samples recorded into a few different
slots. The WAV files themselves are saved on the microSD card, and the STS has
assigned each file to a bank/slot. You should be familiar how to play each sample
you just recorded by going to the bank and slot number on a play channel."
At this point, the
information telling the STS which sample
file is assigned to which slot in the bank is
not saved to the microSD card. Keep in
mind that the sample files themselves are
saved, but the STS is only temporarily
assigning them to the bank/slot you
recorded them into. To make this
temporary assignment permanent, you
have to save it."
To save the sample bank/slot assignment
information, hold down Edit Sample and
the left side PLAY for half a second. The
lights will flash a bit while it saves."
Notice the word “SAVE” above the left side PLAY button— it’s written in gold just like the Edit Sample
button to remind you of the alternate feature of this button."
Why doesn’t the STS just save your sample slot assignment information automatically when you
record? The reason is that you might have recorded over a slot that you didn’t mean to, or you might
not like any of your takes and decide not to keep them. If this happens, you can either use the
Edit+Revert+Bank feature (see Edit Mode section), or re-assign the slot using the Edit+Next File
feature (see Assigning Samples section)… or just do nothing and the next time you power on the STS,
the samples will be back to the way you had them before."
Tutorial 4: Loading Files onto the microSD Card
The STS has an intelligent and intuitive sample file management
system. You can do everything in several different ways,
depending on your preferences: use a computer OS to move
files, or use the STS’s on-board assignment feature, or edit the
index file with a text editor (hackers only)."
"
Unlike many other samplers, you never have to rename your files
for the STS. You can simply drag your sample files into folders
and the STS will load them into banks. This makes loading a
huge sample library a breeze."
Included with your STS is a SD Card adaptor that fits any
computer with a SD Card slot. If your computer lacks this slot,
you need to purchase a microSD to USB adaptor."
First, make sure the Busy light is off, and power down the STS.
Remove the microSD card and insert it into the adaptor in your
computer. The microSD card should show up as a drive on your
computer, similar to what’s shown on the right:"
Each of these folders contains WAV files. Think of each folder as
a bank."
Page of 10 24
PLAY
SaveSave
Edit
Sample
Edit
Sample
Hold both 0.5 sec
+
How it works:!The STS never deletes or overwrites your files!
When you make a new recording, the STS
assigns the new WAV file to the sample bank/
slot selected by the REC Bank and Sample
controls. If you accidentally record into a
bank/slot that already has a sample you
wanted to keep, don’t worry— the previous
sample file is still saved on the card, but it’s
temporarily not assigned to any sample slot. If
you don’t hit Save, then the old file will be
loaded next time you power on. Read the
Assigning Samples section for more ways to
re-assign samples to slots.

Create a bank by copying a folder of WAV files
To create a new bank with your own samples, simply drag/copy a folder containing WAV files onto the
root level of the STS microSD card. The WAV files must be directly inside the folder. Folders inside
folders (sub-folders) will be ignored by the STS "
You can copy as many as folders full of WAV files as you like: only 60 banks can be loaded at once,
but the other folders will still be accessible from the STS using the Edit+Next File feature."
You also could copy sample(s) to an existing folder. If the other samples in that folder are in a bank
with less than 10 samples in it, the new file(s) will automatically be loaded into that bank."
If you remove a file from a folder, then the STS won’t be able to find that file and will look for it. If it
finds the file in another folder, it’ll update the index to the new location. But if the STS can’t find the file
anywhere, then it’ll try to find a new file to fill that slot. The first place it will look is the original file’s
folder. What this means is that if you don’t like a particular sample, you can delete the file and replace
it with a new file. The STS won’t find the deleted file, and it will load the new file instead."
Page of 11 24
Above: copying a folder of 10 WAV files onto the STS microSD card. The folder starts with the word “Green” so
it will get loaded into the Green bank. The files will be loaded in alphabetical order into slots 1 – 10.

Folders with color names
If you name the folder starting with a color name from the list on page 5, the folder will automatically
be loaded into the bank of that color! Example: “Orange - My Field Recordings” will be loaded into the
Orange bank. What if there’s already an Orange bank? It’ll get bumped down to Orange-1 (that’s
Orange with one blink). And if Orange-1 exists, it’ll get bumped down to Orange-2, etc…"
Here are the valid color names:"
White Red Orange Yellow Green Cyan Blue Magenta Lavender Pearl"
You can type the color names in ALL CAPS, all lower case, or with An Initial Capital Letter. After the
color name you can write any ASCII characters. The STS does not support emojis or unicode ¯\_(ツ)_/¯"
Automatic loading of new/moved files
When you put the microSD card back into the STS and power it back up, the STS will recognize any
new folders and will create a new bank for each one. The first 10 WAV files inside that folder
(alphabetically) will be loaded into the 10 slots of the bank. If there are more than 10 WAV files in a
folder, only 10 will be loaded, but the rest are still accessible using the Edit+Next File feature we’ll talk
about later. Remember, sub-folders are ignored, so only WAV files directly in the folder will be
scanned."
Also, missing files will be searched for and/or replaced by new files inside existing folders."
"
Sample List HTML file
After you’ve made changes to the microSD card
using a computer, the next time you boot the STS
with that card, the module will create a file in the
root level of the microSD card called"
__Sample List__.html"
This is a handy quick reference for
seeing what files are in what banks
and how long each sample is. So if
you ever are wondering which samples are
assigned to which slots in which banks, open this
up and it’ll tell you! You might even want to email
it to your phone, or print it out so you have it
nearby if you want to look something up. "
_STS.system folder
Inside this folder are files that we officially ask you
not to touch! With that warning out of the way,
software engineers, hackers and curious-minded
tinkerers may find an interest in opening the
sample_index.dat file and settings.txt file in
a text editor and seeing how they work. All
features controlled by these files can be set using
the STS without a computer — but if you’re a
reverse-engineering type person, you might enjoy
looking “under the hood” to see how they work. "
Backup the _STS.system/ folder onto your computer before making changes!
While no real damage can occur, the worst case is you could lose all your sample loop/trim points,
gain settings, and bank/slot assignments. Your actual sample files will never be changed."
We plan to create a guide to editing the index file, as well as making the STS’s text parser a bit more
robust in terms of handling human error before releasing a guide to editing it. However, those familiar
with config files will probably be able to figure out the syntax easily.%
Page of 12 24

Edit Mode: Gain, Loop/Trim points
You can edit some features of samples without using a computer. These edits do not change
the actual WAV file, they just store loop points and gain information in a separate file for the
STS to use."
All these features use the Edit button to modify the sample loaded into the left side. As a
reminder of this, there’s an arrowhead pointing left next to the Edit button."
"
The changes you make using the Edit features are not saved until/unless you tell the STS to save your
changes. This way, if you goof up, you can always go back to how it was. Remember, your WAV files
are never modified, the STS just stores the loop/trim points and gain settings in its own file."
"
Editing a sample: Gain
By holding down the Edit button and turning the Gain knob (right side Sample
knob) you can adjust the gain of the sample being played."
At 0% the gain is set to 0.1, or 10% of the volume."
At 50% the gain is set to 1, which is the default."
At 100% the gain is set to 5, or 500% of the volume (clipping may occur!)"
Try this out now: play a sample on the left side and hold
Edit while you turn Gain. Hear how the gain changes. It
can even make a sample clip or overdrive if you want to."
"
Editing a sample: Loop/Trim start and stop points"
Similar to gain, you can also edit the
maximum start and stop points of a
sample. These are known as the
Loop or Trim points, and are
controlled using the Scrub Start/End
feature."
Hold Edit and turn the right side Scrub Start or Scrub End knobs. The STS will scrub the start or end
point of the sample as you turn the knob. The knob is velocity-sensitive, so turning it quickly will scrub
a large distance, while turning it slowly will scrub a small amount."
Release the Edit button
when you’re done
scrubbing. To hear how the
newly trimmed sample
sounds, make sure you turn
the left side’s Start Pos knob
to 0, and Length knob to 100% and then press
the left side PLAY. If you want to adjust them
some more, you can do Edit+Scrub again as
much as you like."
This is a very useful technique for creating
loops, or isolating “hits” or parts from a longer
sample. Example: you can isolate phrases or
words from a speech or audio book, or you can create a drum loop from a pop song. Or split up a
sample into a bunch of smaller slices. It’s also useful for removing silence or noise from the beginning
or end of a sample file. "
Remember to Save your work! Your Loop/Trim points will be in effect as long as the STS is powered
up. If you want to keep them after power down, you have to save them. Hold Edit and Save (left side
Page of 13 24
Edit
Sample
Edit
Sample
Edit
Sample
Edit
Sample
Sample
110
2 9
3 8
4 7
5 6
GainGain
+
Edit
Sample
Edit
Sample
Start Pos.
Scrub StartScrub Start
+
Edit
Sample
Edit
Sample
Length
Scrub EndScrub End
+
Gain vs. Volume:!The gain setting stays
with the sample, no
matter which channel you
play it on, as opposed to
the Channel Volume
feature which stays with
the channel, no matter
what sample you play.
Start Pos/Length vs. Scrub Start/End: $
How is Scrub Start/End different than using the Start
Pos and Length knobs? It has the same effect, but the
difference is that the Loop/Trim points (Edit+Scrub
Start/End points) can be saved after you power down.
The Start Pos and Length knobs are limited in range
by the Loop/Trim points: no matter how you CV and
knob-twist the Start Pos and Length, it’ll always stay
within the Loop/Trim window. So you can effectively
create a new sample by grabbing a short window from
a long sample.

PLAY) for half a second to save. After you save your start/end points, playing the sample will be
limited to within those points, no matter how you set the Start Pos and Length knobs. You can always
clear your loop points by holding Edit and spinning the Scrub Start knob rapidly to the left a handful of
times, and then the Scrub End knob rapidly to the right a handful of times."
"
Saving and Reverting
Any changes you make using the Edit functions must be saved if you want to see
these changes the next time you power the STS on. To save, hold down Edit +
Save (left side PLAY) for half a second. Release the buttons when you see the lights
change."
"
Undo changes to one sample"
If you want to undo the changes you just made to a sample, hold down
Edit+Revert (left side Reverse) for half a second. This will revert the currently
selected sample."
Revert one bank"
If you want to revert a whole bank back to the last saved version, hold
down Edit+Revert and the Bank button for that channel for two seconds.
This will revert the currently selected bank to the last saved version."
"
Revert all banks"
If you want to revert everything back to the last saved version,
hold down Edit+Revert (left side Reverse) and both Bank buttons
for four seconds. This will revert the STS to the state it was when
you last powered on (this is the same as flipping the power on
and off, but it’s much safer!)"
"
Copying
You can copy a sample from one bank to another. Copying doesn’t actually copy the
file on the microSD card, it just assigns the file to multiple sample slots. It also
copies the gain, and loop/trim points, but you can edit the gain or loop/trim points
on each copy independently."
To perform a copy:"
1. On the left side, go to the sample/bank you want to copy from."
2. On the right side, select the bank and sample you want to copy into (whatever sample is in that
slot will no longer be assigned)."
3. Hold down Edit and Copy (right side PLAY) for half a second."
Remember, the copy action happens from the left side to the right side. Whatever is in the right side
before you copy will be bumped out. You have to save your changes after copying if you want them to
appear the next time you power on (see “Saving and Reverting” section above)"
Copying is a powerful feature that allows you to create multiple instances of a sample. Example uses:"
•Create a copy of a snare sound and set the Gain higher to produce an “accented” version."
•Copy a sample of a speech, and set the trim points on each copy to grab different words."
•Copy a sample you like to use a lot, and place the copies in multiple banks for easy access."
•Create a new bank of samples that are spread out around other banks."
•Turn one sample into several slices or loops. "
Page of 14 24
PLAY
SaveSave
Edit
Sample
Edit
Sample
Save: Hold 0.5 sec
+
Edit
Sample
Edit
Sample
PLAY
CopyCopy
Copy: Hold 0.5 sec
+
Edit
Sample
Edit
Sample
Undo: Hold 0.5 sec
+
Reverse
RevertRevert
Edit
Sample
Edit
Sample
+
Reverse
RevertRevert
Bank
+
Revert bank: Hold 2 sec
Edit
Sample
Edit
Sample
Revert all banks: Hold 4 sec
Reverse
RevertRevert
Bank
+
Bank
+
+

Tutorial 5: Creating Slices
You can combine Copying and setting the Trim/Loop points to create multiple slices of a sample, and
store those slices into sample slots. "
1. Go to the sample you want to slice up on the left side of the STS."
2. On the right side, go to the destination bank where you want to store the slices (see the
“Navigating Banks” section for how to go to an empty bank)."
3. Turn the right Sample knob to the slot you want to put the first slice in."
4. Now hold Edit+Copy (right PLAY button) for half a second. You just copied the sample from the left
side to the right side!"
5. Turn the right Sample knob to the next slot and hit Edit+Copy again. Repeat until you created
enough copies."
Now we’re going to set the loop/trim points on each copy:"
6. On the left side, go to the same bank the right side is in."
7. Set the left Sample knob to the slot you want to edit."
8. Use Edit+Scrub Start (right Start Pos knob) and Edit+Scrub End (right Length knob) to scrub the
beginning and end points."
9. When you found the start/end points you like, set the left Sample knob to the next slot and repeat
step 8."
10. Don’t forget to do Edit+Save if you want to save your work!"
Page of 15 24
Original sample:
Copy into multiple slots (using Edit+Copy)
Use Edit+Scrub Start/End to create various slices
Sample
110
2 9
3 8
4 7
5 6
Sample
110
2 9
3 8
4 7
5 6
Sample
110
2 9
3 8
4 7
5 6
Sample
110
2 9
3 8
4 7
5 6
PLAY
CopyCopy
Edit
Sample
Edit
Sample
Edit
Sample
Length
Start Pos.
Scrub Start
Scrub End
Scrub Start
Scrub End

Example Patch: Sequencing the STS
The STS works well with a standard
CV/Gate sequencer. A typical patch is
shown on the left."
The Trigger or Gate output of the
Sequencer is patched to the Play
input of the STS. This makes the
sample fire on each sequencer step.
Some sequencers have gate repeat
effects, which will make the STS fire a
sample multiple times per step."
"
The CV output of the sequencer is
patched to any of the CV inputs on the
STS. If you want to use the sequencer
to control pitch (playing a sample at
various pitches), patch into the 1V/OCT
jack."
If you want a “multi-timbral” effect,
patch the CV output into the Sample CV
jack on the STS. Each step of the
sequencer can trigger a different
sample to play. "
If you have a sequencer with 2 or more
CV outputs, you can even sequence
both pitch and sample selection at once!"
Multi-voice, multi-timbral
Since the STS has two channels, you can use a sequencer with two trigger/gate channels to drive
both STS channels with different rhythmic patterns. In Stereo Mode (see p.8) both stereo samples will
be mixed together. Each side of the STS has its own CV jacks, so you can treat each side of the STS
as an independent instrument, but both draw from the same collection of samples."
You also can select “slices” of a long sample by running the Sequencer into the Start Pos CV jack.
Each step of the sequencer can thus play a different slice of the original sample."
STS as the clock source: End Out->Clock In"
One variation of this patch is to use the STS itself to clock for the sequencer by patching the End Out
to the Sequencer’s clock input. Make sure to set the sequencer to run on external clock."
To start the patch, hit PLAY on the STS once. The End Out will fire, thus clocking the sequencer, which
starts a sample on the STS, which fires an End Out when it finishes, which advances the sequencer,
etc… The Length control on the STS will control the tempo, which will vary with each step if the
samples are of different lengths. Try this patch with the Sequencer CV out into the STS Sample CV."
Note: if the patch seems to run for a moment and then stop, the gate pulse width on the sequencer is
probably preventing it from firing new steps. Either reduce PW to triggers or hold PLAY on the STS for
half a second to loop the STS channel.
Clock Divided Reverse"
Try splitting/mult’ing End Out and running it to Reverse . Or patch End Out into a clock divider and
use the divisions to reverse playback every N steps! If you only have one side of the STS patched so
far, patch other clock divider outputs into the Play on the other side."
Page of 16 24
To output
mixer (Right)
To output
mixer (Left)
Sequencer
CV ch 2
(optional)
Sequencer
Trigger/
Gate out
Sequencer
CV out
(Pitch)
Seq. CV ch 3
(optional)
Seq. CV ch 4
(optional)
Sequencer
Trigger/
Gate out 2
To Seq.
Clock In
(see below)

Example Patch: Granular Scrubbing
Since the STS can play fragments of a
sample as small as 8 ms, it can be used
for some basic granular synthesis
techniques such as granular scrubbing.
This can be used for a variety of sounds,
including time-stretching (without
changing pitch), and pitch-shifting
(without modifying playback time). "
The simplest way to play with granular
scrubbing on the STS is to load a familiar
sample: a drum loop or a vocal sample,
perhaps. For starters, pick a sample
that’s between 1 and 10 seconds long."
1.Turn Start Pos and Length to 0%."
2.Hold PLAY to make the channel loop.
You should hear a buzzy tone."
3.Slowly turn the Start Pos knob up, and
listen how the sample is played
(scrubbed). Start Pos essentially is
sweeping the play head."
4.Now turn Start Pos down slowly. The
sample should play backwards! Notice
that no matter how fast you turn Start Pos, the pitch does not change. That is, you can play the
sample faster or slower without changing its pitch. This is time-stretching in its most basic form."
5. Now turn Length up a tiny bit. Hear how the buzzy overtone changes? Length is setting the size of
the grains."
6. Let’s use an LFO to sweep through the sample so you don’t have to do it by hand. Patch a very
slow ramp-up LFO into the Start Pos CV jack. A Pingable Envelope Generator is great for this. The
period of the LFO will equal the playback time, so make the LFO’s period several seconds long.
Make sure the Start Pos knob is back at 0. For full range, the ramp-up LFO should be 0V to +5V:
Set the PEG’s Scale knob to 3:00 and Bi-Polar off. Attenuate or shift as needed: any voltage under
0V or over +5V will make playback “hang”. When the LFO is exactly 0V to +5V, you should hear the
entire sample being played forwards. Adjust the LFO speed to adjust the playback speed. Also,
you can attenuate the LFO and/or adjust the Start Pos knob to select certain portions of the
sample to playback."
7. Try different LFO wave shapes: ramp-down will play the sample backwards, triangle will play it
forwards-backwards, curved waves will play it at variable speeds (constant pitch)."
8. Next, let’s get rid of that buzzy overtone. Patch a random LFO (or a simple triangle if you don’t
have a random source) into an attenuator module. Attenuate the signal heavily, down to about
+0.5V max. Patch the attenuated random LFO/noise into the Length CV jack. Make sure the Length
knob is turned all the way back down. The overtone should now be randomized enough that it
disappears. Adjust the attenuation and/or random speed and/or Length knob to suit your taste."
9. To change pitch without changing the playback time, simply adjust the Pitch knob (or use the 1V/
OCT jack). Since the playback time is set by the LFO in Start Pos CV, you can freely adjust Pitch
without changing the timing. Likewise, you can adjust the playback timing without adjust the Pitch."
Random Grains"
Scrubbing involves playing the grains in order, but you also can play grains in random order. Patch the
random LFO into Start Pos CV instead of Length CV, and don’t attenuate it as much (or at all). Then
you can leave Length CV unpatched, or patch some other LFO into it to vary the grain sizes.!
Page of 17 24
To output
mixer
Random CV
(attenuated)
0V to 500mV
Hold to
Loop
LFO
(e.g. Ramp)
max 0V to +5V

Recording the STS Output as a New Sample
With some skillful button taps, knob twists, and thick
CV lines, you can turn any pack of samples into an
original creation worthy of being its own sample!"
Since the STS can record and playback
simultaneously, this is easy to do: you just need to
patch the outputs into the inputs and record as normal."
A couple things to keep in mind:"
1) To listen as you record, split or mult the outputs:
one cable running to the RECORD input jacks,
and one cable running to your mixer. See diagram
at right. A passive mult or a “stackcable" will
work."
2) When you arm recording, the STS automatically
turns Monitoring on. This will create a feedback
loop (out->in->out). Luckily, as soon as you press
PLAY, the STS disables Monitoring. If you hear a
feedback sound starting to emerge, hit either
PLAY button to disable Monitoring. It’s best to
arm recording before perfecting your patch, in
order to avoid feedback completely"
A future firmware update may include a feature to
automatically record the outputs, without requiring a
manual patch.
Example Patch: Clock Sync and Shifting Ping-Pong Loops
Find a sample with rhythmic elements. Hold PLAY to
make it loop. Turn down Length to between 50% and
90% to make a shorter loop that you like. "
Clock Sync:
Run a clock into Play to sync the loop to the clock. If
the loop is shorter than the clock, the sample will loop
until the next clock."
Shifting Loop:
Patch a very slow LFO into Start Pos CV. Each time the
loop ends, it’ll start in a new position, based on where
Start Pos CV is at the moment the sample re-starts."
Ping-Pong:"
On the left side, patch End Out into Reverse to play the
loop forward/backwards/forward/backwards
Dual Ping-Pong:
Patch End Out of the left side to Play of the right side.
Then patch End Out of the right side to Reverse of the
left. Loop both sides if you like."
Page of 18 24
To output
mixer (Right)
To output
mixer (Left)
Hold to Loop
Clock

Assigning Samples to Banks and Slots
Re-assigning samples to slots
You can change which sample file is assigned to a bank/sample slot. On the left
side channel, go to the bank and sample slot you want to change. Hold Edit and
tap Next File (left side Reverse). A new sample will play. If you keep tapping Next
File with Edit held down, it will keep playing new files, scanning the microSD card
for WAV files, and playing them one by one, in this order:"
Next File/Previous bank"
Next File: Tap the Next File button while holding down Edit "
Previous Bank: Hold Edit+Next File for about two seconds. If you’re in the middle
of a bank, it will go back to the beginning of the bank, and if you're already at the
beginning then it’ll go to the beginning of the previous bank."
Scan All Banks: Hold Edit+Next File continuously. The first file from all banks will
be played, one after another, until you let go."
All the files in the current folder plus the unused files on the card
(left and middle columns of the diagram above) are treated as a
“bank”. This imaginary “bank” is inserted into the normal order of
banks before the White bank. So if you’re in the White bank and
you go back, it’ll go to this “bank”, and if you go back from this
“bank”, it’ll go to the last bank that has samples in it."
The color of the Next File button helps you know where you are in the diagram above:"
In the first column (all files in the folder) the button will flash the current bank’s color."
In the second column (all unassigned files) the button will be flash dim white."
In the last group (each bank) the button will be the color and blink of the bank you’re in."
You have to save with Edit+Save to have the changes take effect after you power the STS off. If you
don’t save, you can hit Edit+Revert+Bank to restore to the latest saved version without having to
power down."
Page of 19 24
Edit
Sample
Edit
Sample
Reverse
Next FileNext File
+
Re-assign current slot:
(Next File)
Edit
Sample
Edit
Sample
Reverse
Next FileNext File
+
Re-assign current slot:
(Previous Bank)
Hold 2 sec
Tip: !Give your finger a break! During
any of these button presses,
you can release the Edit button
at any time, and pick back up
where you left off.
Unused WAV files"
(scans entire card)
All samples in all banks"
(normal order)
Sample 1 2 3 4 5 6 …
Repeat from start
Files in current folder
(alphabetically)

Uses for the Edit+Next File feature
Being able to re-assign samples to different banks and slots is a powerful feature that allows you to
organize your samples on the STS even if no computer is available."
•Create a bank of samples you want to use for a session."
•Change the order of samples within a bank."
•Record multiple takes and choose which one you like."
•Move new recordings to different banks."
•Choose samples you want to use from a folder of more than 10 samples."
•Have more than 600 samples on a microSD card and select which ones you want to use without
using a computer."
•Searching for a sample if you can’t remember what bank it’s in."
Assigning samples walk-through
Let’s do an example. The sample pack that ships with the STS has 15 files in the “Drum Hits
(Electronic)” folder. Let’s try picking a different sample for the sample slot #1:"
1. On the left side play channel, go to the Red bank."
2. Make sure Length is set to 100% and Start Pos is 0% in order to listen to the entire sample."
3. We’re going to re-assign slot #1, so turn the left side Sample knob to 1."
4. Hold Edit and tap Next File (left side Reverse button). A new sample file will play. Notice that the
left side Reverse button flashes red (since you’re in the red bank)."
5. Hold Edit and tap Next File some more times and listen to how it plays a different sample each
time. When you find one you like, stop hitting Edit+Next File."
6. That’s it! You’ve now re-assigned the Red bank slot #1 to whatever sample you picked."
Try it out: move the Sample knob to “2” hit PLAY. Now move it back to “1” and hit PLAY again: it
should play the new sample you picked out! You can repeat this process for slot #2 and the rest of the
Red bank, putting any sample (from anywhere on the microSD card) into any slot."
Like all other Edit button features, your changes will get lost if you power down without saving.
(Remember: to save hold Edit + Save [left side PLAY] for half a second)."
Let’s continue the walk-through and browse all the samples on the microSD Card:"
7. Go to a sample slot you haven’t re-assigned yet. Hit Edit+Next File until the Next File button
changes color from flashing red to flashing dim white. The flashing dim white indicates it’s no
longer scanning the folder, and instead is now scanning the entire microSD card for WAV files that
aren’t being used in a bank somewhere. The sound that you just heard played was a sample file
that’s not assigned anywhere."
8. If you keep hitting Edit+Next File the STS will keep
scanning the card for unused samples. There are a
few dozen of these in the sample pack, feel free to
browse!"
9. Once the STS has scanned the entire card (excluding
sub-folders, of course), it will move on to playing the
banks. The first bank is White with no blink, so the
Next File button will turn White (no blinks). As you
keep hitting the button, it’ll play all 10 samples in the
White bank, then move on to the 10 samples in the
Red bank, then Orange, etc…"
10. If you kept going through all the banks, you would
end up where you started, playing the samples in the
original folder (and the Next File button will flash red
like it did when you started). At that point you will have played every single WAV file on the
microSD card (excluding sub-folders, of course)."
11. Try going backwards: hold down Edit and Next File for 2 seconds. If you’re in the middle of bank
or group, the STS will go to the start and begin playing the first sample. If you hit it again (or keep
holding it down) it will go back a bank/group and play the first sample of the previous bank/group.
If you hold it down for a while, it’ll scan all the first files in every bank."
Page of 20 24
Tip:!When you first hit Edit+Next File, it
starts scanning the folder of the
sample that’s currently assigned to the
slot. But— if you assign a new sample
from a different folder to the slot, the
next time you hit Edit+Next File on that
slot, it’ll start you in the new assigned
sample’s folder. Keep in mind the
position of Edit+Next is retained until
you change banks, so this only
happens if you leave the bank and
come back.
Table of contents
Other 4ms Company Recording Equipment manuals