manuals.online logo
Brands
  1. Home
  2. •
  3. Brands
  4. •
  5. A4Tech
  6. •
  7. Mouse
  8. •
  9. A4Tech Office 8K User manual

A4Tech Office 8K User manual

Office 8K Optical Mouse User s Guide
PDF 案以 "FinePrint pdfFactory Pro" 試用版建立 http://www.pdffactory.com
THIS DEVICE COMPLIES WITH PART 15 OF THE FCC RULES. OPERATION IS SUBJECT TO THE FOLLOWING
TWO
CONDITIONS: (1) THIS DEVICE MAY
NOT CAUSE HARMFUL INTERFERENCE AND (2) THIS DEVICE MUST ACCEPT ANY
INTERFERENCE RECEIVED, INCLUDING INTERFERENCE THAT MAY CAUSE UNDESIRED OPERATION.
Federal Communications Commission Requirements
The equipment has been tested and found to comply with the limits for Class BDigital Device, pursuant to part 15 of the FCC Rules.
These limits are
designed to provide reasonable protection against harmful interference in aresidential installation. This equipment
generates, uses and can radiateradio frequency energy and, if not installed and used in accordance with the instruction, may cause
harmful
interference to radio communication. However, thereis no guarantee that interferencewill not occur in aparticular
installation. If this equipment does cause harmful interference to radio or television reception, which can be determined by turning the
equipment off and on, the user is encouraged to try to correct the interference by one or more of the following measures:
l Reorient of relocate the receiving antenna.
l Increase the separation between the equipment and receiver.
l Connect the equipment into an outlet on a circuit different from that to which the receiver is connected.
l Consult the dealer or an experienced radio/TV technician for help.
This device complies with Part 15 of the FCC Rules. Operation is subject to the following two conditions:
(1)this device mat not cause harmful interference, and
(2) this device must accept any interference received, including interference that may cause undesired operation.
The changes or modifications not expressly approved by the party responsible for compliance could void the user's authority to
operate the equipment.
PDF 案以 "FinePrint pdfFactory Pro" 試用版建立 http://www.pdffactory.com
I
IN
NT
TR
RO
OD
DU
UC
CT
TI
IO
ON
N
C
CO
ON
NG
GR
RA
AT
TU
UL
LA
AT
TI
IO
ON
NS
S
O
ON
N
Y
YO
OU
UR
R
P
PU
UR
RC
CH
HA
AS
SE
E!
!
Y
YO
OU
UR
R
N
NE
EW
W
R
RF
F-
-M
MO
OU
US
SE
E
O
OF
FF
FI
IC
CE
E
8
8K
K
I
IS
S
E
EA
AS
SY
Y
T
TO
O
I
IN
NS
ST
TA
AL
LL
L
A
AN
ND
D
O
OF
FF
FE
ER
RS
S
Y
YO
OU
U
A
A
C
CO
OU
UN
NT
TL
LE
ES
SS
S
O
OF
F
U
US
SE
EF
FU
UL
L
F
FE
EA
AT
TU
UR
RE
ES
S.
.
T
TH
HE
E
R
RA
AD
DI
IO
O
R
RE
EC
CE
EI
IV
VE
ER
R
C
CA
AN
N
B
BE
E
C
CO
ON
NV
VE
EN
NI
IE
EN
NT
TL
LY
Y
P
PL
LA
AC
CE
ED
D
A
AN
NY
YW
WH
HE
ER
RE
E
T
TO
O
G
GI
IV
VE
E
Y
YO
OU
U
T
TH
HE
E
F
FR
RE
EE
ED
DO
OM
M
Y
YO
OU
U
N
NE
EE
ED
D
W
WH
HI
IL
LE
E
W
WO
OR
RK
KI
IN
NG
G.
.
Connecting the RF-Mouse Receiver
The RF-Mouse receiver connects to your computer in the same way as aconventional mouse does;
allowing you
to place the receiver wherever is convenient on your desktop.
1. Locate an available USB mouse port on the back of your computer.
2. Insert the USB mouse port connector into the available computer USB port.
If you want to connect an USB mouse to your computer PS2 port, you must use a USB to PS2 adapter.
Installing the iOfficeWorks Software
If there re other mouse drivers installed onyour computer, please have them uninstalledbefore you
start the installation process. Also
please be sure you have completed above hardware setup.
Windows 95/98/ME/2000/XP/NT4.0 installation (Note: the USB Device does not support Windows 95/NT4.0)
1. Insert the installation CD into your CD drive.
2. The “auto run”program will show you the installation screen.
3. Click on the “iOfficeWorks”to start the installation.
4. Follow the instructions on your screen to complete the installation
PDF 案以 "FinePrint pdfFactory Pro" 試用版建立 http://www.pdffactory.com
Why use iOfficeWorks
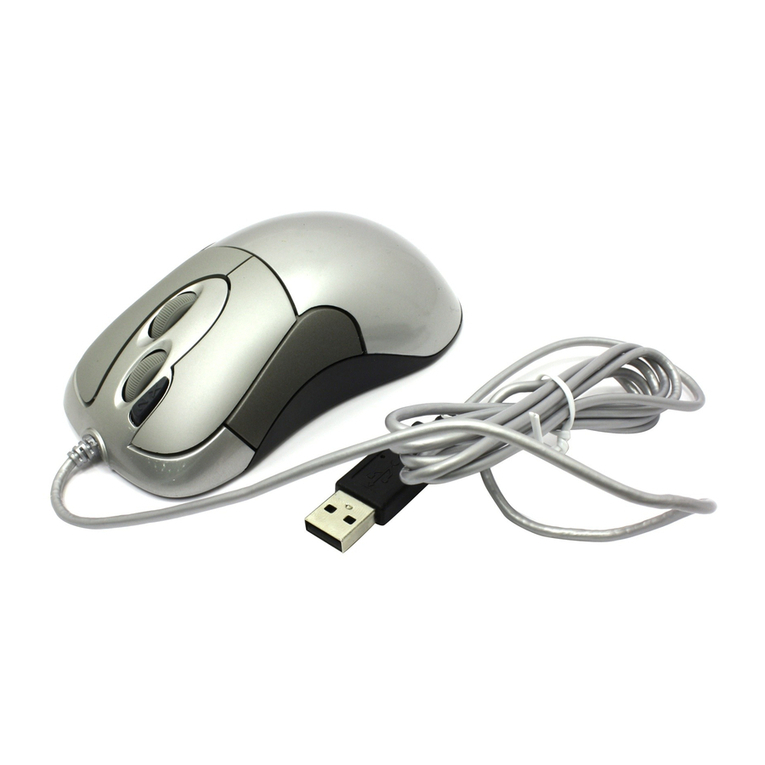
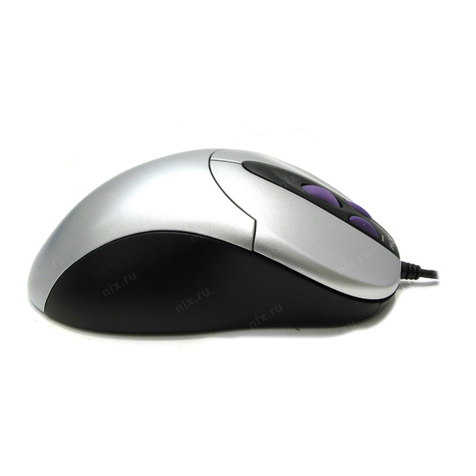
There are a total of 8 buttons on the Office
8K mouse. The 3rd Wheel button, 4th and 5th
buttons are programmable with 54
shortcuts to make your daily repetitive
works easier. Not only that, Office users
will love the Office 8K RF-mouse and its
iOfficeWorks program features. What
makes this mouse different and unique
from all other mice is its 6th, 7th and 8th
buttons, which work as the Office
commands set.
Office 6th,7th and 8th buttons
The 6th and 7th buttons located in front of thewheelare working as thecoupling buttons with 24 various command sets suc
has
“OPEN, CLOSE”; “DELETE, REPLY”, “ZOOMIN, ZOOMOUT”…etc
.which may beeasily changed by one clickon the 8th
OfficeJump key.
8th OfficeJump switch Button
6th Office function Button
7th Office function Button
PDF 案以 "FinePrint pdfFactory Pro" 試用版建立 http://www.pdffactory.com
24 various Office command sets
There are total of 24 Office command sets you
can select according to your Office work needs.
To customize, open the Mouse Properties
window and select the Office Buttons tab. Check
up to 8 sets of command that you need to use
often. Then Click “APPLY”.After Office
command sets screen has been completely setup,
you can use the selected 8 sets of command by
pressing the 8th OfficeJump key. Each time you
press the OfficeJump switch key, there will be a
small OfficeJump Menu appear right by your
cursor.
PDF 案以 "FinePrint pdfFactory Pro" 試用版建立 http://www.pdffactory.com
OfficeJump Menu
You can select one out of eight office icons on the OfficeJump menu. The selected office icon will
be marked with a blue diamond and will be able to use. It will remain unchanged until you
change to another command. The OfficeJump Menu can be found in the Windows System Tray
next to the clock to remind you the current activating office commands you have selected.
By clicking the A4 company logo, you can launch the 24 Office commands
setup screen.
The selected command set icon
will show in System Tray
Experience the Office 8K Mouse with different applications
When you are in Microsoft Outlook
After selected Office command set No.5 - Delete-Reply All . You can press 6th button to delete all garbage mail, or you can press
7th button to reply all. By using Office 8K Mouse, you can instantly read all your email messages and manage your outlook in a second.
Or you can select No.15 - Zoom In- \Zoom out to enlarge your email font size to match your eyesight needs
When you are in Microsoft Word
After selected Office Command set No.1 - Copy-Paste . You can adjust your paragraph length or edit sentences with simply two
clicks. Instead of looking for copy icon and paste icon in the MS Word or Ctrl+C and Ctrl+V on the Keyboard.
or you can select No.15 - Zoom In- \Zoom out to enlarge the page view size to match your eyesight needs.
PDF 案以 "FinePrint pdfFactory Pro" 試用版建立 http://www.pdffactory.com
When you are in Microsoft Excel
After selected Office command set No.14 - Scroll left-Scroll right . You can edit your wide spreadsheet in a second with such a
handful function
When you are in Photoshop, Illustrator, Pro-E or other applications
After selected Office Command Set No.15 - Zoom In- \Zoom out , you can enlarge or shrink the image size whether to do some
editing to the image or just to view the image more clearly with just two clicks.
More than 100 useful applications are supported with our “Zoom in-Zoom out”command set
Thereare so many differentcomputer applications that provides zoom in and out functions. However, each ofthesevarious
applications uses different ways to execute the Zoom function, which can be difficult to neither learn nor remember
theproper way in
performing the Zoom functions. Now, with A4 Tech Zoomin and out function, whether you are an Artist, Designeror Office user,
you can easily press the two zoom buttons to interactive with more than hundreds of applications. We
integrated and standardized
different Zoomcommands into our twooffice fingertips, and this function can be use in all Windows applications that use
Zoom-supported functions.
For more information pleasevisit our website to check supported applica
tion list. If your favorite application does not appear onthe
list, please contact us through the URL: http://www.a4tech.com/EN/tellus.asp
We are more than happy to hear from you!
PDF 案以 "FinePrint pdfFactory Pro" 試用版建立 http://www.pdffactory.com
3rd wheel button - Net/LuckyJump Commands
To use the Net/LuckJump, you need to open the Mouse Properties window and select the Button
tab. Then assign Net/LuckyJump in 3rd button command. You also can use “Setting”
to update
the command list of Net/LuckJump. Press the wheel button, it will show up NetJump or
LuckyJump screen which shows 14 commonly used tasks as for convenient shortcut.
Programmable 3rd, 4th, and 5th buttons –54 available shortcuts
Button assignment lists out of 54 available commands and settings for the 3rd, 4th and 5th keys
which you can open many useful programs
or execute the commands by one click on the button.
The default setting for the 4th and 5th buttons is Internet Explorer and Browser “Back”and
“Forward”function.
PDF 案以 "FinePrint pdfFactory Pro" 試用版建立 http://www.pdffactory.com
EINFÜHRUNG
Wir bedanken uns für Ihren Kauf! Ihre neue RF-Maus lässt sich mühelos installieren und sie bietet zahlreiche nützliche
Funktionen. Der Funkempfänger kann so aufgestellt werden, dass Sie bequem arbeiten können.
Anschließen des RF-Mausempfängers
Der RF-Mausempfänger verbindet sich mit dem Computer so wie eine herkömmliche Maus, so dass Sie den Empfänger dort auf Ihren
Schreibtisch stellen können, wo er Sie nicht stört.
1. Finden Sie einen verfügbaren USB-Mausanschlußauf der Rückseite des Computers.
2. Verbinden Sie den USB-Mausstecker mit dem USB-Mausanschluss.
3. Wenn Sieeine Kombo2-Maus mit dem PS/2-Anschluss IhresComputers verbinden möchten, müssen Sie einen
USB-zu-PS/2-Adapter besorgen.
(Enabled USB IRQ#: Bei Verwendung von USB-Ger ten müssen Sie diesen Punkt im BIOS auf Enabled setzen, um ein IRQ für die USB-Funktion
zu reservieren; auf Disabled gesetzt wird dem USB kein IRQ zugewiesen, woraufhin das USB nicht funktioniert. Details hierzu sind im
BIOS-Setup Ihres Computers angegeben.)
Installieren der iOfficeWorks-Software
Bevor Sie mit der Installation beginnen, müssen Sie alle anderen, auf Ihrem Computer installierten Maustreiber deinstallieren. Auch
muss die Hardware vollständig eingerichtet sein.
Windows 95/98/Me/2000/XP/NT4.0-Installation (Hinweis: Das USB-Gerät unterstützt Windows 95/NT4.0 nicht.)
1. Legen Sie die Installations-CD in das CD-Laufwerk.
2. Das Programm »Auto run«öffnet den Installationsbildschirm.
3. Klicken Sie auf »iOfficeWorks«, um mit der Installation zu beginnen.
4. Stellen Sie die Installation anhand der Anweisungen auf dem Bildschirm fertig.
PDF 案以 "FinePrint pdfFactory Pro" 試用版建立 http://www.pdffactory.com
Warum iOfficeWorks benutzen
Es gibt insgesamt 8 Tasten auf der Office 8K-Maus. Die dritte
Radtaste und die Tasten 4 und 5 können mit 56
Verknüpfungen programmiert werden, um tägliche, sich
wiederholende Aufgaben zu erleichtern. Office-Benutzer
werden die Office 8K RF-Maus und ihre
iOfficeWorks-Funktionen lieben. Was diese Maus von anderen
Mäusen unterscheidet und einzigartig macht, sind ihre Tasten
6, 7 und 8, die als Office-Befehlsset fungieren.
Office-Tasten 6, 7 und 8
Die Tasten 6 und 7 vor dem Rad fungieren als
Verknüpfungstasten mit 24 unterschiedlichen Befehlssets wie
»ÖFFNEN, SCHLIESSEN«; »LÖSCHEN, BEANTWORTEN«,
»EINZOOMEN, AUSZOOMEN«…etc., die durch ein Klicken
auf die 8. OfficeJump-Taste leicht geändert werden können.
24 unterschiedliche Office-Befehlssets
Es gibt insgesamt 24 Office-Befehlssets, die Sie für Ihre Office-Arbeit auswählen können.
Zur Anpassung müssen Sie das Fenster Mauseigenschaften öffnen und die Registerkarte Office-Tasten wählen. Wählen Sie bis zu 8
Sets mit häufig Befehlen an, die Sie häufig verwenden. Klicken Sie dann auf »ÜBERNEHMEN«. Sobald die Office-Befehlssets
eingerichtet sind, können Sie die 8 ausgewählten Sets mit Befehlen durch Drücken der 8. OfficeJump-Taste verwenden. Bei jedem
Drücken der OfficeJump-Schaltertaste erscheint ein kleines OfficeJump-Menürechts neben dem Cursor.
OfficeJump-Menü
Im OfficeJump-Menükönnen Sie ein aus acht Office-Symbolen auswählen. Das ausgewählte Office-Symbol wird mit einem blauen
Karo markiert und bleibt unverändert, bis Sie zu einem anderen Befehl wechseln. Das OfficeJump-Menübefindet sich in der
Windows-Tasklesite neben der Uhr und zeigt die aktuell ausgewählten Office-Befehle an.
Durch Klicken auf das A4-Logo starten Sie den Einrichtungsbildschirm der 24 Office-Befehle.
8th OfficeJump switch
6th Office function
7th Office function
PDF 案以 "FinePrint pdfFactory Pro" 試用版建立 http://www.pdffactory.com
Arbeiten Sie mit der Office 8K-Maus mit unterschiedlichen Anwendungen
Wenn Sie sich in Microsoft Outlook befinden
Wählen Sie das Office-Befehlsset Nr.5 - Löschen-Alles beantworten . Durch Drücken der Taste 6 können Sie überflüssige
Posteingänge löschen oder mit Taste 7 alle beantworten. Mit der Office 8K-Maus können Sie in wenigen Sekunden alle
E-Mail-Nachrichten lesen und Outlook verwalten.
Sie könen auch das Set Nr. 15 auswählen - Einzoomen-Auszoomen , um die E-Mail-Schriftgröße als Lesehilfe zu vergrößern.
Wenn Sie sich in Microsoft Word befinden
Wählen Sie das Office-Befehlsset Nr. 1 - Kopieren-Einfügen . Sie können dann mit nur zwei Klicks die Länge von Paragraphen
einstellen oder Sätze bearbeiten, anstatt auf die Symbole Kopieren und Einfügen in der Symbolleiste klicken oder Strg+C und Strg+V
auf der Tastatur drücken.
Sie könen auch das Set Nr. 15 auswählen - Einzoomen-Auszoomen , um die Seitenansicht als Lesehilfe zu vergrößern.
Wenn Sie sich in Microsoft Excel befinden
Wählen Sie das Office-Befehlsset Nr. 14 –Nach links rollen-Nach rechts rollen . Mit dieser nützlichen Funktion können Sie dann
eine breite Tabelle mühelos bearbeiten.
Wenn Sie sich in Photoshop, Illustrator, Pro-E oder in anderen Anwendungen befinden
Wählen Sie das Office-Befehlsset Nr. 15 - Einzoomen-Auszoomen , um das Bild mit nur zwei Klicks für ein präzises Bearbeiten zu
vergrößern oder zu verkleinern oder um das gesamte Bild deutlich anzuzeigen.
PDF 案以 "FinePrint pdfFactory Pro" 試用版建立 http://www.pdffactory.com
Das Befehlsset »Einzoomen-Auszoomen«wird von mehr als 100 nützlichen Anwendungen unterstützt
Viele unterschiedliche Computeranwendungen verfügen über Ein- und Auszoomfunktionen. Je nach Anwendung gibt es allerdings
unterschiedliche Methoden zur Ausführung der Zoomfunktion, und es ist oft schwierig, sich an die richtige Methode für jede
Anwendung zu erinnern. Ganz gleich, ob Sie jetzt ein Künstler, ein Designer oder ein Office-Benutzer sind, mit der A4 Tech-Ein- und
Auszoomfunktion können Sie durch Drücken von Zoomtasten mühelos mit Hunderten von Anwendungen arbeiten. Wir integrierten
und standardisierten unterschiedliche Zoom-Befehle in unsere beiden Office-Tasten, wobei diese Funktion in allen
Windows-Anwendungen verwendet werden kann, die mit zoom-unterstützenden Funktionen arbeiten.
Besuchen unsere Website, um sich die Liste unterstützter Anwendungen anzuschauen. Wenn Ihre Lieblingsanwendung nicht
aufgelistet, kontaktieren Sie uns über folgendes URL: http://www.a4tech.com/EN/tellus.asp
Dritte Radtaste - Net/LuckyJump-Befehle
Zur Verwendung von Net/LuckyJump müssen Sie das Fenster Mauseigenschaften öffnen und die Registerkarte Tasten wählen.
Weisen Sie dann Net/LuckyJump dem dritten Tastenbefehl zu. Sie können die Befehlsliste von Net/LuckyJump auch mit
»Einstellung«aktualisieren. Drücken Sie die Radtaste und der NetJump- oder LuckyJump-Bildschirm mit 14 Abkürzungen für häufig
verwendete Aufgaben erscheint.Wir freuen uns, von Ihnen Post zu bekommen!
Programmierbare Tasten 3, 4 und 5 –56 verfügbare Verknüpfungen
Die Liste mit Tastenzuweisungen enthält 56 verfügbare Befehle und Einstellungen für die Tasten 3, 4 und 5, um mit einem Klicken
Programme und Befehle auszuführen.
Die Standardeinstellung für die Tasten 4 und 5 ist Internet Explorer und die Funktion »Zurück«und »Weiter«des Browsers.
PDF 案以 "FinePrint pdfFactory Pro" 試用版建立 http://www.pdffactory.com
INTRODUZIONE
Congratulazioni per ilvostro acquisto! Ilnuovo mouse RFèfacile da installaree offre molte utili funzionalità. Ilradioricevitore può
essere posizionato dove piùopportuno, per lavorare nella massima libertà.
Connessione del ricevitore del mouse RF
Il ricevitore del mouse RF si collega al computer allo stesso modo di un mouse tradizionale ed èpossibile collocarlo nella posizione più
comoda sulla scrivania.
1. Individuare una porta USB disponibile per il mouse sul retro del computer.
2. Inserire il connettore del mouse USB nella porta USB del mouse.
3. Se occorre collegare un mouse combo2 alla porta PS2 del computer, ènecessario utilizzare un adattatore USB-PS2.
(N. IRQ USB abilitato: se si utilizzano periferiche USB, puòessere necessario selezionare “Enabled”nel BIOS e riservare un numero IRQ
per consentire il funzionamento della porta USB; l opzione “Disabled”non permette l assegnazione di un numero IRQ alla porta USB,
quindi le impedisce di funzionare; per ulteriori informazioni verificare la configurazione del BIOS del computer locale).
Installazione del software iOfficeWorks
Prima di avviare l installazione, rimuovere ogni altro driver per mouse presente sul computer. Assicurarsi inoltre di completare
linstallazione hardware.
Installazione in Windows 95/98/ME/2000/XP/NT4.0 (Nota: il dispositivo USB non ècompatibile con Windows 95/NT4.0).
1. Inserire il CD di installazione nell unitàCD.
2. Il programma di esecuzione automatica apre la schermata di installazione.
3. Per avviare l installazione, fare clic su “iOfficeWorks”.
Per completare l installazione, attenersi alle istruzioni visualizzate sullo schermo.
PDF 案以 "FinePrint pdfFactory Pro" 試用版建立 http://www.pdffactory.com
Perchéutilizzare iOfficeWorks?
Il mouse Office 8K presenta ben 8 pulsanti. Il terzo (rotellina),
il quarto e il quinto pulsante sono programmabili con 56
scelte rapide, per semplificare le operazioni di routine.
Inoltre gli utenti Office troveranno indispensabile il mouse
8K Office RF e le funzionalitàdel programma iOfficeworks.
Ciòrende questo mouse unico e diverso da tutti altri èla
presenza del sesto, settimo e ottavo pulsante, che operano
come set di comandi Office.
Sesto, settimo e ottavo pulsante per Office
Il sesto e il settimo pulsante, posti davanti alla rotellina,
funzionano in combinazione per realizzare 24 diversi set di
comandi, quali “APRI, CHIUDI”; “ELIMINA, RISPONDI”,
“INGRANDISCI, RIDUCI”…ecc., che possono essere
facilmente modificati con un semplice clic sull ottavo tasto OfficeJump.
24 diversi set di comandi Office
In base alle proprie esigenze, èpossibile selezionare fino a 24 set di comandi Office.
Per personalizzarli, aprire la finestra Proprietàmouse e selezionare la scheda dei pulsanti Office. Scegliere fino a 8 set di comandi
utilizzati di frequente, quindi fare clic su “APPLICA”. Dopo aver impostato i set di comandi Office, per utilizzare quelli selezionati è
sufficiente fare clic sull ottavo tasto OfficeJump. A ogni pressione del tasto di commutazione OfficeJump, accanto al cursore viene
visualizzato un piccolo menu OfficeJump.
Menu OfficeJump
Nel menu OfficeJump èpossibile scegliere tra otto icone Office. L icona Office selezionata viene contrassegnata con un rombo blu e
rimane invariata finchénon si sceglie un altro comando. Il menu OfficeJump, posto nella barra delle applicazioni Windows, accanto
all orologio, mostra il comando Office attualmente selezionato.
Per avviare la schermata di configurazione dei 24 comandi Office, fare clic sul logo A4.
8th OfficeJump switch
6th Office function
7th Office function
PDF 案以 "FinePrint pdfFactory Pro" 試用版建立 http://www.pdffactory.com
Utilizzo del mouse Office 8k con diverse applicazioni
In Microsoft Outlook
Selezionare il set di comandi Office N.5: Elimina-Rispondi a tutti . Ora èpossibile premere il sesto pulsante per eliminare la posta
indesiderata o il settimo per rispondere a tutti i mittenti. Il mouse Office 8K consente di leggere tutti i messaggi di posta elettronica e
gestire Outlook in pochi secondi.
Èinoltre possibile selezionare il set N. 15: Ingrandisci-Riduci per aumentare le dimensioni del carattere nei messaggi di posta
elettronica, rendendoli piùleggibili.
In Microsoft Word
Selezionate il set di comandi Office N.1: Copia-Incolla . Ora èpossibile regolare la lunghezza dei paragrafi o modificare le frasi con
due soli clic, anzichéselezionare le icone Copia e Incolla nella Barra degli strumenti o premere CRTL + C e CTRL + V sulla tastiera.
Èinoltre possibile selezionare il set N. 15: Ingrandisci-Riduci per ingrandire la visualizzazione della pagina, rendendola più
leggibile.
In Microsoft Excel
Selezionare il set di comandi Office N. 14: Scorri a sinistra-Scorri a destra . Grazie a questa comoda funzione, èsemplice modificare
fogli di lavoro di larghezza elevata.
In Photoshop, Illustrator, Pro-E o altre applicazioni
Selezionare il set di comandi Office N. 15: Ingrandisci-Riduci per aumentare o ridurre le dimensioni dell immagine onde
modificarla con precisione o visualizzarla con maggiore chiarezza, in soli due clic.
PDF 案以 "FinePrint pdfFactory Pro" 試用版建立 http://www.pdffactory.com
Il set di comandi “Ingrandisci-Riduci”èsupportato da oltre 100 utili applicazioni
Molte applicazioni sono dotate di funzioni di ingrandimento e riduzione. Tuttavia le modalitàdi esecuzione di tali funzioni variano in
base all applicazione e spesso risulta difficile ricordare le procedure specifiche. Ora, grazie alla funzione di ingrandimento e riduzione
di A4 Tech, un artista, un progettista o un utente di applicazioni per ufficio puòsemplicemente premere i due pulsanti associati alla
funzione e operare con centinaia di applicazioni. Nei pulsanti Office sono stati integrati e standardizzati i diversi comandi di
ingrandimento. Tale funzione puòessere utilizzata in tutte le applicazioni Windows che supportano funzioni simili.
Per l elenco delle applicazioni supportate, visitare il sito Web di A4 Tech. Se l applicazione che interessa non compare nell elenco,
contattate A4 Tech all indirizzo: http://www.a4tech.com/EN/tellus.asp
Siamo a vostra disposizione per aiutarvi.
Terzo pulsante rotellina - comandi Net/LuckyJump
Per utilizzare LuckyJump ènecessario aprire la finestra Proprietàmouse e selezionare la scheda Pulsanti. Assegnare il comando
Net/LuckyJump al terzo pulsante. Per aggiornare l elenco dei comandi Net/LuckyJump èinoltre possibile utilizzare “Impostazioni”.
Premere il pulsante rotellina per visualizzare la schermata NetJump o LuckyJump e le 14 scelte rapide corrispondenti
Terzo, quarto e quinto pulsante programmabili –56 scelte rapide
Lelenco di assegnazione dei pulsanti mostra i 56 comandi e impostazioni disponibili per il terzo, il quarto e il quinto pulsante. Tali
opzioni consentono di avviare programmi o eseguire comandi con un semplice clic.
Per impostazione predefinita, al quarto e quinto pulsante sono assegnati il programma Internet Explorer e le funzioni “Indietro”e
“Avanti”del browser.
PDF 案以 "FinePrint pdfFactory Pro" 試用版建立 http://www.pdffactory.com
INTRODUCTION
Félicitations ! Votre nouvelle souris RF est facile àinstaller et offre de nombreuses fonctions utiles et innovatrices. Placez le
récepteur radio oùvous le désirez pour plus de libertéquand vous travaillez.
Connecter le récepteur RF de la souris
Le récepteur de la souris RF se connecte àvotre ordinateur de la même façon qu une souris conventionnelle, et peut être placé
nimporte oùsur votre bureau.
Localisez un port USB disponible au dos de votre ordinateur.
1. Insérez le connecteur USB de la souris dans le port USB.
2. Si vous voulez connecter une souris combo2 au port PS2 de votre ordinateur, vous devez utiliser un adaptateur USB àPS2.
(No. IRQ USB activé: Si vous utilisez des périphériques USB, il sera peut-être nécessaire de cocher Enabled (activé) dans le BIOS de
votre ordinateur pour réserver un numéro IRQ pour le port USB. L option Disabled (désactivé) ne permet pas au port USB d avoir un
numéro IRQ et l empêche de fonctionner. Pour plus de détails contrôlez le BIOS de votre ordinateur.)
Installer le logiciel iOfficeWorks
Veuillez désinstaller tous les autres pilotes de souris installés sur votre ordinateur avant de lancer le procédéd installation.
Assurez-vous aussi de compléter l installation du matériel.
Installation sous Windows 95/98/ME/2000/XP/NT4.0
(Note : Le périphérique USB ne supporte pas Windows 95/NT4.0)
1. Insérez le CD d installation dans votre lecteur CD.
2. Lécran d installation apparaît automatiquement.
3. Cliquez sur «iOfficeWorks »pour lancer l installation.
Suivez les instructions sur l écran pour compléter l installation
PDF 案以 "FinePrint pdfFactory Pro" 試用版建立 http://www.pdffactory.com
Pourquoi utiliser iOfficeWorks
Il y a 8 boutons sur la souris Office 8K. Le 3ème bouton
roulette, et les 4ème et 5ème boutons sont programmables avec
56 raccourcis pour faciliter vos travaux quotidiens. Les
utilisateurs de Office apprécieront la souris 8K Office RF et
ses caractéristiques iOfficeWorks. Les 6ème, 7ème et 8ème
boutons, le jeu de commandes Office, différencient cette
souris des autres souris sur le marché.
6ème, 7ème et 8ème boutons Office
Les 6ème et 7ème boutons devant la roulette fonctionnent
comme combinaisons avec 24 jeux de commandes, tels que
«OUVRIR, FERMER », «SUPPRIMER,REPONDRE »,
«ZOOM AVANT, ZOOM ARRIERE »…etc. qui peuvent être facilement modifiés avec un clic sur le 8ème bouton OfficeJump.
24 jeux de commandes Office
Vous pouvez sélectionner un total de 24 jeux de commandes Office pour tous vos besoins.
Ouvrez la fenêtre Propriétés de la souris et sélectionnez l onglet Boutons Office. Cochez jusqu à 8 combinaisons de commandes que
vous utilisez souvent. Cliquez alors sur «APPLIQUER ». Une fois cela fait, vous pouvez utiliser les 8 jeux de commandes en pressant le
8ème bouton OfficeJump. Chaque fois vous pressez le bouton OfficeJump, un petit menu OfficeJump apparaît àdroite de votre curseur.
Menu OfficeJump
Vous pouvez sélectionner unedes huit icônes Officedans lemenu OfficeJump. L icônesélectionnée est marquée avec un diamant bleu ;
elle changequand vous passezàuneautrecommande. Lemenu OfficeJump apparaîtdans la barred état système deWindowsàcôtéde
lhorloge, pour indiquer les commandes Office sélectionnées.
Vous pouvez lancer l écran de configuration des 24 jeux de commandes Office en cliquant sur le logo A4.
8th OfficeJump switch
6th Office function
7th Office function
PDF 案以 "FinePrint pdfFactory Pro" 試用版建立 http://www.pdffactory.com
Utiliser la souris 8K Office avec différentes applications
Dans Microsoft Outlook
Sélectionnez le jeu de commandes Office no. 5 - Supprimer-Répondre àtous . Vous pouvez alors presser le 6ème bouton pour
supprimer les courriers indésirables, ou le 7ème bouton pour répondre àtous les correspondants. Avec la souris 8K Office, vous pouvez
lire vos messages et gérer Outlook en quelques secondes.
Vous pouvez aussi sélectionner le jeu no. 15 - Zoom avant-Zoom arrière pour agrandir de la taille de police des messages pour une lecture plus
aisée.
Dans Microsoft Word
Sélectionnez le jeu de commandes Office no. 1 - Copier-Coller . Vous pouvez alors éditer votre texte avec seulement deux clics, au
lieu de cliquer sur les icônes Copier et Coller dans la barre d outils ou presser Ctrl + C et Ctrl + V sur le clavier.
Vous pouvez aussi sélectionner le jeu no. 15 - Zoom avant-Zoom arrière pour agrandir la taille de page pour une meilleure vue.
Dans Microsoft Excel
Sélectionnez le jeu de commandes Office no. 14 –Défiler àgauche-Défiler àdroite . Vous pouvez alors facilement éditer une
grande feuille électronique.
Dans Photoshop, Illustrator, Pro-E ou d autres applications
Sélectionnez le jeu de commandes Office no. 15 - Zoom avant-Zoom arrière pour agrandir ou réduire l image pour des retouches
précises ou visualiser toute l image avec seulement deux clics.
PDF 案以 "FinePrint pdfFactory Pro" 試用版建立 http://www.pdffactory.com
Le jeu de commandes «Zoom avant-Zoom arrière »est supportépar plus de 100 applications utiles
Beaucoup d applications fournissent des fonctions de zoom. Cependant, diverses applications utilisent différentes façons d exécuter la
fonction de zoom, et il est parfois difficile de mémoriser la combinaison correcte pour chaque application. Avec la fonction de zoom de
A4 Tech, si vous êtes un artiste, un dessinateur ou un utilisateur Office, vous pouvez simplement presser les deux boutons de zoom
pour travailler avec plus de 100 applications. Nous avons intégréet standardisédifférentes commandes de zoom dans nos deux boutons
Office, et cette fonction peut être utilisée dans toutes les applications de Windows qui supportent le zoom.
Veuillez visiter notre site Web pour contrôler la liste d applications supportées. Si votre application préférée n apparaît pas dans cette
liste, veuillez nous contacter via l URL suivant : http://www.a4tech.com/EN/tellus.asp
Nous attendons vos commentaires avec anticipation !
Le 3ème bouton roulette –commandes Net/LuckyJump
Pour utiliser Net/LuckyJump, ouvrez la bo te de dialogue Propriétés de la souris et sélectionnez l’onglet Boutons. Assignez alors
Net/LuckyJump au 3ème bouton. Vous pouvez aussi utiliser «Paramètres »pour mettre àjour la liste de commande Net/LuckyJump.
Pressez le bouton roulette, et l’écran de NetJump ou LuckyJump avec 14 raccourcis pour les tâches ordinairement utilisées appara t.
3ème, 4ème, et 5ème boutons programmables –56 raccourcis disponibles
La liste suivante affiche les 56 commandes et les paramètres disponibles pour les 3ème,4ème et 5ème boutons, pour ouvrir des programmes
ou exécuter des commandes avec un simple clic.
Le réglage par défaut pour les 4ème et 5ème boutons est Internet Explorer et les fonctions «Précédente »et «Suivante »du navigateur.
PDF 案以 "FinePrint pdfFactory Pro" 試用版建立 http://www.pdffactory.com

Other A4Tech Mouse manuals

A4Tech G7-300 User manual

A4Tech

A4Tech G7-300 User manual

A4Tech G9-500H User manual

A4Tech

A4Tech G9-500H User manual

A4Tech G9-370 User manual

A4Tech

A4Tech G9-370 User manual

A4Tech RFSWOP-54 User manual

A4Tech

A4Tech RFSWOP-54 User manual

A4Tech G7-630 User manual

A4Tech

A4Tech G7-630 User manual

A4Tech G9-600 User manual

A4Tech

A4Tech G9-600 User manual

A4Tech RFSOP-27A User manual

A4Tech

A4Tech RFSOP-27A User manual

A4Tech RFMSW-15 User manual

A4Tech

A4Tech RFMSW-15 User manual

A4Tech BatteryFREE NB-99D User manual

A4Tech

A4Tech BatteryFREE NB-99D User manual

A4Tech G9-700 User manual

A4Tech

A4Tech G9-700 User manual

A4Tech BT-630 User manual

A4Tech

A4Tech BT-630 User manual

A4Tech G9-100 User manual

A4Tech

A4Tech G9-100 User manual

A4Tech RBW-680 User manual

A4Tech

A4Tech RBW-680 User manual

A4Tech 4D User manual

A4Tech

A4Tech 4D User manual

A4Tech X5-35WD User manual

A4Tech

A4Tech X5-35WD User manual

A4Tech G9-310 User manual

A4Tech

A4Tech G9-310 User manual

A4Tech G9-500F User manual

A4Tech

A4Tech G9-500F User manual

A4Tech G7-200 User manual

A4Tech

A4Tech G7-200 User manual

A4Tech G9-250 User manual

A4Tech

A4Tech G9-250 User manual

A4Tech G9-400 User manual

A4Tech

A4Tech G9-400 User manual

A4Tech G6-19 User manual

A4Tech

A4Tech G6-19 User manual

A4Tech RFSWOP-558 User manual

A4Tech

A4Tech RFSWOP-558 User manual

A4Tech RFSW-53 User manual

A4Tech

A4Tech RFSW-53 User manual

A4Tech BatteryFREE NB-72D User manual

A4Tech

A4Tech BatteryFREE NB-72D User manual

Popular Mouse manuals by other brands

Penclic R2 quick guide

Penclic

Penclic R2 quick guide

Gigabyte M870A Quick installation guide

Gigabyte

Gigabyte M870A Quick installation guide

Nacon GM-300 Instruction booklet

Nacon

Nacon GM-300 Instruction booklet

Connectland MS-148OR manual

Connectland

Connectland MS-148OR manual

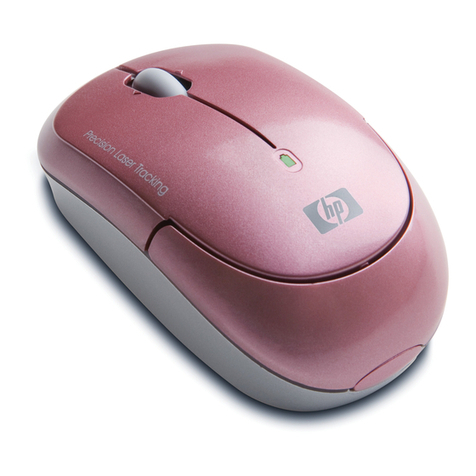
HP KJ453AA - Wireless Laser Mouse datasheet

HP

HP KJ453AA - Wireless Laser Mouse datasheet

Hama M2060 Operating	 instruction

Hama

Hama M2060 Operating instruction

Lenovo M300 User quick guide

Lenovo

Lenovo M300 User quick guide

Arctic M361 user manual

Arctic

Arctic M361 user manual

Glorious O 2 PRO quick start guide

Glorious

Glorious O 2 PRO quick start guide

Plexgear L14 manual

Plexgear

Plexgear L14 manual

Trust MI-7900Z user manual

Trust

Trust MI-7900Z user manual

SMK-Link VP6156 user manual

SMK-Link

SMK-Link VP6156 user manual

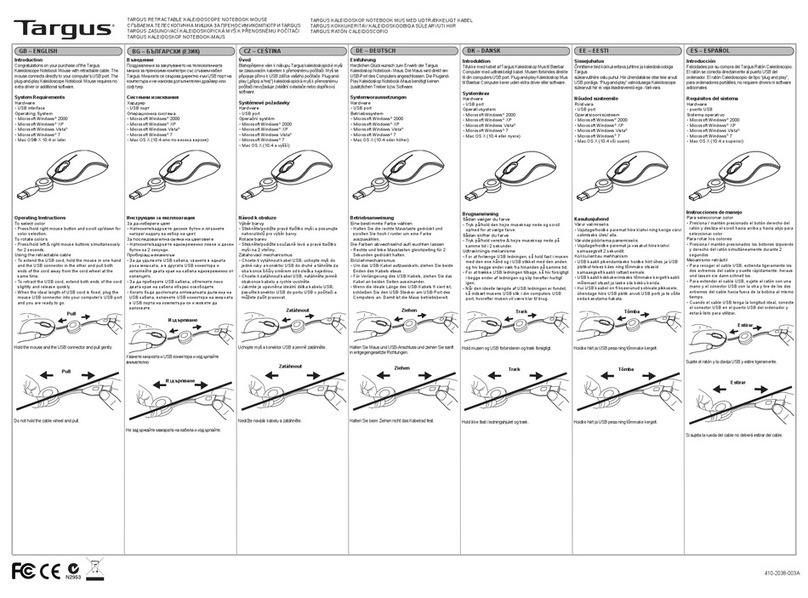
Targus KALEIDOSCOPE user guide

Targus

Targus KALEIDOSCOPE user guide

HP FX287AA - Wireless Eco-Comfort Mobile Mouse datasheet

HP

HP FX287AA - Wireless Eco-Comfort Mobile Mouse datasheet

SMK-Link Rechargeable Wireless Long Range Laser Mouse user manual

SMK-Link

SMK-Link Rechargeable Wireless Long Range Laser Mouse user manual

Logitech Desktop Wave manual

Logitech

Logitech Desktop Wave manual

Microsoft Pointing Device with Bluetooth Wireless... Getting started guide

Microsoft

Microsoft Pointing Device with Bluetooth Wireless... Getting started guide

Natec HAWK user manual

Natec

Natec HAWK user manual

manuals.online logo
manuals.online logoBrands
  • About & Mission
  • Contact us
  • Privacy Policy
  • Terms and Conditions

Copyright 2025 Manuals.Online. All Rights Reserved.