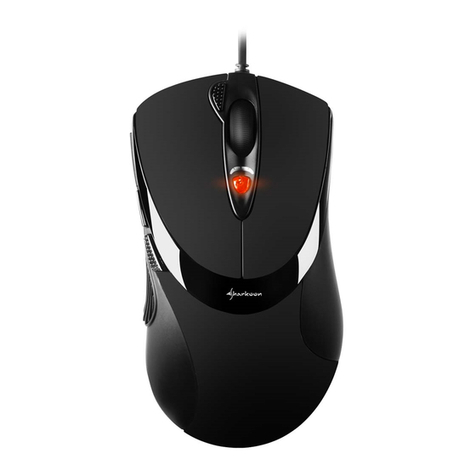
A4Tech X-710 User manual

User s Manual
Model(s): X-710 X-718
www.a4tech.com
SPEEDGameMouse

THIS DEVICE COMPLIES WITH PART 15 OF THE FCC RULES. OPERATION IS SUBJECT TOTHE FOLLOWING TWO
CONDITIONS:(1) THIS DEVICE MAY NOT CAUSE HARMFUL INTERFERENCE AND (2) THIS DEVICE MUST ACCEPT ANY
INTERFERENCE RECEIVED,INCLUDING INTERFERENCE THAT MAY CAUSE UNDESIRED OPERATION.
Federal Communications Commission Requirements
The equipment has been tested and foundto complywith the limits for Class B Digital Device,pursuant to part15
ofthe FCC Rules. These limits are designed to provide reasonable protection against harmful interference in a
residentialinstallation. This equipment generates, uses and can radiate radio frequencyenergyand,ifnot installed
and used in accordance with theinstruction,maycause harmful interference to radio communication. However,
there is no guarantee that interference will notoccur ina particular installation. Ifthis equipment does cause harmful
interference to radio or television reception, whichcan be determined byturning the equipment offand on, theuser
is encouraged to tryto correct the interference byoneor more ofthe following measures:
lReorient ofrelocate the receiving antenna.
lIncrease the separation between the equipment and receiver.
lConnect theequipment intoan outlet on a circuit different fromthat to whichthereceiver is connected.
lConsult the dealer or an experienced radio/TV technician for help.
THE CHANGES OR MODIFICATIONS NOT EXPRESSLY APPROVED BY THE PARTY RESPONSIBLE FOR COMPLIANCE
COULD VOID THE USER SAUTHORITY TO OPERATE THE EQUIPMENT.
This device complies with Part 15 oftheFCC Rules. Operation is subject to the following two conditions:
(1). this device maynot cause harmful interference, and
(2). this device must accept anyinterference received, including interference that maycause undesired operation.

HOW TO CONNECT YOUR MOUSE
1. Locate an available USB mouse port on the backof your computer.
2. Insert the USB mouse connector into the USB port .
If you like to use the PS2 port (for the round PS/2 plug), you will need to plug the
USB connector with a PS2 adapter.
HOW TO CHANGE THE DPI SETTING OF SPEED GAMEMOUSE
Clickthe button shown onthe right figure to quicklyshift
from 600-800-1200-1600-2000 DPI as the scroll wheel
changes color between shifts. You dont need anydriver
for this fabulous function!

MODEL: X-710
At Resolution:
Scrolling Wheel
will change to:
Recommend for: Suitable for Resolution of display
Recommend)
400DPI Non Slow-Speed andnormal accuracy player 640 480
600DPI Green Medium-Speed and required average accuracy player 800 600
800DPI Yellow Fast Speed and required aboveaverage accuracy player 1024 768
1000DPI Red High-Speed and required aboveaverage accuracy player 1152 864
Click6th keyto quicklyshift from 400, 600, 800 to 1000 DPI
MODEL: X-718
At Resolution:
Scrolling Wheel
will change to:
Recommend for: Suitable for Resolution of display
Recommend)
600DPI Non Slow-Speed andnormal accuracy player 800 600
800DPI Green Medium-Speed and required average accuracy player 1024 768
1200DPI Yellow Fast Speed and required aboveaverage accuracy player 1152 864
1600DPI Red High-Speed and required pinpoint accuracy player 1280 960
2000DPI Red & Yellow
coruscating
Extra High-Speed and required pinpoint accuracy player 1280 1024
Click 6th key to quicklyshift from 600, 800, 1200, 1600 to as high as 2000 DPI

STEPONE: HOW TOINSTALLSMART-X7 SOFTWARE
***** For Windows Me /2000 /2003 /XP
1. MUST: Please uninstall anyprevious mouse driver before installing the Smart-X7
2. MUST: Make sure you have completelyfinished setting upyour
mouse pad andmouse
3. Insert theincluded Compact Disc (CD) into your CD-ROM
4. Click “Install Driver”. Select model: X-710/718 Optical Mouse
5. Clickthe buttonon the right to install driver
6. Followthe on screen instruction to complete your installation
7. Restart your computerafter the driver has beeninstalled
8. You will see amouse icon “ ” appear on the bottomright
of your taskbar (near the clockarea)
9. Double clickon the mouse icon “ ” will bring you the mouse property(Image - Top: Mouse Properties Window)
10. Ifthe mouse image appears in themouse properties menu looksexactly thesameas the mouse on hand, then you
have successfullyinstalled the Smart-X7 driver
Mouse Properties Window

STEPTWO: HOW TO PROGRAMYOUR MOUSE BUTTONS
MOUSE PROPERTY
lOpen your MouseProperties.
First Tab: Button
Section I: Button Assignment
1. The mouse image that appears in the first section is a keyto numbers
listed to the right.For example, button #1 has been assigned as “Main
Button”bydefault andits not programmable.
2. The rest ofthe buttons from#2 to # 5are programmable.
Section II: Double-Click Speed Section III: Button Configuration
Adjust your double-clickspeed If you select “Left-Handed”,your
Main Buttonwill be#2 button.
Keyboard Property
Before wego further to setting up your mouse buttons with game commands,
we want tomake sure your keyboard properties has the character repeat
setting correct. Followthe steps belowto get toKeyboard Properties:
1) Go to Control Panel
2) Clickon Keyboard
3) For Repeat Delay:Most right (SHORT)
4) For Repeat Rate: Most right (FAST)
5) Apply>> OK

STEPTHREE: HOW TO SET X7-JUMP FUNCTION
( LEARN TO SIMULATE KEYBOARD S COMMANDS AND PROGRAMXYSENSITIVITYINDEPENDENTLY)
The function Smart-X7 not only provides program XY sensitivity
independently , but also can be set in any of the buttons from # 2 to
# 5 of simulation functions for the keyboard and half of the mouse
button simulation functions for the keyboard.
1. Double clickon the mouse icon “ ” will bring you the mouse
property. (image A)
2. One Clickon X7-Jump and you ll seethepop upwindow( image B)
Here you will see 2Parts:
lPart Oneis Change Mouse DPI.
lPart Two is Keystrokes.
Let s enjoyall the innovative features of the mousestep bystep as
follows :
image A
image B

Section I: Change Mouse DPI :Set mouse XY axis sensitivitylevels
In order to Shift from pixel-precise targeting to fast-twitch maneuvers, without stopping the action. This
avoids the error in operation for more efficiency. You can configure your mouse as synchronism or
non-synchronism higher/lower with manyparameters to control the X/Ydpi byyourself in this smart X7
Software ,
Model At Resolution: LED of Scrolling Wheel Confirmable range of X/Y axes by software
400DPI Non 200DPI-400DPI
600DPI Green 200DPI-600DPI
800DPI Yellow 200DPI-800DPI
X-710
1000DPI Red 200DPI-1000DPI
600DPI Non 200DPI-600DPI
800DPI Green 200DPI-800DPI
1200DPI Yellow 200DPI-1200DPI
1600DPI Red 200DPI-1600DPI
X-718
2000DPI Red & Yellow coruscating 200DPI-2000DPI
If to cancel this mode, just clickthe 6th button ,it will automaticallychange to the next light status, if you need
the dpi amount prior to usage ,just click “Utilizemouse sensitivityconfiguration”mode and apply “”.

Section II: Keystrokes
ToADD keystrokes: Clickon the button “NewKeystroke”and youll see
a “Keystroke”Windowpopsup (Image: left, bottom)
Here youwill see 3 radio buttons:
lPress and hold will input keystrokes consecutively
lPress and hold will onlyinput oncethekeystrokes
lPress will input keystrokes consecutively,press again will release the
keystrokes
If you select the 1st radio button, it means youwould like to have the mouse
completelysimulate the keyboards keystroke –when you press and hold a
keyon the keyboard, it will input a character consecutively.
If you select the 2nd radio button, it means youwould like to have the mouse
partiallysimulatekeyboardskeystroke –when you press and hold a keyon
the keyboard, it will onlyinput onceunless youlift it and press it again.
If you choose the 3rd radio button, it means that you should have the mouse
buttonautomatically simulate the keyboardskeystroke –whenyoupress and
hold a keyon the keyboard, it will automaticallykeep inputting a character
unless youtype the mouse button assignedagain.
Let s do some example together…

Example 1: Select 1st Radio Button
1. Clickon “Record”(Reference: Image A)
2. Press “R”on the Keyboard
3. Click “OK”
4. It will bringyoubackto previous page
5. Nowclickon “Keystroke (R)”, the one youjust created
6. Select the Mouse Button (green icon) ontheMouse Image toyour right
to store the “Keystroke (R)”.
7. Green iconwill turn red once its beenselected. (ImageB)
8. Click “Apply”>> “OK”
We have stored it in Mouse Button # 2.
Let s tryit on regular word document or on game application (Counter
Strikes).
lTryit on Word Document. Press and hold your mouse button #3
.
Did you see the character “RRRRRRR”inputted consecutively?
lTryit on GameApplication.Press and hold your mouse button #
3.In Counter Strike, “Keystroke (R)”means to add bullets. Did
yousee it adding bullets? Ifyes, youhave successfully created a
command.
(Image A)
(Image B)

Example 2: Select 1st Radio Button
1. Clickon “Ctrl+A”(Reference: Image C)
2. Press “Ctrl+A”ontheKeyboard
3. Click “OK”
4. It will bringyoubackto previous page
5. Nowclickon “Keystroke (Ctrl+A)”, the one you just created
6. Select the Mouse Button (green icon) on theMouse Image to your right to
store the “Keystroke (Ctrl+A)”.
7. Green iconwill turn red once its beenselected. (ImageD)
8. Click “Apply”>> “OK”
We have stored it in Mouse Button # 3.
Let s tryit on regular word document
lTryit on Word Document. Press and hold your mouse button #3. Did
you see the character “Ctrl+ACtrl+ACtrl+ACtrl+ACtrl+A”inputted
consecutively?
(Image C)
(Image D)

Example 3:Select 2ndRadio Button
1. Clickon “Record”(Image E)
2. Press “A4TECH”on theKeyboard
3. Click “OK”
4. It will bringyoubackto previous page
5. Nowclickon “Keystroke(A4TECH)”, the oneyou just created
6. Select the Mouse Button (green icon) ontheMouse Image toyour right
to store the “Keystroke (A4TECH)”.
7. Green iconwill turn red once its beenselected. (Image F)
8. Click “Apply”, then “OK”
We have stored it in Mouse Button # 4.
Let s tryit on regular word document and on gameapplication.
lTryit on Word Document. Press and hold your mouse button #4.
Did you see the onlycharacter “A4TECH”even thoughyou have press
and hold? This is partiallysimulation. You maystore your most
frequentlyused word, for instance, you first name.
lTryit on Game Application. Press and hold your mouse button # 4.
In Counter Strike, “Keystroke (A4TECH)”means nothing. So when you
tryitincounter strike, it will do nothing.
(Image E)
(Image F)

Example 4: Select 3rdRadio Button
1. Clickon “Record”
2. Press “Z the Keyboard (Image G)
3. Click “Stop”to stop recording >> then click “OK”
4. It will bringyoubackto previous page (Image F)
5. Nowclickon “Keystroke(Z)”, the one you just created
6. Select the Mouse Button (green icon) on theMouse Image to your right to
store the “Keystroke(Z)”.
7. Green iconwill turn red once its beenselected. (ImageH)
8. Click “OK”
We have stored it in Mouse Button # 5.
Let s tryit
lPress and hold your mousebutton #5.
In BF2(AStratagemGame) , “Keystroke (Z)”means to hunker down
Did yousee yourselfstayedhunker down unless youdon tre- press the
button #5 to Stop its automatic typing “?
lTryit on Word Document. Press and hold your mouse button #5. Did
you see the character “ZZZZZZZZZ”inputted consecutivelyunless you
don t re- press the button #5 to Stop its automatic typing “?If yes, you
Image G
Image H

have successfullycreated a command.
TECH SUPPORT
For tech support, please visit our website at www.a4tech.com or email us
at support@a4tech.com
WARRANTY
All A4 Tech products come with 2 years limited warranty.
This manual suits for next models
3
Table of contents
Other A4Tech Mouse manuals

A4Tech
A4Tech G7-200 User manual

A4Tech
A4Tech G9-600FX User manual

A4Tech
A4Tech RFSOP-29A User manual

A4Tech
A4Tech G7-540 User manual

A4Tech
A4Tech G9-630 User manual

A4Tech
A4Tech G9-730FX User manual

A4Tech
A4Tech N-400 User manual

A4Tech
A4Tech NB-20D User manual

A4Tech
A4Tech G9-340F User manual

A4Tech
A4Tech G9-250 User manual

A4Tech
A4Tech R7 PowerSaver User manual

A4Tech
A4Tech G7-540 User manual

A4Tech
A4Tech G6-70MD User manual

A4Tech
A4Tech X5-35WD User manual

A4Tech
A4Tech G6-10 User manual

A4Tech
A4Tech RFSOP-54 User manual

A4Tech
A4Tech NB-60 User manual

A4Tech
A4Tech RFSOP-533 User manual

A4Tech
A4Tech RFSW-53 User manual

A4Tech
A4Tech 4D User manual