Abbra Home Control User manual

This Page Intentionally Left Blank
Quick Start Guide
FOR MODELS
Abbra Home Control
Abbra Campus
AbbraLink
Abbra Home Control
Quick Start Guide

WARRANTY
Visonic Ltd. and/or its subsidiaries and its affiliates ("the Manufacturer") warrants its products hereinafter
referred to as "the Product" or "Products" to be in conformance with its own plans and specifications and to
be free of defects in materials and workmanship under normal use and service for a period of twelve months
from the date of shipment by the Manufacturer. The Manufacturer's obligations shall be limited within the
warranty period, at its option, to repair or replace the product or any part thereof. The Manufacturer shall not
be responsible for dismantling and/or reinstallation charges. To exercise the warranty the product must be
returned to the Manufacturer freight prepaid and insured. This warranty does not apply in the following
cases: improper installation, misuse, failure to follow installation and operating instructions, alteration,
abuse, accident or tampering, and repair by anyone other than the Manufacturer. This warranty is exclusive
and expressly in lieu of all other warranties, obligations or liabilities, whether written, oral, express or
implied, including any warranty of merchantability or fitness for a particular purpose, or otherwise. In no
case shall the Manufacturer be liable to anyone for any consequential or incidental damages for breach of
this warranty or any other warranties whatsoever, as aforesaid. This warranty shall not be modified, varied
or extended, and the Manufacturer does not authorize any person to act on its behalf in the modification,
variation or extension of this warranty. This warranty shall apply to the Product only. All products,
accessories or attachments of others used in conjunction with the Product, including batteries, shall be
covered solely by their own warranty, if any. The Manufacturer shall not be liable for any damage or loss
whatsoever, whether directly, indirectly, incidentally, consequentially or otherwise, caused by the
malfunction of the Product due to products, accessories, or attachments of others, including batteries, used
in conjunction with the Products. The Manufacturer does not represent that its Product may not be
compromised and/or circumvented, or that the Product will prevent any death, personal and/or bodily injury
and/or damage to property resulting from burglary, robbery, fire or otherwise, or that the Product will in all
cases provide adequate warning or protection. User understands that a properly installed and maintained
alarm may only reduce the risk of events such as burglary, robbery, and fire without warning, but it is not
insurance or a guarantee that such will not occur or that there will be no death, personal damage and/or
damage to property as a result.
The Manufacturer shall have no liability for any death, personal and/or bodily injury and/or damage to
property or other loss whether direct, indirect, incidental, consequential or otherwise, based on a claim that
the Product failed to function. However, if the Manufacturer is held liable, whether directly or indirectly, for
any loss or damage arising under this limited warranty or otherwise, regardless of cause or origin, the
Manufacturer's maximum liability shall not in any case exceed the purchase price of the Product, which shall
be fixed as liquidated damages and not as a penalty, and shall be the complete and exclusive remedy
against the Manufacturer.
Warning: The user should follow the installation and operation instructions and among other things test the
Product and the whole system at least once a week. For various reasons, including, but not limited to,
changes in environmental conditions, electric or electronic disruptions and tampering, the Product may not
perform as expected. The user is advised to take all necessary precautions for his /her safety and the
protection of his/her property.
Support
For further assistance:
If you need further information not covered in this guide, please refer in the first instance
to the main Abbra System User Guide available at www.myabra.com.Alternatively,
NextAlarm advisors are on hand to assist during office hours. Please email them at
For more information about home automation devices compatible with your
Abbra system,visit www.x10pro.com.
NOTES

Perimeter Zone: This type of zone setting is used be a sensor designed to detect entry into
the premises from outside. Sensors that would fit this purpose would be sensors on exterior
doors such as front, back or an interior garage door as well as windows. This sensor is not
ignored when the Abbra system is armed in the Home mode so any intrusion is detected.
User Settings Mode or window will trigger an alarm, as will moving in front of a motion
sensor.
Zone –A zone is essentially another name for a sensor. Each sensor must be assigned its
own zone. A zone has a number, a name, and a type (such as perimeter, interior, or fire). In
the Basic Kit, the three sensors are pre-programmed to zones 1, 2, and 3.
1 2 3 4 5 7 8 9 0 *******
Congratulations, and thank you for purchasing your
new Abbra System!
The Abbra line includes Abbra Campus for college students as well as AbbraLink for
active seniors that appreciate help being a push button away.
The Complete SimpleConnect kit includes the NextAlarm.com monitoring service,
so should an emergency occur, the appropriate authorities will be swiftly contacted.
With the easy to understand menu-driven interface and extensive voice prompts,
everyone can install the Abbra quickly, and maintenance is a snap.
This Quick Start Guide is all you need to get started. In this guide are step-by-step
instructions to installing, programming, and using your home control/ security system.
For more information on the Abbra line, or if you have purchased any additional
sensors or other equipment, please visit www.myabbra.com to download the complete
Installation and User Manuals. If you purchased the Abbra with NextAlarm monitoring
service included, and wish to activate it, please visit www.myabbra.com and click
"Register". If you did not purchase monitoring with your system, but would like to use
NextAlarm monitoring, then please visit www.myabbra.com and click “Sign Up”.
Step 1 –Inside the Box*
Your Abbra package should contain the following items. If you are missing any of these
elements, please contact us at abbra@nextalarm.com
•1 Control Panel
•1 Keychain Remote
Control
•1 Motion Sensor
•2 Magnetic Door /
Window Transmitters*
•1 Telephone Cable
*AbbraLink includes an emergency pendant
* Abbra Campus includes only one Door /
Window Transmitter
•1 Power Wall Adapter
•Rechargeable Batteries
•Tabletop Mounting Feet
•User Guide and Quick Start
Guide
•Customer Literature
•Registration Form
•Any Additional Devices
You've Purchased (optional)

Step 2 –Activating the Control Panel
The Control Panel comes with its wall mounting bracket already fixed in place. Leave in this
position to complete the installation and registration. The wall mounting option is explained
later in this guide.
Find a central location to place the
Abbra Control Panel that has close
access to a telephone jack and electrical
outlet. Attach end of the wire supplied
with the power wall adapter to the screw
terminals of the power wall adapter.
Connect one end of the power wall
adapter to the socket at the back of the
Abbra Control Panel. Plug the other end
into an electrical outlet. NOTE: Be sure
the electrical outlet is not controlled by a
light switch.
Insert the rechargeable battery pack.
Plug into the socket on the right hand
side of the compartment. Replace the
battery cover.
To activate the battery, flip open the
cover to the Control Panel buttons.
Release the screw to the cover where the
batteries are kept.
The backup batteries will need to charge
for 24 hours before they are fully
functional.
Please do not attach the telephone cord
at this time. This will happen at the end of
Step 6.
List of Terms
(in alphabetical order)
Alarm –When Abbra detects that a zone has been disturbed, it will trigger an alarm. The
siren will sound, and an alarm signal will be sent to the Central Station.
Arm –Activate the Abbra home security system, so that if a zone is disturbed, it will trigger
an alarm. The Abbra may be armed in Away mode, Home mode, or Instant mode.
Away mode arming –If Abbra is armed in Away mode, then all interior and perimeter zones
will be active. Opening a door command takes effect and the zones actually become active.
This is to give you time to leave the house or settle in for the night. This period of time is
called the Exit Delay. When the Abbra is armed in Home or Away mode, opening a Delay
zone will not cause an immediate alarm. Instead, the Abbra will ask you to disarm the
system, and beep for a period of time. When this time has ended, an alarm will occur. This
time is called the Entry Delay. In the Abbra Basic Kit, zone 1 is pre-configured as a Delay
zone.
Bypass –If one or more zones are bypassed, then they will be inactive for the next arming
period. Disturbing bypassed zones will not trigger an alarm.
Central station –The location to which the Abbra will send alarm signals. When a signal is
received at the central station, the operator will take appropriate action, such as calling your
home or dispatching your local police.
Chime mode –While the Abbra is disarmed, it may be placed into Chime mode. In Chime
mode, disturbing Chime zones will cause the Abbra to either sound a doorbell-like chime, or
speak the name of the zone, depending on how you have configured the system. In the
Abbra Basic Kit, the two magnetic contact sensors are pre-configured as Chime zones.
Code –A secret four-digit number. There are several kinds of codes used by the Abbra.
The Master User Code, which is set to 1 1 1 1 by default, may be used to arm and disarm the
system, access the full User Settings menu, and create or delete User Codes. User Codes
may be used to arm and disarm the system, and access parts of the User Settings menu.
The Installer Code is only used for accessing the Abbra’s installer mode. For information on
installer mode, visit our online help files at www.myabbra.com.
Delay (Entry Delay, Exit Delay) –When the Abbra is armed in any mode, it will take a
certain amount of time before the arm
Disarm –“Un-arm” the Abbra. When the Abbra is disarmed, no sensors will be active,
unless they have been specially configured as 24-hour zones in installer mode.
Home Mode Arm –When the Abbra is armed in Home mode, the perimeter sensors, doors
and windows, will be active, but interior zones, such as motion detectors, will not. This mode
is useful for arming the system before you go to sleep at night.
Instant mode arm –When the Abbra is armed in Instant mode, all sensors will be active,
and the Entry delay will be eliminated. Disturbing any zone, even a Delay zone, will cause an
immediate alarm.
Interior Zone: This type of zone setting is used by any sensor placed within the premises
such as a motion sensor, glass break sensor or a door contact on an interior door such as a
closet. This sensor is ignored when the Abbra system is armed in the Home mode so that
normal activity will be ignored.

•Go to www.myabbra.com and select
the Latchkey Notification link.
•Enable this feature so you will be
notified when the children arrive
home. Select the people and
methods you would like to Abbra to
notify.
•Now select the Automation link
•Assign each of the Automate fields
the appropriate House Code and
Unit Code to match the House Code
and Unit Code you have selected on
the XPR
•Select Schedule as the trigger for
this scenario and enter the times
the outlet will be powered down and
when power will be resumed. For
this scenario we would select 3:30
PM for the Off time and 5:00 PM as
the On time. Now check the days
this rule will apply, each of the days
from Monday through Friday.
Using Your Abbra
QUICK REFERENCE TO ARMING AND DISARMING
Arming AWAY………………. + [Code]*
Arming AWAY-INSTANT...…+ [Code]* +
Arming HOME ……………… + [Code]*
Arming HOME-INSTANT …. + [Code]* +
Force Arming AWAY (bypass open zones)…. + [Code]* +
Force Arming HOME (bypass open zones)…. + [Code]* +
Disarming and stopping alarms…………….. + [Code]
*
The factory default master user code is 1 1 1 1.
•You can also use your keychain remote control transmitter remote control to arm and
disarm the system.
•Pressing the Lock button will arm the system in Away mode.
•Pressing the Home button will arm the system in Home mode.
•Pressing the Unlock button followed by your code will disarm the system.
•Pressing the * button will cause the Abbra to announce whether or not it
can currently be armed.
Step 3 –Installing the
Wireless Sensors
There are two types of sensors provided,
the Magnetic Contact for doors or
windows and the Movement Sensor
which are wall mounted, either on a flat
surface or in corners.
Installing the Magnetic Contact
Activate the battery by removing the
transmitter cover, using a screwdriver.
Remove the red tag from the battery and
check that the LED flashes.
Replace the cover and tighten the screw.
Install the Magnetic Contact on a door
or window. Attach the transmitter to the
frame and the magnet to the door or
window, ensuring that the ^ marking
faces the magnet, and the two parts are
no more than 1/4 inch (0.25'') apart when
closed.
The Magnetic Contact is pre-
programmed as FRONT DOOR and it
has an ENTRY DELAY. This means you
will have 45 seconds to switch the
system off before the siren sounds. You
can change both these settings later if
you desire, particularly if you wish to use
on a window.
Quick and easy press and stick
mount: You can install the Magnetic
Contact by fixing with adhesive tape to
the back of the contact and the magnet
and pressing into place or by screwing to
the mounting surface. Note that the
adhesive tape is very strong. The bond
will strengthen over time and set
completely after 72 hours. To attach with
screws, you must open the Magnetic
Contact and gently lever out the
circuit board. Use the casing to mark the
drill holes. Insert wall plugs and screw
case to wall.
Replace circuit board and transmitter
cover. If you have an uneven surface
which prevents the transmitter and the
magnet from aligning correctly e.g. PVC
doors or windows, you may wish to use
the spacers provided. Please refer to the
main User Guide for more information.
Installing the Motion Sensor
Activate the battery by removing the
front cover of the sensor, using a
screwdriver. Remove the red tag from the
battery and check that the LED flashes.
Replace the cover and tighten the screw.
Install each Motion Sensor on a solid
interior surface only, between a height of
1.8m (6') and 2.4m (8'). Do not point at
sources of heat, expose to drafts, or
place in direct sunlight.
The Motion Sensor is pre-programmed
as LIVING ROOM and has the HOME &
AWAY response type. This means that
as soon as any activity is sensed when

your system is activated in the AWAY
mode, an alert will be triggered and the
siren will sound. You can change both
these settings later if you desire.
Quick and easy press and stick
mount: You can install Movement
Detectors either by fixing with adhesive
tape or by screwing to the mounting
surface. Note that the adhesive tape is
very strong. Simply peel the tape and
press on the device, then press in place
at the location of your choice. The bond
will strengthen over time, and set
completely after 72 hours. To attach with
screws, you must open the Motion
Sensor and remove the circuit board.
Remove the circuit board by gently
flexing the catch at the top of the board
out towards the top of the housing.
Use the casing to mark the drill holes.
Insert wall mollies and screw case to
wall. Replace circuit board and cover.
Installing the Keychain Remote
Control
The Keychain Remote Control is
supplied with the battery already installed
and is pre-programmed as USER 1.
Press the STAR button. Check that
the Keychain Remote Control LED
flashes and that the Control Panel gives
an audible confirmation.
Press ON and ON Home together to send an
Emergency alert.
Step 4 –Registering For
Your Monitoring Account
Once the Control Panel and sensors are
installed at home, you are ready to link
your Abbra system to the monitoring
service. In order to get your account up
and running, you will need to register.
Go To www.myabbra.com
i. Click on the REGISTER button in the
box called ‘I am a new customer’.
ii. You will need to input the following
details:
_ The serial number of your Abbra Home
Control unit. This can be found on your
Control Panel. No spaces are necessary.
_ Where you purchased your Abbra
system
_ Title, First Name, Last Name.
_ A valid and secure email address. Your
temporary password will be sent here.
_ Home and Mobile telephone numbers.
_ Address, City, County, State, Zip Code.
Once this information is submitted you
will be asked to verify your email address
and your temporary password will be
sent to you shortly.
MEMORY (activated when an alarm has
occurred and the system is still armed,
turned off disarming and rearming
Abbra).
DELAY (during exit / entry delays).
BY KEYCHAIN REMOTE (upon pressing
the * button).
BY ZONES (by triggering any of 3
zones).
TOGGLE the PGM output will be turned
on upon event occurrence in these zones
and will be turned off upon next event
occurrence, alternately.
SCHEDULE select the time and specific
days you would like this trigger to turn the
lights on and off.
With the Abbra Home Control system,
you can choose on/off groups of
appliances at certain hours during certain
days according to your needs. For
example, during working days you can
create the following setting:
Automate 1 will turn off lights and
heaters when every body has left home
at 9.30
Automate 2 will switch on the heaters at
5.30 pm, just before the kids return
Automate 3 will switch on the washing
machine at 2.00 am on Monday and
Friday
Scenario 2 The Active Family
The Rogers family, a family of four, and
both mom and dad work outside the
home. Both children arrive home from
school on the bus around 3:30PM; a full
two and a half hours before either mom
or dad get home from work.
With Abbra the anxiety of wondering if
the children arrived home safely and
once home are tending to their home
work is eliminated.
•Thanks to Abbra, the Rogers
children arrive home at 3:43PM.
•They enter a secure and safe home
by turning the Abbra system off with
their Keychain Remote Control.
•Abbra immediately notifies Mr. and
Mrs. Rogers that the children are
home safe and secure by sending
an email to Mrs. Rogers work email
address and text message to Mr.
Rogers cell phone.
•The electrical outlet that powers the
TV set and the computer is
powered off so the children will not
be distracted while they are doing
their homework
•Mr. Rogers calls home to speak with
the children, but the children have
been instructed not to answer the
phone when an adult is not home so
he uses his code to activate the long
range speakerphone in the Abbra
system and has a conversation with
the children without either having to
pick up a phone.
To realize this application, you
need:
•Keychain Remote Control (Qty: 1 for
each child). Each keychain Remote
Control identifies which child turned
the Abbra system off upon arriving
home.
NOTE: The children's Keychain
Remote Controls will have to be
recognized by the Abbra control
panel and placed in available slots 5
through 8.
•XPR X10 Duplex Receptacle (Qty: 1
for each electrical outlet) The X10
Duplex Receptacle can be
controlled by the Abbra system so
that any appliance plugged into it
will not receive power when the
receptacle is powered down by the
Abbra system.
NOTE: IF all of the XPR outlets will be
powered down at the same time
assign them all the same Unit Code.

5. Lights can turn on and off according to
a predetermined schedule to make your
home look occupied while away on
vacation.
6. Turn lights on or off while away from
your home using your cell phone.
With the addition of X10 lamp modules,
appliance modules, electrical outlets and
light switches you will be able to control
most of the day to day events from the
convenience of your cell phone.
A day in the life of an Abbra
customer….
Scenario 1 The Morning Rush
Each working day, it was always the
same process to be ready for work: Bill
turned on the lamp next to his bed,
opened the bedroom drapes, switched on
the bathroom lights and turned on the
heat lamp so it would be comfortable
after he took his morning shower, then
went to the kitchen for breakfast. One
day, Bill discovered a wonderful way to
get rid of these redundant tasks, easily
and reliably: the Abbra Home control
system
Thanks to Abbra, Bill could set all
these actions just as he needed:
•at 6.55 am, the alarm rings,
•5 minutes later, the bathroom heat
lamp is switched on, as well as the
lights in his bedroom, in the kitchen, in
the bathroom, and the drapes open.
•10 minutes after leaving for work, the
heat lamp and all the lights are turned
off automatically.
Now Bill's "waking up" is more peaceful.
Thanks to Abbra, he even gets to lay in
bed 10 minutes longer.
Taking advantage of off-peak hours
electricity is quite difficult in our busy
lives, because the lowest rate always
applies during unpractical periods of time
at night, when the whole family is
sleeping.
Avoiding energy waste is also a hard
discipline; all the members of the family
must remember to turn off certain electric
appliances and lights before leaving a
room for a long period!
Thanks to Abbra, a lot of domestic tasks
are automatically realized when the
energy cost is at its lowest. No need to
remember, as Abbra will remember for
you!
To realize this application, you
need:
•PAM01 Appliance module (Qty:
several units) -Plug all the electrical
appliances you wish to control by
setting, in an appliance module.
Give each PAM01 the same House
Code ( i.e.A) and a specific Unit
Code ( 1 -16)
•PLM03 Lamp module (Qty: several
units) -Plug all the table lamps you
wish to control by setting in a lamp
module. Give each PLM03 the same
House Code (i.e. A) and a specific
Unit Code (1 -16)
•NOTE: All lights that are turning on
and off in unison can have the same
Unit Code.
•Go to www.myabbra.com and select
the Automation link.
•Assign each of the Automate fields
the appropriate House Code and
Unit Code to match the House Code
and Unit Code you have selected on
the PAM01and PLM03.
•Assign each Trigger field the trigger
that will cause the light to turn on or
off. This can be activation by
passing in front of a motion detector,
opening a door, by a schedule or by
an event such as arming the
system.
Trigger Options
ARM AWAY (upon AWAY arming).
ARM HOME (upon HOME arming).
DISARM (upon disarming).
Once you have received your temporary
password for your online account, you
can return and set up your personal
details.
On the email detailing your password,
click the URL link which will take you to:
www.myabbracom
Enter your log in name –this is the email
address you used to Register along with
the temporary password provided by
NextAlarm. You will immediately be
prompted to change your password to
something more memorable to you. You
will also be asked to pick a security
question, in case you ever forget your
password. Continue with the account set
up by confirming your personal details
and the details of your Abbra system
sensors. Ensure all details are correct.
You will now be given a X-digit Account
Number. Take a note of this number.It
will also be emailed to you for your
records.
Step 5 –Completing the
Control Panel Installation
Easy Tabletop Placement: To
Attach the Abbra Tabletop Feet turn your
Abbra control panel over so you are
looking at the back of the unit. The
connector section should be at the top.
Affix the self adhesive rubber feet to the
base of the unit in each corner of the
control panel.
Take the Phone Cable and insert into
the jack labeled LINE on the back of the
Control Panel. If a phone occupied the
wall jack prior to plugging in the Abbra,
insert the telephone cable into the jack
labeled SET on the back of the Control
Panel
Optional Wall Mounting Your
Abbra
Gently release and remove the battery
cover.
Remove the screw which holds the
bracket in place.
Remove the wall mounting bracket
from the back of the Control Panel.

Using the bracket as a guide,mark
the mounting surface with the three
drilling holes. The large circle in the
bracket is for the tamper retainer washer
which is a fourth hole that needs to be
marked (using the tamper retainer
washer will ensure that if there is an
attempt to force your Control Panel off
the wall a tamper alarmwill be occur)
Step 6 –Testing Your
System
Make sure all you windows and doors are
closed and sensors are undisturbed. The
Control Panel screen should display
READY. If it does not, please consult the
troubleshooting section of the main User
Guide.
To test your sensors, follow these
instructions:
-Be sure that your account with
NextAlarm is in the test mode. You can
place your account in the test mode by
logging into your account at the
www.myabbra.com website.
-Activate your Abbra system by pressing
the ON AWAY button on your Keychain
Remote Control.
-Wait for the Exit Delay countdown
beeping to end.
-Now open a door or window and allow
the emergency sounder to trigger. NOTE:
If the door you have opened is your main
entry door that has an Entry Delay, you
will have to wait for the Entry Delay to
expire before the emergency sounder will
trigger.
User Settings
Now that you have installed your Abbra
security system, you should program in a
few settings to best suit your needs, and
then you can begin using it.
Open the Abbra’s front door, exposing
the keypad. The part of the Abbra we will
be using next, the User Settings mode, is
operated through a system of menus.
The buttons on the keypad are used to
navigate through these menus. To the
right is a list of all items on the User
Settings menu.
-<Next Item> button is used to move
to the next item on a menu.
-<View/Select> button is used to
select the current item, and also to
confirm the contents of an item if
you have entered new settings.
-<Back> button is used to move
back to the previous item on a
menu.
-<Home> button is used to exit from
a selected item to the previous
menu.
-<Away> button is used to exit the
current mode entirely, and return the
Abbra back to its normal operating
mode.
Press <Next Item> until User Settings is
displayed on the LCD screen, and then
press <View/Select>. The Abbra will
now speak “Please Enter Code”, and a
flashing cursor will appear on the screen.
The Abbra is asking you to enter in your
Master User Code, which you will be
choosing soon. Right now, it is set to 1 1
1 1, so type that in, and the Abbra will
beep several times and display Set
Bypass, the first item on the User
Settings menu. Press <Next Item> until
Set User Codes is displayed, then press
<View/Select>.
The screen will now display User Code
1. This is the Master User Code, and
since 1 1 1 1, is not very secure, the first
thing you should do is change it to a new
number. Press <View/Select>. Now
you should think of a new Master User
Code. The code needs to be four digits,
and, like your bank PIN number, should
be one that is not easy to guess. Type in
the new Master User Code, then press
<View/Select> twice. You need to press
it twice because you have changed the
contents of this menu item. The screen
will now display User Code 1 again. You
can either press <Next Item> to move to
User Code 2 and set it in the same way,
or you can press <Home> to move back
to the User Settings main menu. You
can also press <Away> then
<View/Select> to exit the User Settings
mode entirely.
At this point, the Abbra is ready to use. If
you like, you can use the User Settings
menu to do other things, such as bypass
zones, set the Abbra’s internal clock, or
add new keychain remote control
transmitters, using the <Next Item> and
<View/Select> keys just like you did to
set the user codes. You can use your
new Master User Code to access this
menu any time the Abbra is disarmed.
Automation Control
Your Abbra system is equipped with the X10 home automation platform. With the addition of
the X10 Interface PSC04 which plugs directly into the back of your Abbra control panel in the
X10 jack, you're on your way to making your home the smart home of the future.
Examples of how your Abbra
system can make your life simpler
Automatic lighting control can greatly
improve security, economy and
convenience in your home.
When areas are unoccupied, you can
have Abbra switch lights on and off
automatically when people enter an area
and off when they exit. In areas of the
home there are both convenience and
safety features in having automatic
lighting. For example a sleepy child or an
elderly person might stumble on unlit
stairs. Coming home to a well lit house
can greatly enhance security and safety.
1. As you come close to a motion
detector, it switches on a light to guide
you safely.
2. Lights will also go on if you open a
door.
3. In a large building a whole area will
light up if someone comes in.
4. If no one is in the area for a time, the
lights will go off to save money.
Other manuals for Home Control
1
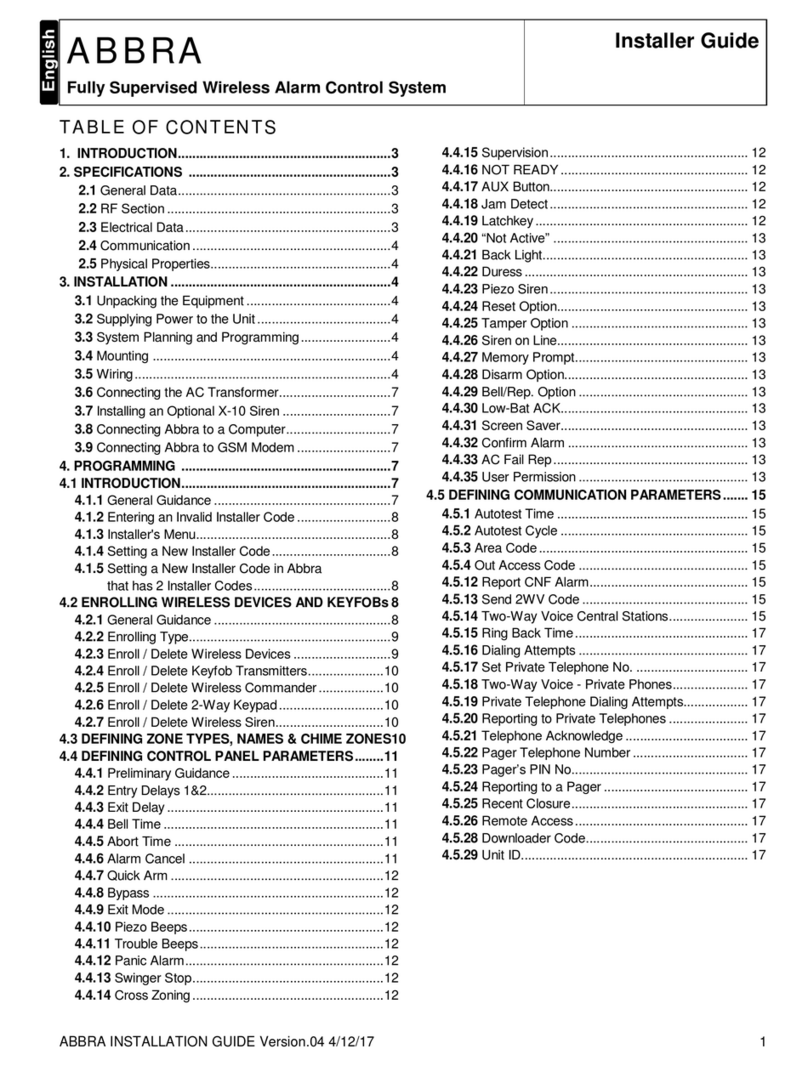
Table of contents
Other Abbra Security System manuals
Popular Security System manuals by other brands

American Dynamics
American Dynamics MegaPower 3200 installation guide

Honeywell
Honeywell INTELLIGUARD 9000 user manual

SwissPhone
SwissPhone 0800206 quick start guide

Philips
Philips Lifeline FD100 Instructions for use

NUUO
NUUO G3 Card Hardware & software installation

Apollo
Apollo 55100-021 MAR installation guide