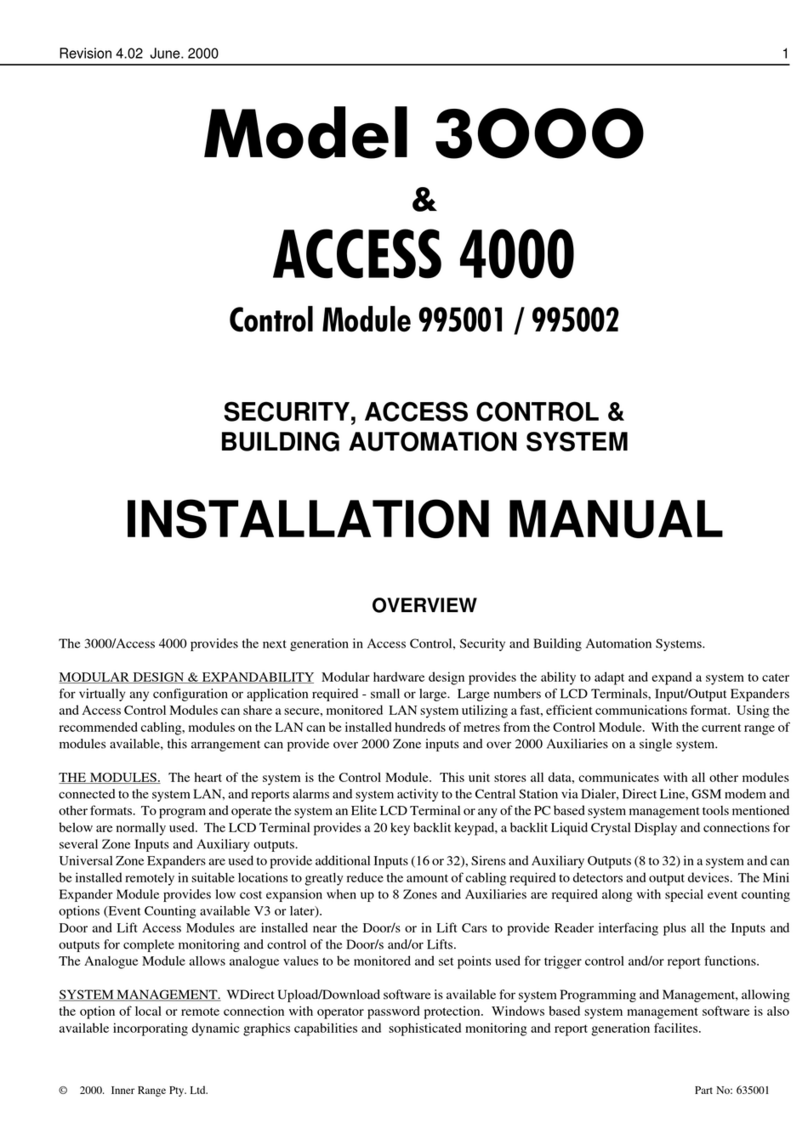
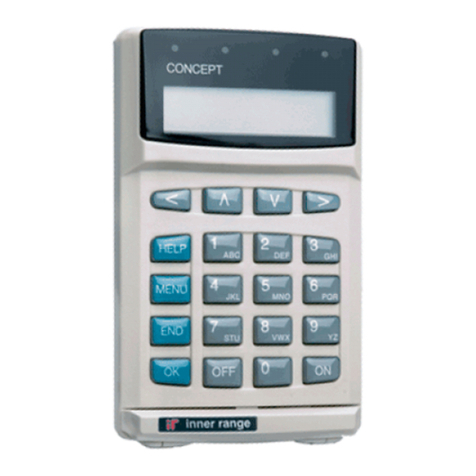
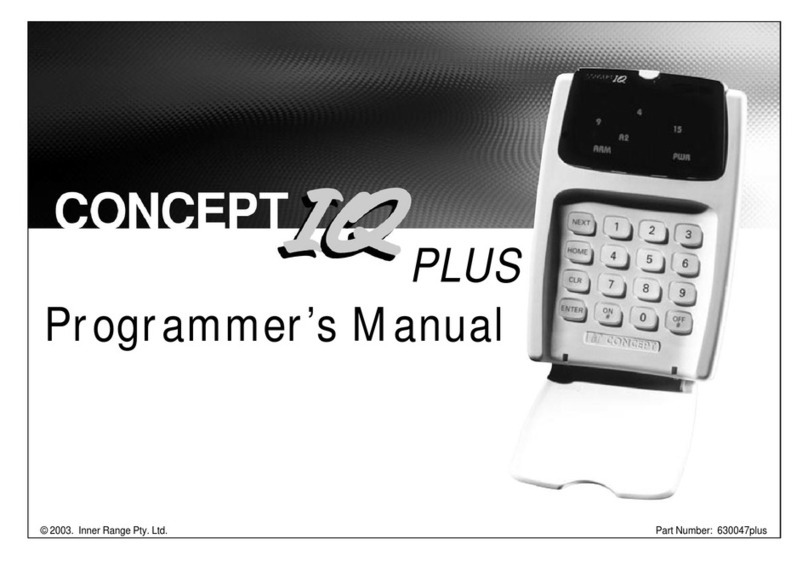
Inner Range Concept 2000 User manual

Provided for Download by www.bendigosecurity.com.au

Provided for Download by www.bendigosecurity.com.au

C2000 User Manual
Page 1 of 26
Basic Concepts
To use the Concept 2000 system effectively it is helpful to understand six simple terms used in the system. These six
terms are:
•Areas
•Users
•Zones
•On
•Off
•Terminals
AREA
The Concept 2000 security system is designed to protect one or more areas. When you wish the Concept 2000 to protect
an area, then you need to turn that area on. When protection is no longer required for an area then you need to turn that
area off.
The areas protected by the Concept 2000 system all have names so that you can recognize what they are. These names
can be chosen by you so that you can easily recognize the area you are protecting.
Examples of area names are:
FRANKS SHED OFFICE HOUSE AND GARAGE
E.D.P. CENTER WAREHOUSE ADMINISTRATION
USERS
The Concept 2000 can be operated by one or more persons who are called users.
All users, who are allowed to operate your Concept 2000 , have names so that the Concept 2000 can recognize who is
using the system. These names can be chosen by you so that you can easily recognize what user you are referring to.
Examples of user names are:
FRANK THRING SALLY FIELDS ALAN BOND
ZONES
The Concept 2000 protects an Area with special alarm detectors called Zones.
These alarm detectors are designed to register un-authorized movement in the protected Area.
The Zones all have names, chosen by you, so that you can recognize which Zone is which.
Example of Zone names are :-
FAMILY ROOM SLIDING DOOR FRANKS SHED WINDOW
COMPUTER ROOM PIR REAR FIRE EXIT DOOR LIFT LOBBY PIR
Provided for Download by www.bendigosecurity.com.au

C2000 User Manual
Page 2 of 26
ON And OFF
The most common operation performed on the Concept 2000 is a User (eg. FRANK THRING )
turning an Area ( eg. FRANKS SHED) either On to protect the Area, or Off to access the Area.
Each Area ( eg. FRANKS SHED) may have one or more Zones ( eg. FRANKS SHED WINDOW)
used to protect that Area when the Area is turned On.
TERMINAL
All Concept 2000 operations, such as turning On and Off Areas, are carried out at a Terminal.
The Concept 2000 may have up to eight (8) Terminals connected and any Terminal may be used to operate the system.
A terminal is referred to in two parts, the keypad which is used to enter your User code and operate the system and a
display window, immediately above the keypad, which is used to display messages from the system to the User.
The first step in using a Terminal is to enter your own secret code using the digit keys on the keypad, and then pressing
the OK key. The Concept 2000 will now work out who you are and greet you by displaying your name in the display
window.
After a few seconds the Concept 2000 will now display the name of the Area that you are allowed to turn On or Off.
The display window is used to tell you what the system is doing. Sometimes the message to be displayed is larger than
will fit in the display window. If this occurs, the message will automatically scroll slowly to the left so that you can read
it.
An important feature of the Concept 2000 panel is the use of the HELP key. When the HELP key is pressed, the
Concept 2000 panel will display a “ help message” on the panel operation you are currently performing.
If you are not sure what to do next, when using the Concept 2000, then press the HELP key.
Provided for Download by www.bendigosecurity.com.au

C2000 User Manual
Page 3 of 26
Description Of The Keys
The Concept 2000 is controlled by using the keypad located below the display window.
Each time a key is pressed the Concept 2000 will emit a short “beep” to indicate that the key was accepted.
You may press the keys as fast as you like but, only one key should be pressed at a time.
If the Concept 2000 emits a “long beep” when a key is pressed it means that the key was not accepted or is not allowed.
The keypad has 20 keys, all of which are listed below with a brief explanation of their purpose,
The HELP key is used to display a “help message”, on the current operation being performed, by the user. The HELP
key can be pressed at any time. If no help is available on the current item then the display window will not alter. When
you have finished looking at the “help message”, press any digit key.
The digit keys are used for entering your secret code before using the Concept 2000. When entering your secret code,
you have 15 seconds to press each digit. When you have entered all of the digits of your secret code, you must press the
OK key. No Concept 2000 panel operations can be carried out until you have entered your secret code and pushed the
OK key.
Each key has letters associated letters with the digits. By using familiar words, these letters can be used to help you
remember your secret code.
For example; the word “FRANK” could be used to help you remember the secret code comprising of the digits “2”, “6”,
“1”, “5” and “4”
The OK key is pressed after you have entered your secret code. You have 15 seconds to press the OK key once you have
completed entering your secret code. Pressing the OK key tells the Concept 2000 to check the secret code you have just
entered.
The END key is used when you have finished using the Concept 2000 panel, or if you make a mistake whilst entering
your secret code. Once the END key is pushed, you must enter your secret code again.
During normal operations, if the Concept 2000 detects no key presses for more than 15 seconds, then the Concept 2000
will automatically “press” the END key and you will have to re-enter your secret code again.
The ON key is used to turn On the Area whose name is being displayed in the display window.
The OFF key is used to turn Off the Area whose name is being displayed in the display window.
The MENU key is used if you wish to perform other Concept 2000 operations apart from turning Areas On or Off. (Of
course you must have already entered your secret code plus the OK key.)
When the MENU key is pushed, the Concept 2000 will list, in the display window, the other operations you are allowed
to perform.
The MENU key is not used during normal operation. If you press it by accident then press the “O” key or the END key.
Provided for Download by www.bendigosecurity.com.au

C2000 User Manual
Page 4 of 26
The LEFT and RIGHT arrow keys are optionally used during normal operations to control scrolling messages in the
display window. Each time the LEFT arrow is pushed, the scrolling message will start again from the beginning. If the
scrolling is too fast, or too slow, use the RIGHT arrow to step the message one letter at a time, or, hold down the
RIGHT arrow to speed up the scrolling message. Most scrolling messages will scroll 3 times.
You do not need to use these keys during scrolling messages if you do not want to. The speed of scrolling messages is
set to your reading rate and when the scrolling message reaches the end it will start again, from the beginning
automatically.
The UP and DOWN arrow keys are normally used by persons who are allowed to turn On or off more than one Area. If
the Area name in the display window is not the Area you wish to turn On or Off then, pressing the UP or DOWN arrows
repeatedly, the display window will show the names of all Areas that this User is allowed to operate.
The UP and DOWN arrow keys are also used in other Concept 2000 panel operations such as Review and Change
Codes.
Provided for Download by www.bendigosecurity.com.au

C2000 User Manual
Page 5 of 26
Operating your System
3.1 Turning An Area On Or Off
The most common operation of the Concept 2000 panel is turning On or Off Areas. To turn On or Off an Area you must
first enter your secret code then press the OK key.
As the digits of your secret code are entered the display window will show each digit as a “#” character:
If you make a mistake, press the END key and start again.
After the OK key is pressed, the Concept 2000 will work out who you are and will display a short greeting message such
as:
After a few seconds, the Concept 2000 will work out and display which Area you would normally turn On and Off and
whether that Area is currently On or Off.
For example:
You may now press either the ON key to turn the Area On, or the OFF key to turn the Area Off.
If you do not wish to turn the Area On or Off, you may finish panel operations by pressing the END key, or you may
press the MENU key to perform other panel operations. (See “Other panel Operations”)
Some Users may be allowed to control more than one Area. If you can control more than one Area, and the Area name
shown on the display is not the Area you wish to control, then by pressing the up or DOWN arrow keys, the Concept
2000 will display all of the Area you are allowed to turn On or Off.
Alternatively, if you know the Area number you wish to operate, simply press the number of the Area you wish to
control.
When the Area being shown is correct, you may press the ON key or the OFF key to turn On or Off that Area.
3.2 Multiple Area User
Some Users may be asked which Area they wish to operate and the display window will show:
The second line of the display window will show all the Areas that you are allowed to turn On or Off. Simply press the
number of the Area you wish to operate.
When an Area is turned On, the Concept 2000 will first check all of the Zones that are used to protect that Area and see
that they are currently ready to be armed. (Sealed) If there is a problem with any Zone, the Concept 2000 will display
the name of the faulty Zone so that the User may go and rectify the problem.
•For example; if “FRANKS SHED WINDOW’ was open when “FRANK THRING” went to turn On “FRANKS
SHED”, then the Concept 2000 would display the following message:
“FRANKS SHED WINDOW is un-sealed. Please secure zone and press ON or press END”
FRANK THRING must go and shut the window and then try again by pressing ON. If FRANK took too long in shutting
the window, he may have to start again by re-entering his User code.
Provided for Download by www.bendigosecurity.com.au

C2000 User Manual
Page 6 of 26
3.3 Isolating Zones On Exit
Some Users may be allowed to Isolate the un-sealed Zone which will then prevent the Zone from detecting movement
for the period that the Area is turned On.
If FRANK THRING was allowed to Isolate Zones then the display would show:
!“FRANKS SHED WINDOW is un-sealed. Please secure zone and press ON or isolate this zone by pressing OK.
Press END to abort”
FRANK THRING may go and shut the window and then try again by pressing ON or FRANK can Isolate FRANKS
SHED WINDOW by pressing the OK key.
3.4 Turning On/Off More Than One Area
Some Users, who can operate more than one Area, may wish to turn On or Off all their Areas at once. This can be done
by pushing the LEFT or RIGHT arrow keys when an Area is being displayed.
The display window will now show:
By pressing the ON key, all Areas you are allowed to control will automatically turn On, one by one, if they are Off.
By pressing the OFF key, all Areas you are allowed to control will automatically turn Off, one by one, if they are On.
If some of the Areas are already Off or On, then the Terminal will “beep” and the display window will show that the
“Area is already Off”, or, the “Area is already On”.
3.5 SPECIAL AREAS - AREA 0 AND AREA 9
The Concept 2000 has ten (10) Areas which may all be turned both On and Off. These Areas are numbered from 0 to 9
and all have names so that you can easily recognize which Areas they are.
Area 0 and Area 9 are two special Areas that are normally turned On at all times.
Area 0 is often named “TAMPER AREA” whilst Area 9 is often named “SYSTEM AREA”. Both of these Areas are
used to protect the Concept 2000 from any un-authorized tampering.
If an alarm occurs in Area 0 or Area 9, then the Area may be turned Off to silence the sirens if they are sounding. If
sirens are not sounding, then you needn’t turn Off the Area but rather just acknowledge the Alarm. (See
“Acknowledging alarms” )
A User must be able to control Area 0 and Area 9 before “Tamper Area” or “System Area” alarms can be
acknowledged.
You must remember to turn Area 0 and Area 9 back On. If they are not turned On, the Concept 2000 will be vulnerable
to tampering and SYSTEM SECURITY WILL BE SEVERELY COMPROMISED.
When turning on Area 0 or Area 9, any problems will be displayed if they are present.
DO NOT TURN ON AREA 0 OR AREA 9 IF A PROBLEM IS DISPLAYED, WITHOUT FIRST RECTIFYING THE
PROBLEM.
•Note: If the OK key is pressed, when a problem is displayed, you will cause an alarm immediately which may sound
the sirens.
Provided for Download by www.bendigosecurity.com.au

C2000 User Manual
Page 7 of 26
3.6 ACKNOWLEDGING ALARM MESSAGES
When an alarm occurs in an Area which is turned On, the Concept 2000 will often display an alarm message on the
Terminal. The alarm message will identify the name of the Zone which caused the alarm and the name of the Area that
contains the alarmed Zone.
The alarm message will be continuously displayed, in the display window, until the alarm message has been
acknowledged by a User.
Any User can acknowledge the alarm message as long as that User can control the Area in which the alarm occurred.
The User simply enters their secret code and then presses the OK key to acknowledge the alarm.
The User will often want to turn the Area Off so that he/she can gain access. Because you need to enter your secret code
and press OK before you can turn the Area Off, any alarm messages for that Area will be automatically acknowledged.
If more than one alarm occurs in a single Area, only the last Alarm is displayed.
If alarms occur in more than one Area, then each alarm needs to be acknowledged separately.
3.7 TURNING OFF SIRENS
If an alarm occurs in an Area that is programmed to sound the sirens, the sirens will sound for 10 minutes (or the time
set by the Installer) before turning Off automatically. The sirens can be turned Off earlier by any User simply entering
their secret code and pressing the OK key as long as that User is allowed to operate the Area which caused the sirens to
sound.
IMPORTANT; THE SYSTEM HAS NOT BEEN TURNED OFF.
YOU HAVE ONLY TURNED THE SIRENS OFF. IF ANOTHER ALARM OCCURS THEN THE SIRENS WILL
OPERATE AGAIN. YOU MUST TURN THE AREA WHICH CAUSED THE ALARM OFF TO PREVENT
FURTHER SIREN ACTIVATIONS.
Provided for Download by www.bendigosecurity.com.au

C2000 User Manual
Page 8 of 26
OTHER PANEL OPERATIONS
When your secret code is entered and the OK key is pushed, the Concept 2000 assumes that you wish to turn On or Off
an Area. Sometimes you may wish to perform some other panel operation.
4.1 MENU
To perform another panel operation, other than turning On or Off Areas, you must press the MENU key first.
When the MENU key is pushed, the Concept 2000 will display what other operations you are allowed to perform. The
operations available may be different from User to User.
Listed below are all of the possible panel operations available other than the turning On and Off of Areas:
•0 AREA ON/OFF
This option will return the User from the Menu options back to Area On/Off operations.
•1 REVIEW PAST EVENTS.
This option is used to inspect the Concept 2000 memory to see, for example, what alarms have occurred or who has
been turning On or Off Areas.
•2 CHANGE CODES.
This option is used to alter or delete existing User codes in the Concept 2000 system or to add new User codes.
•3 ISOLATE ZONES
This option allows individual Zones in the Concept 2000 system to be isolated prior to turning On an Area.
•4 WALK-TEST AN AREA
This option allows a User to Walk-test an Area so as to check the operation of all Zones within the system.
•5 SET TIME AND DATE.
This option allows the User to set the Time and the Date for the Concept 2000 system.
•6 ENABLE DEADMAN.
This option allows the User to turn on and off the Deadman feature. (See “Using the Deadman facility”)
•7 PROGRAMMING.
This facility is not used in the day to day operations of the Concept 2000 system and is only accessible by the Installer
during the programming of the system.
•8 MENU CALL-BACK.
This will cause the Concept 2000 to dial the pre-programmed Call-Back number used to contact the Installer’s Service
Center. Only use this option when instructed by the Installer. Only the Master User or Installer can operate this option.
*Note: You may go back to turning On or Off Areas by pressing the “0” key.
Provided for Download by www.bendigosecurity.com.au

C2000 User Manual
Page 9 of 26
REVIEW MEMORY
Review is used to inspect what your system has been up to while you were not using it.
After pressing the MENU key, press the “1” key.
The display window will now show the last item which was entered in the review memory. The first line will show the
date and time, to the nearest second, that the event occurred. The second line will show the actual event and will often
be scrolling.
Use the UP arrow to go backwards through review memory and inspect earlier events. One key- press of the UP arrow is
one review event.
Use the DOWN arrow to go forward through review memory and inspect more recent events. One key -press of the
DOWN arrow is one review event.
The LEFT and RIGHT arrows can be used to control the scrolling if you wish.
Each time the LEFT arrow is pushed, the scrolling message will start again from the beginning.
If the scrolling is too fast, or too slow, use the RIGHT arrow to step the message one letter at a time, or hold down the
RIGHT arrow to speed up the scrolling message.
When you are finished using the Review facility, press the END key if you are finished using the Concept 2000, or press
the MENU key to perform another Concept 2000 function.
*Note: At any time the user may press HELP for help on review.
Provided for Download by www.bendigosecurity.com.au

C2000 User Manual
Page 10 of 26
5.1 SEARCHING FOR AN EVENT IN REVIEW
Sometimes you may wish to find a particular review event that may have occurred many days ago. To save looking at all
review events, which may have occurred after the particular event you are looking for, the Concept 2000 can
automatically search for a particular event.
The digit keys from “0” to “8” can be pressed to search backwards through review memory for specific items. Each
time a digit key is pressed the review memory is searched backwards for that item. If the item is not the desired one then
press the same digit key again to resume searching for the next event.
When the start of review is reached, press the “8” key to go to the end of review so you can search backwards again if
you wish.
The possible search items are:
0 …… Jump to the first Review item saved. (Start of review)
1 ……. Search for he last Alarm or Restore which occurred.
2 ……. Search for the last Isolate of a Zone.
3 ……. Search for the last User to log on to a terminal.
4 ……. Search for the last time Sirens turned on or off
5 ……. Search for the time an Auxiliary turned on or off.
6 ……. Search for the last lock operation.
7 ……. Search for other Miscellaneous items.
8 ……. Jump to the last Review item saved. (End of review)
5.2 REVIEW MEMORY SIZE
Pressing the “9” key will cause the Concept 2000 to display how many items the review memory can hold.
The number of items it can hold depends on the number of User codes and the number of Zones in the system. When the
review memory fills the oldest event will be forgotten, on an event by event basis, each time a new event is saved.
5.3 CONDENSED MODE
When skipping through Review, searching for certain events, it may be convenient to have the Review information
condensed so that it is easy to read. If the OK key is pushed whilst you are in Review, then the Review format, in the
display window, will be condensed with no scrolling messages.
Pressing the OK key a second time will cause the normal Review format to be displayed.
Provided for Download by www.bendigosecurity.com.au

C2000 User Manual
Page 11 of 26
CHANGE CODES
All Users who are allowed to operate your Concept 2000 panel are issued numbers from000 to 016.
•Note: Some systems may allow up to 96 Users and others to 512.
Each User has their own name and their own secret code. One of the Users has to be given the responsibility of setting
up and making the required changes to User codes.
The User with this responsibility is User 000 and is referred to as the MASTER USER.
When User 000 presses the MENU key, one of the options available to him/her is:-
“2 = Change Codes”
If Users are to be altered, or more Users added, then User 000 selects this option.
When Change Codes is first entered, the display window shows:
Either enter the specific User number to alter, using the digit keys, or press the OK key to proceed with the displayed
User number.
•For the following options, pressing the OK key will advance to the next question
•Pressing the LEFT arrow will go back to the previous question.
•Pressing the UP or DOWN arrows will display the current question for other User numbers.
•For Yes/No questions, press the “9” key for “Yes” and any other digit key for “No”.
•Note: A “No” is displayed as a “Blank”.
After selecting a User number to inspect or alter, the first item to enter is the User’s name.
This option allows the User’s name to be inspected or altered. The digit keys and the LEFT & RIGHT arrows can be
used to alter the displayed name.
•Note: The example used is User 002.
To select a letter, press the appropriate digit key where the desired letter appears. Press this key repeatedly until the
correct letter is displayed. Press the RIGHT arrow to advance to the next letter or the LEFT arrow to go back to the
previous letter.
•Pressing the OFF key clears the display.
•Pressing the ON key clears the display to the right of the cursor.
•A “space” is located with “9” key.
•Miscellaneous punctuation is located with the “0” key.
Provided for Download by www.bendigosecurity.com.au

C2000 User Manual
Page 12 of 26
The secret code may now be entered for this User number.
All digits “0” to “9” are allowed and the secret code may be 1 to 8 digits in length.
•Note: the actual numbers contained in the secret code are only displayed if you are inspecting or altering your won
code. If you are not altering your own secret code the numbers are displayed as “#”. This allows individual Users to
keep their secret code private from User 000.
This option determines which of the Concept 2000’s eight Areas this User number is allowed to control.
•Note: User 000 is also allowed to control Area 0 and Area 9. (See “Special areas - Area 0 and Area 9”)
This option determines if this User is allowed to Isolate Zones, which belong to the Areas controlled by this User. This
option only applies to the “Isolate zones” option in the MENU.
•Note: This question is not asked for User 000.
This option determines whether this User is allowed to inspect Review memory and scroll through the review events.
•Note: This question not asked for User 000
All Users may turn On Areas that they are allowed to control. This option allows some Users to turn Areas On but not
Off.
•Note: This question is not asked for User 000.
If programmed “Y”, then this User can turn On the Deadman alarm feature. (See “Using the Deadman facility”)
•Note: This question not asked for User 000.
Normally, only User 000, the Master User, is allowed to alter or issue other User codes, however, other responsible
Users may also be allowed to perform this function if this option is programmed “Y”.
Other Users given this privilege may never alter User 000 or User 001.
•This question not asked for User 000.
The Concept 2000 has two special Areas called Area 0 and Area 9. Answering “Y” to this option allows this User to
operate these special Areas. (See “Special Areas- Area 0 and Area 9”)
•Note: This question not asked for User 000.
When a User attempts to turn On an Area, any un-sealed Zones in the Area will be displayed in the display window. If
this option is “Y”, then this User may Isolate any un-sealed Zones by pressing the OK key.
Provided for Download by www.bendigosecurity.com.au

C2000 User Manual
Page 13 of 26
If this option is set to “N”, then the Area with the un-sealed Zones cannot be turned On by this User until the offending
Zones are secured.
•Note: This question not asked for User 000
This option determines whether this User is allowed to perform Walk-testing of Areas under his/her control. (See
“Walk-testing an Area”)
•Note: This question not asked for User 000
Your Concept 2000 may have been configured to include up to 5 different time zones which may b employed to prevent
certain Users from using the system outside the times specified by the time zones.
If a “Y” appears under one of the five time zone digits, then this User code will only operate during the hours
programmed to that time zone.
A User may be associated with more than one time zone. When more than one time zone is selected, then the User
code will operate during any of the time zones specified. Check with your Installer as to whether time zones have been
set up.
For example:
Time zone #1 - 09:00 AM to 17:00 PM, Mondays to Fridays.
Time zone #2 - 10:00 AM to 13:00 PM, Saturdays only.
•Note: This question not asked for User 000.
This option is normally set to “Y”. This will cause the Concept 2000 to assume that the Area you wish to turn On or Off
is the Area that you would commonly operate from the Terminal at which you are standing and where you have just
entered your secret code.
Your Installer will set up what common Areas relate to each Terminal location.
If this User is only allowed to un-lock doors and not allowed to turn On or Off Areas, then answer “Y” to this question.
(See “Operating door-locks”)
•Note: This question not asked for User 000
This option has been set aside for future expansion of the Concept 2000. Leave this option set to “N”.
•Note: This question not asked for User 000
Any User number, with the exception of User 000, may be defined as a Duress code. A Duress code works identically
to a normal User code, with the exception that a Duress alarm is raised, which may optionally contact a Central Station.
Every User may have their own Duress code, or alternatively, a few User codes may be set aside as common Duress
codes.
•For example: 999,00000,11444, or something less obvious.
•Note: This question not asked for User 000
Provided for Download by www.bendigosecurity.com.au

C2000 User Manual
Page 14 of 26
When the Concept 2000 needs to display more than one screen of information, the second line of the display window is
scrolled. The scrolling may always be controlled by, pressing the LEFT arrow to re-start scrolling, or the RIGHT arrow
to scroll letter by letter. Holding the RIGHT arrow pressed will speed up the scrolling.
This option allows the default scrolling rate to alter depending on the current User operating the system. Scrolling speed
may be set between 1 and 8 characters a second. A good average to choose is 5 to 7 chars/sec.
6.1 User 999 - The Master User
User 999 is the most powerful User in the system. He/she can perform any panel operation except Concept 2000
programming. The secret code of User 000 is the single most important code in the system and must be treated as if it
were the combination to a vault.
DO NOT LOSE OR FORGET THE MASTER CODE.
6.2 USER 001 - THE INSTALLER
Programming of the Concept 2000 can only be performed by User 001. User 001 is normally assigned to the Installing
Company. User 000 cannot alter User 001 code options. Like-wise, User 001 cannot any other User code options
although can access Programming options ect.
6.3 DIS-ABLE USER 001
After the completion of the Concept 2000 installation, setting this option to “Y” prevents the Installer from accessing
system both locally and via the telephone line, (except if the system is monitored). If User 001 ( normally the Installer )
wishes to alter your system, he/she must first ask the Master User to set the above option to “N”.
Provided for Download by www.bendigosecurity.com.au

C2000 User Manual
Page 15 of 26
ISOLATE ZONE/INPUT
Certain Users may be allowed to Isolate Zones via the Concept 2000 ‘s MENU options
•Note: To Isolate a Zone the Area(s) which that Zone is in, must be OFF.
When a Zone is Isolated and the Area containing that Zone is turned On, the Zone will be ignored for the rest of the time
that the Area remains On. When the Area is turned OFF again, the Isolated Zone will automatically be re-installed and
no longer be ignored.
The opposite for a Zone being Isolated is for the Zone to be Enabled.
The normal operating condition is for all Zones to be Enabled so that when an Area is turned ON, the Zones belonging
to that Area will operate.
Isolating Zones using this method is designed as a temporary fix to a problem only.
•For example: If a detector has been accidentally knocked off a wall, that Zone may be Isolated prior to it being
fixed.
To Isolate a Zone, press the MENU key followed by the “3” key.
The display window will show:
Select the number of the Zone that you wish to Isolate, by using the digit keys, and then pressing the OK key.
The display window may show:
or
The first line, of the display window, shows whether that Zone is currently Enabled (normal setting) or is currently
Isolated.
The second line, of the display window, shows the name of the selected Zone.
If the Zone is Enabled you may Isolate it by pressing the OFF key.
If the Zone is Isolated you may Enable it by pressing the ON key.
Often, the User will only know the name of the Zone to be Isolated or Enabled. By using the UP or DOWN arrows, the
names of all the Zones can be quickly checked until the right Zone name appears on the second line.
Pushing the OK key will prompt the User for another Zone number.
Provided for Download by www.bendigosecurity.com.au

C2000 User Manual
Page 16 of 26
When you are finished, press either the MENU key or the END key.
User 000 will be asked a preliminary question after the MENU and “3” keys are pushed.
Press the “1” key.
The “2” key should only be used under instruction from your Installing company.
Provided for Download by www.bendigosecurity.com.au

C2000 User Manual
Page 17 of 26
WALK-TESTING AREAS
It is prudent to regularly check that all Zones within an Area are fully operational, Some Insurance requirements insist
that this type of test is performed on a regular monthly basis.
8.1 SINGLE AREA USER
All Zones within an Area can be checked when the Area is OFF by pressing the MENU key, then the “4” key.
The display window will show the mane of the Area being tested.
For example: The display window may show:
The User now walks around the Area (FRANKS SHED) and deliberately alarms every Zone used to protect that Area.
As each Zone is alarmed, the Terminal will emit a short “beep”. You may take as long as you like to Walk-test an Area.
When all Zones have been alarmed, the User now presses any digit key on the key-pad.
If all Zones protecting that Area have operated correctly, the display window will show:
The User may now either press MENU, to select another Concept 2000 operation, or press END if finished with the
Concept 2000.
If one or more Zones were not alarmed whilst Walk-testing the Area, the display window will show:
The User may now repeatedly press any digit key to display the names of all Zones that failed the Walk-test.
When the failed Zone(s) have been identified, press the OK key to resume Walk-testing and proceed to alarm the
Zone(s) that failed the first time.
On return to the T4erminal, again press any digit key to see if the Walk-test passed.
When you are finished Walk-testing, whether the test passed or failed, press the END key or the MENU key.
8.2 MULTIPLE AREA USERS
Some Users are allowed to Walk-test more than one Area. These User will be asked which Area they wish to test proir
to the start of the Walk-test’
The second line, of the display window, will list all the Areas which may be Walk-tested by this User.
Simply press a digit key corresponding to the Area you wish to test and follow the same procedures listed for a single
Area User
Provided for Download by www.bendigosecurity.com.au

C2000 User Manual
Page 18 of 26
ADJUSTING THE TIME AND DATE.
The Concept 2000’s Time and Date can be set by the Master User. Some Central Stations will automatically perform
this task for you when the system is monitored.
First press the MENU key, followed by the “5” key.
•Note: Only User 000 may perform this function.
The display window will show:
The second line shows the time, to the nearest minute, when Set time/date was entered.
By using the LEFT arrow, the RIGHT arrow and the digit keys, the time and date may be adjusted to the correct
settings.
Now press the OK key to save the new time and date.
At the instant the OK key is pushed, the seconds are set to zero and the Concept 2000 automatically returns the User to
the menu.
9.1 CLOCK CORRECTION
Sometimes, the Concept 2000 clock maybe running slightly fast or slightly slow.
The clock can be corrected by pressing the UP or DOWN arrow keys when setting the time and date.
The display window will now show:
The current clock correction can be adjusted by repeatedly pressing the UP or DOWN arrow keys to achieve the desired
amount of seconds.
•For example: If the clock is running fast by 10 seconds per week then adjust the current clock
correction down by 10 seconds a week. (-10 s
•If the clock is running slow by 10 seconds per week then adjust the current clock
. correction up by 10 seconds a week. (+ 10 secs)
When the clock corr4ection has been adjusted, press the LEFT or RIGHT arrow keys to go back to the set time and date
display.
Provided for Download by www.bendigosecurity.com.au
Table of contents
Other Inner Range Security System manuals

Inner Range
Inner Range CONCEPT IQ User manual

Inner Range
Inner Range 4000 User manual

Inner Range
Inner Range CONCEPT IQ. PLUS Operating and maintenance manual

Inner Range
Inner Range Integriti Prisma Keypad User manual

Inner Range
Inner Range CONCEPT IQ User manual

Inner Range
Inner Range IQ plus Operating and maintenance manual

Inner Range
Inner Range 3000 User manual