abco STORMPAC Installation guide

PRODUCT, MAINTENANCE & WARRANTY MANUAL
COMMERCIAL CORD BACKPACK
DRY VACUUM CLEANER
Original
Instructions
1800 177 399
Service & Support
190752
RE-ORDER CODE

1
Contents
Technical Data .................................................................................................................1
General Safety Warnings ...............................................................................................1
Danger Levels ..........................................................................................................1
Transport ................................................................................................................. 2
Maintenance ........................................................................................................... 2
Accessories And Spare Parts ................................................................................ 2
Dry Vacuum Cleaner ...............................................................................................2
Important Safety Instructions ..................................................................................... 3
Maintenance & Care ...................................................................................................... 4
Operations ........................................................................................................................4
Trouble Shooting ............................................................................................................ 4
Preparing To Work ..........................................................................................................5
Work .................................................................................................................................. 5
The End Of The Work .....................................................................................................5
Maintenance ....................................................................................................................5
Disposal ............................................................................................................................5
Parts List .......................................................................................................................... 6
Warranty .......................................................................................................................... 7
TECHNICAL DATA U.M.
[SI] STORMPAC
Electrical characteristics of the vacuum motor V / W 1040W
Type of vacuum cleaner Dry
Number of vacuum motors 1
Vacuum
Air flow rate
kPa 16
l/s
L
47
Collection tank capacity 6
Barrel material HDPE
Appliance weight when dry (without battery) kg 5.5
Appliance weight when ready to use kg 6.5
Dimensions (length x height x depth) cm 26.5x51x22.3
Accessories diameter mm 32
Electrical protection class (vacuum cleaner) III
Sound pressure level (ISO 11201) dB (A) <72
Uncertainty Kpa dB (A) 1.5
Hand vibration level (ISO 5349) m/s20.5
Body vibration level (ISO 2631) m/s24.95
Vibration measurement uncertainty 1.5%
General Safety & Warnings
Before using this appliance, please read
and comply with these safety warnings.
Read this manual before using the appliance
or carrying out any maintenance work.
Keep these safety warnings on hand and
review them regularly.
Please pass this document on to successive
owners of this product.
• Before commissioning read the
appliance’s user manual.
• The warning plates on the appliance provide
important instructions for its safe use.
• Always comply with both the directions on
the instructions, as well as current safety
standards.
• Keep the packing film out of the reach of
children. Risk of asphyxiation!
DANGER LEVELS
DANGER: Indicates an imminent danger that could cause serious injury or death.
WARNING: Indicates a probable dangerous situation that could cause serious injury or death.
CAUTION: Indicates a probable dangerous situation that could cause minor injuries.
ATTENTION: Indicates a probable dangerous situation that could damage objects.

32
When using an electrical appliance, basic precautions
should be observed, including the following:
■Do not modify the polarized plug to fit a non-polarized outlet or
extension cord
■Do not leave the vacuum cleaner unattended when it is plugged in.
■Unplug from outlet when in use and before servicing.
■Do not use outdoors or on wet surfaces
■Do not allow children to operate vacuum cleaner or use as a toy
■Do not use for any purpose other than described in this user’s guide.
■Use only manufacture’s recommended attachments.
■Do not use with damaged cord or plug.
■If appliance is not working as it should, has been dropped,
damaged, left outdoors, or dropped into water, have it repaired at
an authorized service centre.
■Do not pull or carry by cord, use cord as a handle, close a door on
cord, or pull cord around sharp edges or corners. Do not run
appliance over cord. Keep cord away from heated surfaces.
■Do not unplug by pulling cord.
■Do not handle vacuum cleaner or plug it with wet hands
■Do not put any object into openings. Do not use with any opening
blocked; keep openings free of dust. Lint, hair, and anything that
may reduce air flow.
■Keep hair, loose clothing, fingers and all parts of body away from
openings and moving parts.
■Turn off all controls before plugging or unplugging vacuum cleaner.
■Use extra care when cleaning stairs.
■Do not pick up flammable materials (lighter fluid, gasoline,
kerosene etc.) or use in the presence of explosive liquids or vapors.
■Do not pickup toxic materials (chlorine, bleach, ammonia, drain
cleaner, etc.)
■Do not use vacuum cleaner in an enclosed space filled with vapor
given off by oil base paint, paint-thinner, some moth proofing
substances, flammable dust, or other explosive or toxic vapors.
■Do not pick up hard or sharp objects such as glass, nails, screws,
coins etc.
■Do not pick up anything that is burning or smoking such as
cigarettes, matches, or hot ashes.
■Do not use without filter in place.
■Use only on dry, indoor surfaces
■Keep appliance on a level surface
■Do not carry the vacuum cleaner while it is running
■Do not operate cleaner in bare foot or when wearing open
toe shoes or sandals.
■Do not use without dust bag.
This appliance must be connected to a grounded wiring
system. If it should malfunction or breakdown, grounding
provides a safe path of least resistance for electrical current,
reducing the risk of electrical shock. The cord of this
appliance has an equipment-grounding conductor and a
ground plug. It must only be plugged into an outlet that is
properly installed and grounded in accordance with all
local codes and ordinances.
Improper connection of the equipment-grounding conductor
can result in a risk of electrical shock. Check with a qualified
electrician or service person if you aren’t sure if the outlet is
properly grounded. DO NOT MODIFY THE PLUG. If it will not
fit the outlet, have a proper outlet installed by a qualified
electrician.
This appliance is designed for use on a nominal 120-volt
circuit, and has a grounding attachment plug that looks like
a plug in the drawing above. Make certain that the appliance
is connected to an outlet having the same configuration as
the plug. No plug adapter should be used with this appliance.
IMPORTANT SAFETY INSTRUCTIONS
WARNING:
SAVE THESE
INSTRUCTIONS.
GROUNDING
INSTRUCTIONS
To reduce the risk of fire,
electric shock, or injury:
THIS MODEL IS FOR
COMMERCIAL USE.
WARNING:
To reduce the risk of fire,
electric shock, or injury:
READ ALL INSTRUCTIONS
BEFORE USING THE APPLIANCE
Grounded
Outlets
Grounding Pin
TRANSPORT
DANGER:
DANGER:
CAUTION:
• Only use accessories and spare parts that have been authorised by the manufacturer. Original
accessories and spare parts ensure the appliance can be used safely and without any fault.
MAINTENANCE
ACCESSORIES AND SPARE PARTS
DANGER:
• The appliance has been designed only for vacuuming dry solid material and it should not be used for
other purposes.
WARNING:
• The appliance is not suitable for vacuuming powders that are damaging to health.
DRY VACUUM CLEANER
• When the appliance is operating do not place it close to delicate organs like ears, mouth, eyes, etc.
• Do not use the appliance without filters. The dry vacuum cleaner must always have a bag filter fitted.
• The device must only be kept in closed areas.
• If the vacuum cleaner is not working properly or it has fallen, been damaged, left outside or has fallen in water,
take it to an authorised Surevac service agent.
• Always use the appliance in compliance with its intended use, taking into consideration local conditions and
looking out for the presence of others, especially children, when working.
• Never leave the appliance unattended before it is switched off and the cord removed.
• The appliance should only be used by people trained in its use and who have shown that they know how to
use the appliance and have been expressly authorised to do so.
• Do not place any liquid containers on the appliance.
• In the event of a fire, use a powder extinguisher. Do not use water.
• If foam forms or liquid leaks, immediately switch off the appliance.
• This appliance has been designed and built to be used for cleaning (vacuuming solid, dry elements) smooth
flooring in the commercial and residential (for example: hotels; schools; hospitals; shops; offices and
business premises), in proven safety conditions, by a qualified operator.
• Before transporting, close all the locking hooks of the top cover. When transporting the appliance, the engine
should be switched off, and make sure that the appliance is in a stable and secure position.
• Switch off the appliance and remove the cord before cleaning, replacing components and carrying out
maintenance on the appliance.
• Repairs should only be carried out by an authorised Surevac service agent.
• Observe the safety check as per local provisions for commercial appliances.

54
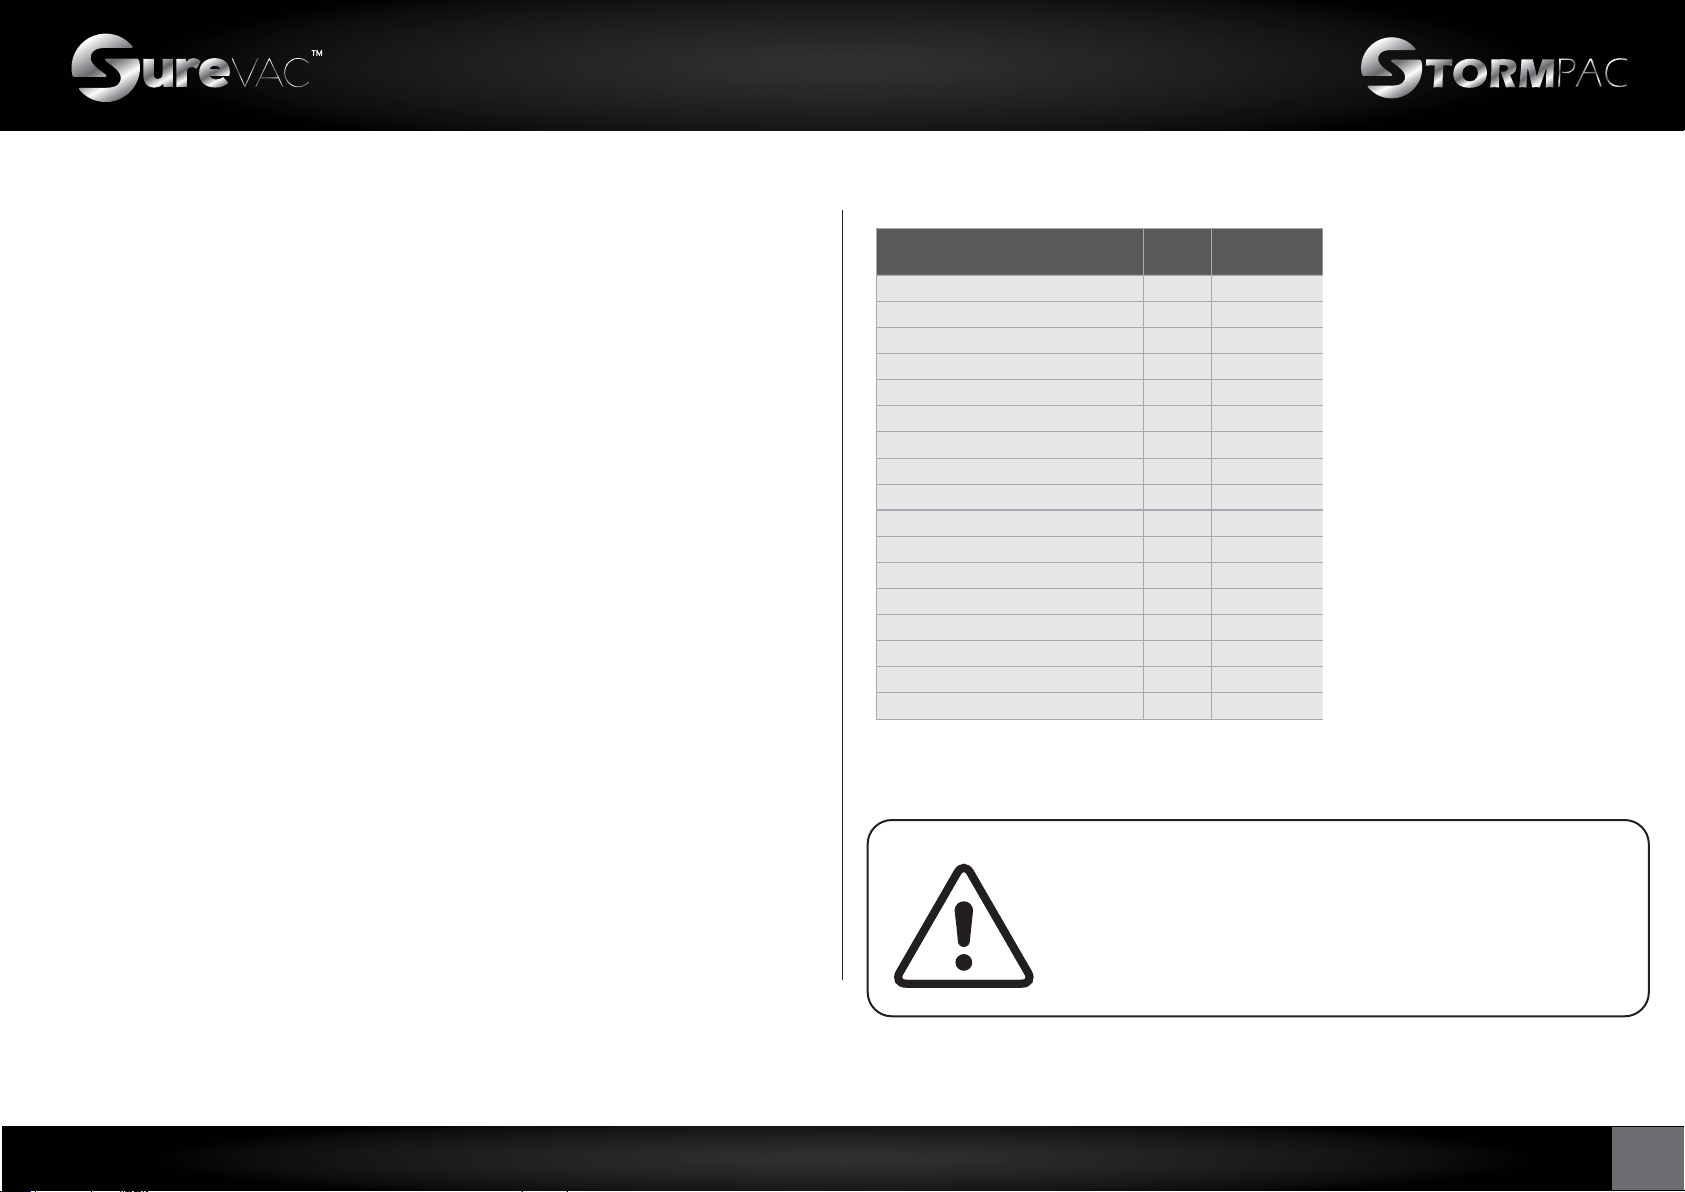
This chapter lists the common problems linked with the use of the appliance. If you are unable to
resolve the problems with the information given here, please contact your nearest assistance centre.
Low Suction or Poor Pickup
Possible causes
1.Disposable dust bag is full
2.Wand is not properly installed
3.Tool not working properly
4.Air path obstructed
Vacuum Motor is not working
Possible causes
1.Vacuum is not plugged in
2.Electrical outlet is not working
3.Motor thermal protector activated due to blockage
4.ON/OFF switch fault
5.Motor defective
Remedies
1.Dispose current disposable bag and replace with new
2.Secure wand properly to ensure no air leaks
3.Make sure tool is on the wand properly and tightly
4.Check for any air flow obstructions
Remedies
1.Check to make sure vacuum is plugged in properly
2.Check electrical source.
3.Allow cleaner to cool down, and check the vacuum ducts
and filters for blockage.
4.Contact an authorized service centre.
5.Contact an authorized service centre.
MAINTENANCE AND CARE
OPERATIONS
TROUBLE SHOOTING
1. Make sure the machine has been secured (see the section titled “SECURING THE MACHINE”).
2. Take the appliance to the designated place for emptying the tank.
3. Carry out the procedures described in the chapter “MAINTENANCE”.
4. Position the appliance on a flat surface in an enclosed place; there must be no objects near the
appliance that could either damage it, or be damaged through contact with it. If you decide to
hang the appliance on supports, make sure they are able to sustain its volume and weight.
THE END OF THE WORK
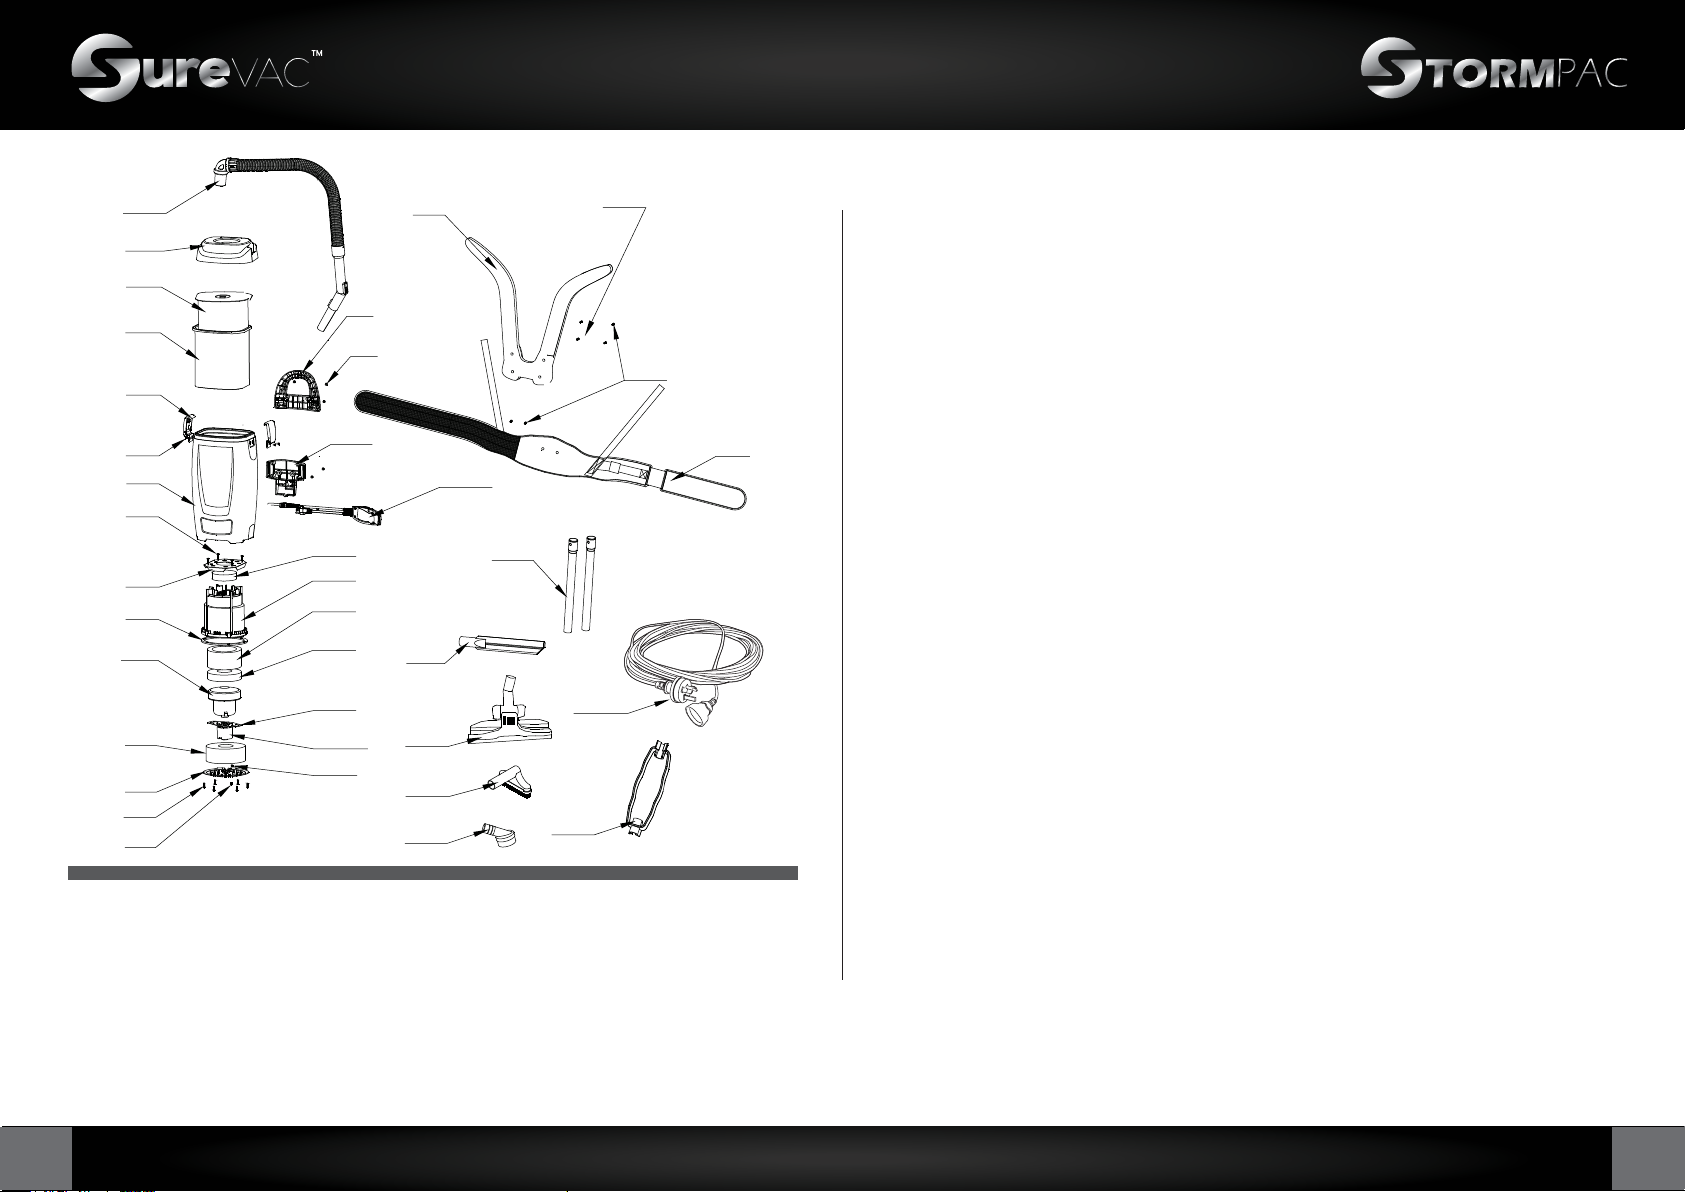
1. Release the two latches and lift off the lid to ensure that the
micro filter cloth bag and the disposable bag are inside. Once
checked replace the lid back and lock the latches.
2. Both the micro filter cloth bag and disposable bag, filter the air
while holding all debris. The micro filter cloth bag with its rubber
top provides the seal for the vacuum while also filtering the air.
Replace or empty each as necessary.
3. Make sure lid is locked on the vacuum. Take the vacuum hose
and push it into round opening on top of lid.
To change the filter bag:
1. Shut off power switch and unplug all cords from outlet
and vacuum.
2. Check disposable bag to see if it is full. Always change
disposable bag when full, discard and replace with a new one.
3. Do not reuse the disposable bag – this affects the filtration
of the backpack.
4. Always check the micro filter cloth bag each time when you
replace the disposable bag. Clean or change it as necessary.
NOTE: Very fine powders and substances may clog the cloth bag.
Please remember to empty bag often so that vacuum cleaner can
efficiently operate.
Power cord and storage:
5. Always unwind the extension cord completely before vacuuming.
6. Never stretch or pull cord tightly, this will damage the cord and
create a danger.
7. Always unplug vacuum from wall when not in use.
8. Always check condition of all electrical cords before use.
Never use cord if it is ripped or has a tear.
9. Unplug extension cord and wrap loosely when not in use.
10. When backpack vacuum is not in use, always store in a dry area
or place.
NOTE: Do not repair if you are not an authorized technician familiar with
the commercial backpack. Do not lubricate motor. It is equipped with
sealing bearings.
1. Make sure the machine has been secured (see the section titled “SECURING THE MACHINE”).
2. Remove the vacuum nozzle (1) from the hole in the cover (2) of the appliance turning it
anti-clockwise (Fig. 1) .
3. Remove the cover (2) of the vacuum tank (Fig. 2), releasing the hooks (3) on the side of the tank
itself (Fig. 3)
4. Remove the collection bag (4) from the tank (Fig.4).
5. Remove the fabric filler (5) from the appliance (Fig.5).
6. Clean the inside of the collection tank with a damp cloth.
7. Insert the fabric filter (5) in the tank (Fig.6).
8. Insert the collection bag (4) in the tank (Fig.7)
9. Place the cover (2) on the vacuum tank (Fig.8), using the hooks (3) on the side of the tank
itself (Fig.9)
10. Disconnect the vacuum hose (6) from the cover (2) (Fig.10).
11. Clean the inside of the vacuum with a jet of compressed air, if necessary removing any
obstructions.
12. Disconnect the cleaning accessory.
13. Clean the inside of the vacuum chamber of the accessory with compressed air, and if
necessary remove any obstructions.
MAINTENANCE
To dispose of the appliance, take it to a demolition centre or an authorised collection centre.
Before scrapping the machine, it is necessary to remove and separate out the
following materials, then send them to the appropriated collection centres in
accordance with the environmental hygiene regulations in force:
• Felt
• Electric and electronic parts*
• Plastic parts
• Metallic parts
(*) In particular, contact your local distributor when scrapping electric and
electronic parts.
DISPOSAL
ATTENTION: Check the condition of the cloth filter if the filter surface area is particularly clogged
or if it is damaged replace it.
ATTENTION: When inserting the fabric filter (5) in the tank, make sure that the gasket adheres
fully to the edge of the tank so that the vacuuming is not compromised.
ATTENTION: When putting on the cover (2) make sure that the nozzle (6) is inserted correctly
into the hole on the collection bag (4) (Fig.8).
WARNING: Before inserting the fabric filter (5) in the tank, wait until it is completely dry if it was
washed.
N.B. : When using bags for collecting dust, made of fabric instead of paper, empty them and
clean them with a jet of air, check their condition and if necessary change them.
N.B. : If the surface of the filler is extremely dirty, brush the filler with a normal soft brush to clean
it thoroughly, and if necessary wash it in water.
21 3
3
2
1
654
554
7
4
8 9
3
2
10
6
WARNING:
To reduce the risk of fire, electric
shock, or injury, turn power
OFF and disconnect plug from
electrical outlet before performing
maintenance or troubleshooting.
2.
1. Remove the cover (1) from the vacuum tank (Fig.1) using the hooks (2) on the side of the
tank itself (Fig.2).
2. Check the fabric fibre (3) is correctly positioned (Fig.3) and that the collection bag (4) is
correctly inserted inside it (Fig.4).
3. Fasten the cover (1) above the vacuum tank (Fig.5) locking it with the hooks (2) on the side
of the tank itself (Fig.6)
4. Insert the nozzle (5) on the vacuum hose into the hole on the cover of the vacuum tank (Fig.7).
5. Connect the vacuum hose (6) with the aluminum pipe (7) (8)
6. Select the most suitable attachment for the work to be carried out. Attach the attachment (8)
to the aluminum tube (7)
1, Switch on the machine by setting the main switch (1) to “I” (Fig.1).
PREPARING TO WORK
WORK
N.B. : If the vacuuming capacity is excessive, shift the lever (3) on the vacuum hose handle (Fig.3)
while the accessory is in contact with the floor.

PARTS LIST
76
207240 Hose assembly
207241 Lid
207242 Hepa bag
207243 Cloth bag
207244 Lid latch assembly
207245 Lid latch screw
207246 Body
207247 Bag support screw
207248 Bag support
207249 Motor shroud seal
207250 Motor to suit 190752
207252 Exhaust sponge
207253 Bottom cover
207254 Bottom cover screw
207255 Grounding screw
207256 Grounding nut
207257 M Motor mount
to suit 190752
207259 Thermal baffle
207260 M Motor seal
207262 Noise muffle sponge
207263 Motor shroud
207264 Pre-motor filter
207265 Switch box assy
to suit 190752
207267 Waist belt
207268 Shoulder strap
207269 Waist belt mounting plate to suit 190752
207271 Waist belt screw
207272 Carry handle screw
207273 Carry handle
207274 Shoulder strap screw
207275 Crevice tool
207276 Dusting brush
207277 Upholstery tool
207278 Metal tube
207279 Bare floor tool
207280 Extension cord
207281 Cord clip
SUREVAC STORMPAC SERVICE & WARRANTY TERMS
WHAT THIS WARRANTY COVERS
The STORMPAC commercial vacuum cleaner has a 2-year warranty on the body and
motor only. The warranty for this vacuum cleaner is granted only to the original
purchaser of the vacuum cleaner. Warranty coverage shall commence on the date of
purchase by the original purchaser (as evidenced by an invoice confirming proof of
purchase).
At our discretion we will repair or replace a defective cleaner or cleaner part that
is covered by this warranty. As a matter of warranty policy, we will not refund the
consumer’s purchase price.
• Parts of the cleaner that require replacement under normal use, such as bags, filters,
belts, floor tools, electrical leads, hoses.
• Damage or malfunctions caused by negligence, abuse, altered parts or use not in
accordance with the Owner’s Guide.
• Defects or damages caused by unauthorised service or the use of parts other than
surevac (stormpac) parts. Defective parts do not include wear and tear by normal or
overuse of the machine.
WHAT THIS WARRANTY DOES NOT COVER:
207274
207255
207240
207241
207242
207243
207244
207245
207246
207247
207248
207249
207250
207252
207253
207254
207259
207256
207272
207269
207264
207263
207260
207262
207257
207273
207265
207271
207267
207278
207280
207281
207277
207279
207275
207276
207268
This manual suits for next models
1
Table of contents
Other abco Vacuum Cleaner manuals