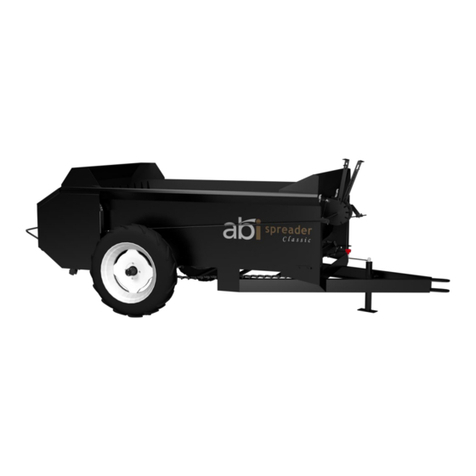
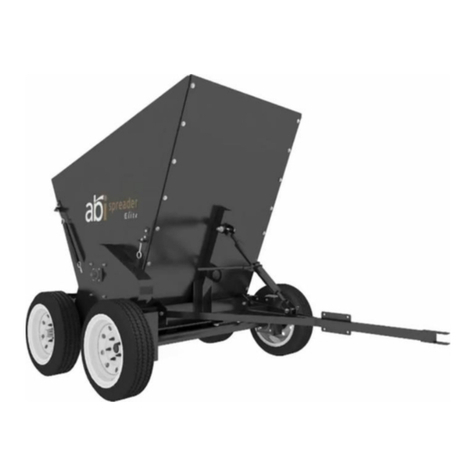
abi 3H User manual

ABI(Absolute Innovations, Inc.) - 1320 Third Street, Osceola IN 46561 - 855-
211-0598 www.abiattachments.com
Elite Hydraulic Spreader
Setup Guide
THIS MANUAL MUST BE READ AND UNDERSTOOD BEFORE DELIVERY!

Elite Hydraulic Spreader Setup Guide
ABI(Absolute Innovations, Inc.) - 855-211-0598 - www.abisupport.com Page | 2
TABLE OF CONTENTS
Introduction ………………………………………………………. 3-4
Specifications …………………………………………………….. 5
Safety …………………………………………………………………. 6-7
Operation ………………………………………………………….. 8
Unpacking & Set- up ………………………………...… 8-9
Before First Use ………………………………………… 10
Vehicle Size ……………………………………………… 10
Attaching to Tow Vehicle ….………………………. 11-12
Loading the Spreader …………………………………. 13
How To Control Material Flow …...………….…….…14
Storage ………………………………………………………….…… 14
Maintenance & Lubrication .…………………………....... 15-16

Elite Hydraulic Spreader Setup Guide
ABI(Absolute Innovations, Inc.) - 855-211-0598 - www.abisupport.com Page | 3
INTRODUCTION:
Thank You,
On behalf of the ABI family we would like to thank you for your recent
purchase of your Elite Spreader. Our Company’s goal is to provide you, our
customer; with innovative, quality tools as well as first rate customer service.
These instructions are designed to help you, the customer; get your new Elite
Spreader off the delivery pallet and into use. Once you have put your Elite Spreader
to work, if you have any questions, please feel free to call and talk with our friendly
and knowledgeable Customer Service Department. To contact our Customer Service
Department call 855-211-0598, M- Th 8am-8pm EST and Friday 8am-5pm EST.
To order parts for your Elite Spreader please contact our Customer Support
Department by phone at: 855-211-0598 M-TH 8am –8pm and Friday 8am-5pm EST
Additional Contact Information:
Additional information on the Elite Spreader can be found on the ABI Support site
at: www.abisupport.com
To contact ABI’s Customer Service Department after hours go to the Help Desk on
the ABI Support page at: www.abisupport.com and send our Customer Service
Department an email regarding any issue you may be experiencing with the Elite
Spreader.
To the Operator:
The information presented in this manual will prepare you to operate the Elite
Spreader in a safe and knowledgeable manner. Operating the Elite Spreader in a
proper manner will provide a safer working environment and create a more
efficient result. Read this manual fully and understand the entire manual prior to
setup, operation, adjusting, performing maintenance, or storing the Elite Spreader.
This manual contains information that will allow you the operator to get years of
dependable performance from the Elite Spreader.
This manual will provide you with information on safely operating and maintaining
the Elite Spreader. Operating the Elite Spreader outside of the stated safety and
operations guidelines may result in injury to operator and equipment, or void the
warranty.
The information provided in this manual was current at the time of printing.
Variations may be present as Absolute Innovations, Inc. continues to improve and
upgrade the Elite Spreader for future use. Absolute Innovations, Inc. reserves the
right to implement engineering and design changes to the Elite Spreader as may be
necessary without prior notification.

Elite Hydraulic Spreader Setup Guide
ABI(Absolute Innovations, Inc.) - 855-211-0598 - www.abisupport.com Page | 4
Operational Safety Rules:
Please exercise caution at all times when setting up, operating, or performing
maintenance on the Elite Spreader. Remember, any piece of equipment like
the Elite Spreader can cause injury/damage if operated improperly or if the
user does not understand how to operate the equipment. Exercise caution at
all times with using the Elite Spreader.
Never permit any person to ride or board the ELITE SPREADER at any time. NEVER ALLOW
RIDERS ON THE ELITE SPREADER!
Use care and maintain minimum ground speed when operating the ELITE SPREADER on a
hillside, or when operating close to ditches, fences, or water sources.
Never place any body part under the while the ELITE SPREADER is in operation.
Never allow anyone near the ELITE SPREADER while in operation.
Operate the ELITE SPREADER in the daylight or under good artificial light. Operator should
always be able to clearly see where they are going.
Be alert for hidden hazards. Always operate the ELITE SPREADER with caution over work
environments that may have buried obstacles.
Stay well and clear of all moving parts. Keep all limbs clear of attachments when making
adjustments with all hydraulically operated attachments.
Use caution when operating the ELITE SPREADER in icy, wet, or snowy condition.
Do not use the ELITE SPREADER on highways or public thoroughfares. The ELITE SPREADER is
designed for off road use only.
Always follow Tractor Manufacturer’s rules for safe Operation of Tractor, and for proper
procedures for attaching and disconnecting attachments. Contact your local dealership for
an Owner’s Manual for any questions related to the safe operation of the Tractor.
Use caution when operating the ELITE SPREADER. Using the ELITE SPREADER
outside of stated safety and operations guidelines may result in injury to operator or
others, property damage, or a void in warranty.
Please read this entire manual before operating. Failure to follow the
instructions outlined in this manual may result in personal injury and/or
damaged equipment, and could void the warranty.
Serial Number Location -
The spreader’s serial number can be found on the back right frame rail behind the
right tire.
All pictures and instructions in this manual assume that the right and left sides
of the spreader are that of someone standing behind the unit facing forward.

Elite Hydraulic Spreader Setup Guide
ABI(Absolute Innovations, Inc.) - 855-211-0598 - www.abisupport.com Page | 5
SPECIFICATIONS:
Model
3H
6H
# Of Horses
Up To 6
Up To 20
Capacity
37 cu. Ft. Heaped
72 cu. ft. Heaped
Overall Length
93”
93”
Overall Width
57”
98”
Overall Height
60”
61”
Loading Height
Adjustable 36” – 41”
Adjustable 37” – 42”
Frame Construction
A36 ⅛” 2x3 Tube Steel
Bin Construction
12 gauge steel
12 gauge steel
Body Finish
Powder Coated
Powder Coated
Chain
# 50
# 50
Drive
Hydraulic Motor
1,800 psi continuous
2,400 psi max
Set of 9’ Hoses w/quick
connect
Hydraulic Motor
1,800 psi continuous
2,400 psi max
Set of 9’ Hoses w/quick
connect
Hydraulics Needed
1 Set of ports @ 1,200 psi min.
Ground Clearance
8”
9”
Front Stabilizer
2,250 lbs. Pivot-Skid Jack
Wheel Assembly
20”x5” Foam Filled Tires
4.80-12 4-ply
Replaceable Hubs & Bearings
22”x7” Air Filled Tires
B78-13st 2-ply
Replaceable Hubs & Bearings
Total Shipping Weight
850 lbs.
1,000 lbs.
Power Required
17 hp - 350 cc
25 hp - 450 cc
Warranty
1 Year Limited
1 Year Limited

Elite Hydraulic Spreader Setup Guide
ABI(Absolute Innovations, Inc.) - 855-211-0598 - www.abisupport.com Page | 6
SAFETY:
While the Elite Hydraulic Spreader™ is among the safest manure
spreaders on the market it is very important to observe a few standard
farm implement safety precautions to avoid injury.
This symbol shown here to the left, is posted before important safety
instructions throughout this manual that should given special attention.
FAILURE TO FOLLOW THE INSTRUCTIONS IN THIS MANUAL COULD
RESULT IN PERSONAL INJURY OR DEATH. PLEASE READ THE ENTIRE
MANUAL BEFORE OPERATING THE ELITE HYDRAULIC SPREADER™.
STAND CLEAR of the spreader while it is in motion or hydraulics hoses
are connected to the tractor. Disconnect hoses when not spreading in field.
DO NOT start the spreader until you know everyone is clear of it. Keep
hands and feet from under the spreader at all times.
DO NOT operate the spreader near holes, trenches, and immovable
objects like large rocks, stumps, or steep inclines that could upset the tractor
or cause damage to the spreader.
Keep hands, feet and clothing clear of the spreaders moving parts. Do not
wear loose clothing near the spreader as it might catch on moving parts.
Replace the chain shield after lubrication or repairs for your protection.
It is your responsibility to ensure it is installed at all times during operation.
Never allow riders on or in the spreader under any circumstances.
Always park on level ground and block wheels before disconnecting from
the tow vehicle to prevent spreader from rolling.
Never get off the tractor while in motion, while the spreader is in
operation, or while the hydraulics are on.
When moving the machine on public roads use the proper reflectors,
lights, and slow moving vehicle signs required by local government agencies.
To prevent the hitch from coming disconnected during operation, use the
proper size hitch pin and lynch pin at all times.
The combined weight of the spreader and the manure must never be
more than the weight of the tow vehicle you are using to pull the load.

Elite Hydraulic Spreader Setup Guide
ABI(Absolute Innovations, Inc.) - 855-211-0598 - www.abisupport.com Page | 7
SAFETY:
Decals are needed for safety. If they are faded or missing please request
replacements from Absolute Innovations, Inc.
Location of Safety Decals -
The decal shown above is found in the three locations shown below.
Located on chain shield.
Located on front of bin.
Located on back of bin.

Elite Hydraulic Spreader Setup Guide
ABI(Absolute Innovations, Inc.) - 855-211-0598 - www.abisupport.com Page | 8
OPERATION:
Unpacking & Set-up -
1. Offload from the freight truck in a
level area that allows space to
work. We highly recommend the
use of a forklift, tractor with
loader or other heavy machinery
that has the capacity to lift at least
1,200 lbs.. Be sure the machinery
is well balanced with a counter
weight on the back. The spreader
also has a large steel hook welded to the frame. (Shown Above) This
may be used to lift the spreader on to the ground with a loader if the
unit is not attached to a pallet. CAUTION YOU MUST HAVE A COUNTER
WEIGHT! If none of these options are available you must be certain the
freight delivery truck is equipped with a lift gate to lower the spreader
to the ground. Another option is a ramp or dock. Without any of these
options you will not be able to safely offload the spreader.
2. Once the spreader is safely on level-ground inspect the spreader for
signs of shipping damage. If damage is found note such damage on the
paperwork offered to you by the freight truck driver. Also, it is possible
that the shipping pallets and banding material may have been damaged
is shipping. This may cause a hazard; please take extra precautions
when unpack and setting up the
spreader.
3. Begin by detaching all packing &
banding materials that mount the
spreader to the pallet. This will
require tin snips and a crowbar.
(Please use safety eyewear and
work gloves.)
4. Carefully pull the hitch harness
back toward you until
perpendicular with the ground.
Then remove the hitch pin from
the connecting tab. You will find
the connecting tab welded mid
way up the harness.

Elite Hydraulic Spreader Setup Guide
ABI(Absolute Innovations, Inc.) - 855-211-0598 - www.abisupport.com Page | 9
OPERATION:
Unpacking & Set-up -
5. Grab the ratcheting turn knuckle
and meet up with the connecting
tab welded to the hitch harness.
Use the hitch pin you removed
from the connecting tab to pin the
turn knuckle and connecting tab
together. Be sure to use the
provided safety lynch pin to lock
hitch pin in place.
6. Remove locking pin from the
crank jack and pivot position to be
parellel with the ground. Then
reset the locking pin.
7. This next step REQUIRES two
strong individuals to complete.
With two strong individuals grab
the hitch harness and use it as
leverage to pull the spreader onto
it’s wheels.
8. Now your Elite Hydraulic Spreader is ready to connect to your tow
vehicle. See sections below for information on hooking up the hydraulic
system and attaching to a tow vehicle.

Elite Hydraulic Spreader Setup Guide
ABI(Absolute Innovations, Inc.) - 855-211-0598 - www.abisupport.com Page | 10
OPERATION:
Before First Use -
Equip the spreader with an SMV (Slow Moving Vehicle) emblem if it will be
transported on public road.
Do not operate the spreader until the safety precautions in this manual and the
decals on the spreader have been read and understood by the operator.
Check & fill hydraulic fluid levels in the tractor to ensure it is filled to the
tractor manufacturer’s recommendations. This equipment will take a small
amount of hydraulic fluid out of the tractors reservoir. You may need to
replenish some hydraulic fluid to the tractor after setup.
Vehicle Size -
Just because a small tractor may be able to pull a loaded spreader it may not be
heavy enough to safely operate on hills. Always use a tractor that is heavier
than the loaded spreader when operating on inclines to provide sufficient
traction and braking
Attaching to Tow Vehicle -
After you have completed the “Unpacking & Setup” instructions beginning on
page 7, it is now time to attach the Elite Hydraulic Spreader™ to your tractor
and prepare it for use.
1. Open and remove the safety lynch
pin then remove hitch pin from
the hitch.
2. With caution, backup the tractor
to the spreader trying to align the
drawbar with the hitch. Turn off
tractor and use the crank jack to
raise or lower the hitch point to
match the drawbar height.

Elite Hydraulic Spreader Setup Guide
ABI(Absolute Innovations, Inc.) - 855-211-0598 - www.abisupport.com Page | 11
OPERATION:
Attaching to Tow Vehicle -
3. With everyone clear of the
spreader and tractor backup and
align the tractor into the hitch.
4. With the tractor turned off and the
parking brakes on, use the hitch
pin to connect the spreaders hitch
to the tractors drawbar. You may
need to move the spreaders hitch
around a few inches by hand to
get perfect alignment.
5. The image shown to the right
illustrates proper connection. Be
sure to reinsert the safety lynch
pin into the hitch pin.
6. With the spreader and tractor
securely connected, turn the crank
jack until it no longer touches the
ground. Then remove the locking
pin, pivot the jack to the side and
reinsert the locking pin. Now the
jack is in a travelling position and
no longer holding the spreader.

Elite Hydraulic Spreader Setup Guide
ABI(Absolute Innovations, Inc.) - 855-211-0598 - www.abisupport.com Page | 12
OPERATION:
Attaching to Tow Vehicle -
7. The ratcheting turn knuckle
enables the operator to adjust the
angle of the spreaders frame and
bin to maximize material flow.
Start by cranking the turn knuckle
until the frame of the spreader is
parallel with the level ground.
8. (We recommend wearing work gloves to
connect hydraulics.) Connect both
hydraulic hoses to the hydraulic
ports on the back of your tractor.
The hydraulic motor will not
allow you to operate backwards
so it does not matter which hose
goes into either port.
9. With both hoses securely
connected to the hydraulic ports
(Ensure everyone stands clear) start up
your tractor and run the
hydraulics in both directions. (You
will notice only one direction works.)
Allow the hydraulics to
operate for a few seconds; this
will fill the hoses and motor
with hydraulic fluid. You may
need to refill the tractors hydraulic fluid to
the manufacturer’s recommendation.
10. The final step is to make sure the hydraulic hoses are not dangling
near the ground. If you have excess hoses we recommend using zip ties
to secure them. Leave enough slack for turning. Raise the three point
arms so they allow free movement of hitch.

Elite Hydraulic Spreader Setup Guide
ABI(Absolute Innovations, Inc.) - 855-211-0598 - www.abisupport.com Page | 13
OPERATION:
Loading the Spreader -
There are three primary ways to load the Elite Hydraulic Spreader™ safely.
Also note that the ratcheting turn knuckle, found at the front of the spreader,
may be extended out to lower the loading height at the back of the spreader. It
is also okay to heap the load.
1. Loading Directly From Stall: Depending upon your barn layout you
may find it easiest to pick each stall and load each fork full directly into
the spreader bin. As some tractors may be too large to drive down the
stall isles you may connect your spreader to a smaller tow vehicle, if not
operating on an incline, while cleaning the stalls and then change to a
tractor with hydraulics before spreading.
2. Loading w/Muck Bucket: You
may choose to load the spreader
by picking your stalls into a muck
bucket then loading into the
spreader bin. We have made this
process a little easier by creating a
step on the back of the spreader to
give you more leverage. Please use
proper lifting techniques when
lifting a muck bucket. We also
recommend a tow vehicle be
connected to the spreader if you
will be utilizing the step.
3. Loading w/Tractor Bucket: You
may have piles of manure or
compost piles you would like to
spread. The easiest way to load
this material is to use the bucket
on your front-end loader. Be
careful when dumping the load
that you do not damage the
spreader by running into it. Dump
the load from a high position to
avoid the loader contacting the
spreader. On the 3H model you
may find it easier to approach and
load the spreader from the side.

Elite Hydraulic Spreader Setup Guide
ABI(Absolute Innovations, Inc.) - 855-211-0598 - www.abisupport.com Page | 14
How to Control Material Flow:
The Elite Hydraulic Spreader™ is hydraulically controlled. This enables the
operator to control the placement and flow rate of the spread of material. It is
important to understand how the hydraulic lever, throttle & gear shifter of the
tractor work together to control the spreader. Every tractor with hydraulics is
different but has each of these controls.
1. The hydrualic lever starts and stops the spread of material.
2. The throttle controls how fast material flows out of the spreader.
3. The gear shifter controls how much material is spread.
If you want to output more material lower your gear and raise the throttle. If
you want to output less material raise your gear and lower your throttle. To
spread, the hydraulic lever must be held in the on position. To stop spreading
simply let go and the lever with spring back to off.
STORAGE
Preparing the Elite Hydraulic Spreader™ for Storage
If the spreader is to be stored and will not be operated for some length of time,
take the following steps to insure long life and trouble free startup for the next
usage period.
Remove all manure from the inside and outside of the spreader. Power
washing is a good way to clean the spreader thoroughly but you must be
careful if there are any spots where the paint is chipped away from the metal
as the high pressure washer may get under the paint and peel it away from the
metal.
If at all possible, store the spreader indoors and cover with a plastic sheet or
tarp.
If there are any areas that the paint has been chipped or scratched, these areas
should be touched up with Rust-oleum spray paint or protected from rust with
light oil or grease.

Elite Hydraulic Spreader Setup Guide
ABI(Absolute Innovations, Inc.) - 855-211-0598 - www.abisupport.com Page | 15
MAINTENANCE & LUBRICATION:
General Maintenance -
Remove manure builup regularly. Occasionally wash down the spreader with a
power washer and touch up any chips or scratches in the powder coating with
paint. Check all nuts for tightness and retighten as needed.
Chain Maintenance -
The chain must be oiled with SEA #30 oil
twice a year with regular use or before any
period of storage. The chain guard must be
removed to oil the chain. To remove the
guard, first jack up the spreader from under
the back frame rail, remove the tire and then
remove the 4 bolts on the face of the guard.
The guard is now free to be removed. Oil the
chain and reassemble the spreader. The
chain tension is properly set at the factory.
However, overtime tightening may be
necessary. A chain that is too loose will slip
and causes excessive wear. To tighten the
chain, loosen the four bolts shown to the
right. Then tighten the large tension
adjustment bolt. Then you must retighten the
four bolts to prevent damage to the spreader.
DO NOT OVER TIGHTEN THE CHAIN!
Wheel Assembly Maintenance -
Repack bearings twice a year.
Relief Panel Spring Maintenance -
Top bolt should be tightened to 30 lbs. ft
torque. Make sure to tighten both sides
the same.

Elite Hydraulic Spreader Setup Guide
ABI(Absolute Innovations, Inc.) - 855-211-0598 - www.abisupport.com Page | 16
MAINTENANCE & LUBRICATION:
7 Total Lubrication Points -
For normal operation, spreading a few
times per week, we recommend you
grease each lubrication point once per
month. If using the spreader multiple
hours per day, increase lubrication to
after each use. If you are working all day
with the spreader to eliminate a large
pile we recommend you grease after 8
hours of continuous use. Never grease
with hydraulic hoses connected to
tractor! Doing so may cause serious
personal injury!
1. Right Side Agitator Bar -Found
outside chain shield.
2. Left Side Agitator Bar -Found outside
of bin.
3. Left Side Sprocket -Found inside
chain shield.
4. Right side shredder drum -Found
under frame behind tire
5. Left side shredder drum -Found
under frame behind tire
6. Top of turn knuckle
7. Bottom of turn knuckle
1
2
3
4
5
6
7

Elite Hydraulic Spreader Setup Guide
ABI(Absolute Innovations, Inc.) - 855-211-0598 - www.abisupport.com Page | 17
If you have any other questions about your Elite Hydraulic Spreader please feel free
to contact our Customer Support staff at 855-211-0598. You can also check out our
support page at www.ABIsupport.com for more information and videos on your Elite
Hydraulic Spreader or any of our other quality products.
This manual suits for next models
1
Table of contents
Other abi Spreader manuals