manuals.online logo
Brands
  1. Home
  2. •
  3. Brands
  4. •
  5. ABSTRACT
  6. •
  7. Lighting Equipment
  8. •
  9. ABSTRACT LUD48-D User manual

ABSTRACT LUD48-D User manual

USER MANUAL
V-4.1
LUD48-D
LUD48-4
LUD192-D
DIMENSIONS
LUD48-4
Output Current 350mA
LED Outputs 4
Max Voltage 48V
Power Consumption 75W
Channels 1-16Ch (RGB[W])
Power Input Mains 100-240VAC
Data & LED Connections RJ45
Operating Temp Range -20 to 50 °C
234mm
48.40mm
48.40 mm
265 mm
311 mm
48.40mm
185mm
TECHNICAL SPECIFICATIONS
DIMENSIONS
LUD48-D
Output Current 350mA
LED Outputs 1
Max Voltage 48V
Power Consumption 60W
Channels 1-4Ch (RGB[W])
Power Input Mains 100-240VAC
Data & LED Connections RJ45
Operating Temp Range -20 to 50 °C
sales@abstract.co.uk
www.abstract.co.uk Open Mon - Fri 8am - 5pm
T: +44 (0)116 278 8078
64.50 mm
271.20 mm
242 mm
65.50mm
48.40mm
48.40mm
242mm
271.20mm
DIMENSIONS
LUD192-D
Output Current 350mA
LED Outputs 4
Max Voltage 48V
Power Consumption 240W
Channels 1-16Ch (RGB[W])
Power Input Mains 100-240VAC
Data & LED Connections RJ45
Operating Temp Range -20 to 50 °C
234mm
48.40mm
48.40 mm
265 mm
311 mm
265mm
311mm
COMPATIBLE PRODUCTS & LOADS
x 12
CS16 / SL4 /
LUS400
SL8 / LUS800
SL12 / LUS1200
CS4
x 3
x 1
x 1
Output 1 Output 1 Output 2 Output 3 Output 4
LUD48-4
x 3
x 1
-
-
x 3
x 1
-
-
x 3
x 1
-
-
x 3
x 1
-
-
LUD48-D
sales@abstract.co.uk
www.abstract.co.uk Open Mon - Fri 8am - 5pm
T: +44 (0)116 278 8078
Output 1 Output 2 Output 3 Output 4
LUD192-D
x 12
x 3
x 1
x 1
x 12
x 3
x 1
x 1
x 12
x 3
x 1
x 1
x 12
x 3
x 1
x 1
DRIVER CONECTIONS
RJ45 (DMX)
Connect in/out
for continuous
data if more
drivers are
required.
Mains IEC 100-240VAC
RJ45 (LED)
Connect to
desired LED
unit.
RJ45 (DMX)
Connect in/out
for continuous
data if more
drivers are
required.
Mains IEC
90-252VAC
RJ45 (LED)
Connect to
desired LED
unit.
LUD48-4 / LUD192-D
LUD48-D
Pin 1: Red LED +
Pin 2: Green LED +
Pin 3: Blue LED +
Pin 4: White LED +
Pin 5: Red LED -
Pin 6: Green LED -
Pin 7: Blue LED -
Pin 8: White LED -
Pin 1: Data +
Pin 2: Data -
Pin 3: Ground
Pin 4: 48V
Pin 5: 48V
Pin 6: 48V
Pin 7: Ground
Pin 8: Ground
RJ45 (LED) RJ45 (DMX)
Pin 1: Red LED +
Pin 2: Green LED +
Pin 3: Blue LED +
Pin 4: White LED +
Pin 5: Red LED -
Pin 6: Green LED -
Pin 7: Blue LED -
Pin 8: White LED -
Pin 1: Data +
Pin 2: Data -
Pin 3: Ground
Pin 4: 48V
Pin 5: 48V
Pin 6: 48V
Pin 7: Ground
Pin 8: Ground
RJ45 (LED) RJ45 (DMX)
(switchable)
(switchable)
sales@abstract.co.uk
www.abstract.co.uk Open Mon - Fri 8am - 5pm
T: +44 (0)116 278 8078
WARNING: Although this unit uses similar connectors to a computer net-
work, it is not compatible. Network equipment may be damaged if you
connect this unit to a computer network.
WARNING: Although this unit uses similar connectors to a computer net-
work, it is not compatible. Network equipment may be damaged if you
connect this unit to a computer network.
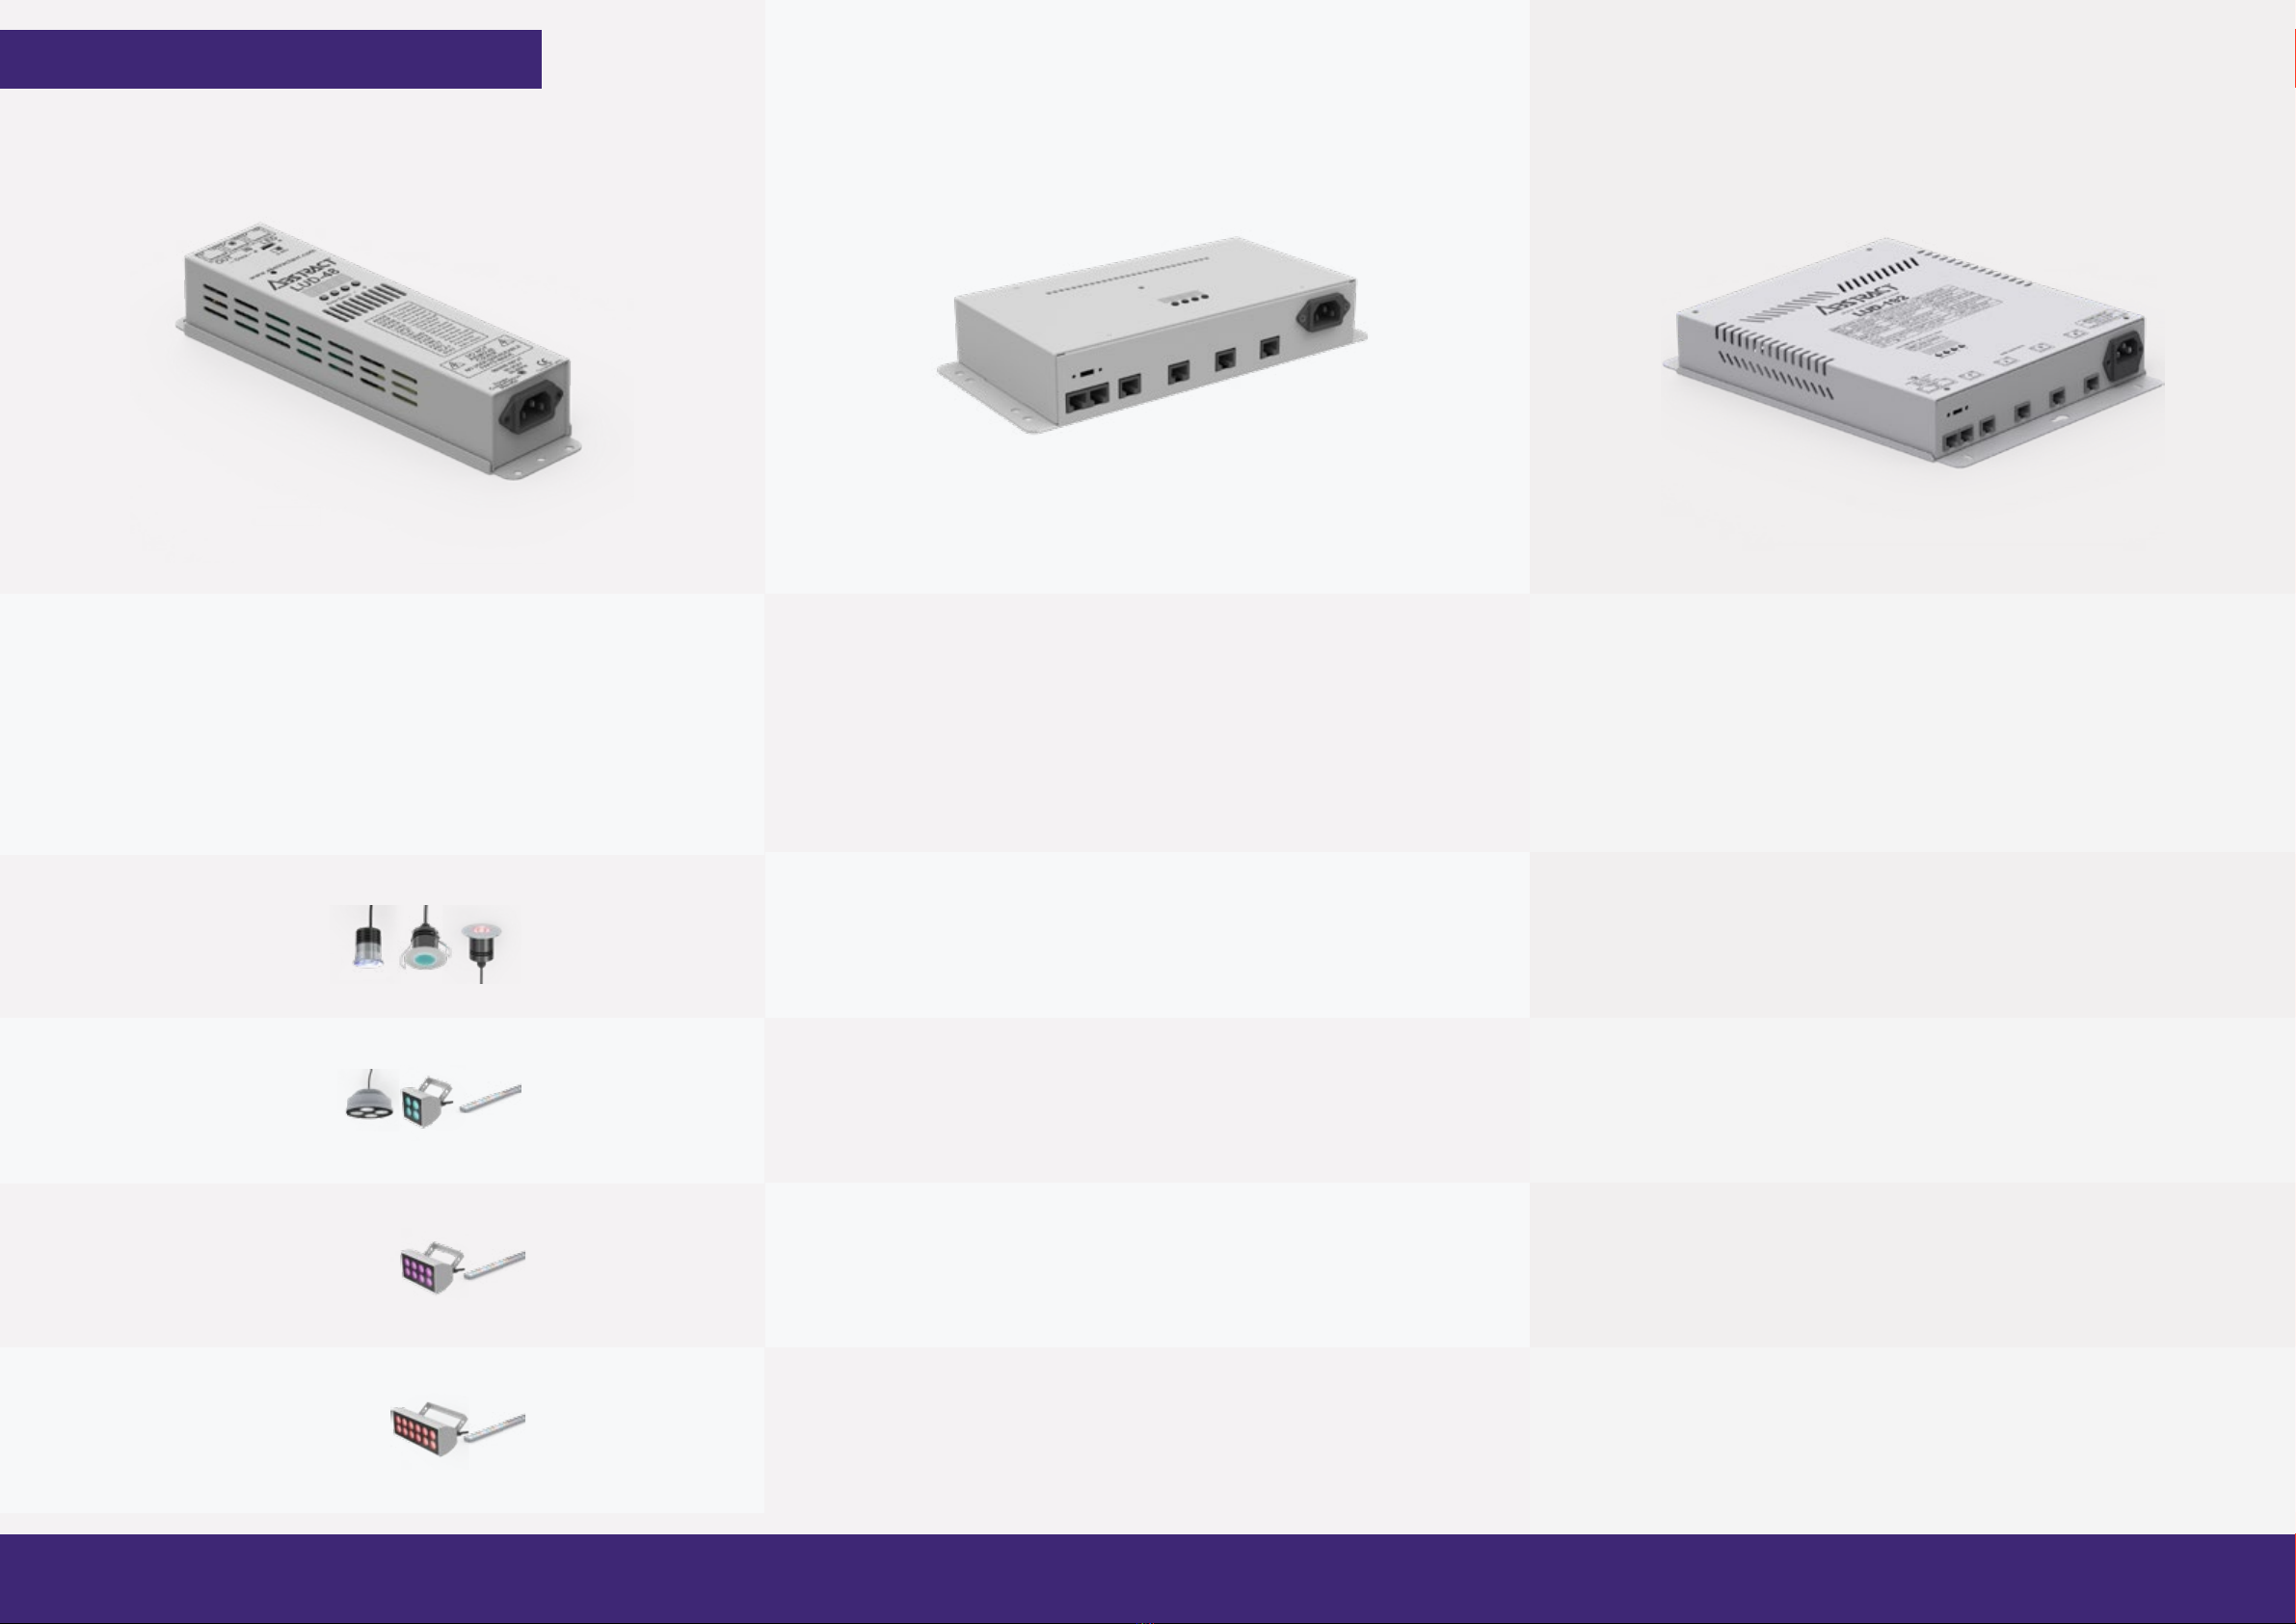
CONNECTING LED FIXTURES
sales@abstract.co.uk
www.abstract.co.uk Open Mon - Fri 8am - 5pm
T: +44 (0)116 278 8078
RJ45 (LED)
Connect to
desired LED
unit.
RJ45 (OUT)
Connect to
next T-Piece ‘IN’
or end of line LED
unit.
RJ45 (IN)
Connect from
driver output to
‘IN’.
T-PIECE WIRING
(FOR MULTIPLE UNITS ON DRIVER OUTPUT)
IMPORTANT
All work involving electrical components should be carrieD out by a competent qualied
electrical professional in accordance to IET BS 7671 and any local by-laws.
All mains power MUST be turned off before starting installation or maintenance; and
MUST remain off for the duration of installation or main-tenance.
Equipment may become hot to the touch when used for periods of time. Ensure equipment
is off and cooled before carrying out maintenance.
DO NOT connect or disconnect LED units while mains power is connected. All RJ45 connec-
tions MUST be made before mains power is connected. Failure to do so may result in cata-
strophic failure of the LED.
You can install any combination of LED units from a single ‘LED’ output on the Driver, ensur-
ing the total combined forward voltage of the ttings
connected to any single ‘LED’ output DOES NOT EXCEED 48V and is NO LESS THAN 8V.
TESTING
You should test each tting in isolation before continuing installation.
1. Disconnect the Driver from mains power.
2. Connect LED unit to the ‘LED’ socket of the Driver in isolation.
3. Power up the Driver.
4. Press ‘ENT’ continuously to select RED, GREEN, BLUE and WHITE.
5. Repeat steps 1 to 4, for each tting.
If each LED unit lights up and displays each colour you can continue with your installation.
If a LED unit does not light up or display each colour please contact us for help. Do not con-
tinue your installation.
CONNECTING INDIVIDUAL LED UNITS
Ensure you have carried out the testing before installation.
1. Disconnect the Driver from mains power.
2. Using a RJ45 patch lead connect from ‘LED’ socket of the Driver to ‘IN’ socket of
In-line connector.
3. Connect the RJ45 of LED unit to ‘OUT’ socket of In-line connector.
(1x ‘IN’ socket, 1x ‘OUT’ socket).
CONNECTING MULTIPLE LED UNITS
Ensure you have carried out the testing before installation.
1. Disconnect the Driver from mains power.
2. Using a RJ45 patch lead connect from ‘LED’ socket of the Driver to ‘IN’ socket of
T-Piece.
3. Connect the RJ45 of LED unit to ‘LED’ socket of T-Piece
(1x ‘LED’ socket, 1x ‘IN’ socket, 1x ‘OUT’ socket).
4. Connect a RJ45 patch lead from ‘OUT’ socket of T-Piece to ‘IN’ socket of next T-Piece.
5. Repeat steps 3. and 4 for each tting, ensuring you do not exceed a total forward
voltage of 48V to each ‘LED’ output of the Driver.
6. The last LED unit should be terminated with an In-line connector in place of the last
T-Piece. (1x ‘IN’ socket, 1x ‘OUT’ socket).
IMPORTANT: WHEN CONNECTING THE LAST LED UNIT, PLEASE ENSURE THAT YOU LEAVE NO OPEN
RJ45 CONNECTIONS ON THE CIRCUIT BY TERMINATING WITH IN-LINE CONNECTOR. LEAVING OPEN
TERMINALS WILL LEAVE THE CIRCUIT INCOMPLETE.
OPERATION, MODES & SETTINGS
sales@abstract.co.uk
www.abstract.co.uk Open Mon - Fri 8am - 5pm
T: +44 (0)116 278 8078
OPERATION, MODES & SETTINGS
sales@abstract.co.uk
www.abstract.co.uk Open Mon - Fri 8am - 5pm
T: +44 (0)116 278 8078
OPERATION, MODES & SETTINGS
sales@abstract.co.uk
www.abstract.co.uk Open Mon - Fri 8am - 5pm
T: +44 (0)116 278 8078
OPERATION, MODES & SETTINGS
sales@abstract.co.uk
www.abstract.co.uk Open Mon - Fri 8am - 5pm
T: +44 (0)116 278 8078
OPERATION, MODES & SETTINGS
sales@abstract.co.uk
www.abstract.co.uk Open Mon - Fri 8am - 5pm
T: +44 (0)116 278 8078

This manual suits for next models

2

Other ABSTRACT Lighting Equipment manuals

ABSTRACT VR8 User manual

ABSTRACT

ABSTRACT VR8 User manual

ABSTRACT VR8 User manual

ABSTRACT

ABSTRACT VR8 User manual

Popular Lighting Equipment manuals by other brands

EuroLite LED KLS-2001 user manual

EuroLite

EuroLite LED KLS-2001 user manual

Magneti Marelli 007935030140 owner's manual

Magneti Marelli

Magneti Marelli 007935030140 owner's manual

Magnum Mx-ILS2 installation guide

Magnum

Magnum Mx-ILS2 installation guide

SGM P Series user manual

SGM

SGM P Series user manual

Sygonix 2361005 operating instructions

Sygonix

Sygonix 2361005 operating instructions

Cameo OTOS SP6 user manual

Cameo

Cameo OTOS SP6 user manual

Alkalite Tracpod Tp-81 user manual

Alkalite

Alkalite Tracpod Tp-81 user manual

Cameo EVOS W7 IP user manual

Cameo

Cameo EVOS W7 IP user manual

EcoxGear SOUNDEXTREME SEI-SEUGLW1236 user guide

EcoxGear

EcoxGear SOUNDEXTREME SEI-SEUGLW1236 user guide

Cheyenne HAWK SPIRIT operating instructions

Cheyenne

Cheyenne HAWK SPIRIT operating instructions

Bruck 220 490 user manual

Bruck

Bruck 220 490 user manual

Chauvet Pinspot YA-15 user guide

Chauvet

Chauvet Pinspot YA-15 user guide

Coemar Infinity Spot S instruction manual

Coemar

Coemar Infinity Spot S instruction manual

hillvert HT-WEDGE-48L user manual

hillvert

hillvert HT-WEDGE-48L user manual

Spitzer LIGHTING STR-22-25W-CCT installation manual

Spitzer LIGHTING

Spitzer LIGHTING STR-22-25W-CCT installation manual

ProLights LUMIPAR7QPRO user manual

ProLights

ProLights LUMIPAR7QPRO user manual

Emos D4AA03 quick start guide

Emos

Emos D4AA03 quick start guide

Dale Tiffany TA60214 Assembly instructions

Dale Tiffany

Dale Tiffany TA60214 Assembly instructions

manuals.online logo
manuals.online logoBrands
  • About & Mission
  • Contact us
  • Privacy Policy
  • Terms and Conditions

Copyright 2025 Manuals.Online. All Rights Reserved.