AC Air Technology AC TRACKTECH T1X2 User manual

Instruction Manual MODEL: AC TRACKTECH T1X2
World’s First Portable, Remote-Control Aircraft Tugs
95373 Rev. D

Contents
1. Components
2. Start-Up Guide
2-1. Radio Operation
2-2. Operating the Tug
2-3. Adjusting the Wheel Cradle
2-4. Adjusting Dovetail Spacers
2-5. Adjusting the Track Tension
2-6. Loading the Tug
2-7. Unloading the Tug
2-8. Installing the Cradle Extender
2-9. Charging the Tug
2-10. Charging the Transmitter
2-11. Replacing Transmitter Batteries
2-12. Spare Parts
2-13. Track Tools
3. Warranty

1. Components
Tug
Booster Plate
Tug Charger
Cradle Extender
Radio Transmitter Battery Tray Radio Charger
Owners Manual Spare Parts Bag

2-1. Radio Operation
ON/OFF
Switch
Control Stick
Dual Rate Switch
Latch Switch Power Indicator
LED
2. Start Up Guide
1. Switch the radio on and make sure the power indicator light turns on and the
radio beeps once. If this does not happen, check to make sure the batteries
were installed correctly. When the battery level for the radio becomes low the
radio will begin to beep, signaling you to replace or recharge the batteries.

Reverse
Right
Forward
Left
2. Start Up Guide
Warning: The control stick on the remote is very sensitive and will cause
the tug to move if it is moved accidenally. When not using the remote it is
recommended that the power switch is turned off.
Note: If the remote is not used for more than a couple minutes it will start
beeping as a indicator that it is still in the on position. This is not an indica-
tor of a low battery.
2. To drive the tug, move the control stick in the desired direction.
Forward
Right
Reverse
Left

2-2. Operating the Tug
2. Start Up Guide
1. Before turning on the tug, make sure that the tracks and bottom of the tug are free
from obstruction.
2. Turn the tug on using the ON/OFF button. There will be a short series of beeps and
then the power indicator LED around the Power button will illuminate to show the tug
is on. The Power indicator LED will blink to indicate the charge level of the battery is
low.
3. Turn on the power switch on the radio controller and the power indicator LED will be
green and the transmit indicator LED will be red.
ON/OFF Button/Power Indicator
Circuit Breaker Access Hole

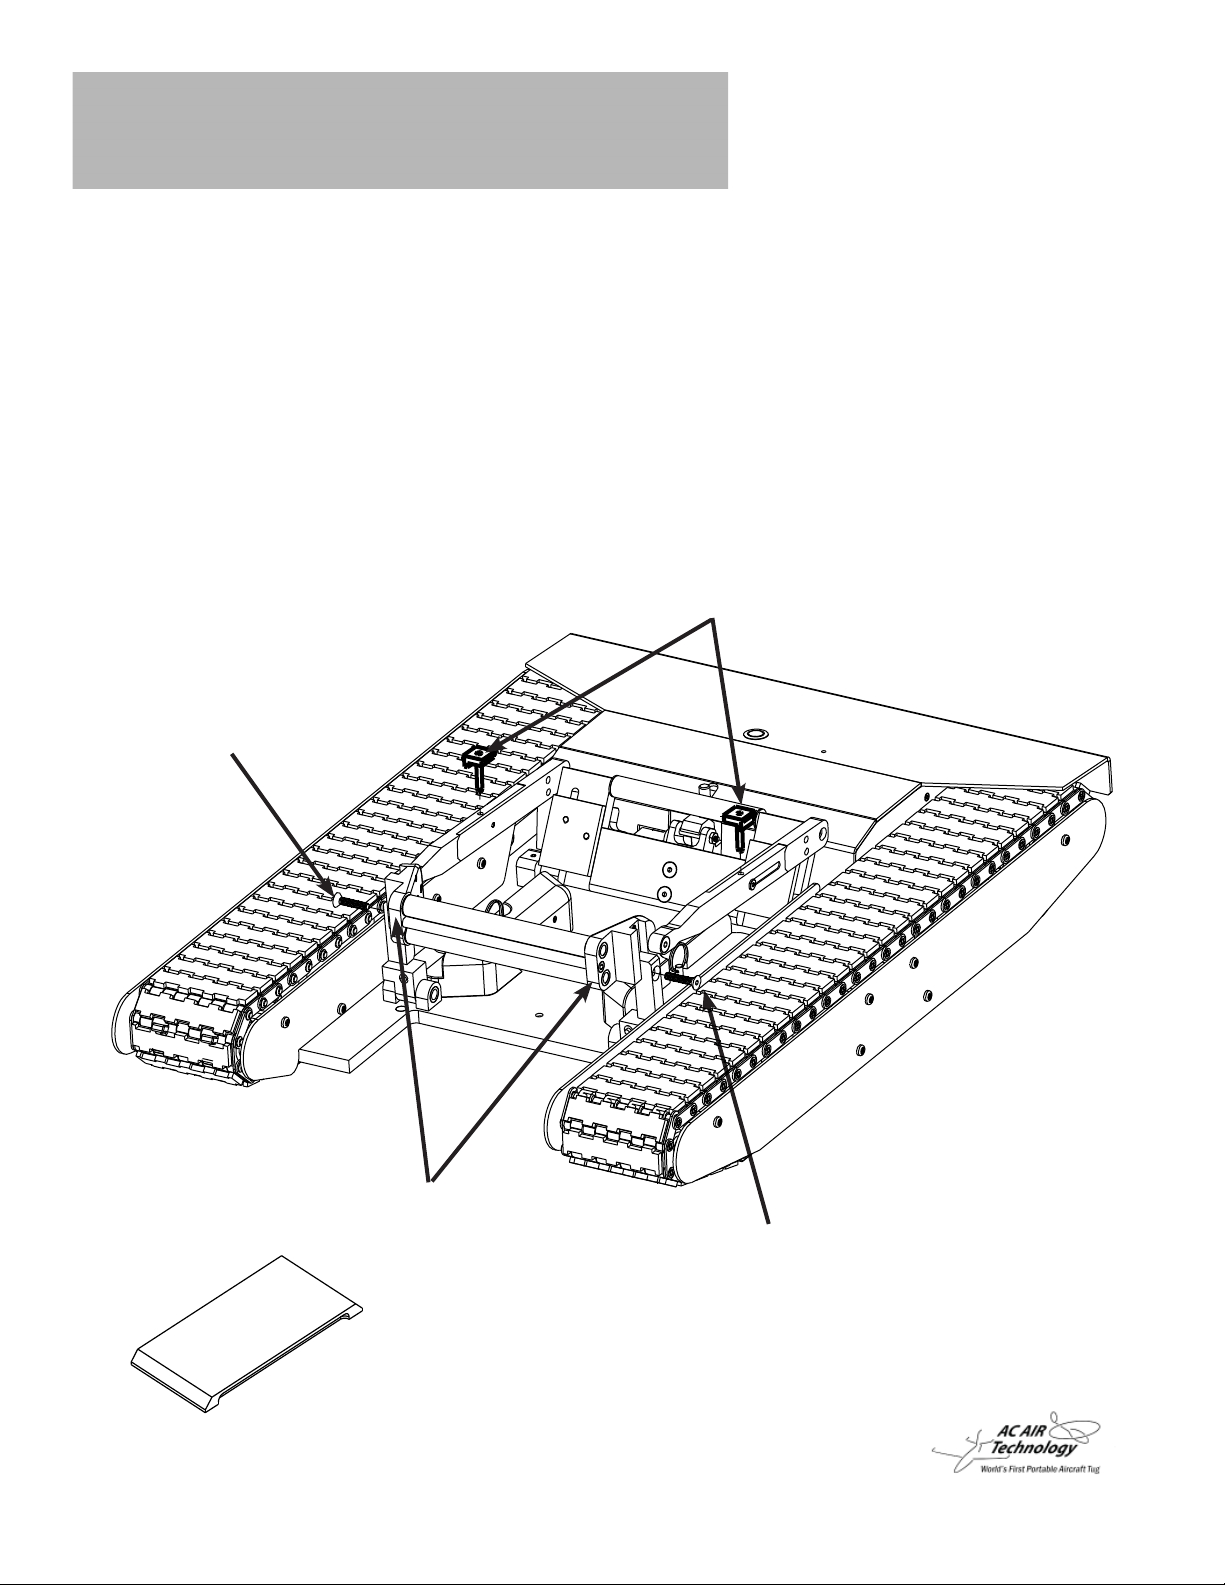
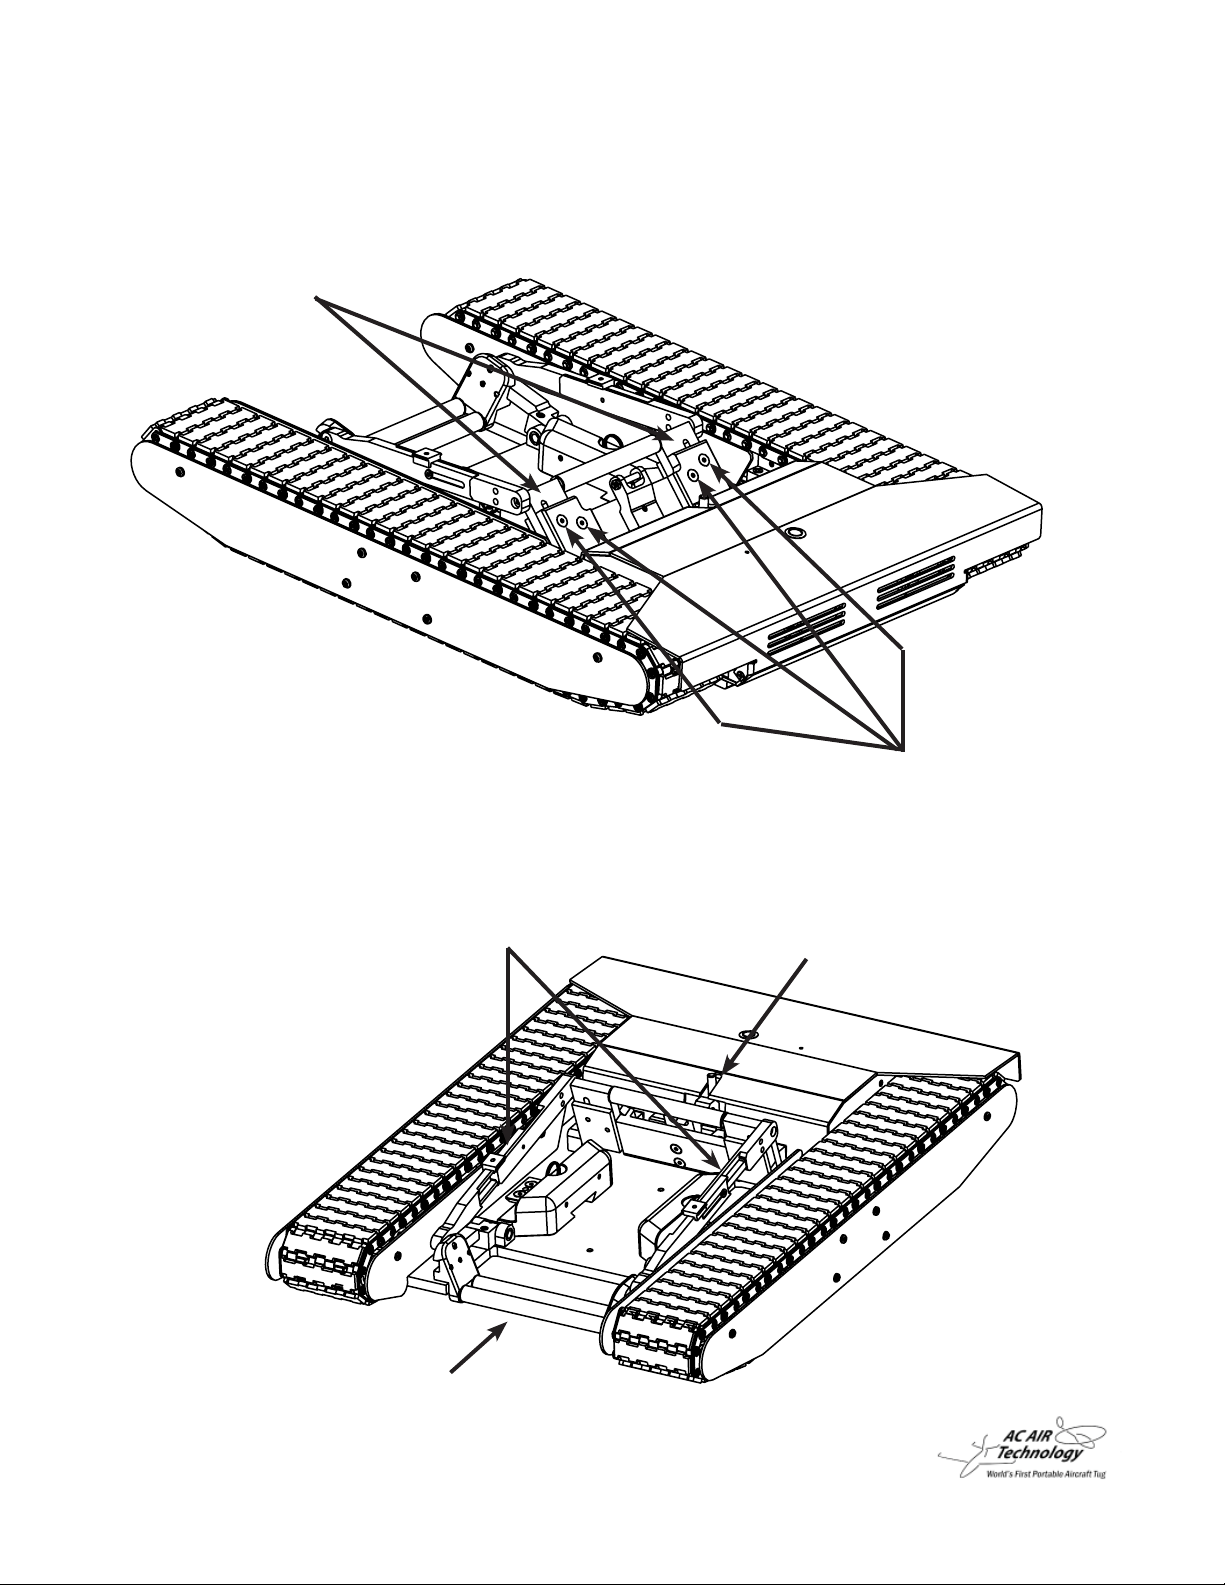
Check for proper seating and alignment.
5. After lifting the tug off of the ground for any reason or taking it in and out of your
aircraft, you must check to make sure the sprockets are correctly seated on the
tracks. If the sprocket is not properly seated, it could result in damage to the tracks.
6. Visually check tracks for wear on the treads and wear on the inner plastic surfaces.
Also inspect for damaged or missing rotoclips as a result of driving over small rocks.
Damaged threads should be replaced beore operating the tug.
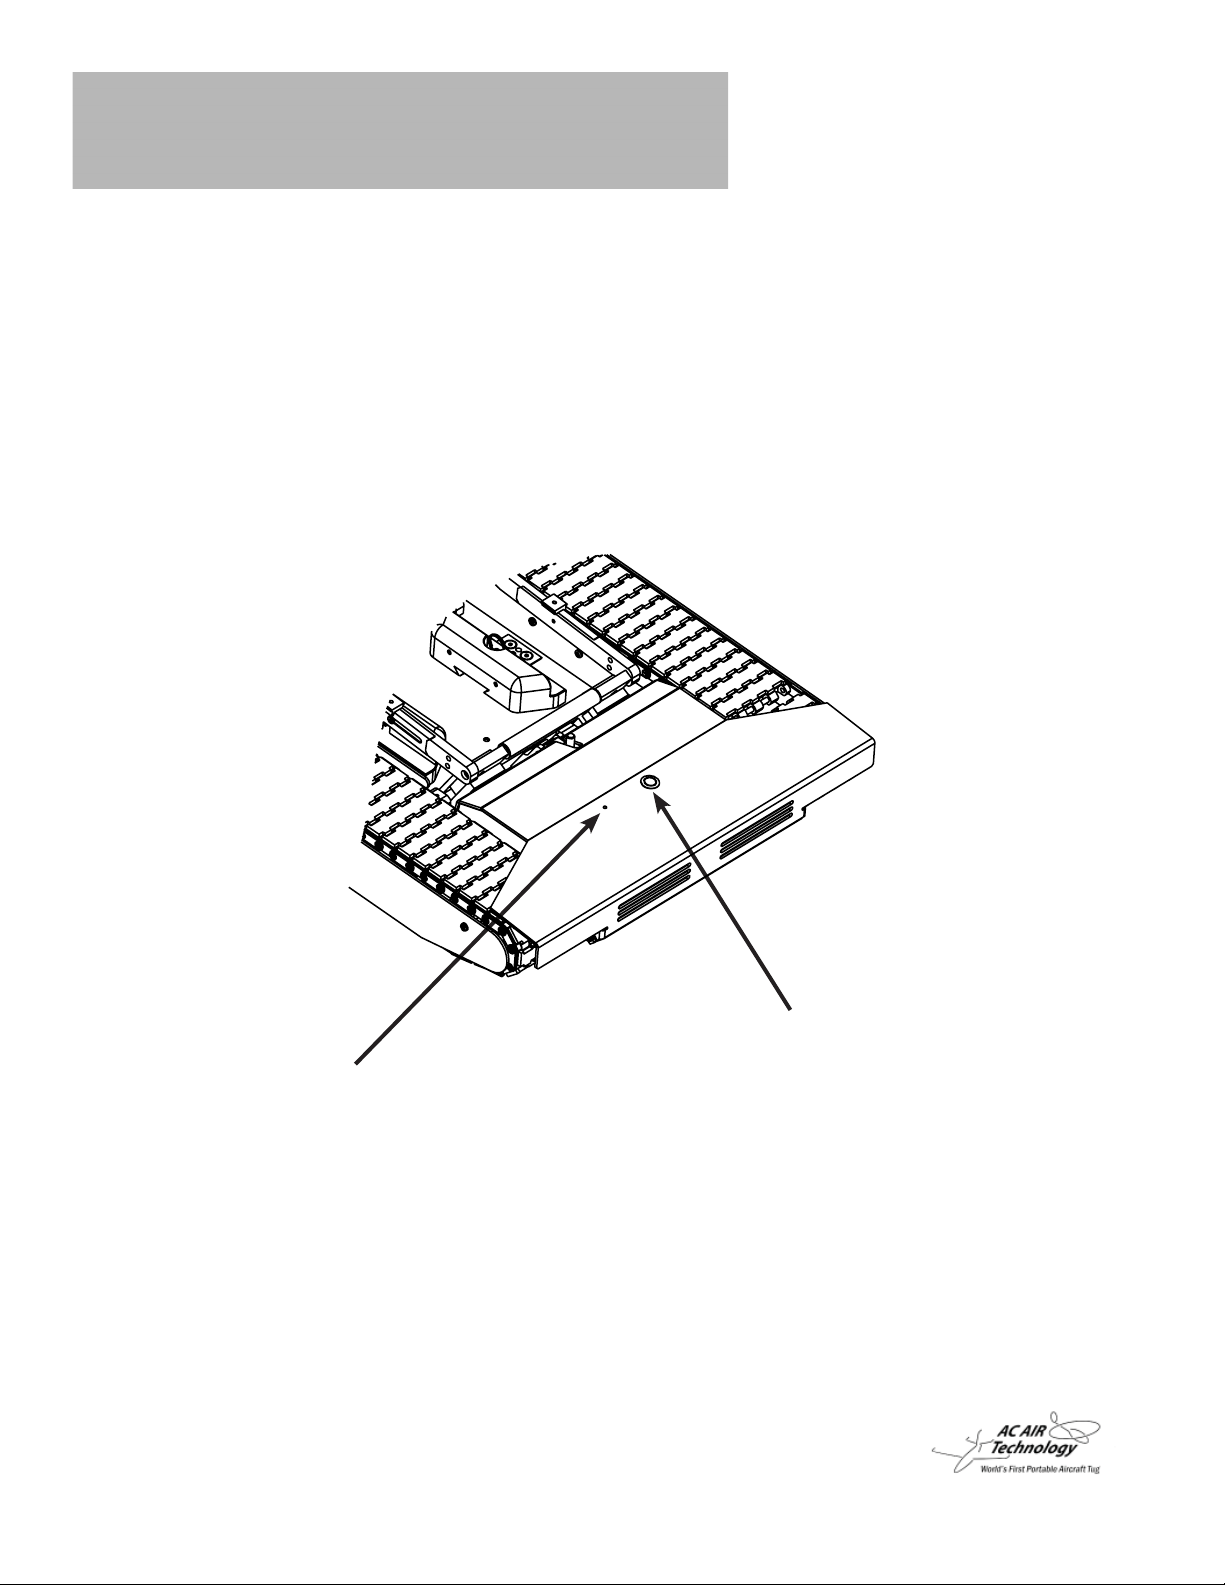
Note: The circuit breaker reset button will trip if the tug is overloaded. To reset
the circuit breaker open the top cover to push the reset button down. If the
reset button pops back up then wait 1 minute and try again.
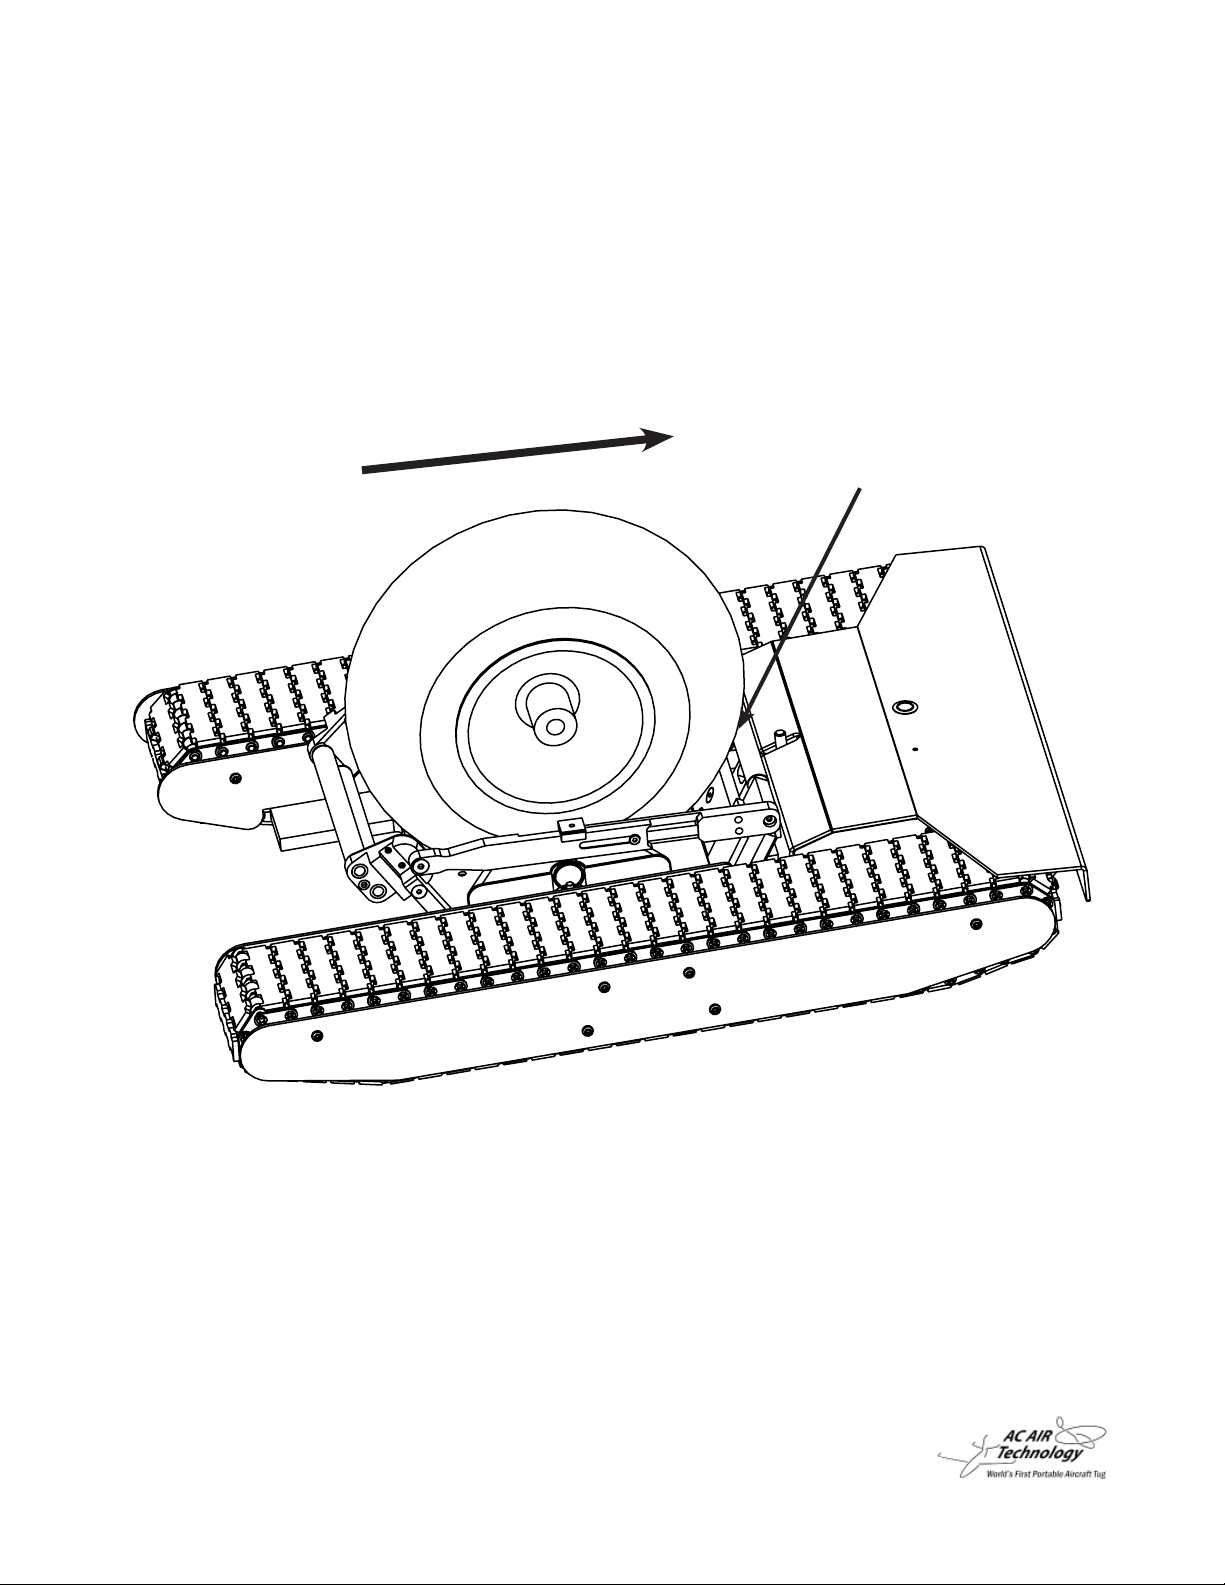
4. When towing your airplane ALWAYS be cautious of the steering angle limitations of
your aircraft. Do not oversteer your aircraft with the tug. This can cause damage to
your gear.

2. Start Up Guide
2-3. Adjusting Wheel Cradle to Your Tire
1. When towing a non-fairing aircraft make sure the front and back cradle gates are adjusted
in the fully extended position. For aircraft with fairings adjust the cradle gates to the lowest
setting. If extra clearance is needed position the booster plate on the center of the main
plate between the dovetail spacers.
2. To adjust the front gate remove the flat head screws from each side and slide the right and
left ramp blocks to the desired position. Then reinstall the flat head screws on each side.
Note: It may be easier to remove these screws with the link locking pins removed.
Ramp Blocks
Flat Head Screw
Flat Head Screw
Link Locking Pins
Booster Plate

3. To adjust the back gate loosen the 4 flat head screws on the back of the gate. Then
slide the right and left sliders to the desired position. Tighten all 4 of the flat head
screws.
Right and Left Sliders
Flat Head Screws
4. Use the cradle release lever to un-latch the cradle and position the wheel cradle in the
down position. Adjust the connecting links to the longest length by removing the link
locking pins and extending the links. Then re-insert the link locking pins in the link holes.
Wheel cradle to be in position shown.
Connecting Links Cradle Release Lever

5. Place wheel chocks behind the rear tires of plane to ensure the plane does not roll
backwards.
6. Drive tug under the wheel of the plane until the wheel cradle locks in the upright position.
Make sure the wheel is touching the back gate as shown.
Wheel touching here.

5. Remove the adjustment pins and push front side of cradle until it is touching the tire
and re-install the pins. If pins cannot be installed while front side is touching the tire,
move front side of cradle away from the tire until the pin can be inserted into the next
closest hole. You do not want this to be too tight on the tire.
Do not force the adjustment pins in.
6. Release the latch using the radio and back the tug out from under the plane. Drive the
tug back under the tire to check that the wheel cradle is set up correctly and
to ensure the cradle is latching securely. When releasing the latch always make sure
the wheel is against the back gate. If not, the latch may not release properly.
Push this side up
towards the tire
Adjustment Pins

2. Start Up Guide
2-4. Adjusting the Dovetail Spacers to Your Tire Adjustment Pin
Dovetail Spacer
1. If the dovetail spacers are in the furthest back position (as shown below) and your tire
does not fit or it is too close of a fit remove the dovetail spacers and adjustment pins.
Furthest Back Postion

2. Adjust the dovetail spacers by removing the adjustment pin and sliding the spacers
towards eachother. Ideally the dovetail spacers should be moved the same distance on
each side to keep the tire centered in the cradle. The distance between the dovetail
spacers should equal the width of your tire plus one inch maximum.
3. Align each dovetail spacer to the nearest hole in the dovetail guide. Insert the adjustment
pin in either one of the two aligning holes on the dovetail spacer. The cradle might limit the
access to one of the aligning holes therefore insert the adjustment pin into the aligning
hole that is easily accessible.
Dovetail Guide is under
the Dovetail Spacer
Width of your tire
plus 1” max

2. Start Up Guide
2-5. Adjusting the Track Tension
Track tension might need to be adjusted after several hours of use. Follow the instructions
below for each track.
1. Remove 6 track cover screws and remove the outside plastic track cover.
Track Cover Screws
Plastic Track Cover
2. Loosen three front rail end retainer screws. It may be necessary to rotate the large
sprocket to get to one of the retainer screws.
3 Retainer Screws
on outer Side of Rail

3. Push the rail end forward using a small pry bar to tighten up the track. There should be
about a 1/2” of play at the center of the track.
Push Rail
End Forward 1/2” Up and Down Play at Center of Track
4. Tighten up all 3 retainer screws and reinstall the plastic track covers.
Install Plastic Track Cover Using 6 Screws.
5. Repeat steps 1 thru 4 for the other track.

2. Start Up Guide
2-6. Loading the Airplane Wheel onto Tug
1. Turn the tug power on and the radio power on.
2. Use the latch release switch on the radio to lower the tire cradle
3. Drive the tug to position it just in front of the wheel.
(Some tail draggers can be approached from the front or the back depending on the
wheel configuration)
4. Drive the tug under the wheel at a moderate speed. No need to get a running start.
5. The wheel will roll up onto the tug and will push the back gate of the cradle to the latched
position.
Note: It may be necessary to apply a little pressure with your foot to the top of the
battery cover to get the wheel started onto the tug.
6. Drive the tug in the forward or backward direction to maneuver the airplane to its desired
location.
Note: Be cautious of the steering angle limitations of your aircraft. Do not oversteer
your aircraft with the tug. This can cause damage to your gear.)
2-7. Unloading the Airplane Wheel Off of the Tug
1. Turn the tug power on and the radio power on if not already on.
2. Push the tug slightly forward so the airplane tire puts pressure on the back gate of the
cradle.
(The back gate is the gate that is closest to the latch mechanism)
3. While holding a slight pressure on the back gate release the latch by holding the latch
release switch on the radio.
4. While still holding the latch release switch move the tug away from the tire.
5. The front gate should go down and the airplane tire will roll out of the cradle.

2. Start Up Guide
2-8. Installing the Cradle Extender
The Cradle Extender secures the tire in the cradle when traveling over rough terrain
or steep inclines. It is recommended to use the Cradle Extender when operating the
tug under these conditions.
NOTE: The extender cannot be used on fairing wheels nor in conjunction with the
AC Air Technology Tail Dragger Attachment option.
Attach the Cradle Extender to the cradle link holes using 4 attachment screws
Cradle Link Holes
Attachment Screws
Cradle Extender

2. Start Up Guide
2-9. Charging the Tug
1. Before charging your tug, be sure the radio and tug are both turned OFF.
2. The charging indicator light on the charger should light up red once the charger is
connected properly. The tug will be fully charged once the charge indicator light turns
green.
It is recommended to leave the tug charging when not in use.
3. Once it is fully charged, unplug the charger and turn the tug on. Then turn the tug off for a
few seconds and back on again. This will resets the tug. It is now ready to be used.
Charging Jack Charging Indicator
Light

2. Start Up Guide
2-10. Charging the Transmitter
WARNING: Only use the supplied charger to charge the transmitter when using the
supplied batteries or the following:
- 1200mAh Ni-MH or Ni-Cd ‘AA’ Rechargeable Batteries
The use of the transmitter charger with alkaline batteries installed can damage the
transmitter. Do not use the charger if alkaline batteries are installed in the transmitter.
1. Plug the transmitter charger into a 110v AC wall socket.
2. Plug the connector from the charger into the charging jack on the transmitter. The charger
LEDs will illuminate red, indicating that the charger is charging.
3. The charging rate of the charger is 150mAh. When using the 1200mAh batteries that are
supplied, the radio requires an 2-4 hour charge when fully discharged (1200/150=8). If us-
ing 2200mAh batteries, it will take approximately 4-6 hours ro recharge (2200/150=14.6).
It is recommended to keep the transmitter charging when not in use.
Charging Jack

Cover Screws
Back Cover
Battery Pack or
Battery Tray
2-11. Replacing the Transmitter Batteries
1. Remove 4 cover screws from back of transmitter case.
2. Remove back cover from transmitter case.
3. Replace old battery pack with new battery pack.
Note: A battery tray is provided with the tug. It can be used with standard AA
rechargable batteries. Refer to section 2-10.
2. Start Up Guide
Other manuals for AC TRACKTECH T1X2
2
Table of contents
Other AC Air Technology Utility Vehicle manuals