7
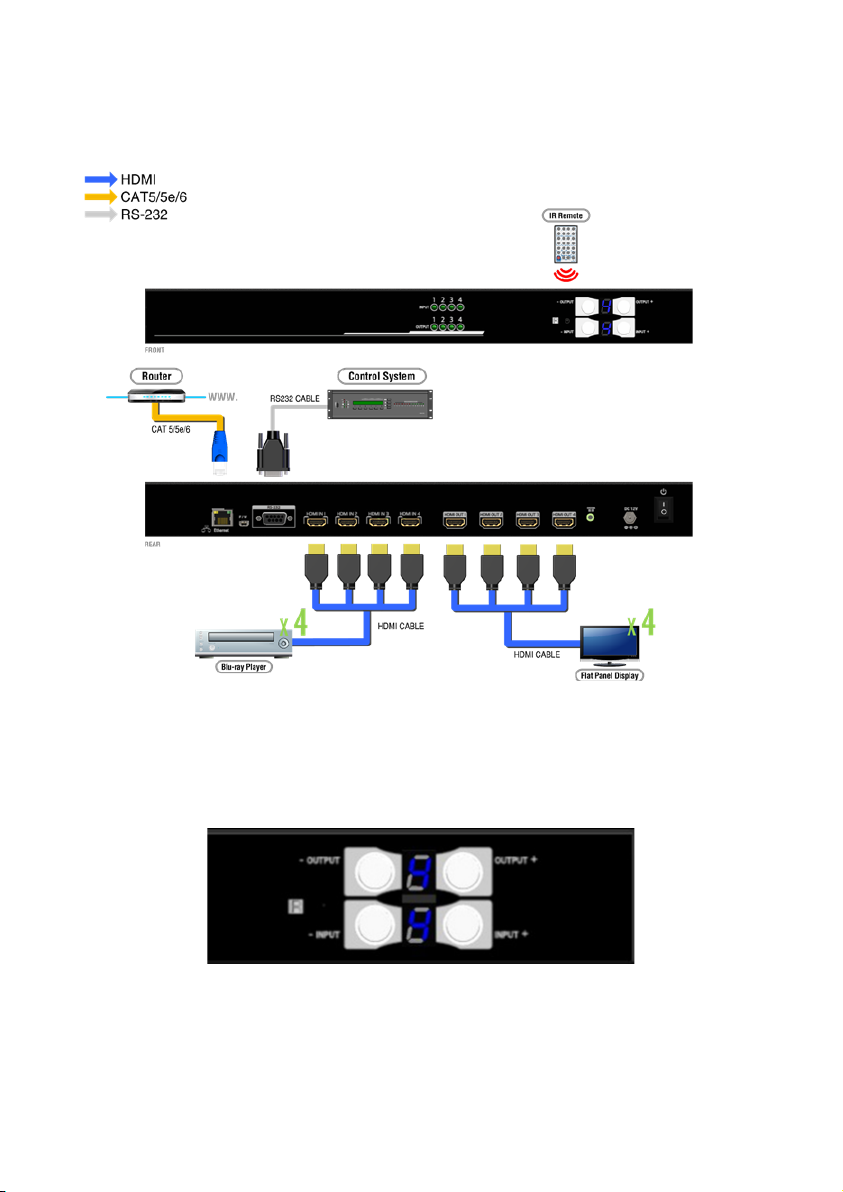
• Example of function key
Operation Procedure 7-Segment LED
Mute Output Mute + A~D(Output 1~4) + Take
Ex: Mute Output 3
1. Press “MUTE” button -
0
2. Press number key “C” to select Output 3 3
0
3.Press “TAKE” button 3
0
Output Status Status + A~D(Output 1~4) + Take
Ex: Output 4
(Input 2)
1.Press “STATUS” button -
-
2.Press number key “D” to select Output 4 4
3.Press “TAKE” button
-
4
2
Save Current Mapping
Save + A~H(1-8 storage site) + Take
Ex: Save current
mapping to 5
1.Press “SAVE” button d
-
2.Press number key “E” to select the storage site 5 d
5
3.Press “TAKE” button
Preset Mapping Preset + A~H(1-8 storage site) + Take
Ex: Preset saved mapping
from 5
1.Press “PRESET” button P
-
2.Press number key “E” to select the storage site 5 P
5
3.Press “TAKE” button
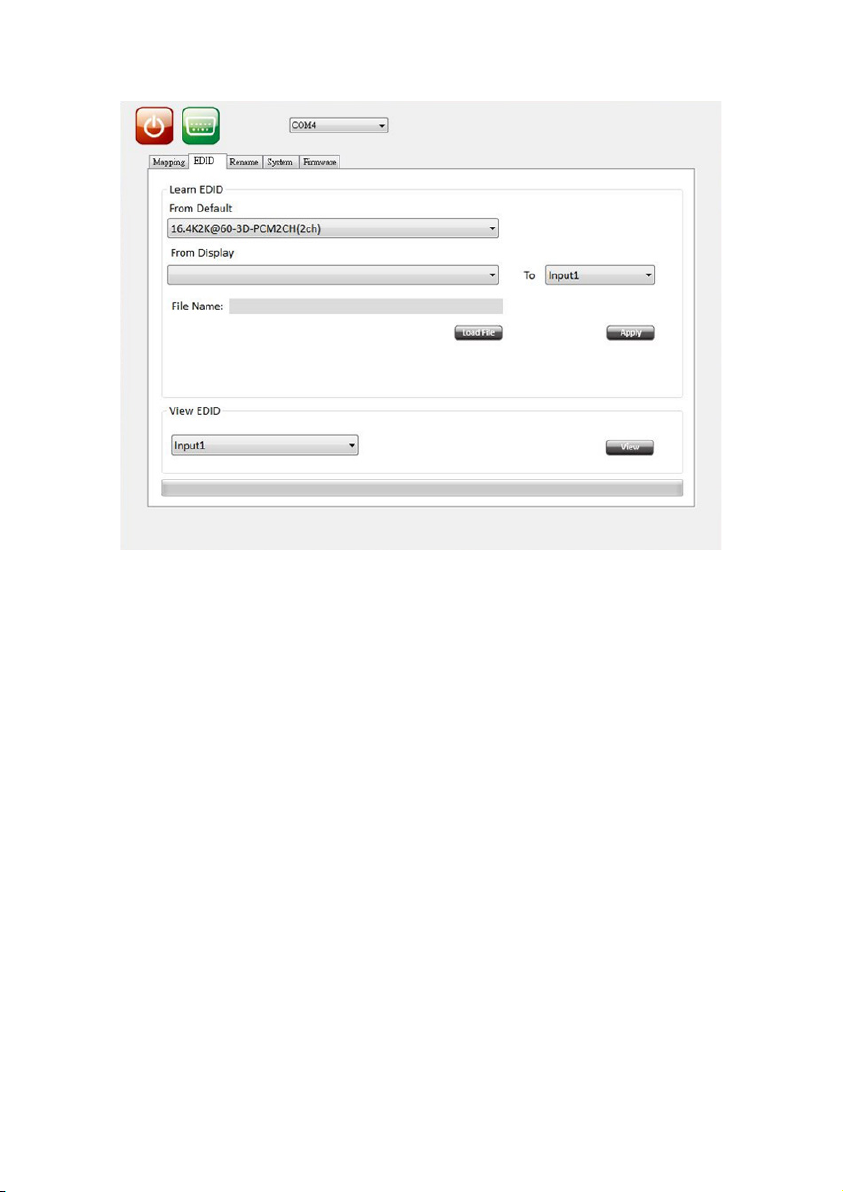
Learn default EDID
Default EDID + A~H(1-8 default EDID) + I~IV(input 1~4) + Take
Ex: Default EDID 2
Input 3
1.Press “DEFAULT EDID” button E
d
2.Press number key “B” to select default EDID 2 2
d
3.Press number key “III” to select Input 3 2
3
4.Press “TAKE” button 0 (success) F (fail)
Learn Output EDID Learn + A~B(Output 1~2) + I~IV(input 1~4) + Take
Ex: Learn Output 4
Input 3
1.Press “LEARN” button E
L
2.Press number key “D” to select Output 4 4
L
3. Press number key “III” to select Input 3 4
3
4.Press “TAKE” button 0 (success) F (fail)
Mute Output Mute + A~B(Output 1~2) + Take
Ex: Mute Output 3
1. Press “MUTE” button -
0
2. Press number key “C” to select Output 3 3
0
3.Press “TAKE” button 3