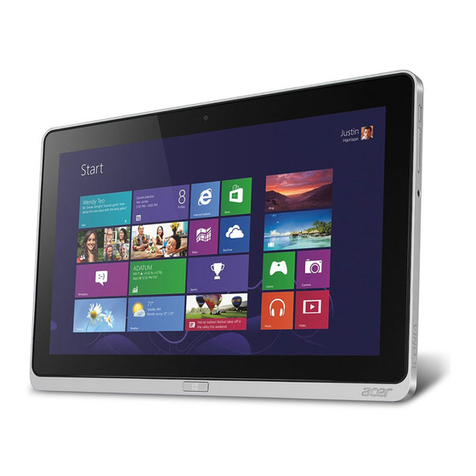
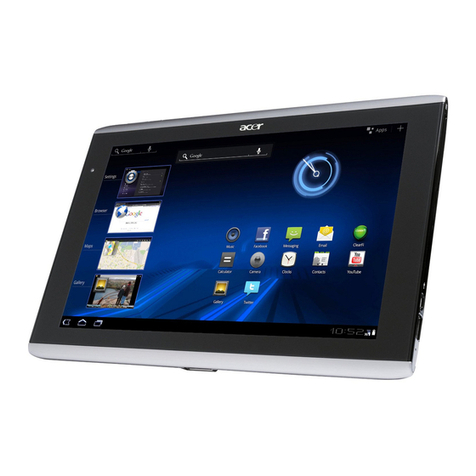
Acer Iconia A1-810 User manual

Iconia A1-810
SERVICE GUIDE

ii
Revision History
Refer to the table below for the updates made to this Iconia A1-810 service guide.
Service guide files and updates are available on the ACER/CSD website. For more
information, go to http://gcsd.acer.com.tw/GCSD_Portal/.The information in this guide is
subject to change without notice.
Disclaimer
The information in this guide is subject to change without notice.
There are no representations or warranties, either expressed or implied, with respect to the
contents hereof and specifically disclaims any warranties of merchantability or fitness for any
particular purpose. The software described in this manual is sold or licensed "as is". Should
the programs prove defective following their purchase, the buyer (not the manufacturer,
distributor, or its dealer) assumes the entire cost of all necessary servicing, repair, and any
incidental or consequential damages resulting from any defect in the software.
Copyright
© 2013 by Acer Incorporated. All rights reserved. No part of this publication may be
reproduced, transmitted, transcribed, stored in a retrieval system, or translated into any
language or computer language, in any form or by any means, electronic, mechanical,
magnetic, optical, chemical, manual or otherwise, without the prior written permission of Acer
Incorporated.
HDMI, the HDMI logo, and High Definition Multimedia Interface are trademarks or registered
trademarks of HDMI Licensing, LLC in the United States and other countries.
Date Chapter Updates

iii
Conventions
The following conventions are used in this manual:
WARNING:
!
Indicates a potential for personal injury.
CAUTION:
!
Indicates a potential loss of data or damage to equipment.
IMPORTANT:
+
Indicates information that is important to know for the proper completion of a
procedure, choice of an option, or completing a task.
The following typographical conventions are used in this document:
Book titles, directory names, file names, path names, and program/process names are
shown in italics.
Example:
the DRS5 User's Guide
/usr/local/bin/fd
the /TPH15spool_M program
Computer output (text that represents information displayed on a computer screen,
such as menus, prompts, responses to input, and error messages) are shown in
constant width.
Example:
[01] The server has been stopped
User input (text that represents information entered by a computer user, such as
command names, option letters, and words) are shown in constant width bold.
Variables contained within user input are shown in angle brackets (< >).
Example:
At the prompt, type run <file name> -m
Keyboard keys are shown in bold italics.
Example:
After entering data, press Enter.

iv
General information 0
Before using this information and the product it supports, read the following general
information.
This service guide provides you with all technical information relating to the basic
configuration for Acer’s global product offering. To better fit local market requirements and
enhance product competitiveness, your regional office may have decided to extend the
functionality of a machine (such as add-on cards, modems, or extra memory capabilities).
These localized features are not covered in this generic service guide. In such cases, contact
your regional office or the responsible personnel/channel to provide you with further technical
details.
When ordering FRU parts: Check the most up-to-date information available on your regional
Web or channel. If, for whatever reason, a part number change is made, it may not be noted
in this printed service guide.
Acer-authorized Service Providers: Your Acer office may have a different part number code
than those given in the FRU list in this service guide. You must use the list provided by your
regional Acer office to order FRU parts for repair and service of customer machines.

1
CHAPTER 1
Hardware Specifications
Features . . . . . . . . . . . . . . . . . . . . . . . . . . . . . . . . . . . . . . . . . . . . 1-5
Operating System. . . . . . . . . . . . . . . . . . . . . . . . . . . . . . . . . . .1-5
Performance . . . . . . . . . . . . . . . . . . . . . . . . . . . . . . . . . . . . . . .1-5
System Memory . . . . . . . . . . . . . . . . . . . . . . . . . . . . . . . . . . . .1-5
Display. . . . . . . . . . . . . . . . . . . . . . . . . . . . . . . . . . . . . . . . . . . .1-5
Audio Subsystem . . . . . . . . . . . . . . . . . . . . . . . . . . . . . . . . . . .1-5
USB Connector . . . . . . . . . . . . . . . . . . . . . . . . . . . . . . . . . . . . .1-5
Power . . . . . . . . . . . . . . . . . . . . . . . . . . . . . . . . . . . . . . . . . . . .1-5
Communication . . . . . . . . . . . . . . . . . . . . . . . . . . . . . . . . . . . .1-6
Storage Subsystem . . . . . . . . . . . . . . . . . . . . . . . . . . . . . . . . . .1-6
Power Adapter and Battery. . . . . . . . . . . . . . . . . . . . . . . . . . .1-6
I/O Ports. . . . . . . . . . . . . . . . . . . . . . . . . . . . . . . . . . . . . . . . . . .1-6
Accessories . . . . . . . . . . . . . . . . . . . . . . . . . . . . . . . . . . . . . . . .1-7
Dimensions and Weight. . . . . . . . . . . . . . . . . . . . . . . . . . . . . .1-7
Environment . . . . . . . . . . . . . . . . . . . . . . . . . . . . . . . . . . . . . . .1-7
Tablet Tour. . . . . . . . . . . . . . . . . . . . . . . . . . . . . . . . . . . . . . . . . . 1-8
Front View . . . . . . . . . . . . . . . . . . . . . . . . . . . . . . . . . . . . . . . .1-8
Right View . . . . . . . . . . . . . . . . . . . . . . . . . . . . . . . . . . . . . . . .1-9
Top View. . . . . . . . . . . . . . . . . . . . . . . . . . . . . . . . . . . . . . . . . .1-10
Bottom View. . . . . . . . . . . . . . . . . . . . . . . . . . . . . . . . . . . . . . .1-11
Back View . . . . . . . . . . . . . . . . . . . . . . . . . . . . . . . . . . . . . . . . .1-12
Touchscreen Basics . . . . . . . . . . . . . . . . . . . . . . . . . . . . . . . . . .1-13
System Block Diagram . . . . . . . . . . . . . . . . . . . . . . . . . . . . . . .1-13
Specification Tables . . . . . . . . . . . . . . . . . . . . . . . . . . . . . . . . . . . 1-14
CHAPTER 2
Diagnostic Utilities
PQAA Tool . . . . . . . . . . . . . . . . . . . . . . . . . . . . . . . . . . . . . . . . . . 2-3
Requirements . . . . . . . . . . . . . . . . . . . . . . . . . . . . . . . . . . . . . .2-3
Installing the PQAA Tool . . . . . . . . . . . . . . . . . . . . . . . . . . . . .2-3
Running the PQAA Tool. . . . . . . . . . . . . . . . . . . . . . . . . . . . . .2-9

2
CHAPTER 3
Machine Maintenance
Machine Disassembly and Replacement. . . . . . . . . . . . . . . . . . . 3-3
Recommended Equipment . . . . . . . . . . . . . . . . . . . . . . . . . . .3-3
Replacement Requirements. . . . . . . . . . . . . . . . . . . . . . . . . . .3-3
Pre-disassembly Instructions . . . . . . . . . . . . . . . . . . . . . . . . . .3-4
Disassembly Process . . . . . . . . . . . . . . . . . . . . . . . . . . . . . . . . . . . 3-5
Disassembly Flowchart . . . . . . . . . . . . . . . . . . . . . . . . . . . . . . .3-5
Removing the MicroSD Card . . . . . . . . . . . . . . . . . . . . . . . . . .3-6
Removing the Back Cover . . . . . . . . . . . . . . . . . . . . . . . . . . . .3-7
Removing the Battery . . . . . . . . . . . . . . . . . . . . . . . . . . . . . . .3-10
Removing the GPS and WLAN Antenna Cables . . . . . . . . . . .3-11
Removing the Vibration Motor Module . . . . . . . . . . . . . . . . .3-13
Removing the Speaker Module. . . . . . . . . . . . . . . . . . . . . . . .3-14
Removing the Audio and USB Boards. . . . . . . . . . . . . . . . . . .3-15
Removing the Rear Camera Module . . . . . . . . . . . . . . . . . . . .3-18
Removing the Mainboard . . . . . . . . . . . . . . . . . . . . . . . . . . . .3-19
Removing the Front Camera Module . . . . . . . . . . . . . . . . . . .3-22
Removing the LCD and Middle Frame Assembly . . . . . . . . . .3-23
Reassembly Process . . . . . . . . . . . . . . . . . . . . . . . . . . . . . . . . . . . 3-24
Replacing the Front Camera Module . . . . . . . . . . . . . . . . . . .3-24
Replacing the LCD and Middle Frame Assembly . . . . . . . . . .3-25
Replacing the Mainboard . . . . . . . . . . . . . . . . . . . . . . . . . . . .3-26
Replacing the Rear Camera Module . . . . . . . . . . . . . . . . . . . .3-29
Replacing the Audio and USB Boards . . . . . . . . . . . . . . . . . . .3-30
Replacing the Speaker Module . . . . . . . . . . . . . . . . . . . . . . . .3-33
Replacing the Vibration Motor Module . . . . . . . . . . . . . . . . .3-34
Replacing the GPS and WLAN Antenna Cables . . . . . . . . . . .3-35
Replacing the Battery. . . . . . . . . . . . . . . . . . . . . . . . . . . . . . . .3-37
Replacing the Back Cover . . . . . . . . . . . . . . . . . . . . . . . . . . . .3-39
Replacing the MicroSD Card . . . . . . . . . . . . . . . . . . . . . . . . . .3-41
CHAPTER 4
Troubleshooting
Introduction . . . . . . . . . . . . . . . . . . . . . . . . . . . . . . . . . . . . . . . . . 4-3
General Information . . . . . . . . . . . . . . . . . . . . . . . . . . . . . . . . . . 4-3
Power On Issues . . . . . . . . . . . . . . . . . . . . . . . . . . . . . . . . . . . .4-4
No Display Issues. . . . . . . . . . . . . . . . . . . . . . . . . . . . . . . . . . . .4-5

3
LCD Picture Failure . . . . . . . . . . . . . . . . . . . . . . . . . . . . . . . . . .4-6
Touchscreen Failure . . . . . . . . . . . . . . . . . . . . . . . . . . . . . . . . .4-7
Internal Speaker Failure. . . . . . . . . . . . . . . . . . . . . . . . . . . . . .4-8
Internal Microphone Failure . . . . . . . . . . . . . . . . . . . . . . . . . .4-9
USB Failure . . . . . . . . . . . . . . . . . . . . . . . . . . . . . . . . . . . . . . . .4-10
Front Camera Failure . . . . . . . . . . . . . . . . . . . . . . . . . . . . . . . .4-11
Rear Camera Failure. . . . . . . . . . . . . . . . . . . . . . . . . . . . . . . . .4-12
Device Vibration Failure. . . . . . . . . . . . . . . . . . . . . . . . . . . . . .4-13
Card Reader Failure . . . . . . . . . . . . . . . . . . . . . . . . . . . . . . . . .4-14
Wireless and Bluetooth Function Test Failure . . . . . . . . . . . .4-15
GPS Function Failure . . . . . . . . . . . . . . . . . . . . . . . . . . . . . . . .4-16
Other Functions Failure . . . . . . . . . . . . . . . . . . . . . . . . . . . . . .4-17
Intermittent Problems . . . . . . . . . . . . . . . . . . . . . . . . . . . . . . . . . 4-18
Undetermined Problems . . . . . . . . . . . . . . . . . . . . . . . . . . . . . . . 4-19
CHAPTER 5
Jumper and Connector Locations
Mainboard Layout . . . . . . . . . . . . . . . . . . . . . . . . . . . . . . . . . . . . 5-3
Top View. . . . . . . . . . . . . . . . . . . . . . . . . . . . . . . . . . . . . . . . . .5-3
Bottom View. . . . . . . . . . . . . . . . . . . . . . . . . . . . . . . . . . . . . . .5-4
CHAPTER 6
FRU List
Iconia A1-810 Exploded Diagrams . . . . . . . . . . . . . . . . . . . . . . . 6-4
Main Assembly . . . . . . . . . . . . . . . . . . . . . . . . . . . . . . . . . . . . .6-4
FRU List . . . . . . . . . . . . . . . . . . . . . . . . . . . . . . . . . . . . . . . . . . . . . 6-6
CHAPTER 7
Test Compatible Components
Android OS Environment Test. . . . . . . . . . . . . . . . . . . . . . . . . . . 7-4
CHAPTER 8
Online Support Information

4

CHAPTER 1
Hardware Specifications

1-2
Features . . . . . . . . . . . . . . . . . . . . . . . . . . . . . . . . . . . . . . . . . . . . 1-5
Operating System. . . . . . . . . . . . . . . . . . . . . . . . . . . . . . . . . . .1-5
Performance . . . . . . . . . . . . . . . . . . . . . . . . . . . . . . . . . . . . . . .1-5
System Memory . . . . . . . . . . . . . . . . . . . . . . . . . . . . . . . . . . . .1-5
Display. . . . . . . . . . . . . . . . . . . . . . . . . . . . . . . . . . . . . . . . . . . .1-5
Audio Subsystem . . . . . . . . . . . . . . . . . . . . . . . . . . . . . . . . . . .1-5
USB Connector . . . . . . . . . . . . . . . . . . . . . . . . . . . . . . . . . . . . .1-5
Power . . . . . . . . . . . . . . . . . . . . . . . . . . . . . . . . . . . . . . . . . . . .1-5
Communication . . . . . . . . . . . . . . . . . . . . . . . . . . . . . . . . . . . .1-6
Storage Subsystem . . . . . . . . . . . . . . . . . . . . . . . . . . . . . . . . . .1-6
Power Adapter and Battery. . . . . . . . . . . . . . . . . . . . . . . . . . .1-6
I/O Ports. . . . . . . . . . . . . . . . . . . . . . . . . . . . . . . . . . . . . . . . . . .1-6
Accessories . . . . . . . . . . . . . . . . . . . . . . . . . . . . . . . . . . . . . . . .1-7
Dimensions and Weight. . . . . . . . . . . . . . . . . . . . . . . . . . . . . .1-7
Environment . . . . . . . . . . . . . . . . . . . . . . . . . . . . . . . . . . . . . . .1-7
Tablet Tour. . . . . . . . . . . . . . . . . . . . . . . . . . . . . . . . . . . . . . . . . . 1-8
Front View . . . . . . . . . . . . . . . . . . . . . . . . . . . . . . . . . . . . . . . .1-8
Right View . . . . . . . . . . . . . . . . . . . . . . . . . . . . . . . . . . . . . . . .1-9
Top View. . . . . . . . . . . . . . . . . . . . . . . . . . . . . . . . . . . . . . . . . .1-10
Bottom View. . . . . . . . . . . . . . . . . . . . . . . . . . . . . . . . . . . . . . .1-11
Back View . . . . . . . . . . . . . . . . . . . . . . . . . . . . . . . . . . . . . . . . .1-12
Touchscreen Basics . . . . . . . . . . . . . . . . . . . . . . . . . . . . . . . . . .1-13
System Block Diagram . . . . . . . . . . . . . . . . . . . . . . . . . . . . . . .1-13
Specification Tables . . . . . . . . . . . . . . . . . . . . . . . . . . . . . . . . . . . 1-14
Tablet Specifications . . . . . . . . . . . . . . . . . . . . . . . . . . . . . . . .1-14
System Board Major Chips . . . . . . . . . . . . . . . . . . . . . . . . . . . .1-16
Processor . . . . . . . . . . . . . . . . . . . . . . . . . . . . . . . . . . . . . . . . . .1-16
Processor Specifications . . . . . . . . . . . . . . . . . . . . . . . . . . . . . .1-17
System Memory . . . . . . . . . . . . . . . . . . . . . . . . . . . . . . . . . . . .1-17
System Memory - eMMC . . . . . . . . . . . . . . . . . . . . . . . . . . . . .1-17
Graphics Controller . . . . . . . . . . . . . . . . . . . . . . . . . . . . . . . . .1-17
Card Reader . . . . . . . . . . . . . . . . . . . . . . . . . . . . . . . . . . . . . . .1-17
LCD . . . . . . . . . . . . . . . . . . . . . . . . . . . . . . . . . . . . . . . . . . . . . .1-17
Supported LCD Resolutions . . . . . . . . . . . . . . . . . . . . . . . . . . .1-18
Audio Codec . . . . . . . . . . . . . . . . . . . . . . . . . . . . . . . . . . . . . .1-18
Audio Interface. . . . . . . . . . . . . . . . . . . . . . . . . . . . . . . . . . . . .1-18
Webcam . . . . . . . . . . . . . . . . . . . . . . . . . . . . . . . . . . . . . . . . . .1-18
Wireless, Bluetooth LAN . . . . . . . . . . . . . . . . . . . . . . . . . . . . .1-19
USB Interface . . . . . . . . . . . . . . . . . . . . . . . . . . . . . . . . . . . . . .1-19
Battery Pack . . . . . . . . . . . . . . . . . . . . . . . . . . . . . . . . . . . . . . .1-19
1-4

Hardware Specifications and Configurations 1-5
Hardware Specifications and Configurations
Features 0
The following is a summary of the tablet’s many features.
Operating System 0
Android Jelly Bean 4.2
Performance 0
MediaTek 1.2 GHz quad-core processor
System Memory 0
1 GB of RAM
8 or 16 GB of flash memory
Display 0
7.9" XGA TFT LCD capacitive multi-touch screen
1024 x 768 resolution display with IPS technology
NOTE:
NOTE:
All brands and product names mentioned herein include trademarks of their respective
companies and are used solely to describe or identify the products.
Audio Subsystem 0
3.5 mm audio jack
Mono speaker
Built-in microphone
Formats supported
Audio recording: AAC-LC, AMR-WB
Audio playback: AAC-LC, AAC, AAC+ (not raw AAC), AMR-NB, AMR-WB, MP3,
OGG Vorbis, WAV
Video recording: H.264 BP, MPEG-4 SP, H.263 BP
Video playback: H.264 BP, H.264 MP, H.264 HP, MPEG-4 SP, H.263 BP
USB Connector 0
Micro USB port
Power 0
DC power-in (5.35 V, 2 A)

1-6 Hardware Specifications and Configurations
Communication 0
Webcam 0
Front camera
0.3M camera
Fixed focus
Rear camera
5M camera
Wireless and networking 0
Bluetooth 4.0
WiFi IEEE 802.11b/g/n
GPS
Storage Subsystem 0
Card reader 0
microSD Card slot (up to 32 GB)
Power Adapter and Battery 0
Power adapter 0
10 W, 5 V 2A AC adapter
Battery 0
Rechargeable Li-ion prismatic battery: Panasonic UF426080*2 (1S2P), 18.6Wh
@4960mAh
Rechargeable Li-ion polymer battery: LGC ICP426080*2 (1S2P), 20Wh @5340mAh
NOTE:
NOTE:
Length of battery operation will depend on power consumption which is based on
system resource use. For example, constantly using the backlight or using
power-demanding applications will shorten battery life between charges.
I/O Ports 0
MicroSD Card slot
Micro USB port
Micro HDMI port
SIM slot (optional)
Headphone jack, supporting 3.5 mm headset with built-in

Hardware Specifications and Configurations 1-7
Accessories 0
Setup poster
USB cable
AC adapter
Warranty
MicroSD card (optional)
Pouch (optional)
Bluetooth keyboard (optional)
Dimensions and Weight 0
Dimensions 0
Width × Depth × Height: 145.7 × 11.1 × 208.7 mm (5.7 × 0.5 × 8.2 in)
Weight 0
WiFi: 410 g (0.90 lbs.)
3G: 430 g (0.95 lbs.)
Environment 0
Temperature:
Operating: 0 to 35 °C
Non-operating: -20 to 60 °C
Humidity (non-condensing):
Operating: 20% to 80%
Non-operating: 20% to 80%

1-8 Hardware Specifications and Configurations
Tablet Tour 0
This section provides an overview of the features and functions of the tablet.
Front View 0
Figure 1-1. Front View
Table 1-1. Front View
No. Item Description
1 Front-facing camera A 0.3-megapixel camera for video chats and self-portrait
images.
2 Touchscreen 7.9-inch, 1024 x 768 pixel capacitive touchscreen.

Hardware Specifications and Configurations 1-9
Right View 0
Figure 1-2. Right View
Table 1-2. Right View
No. Item Description
1 Volume control key Increases and decreases the tablet volume.
2 microSD Card slot Insert a microSD Card into the slot.
3 Microphone Receives audio for video chats and Internet calls.
4 Shutdown pinhole Insert a small thin object (such as a paperclip) to shut down
the tablet.
5 Micro HDMI port Supports high-definition digital video connections.

1-10 Hardware Specifications and Configurations
Top View 0
Figure 1-3. Top View
Table 1-3. Top View
No. Item Description
1 Power button Long press to turn the tablet on, press briefly to turn the
screen on/off or enter sleep mode; press and hold to turn the
tablet off.

Hardware Specifications and Configurations 1-11
Bottom View 0
Figure 1-4. Bottom View
Table 1-4. Bottom View
No. Item Description
1 Micro USB port Connects to a computer via a USB cable. Supports OTG
function and also serves as the charging port for the AC
adapter.
2 Headphone jack Connects to audio devices (e.g., speakers, headphones).

1-12 Hardware Specifications and Configurations
Back View 0
Figure 1-5. Back View
Table 1-5. Back View
No. Item Description
1 Rear camera A 5-megapixel camera for taking high-resolution images and
video.
2 Speaker Emits audio.
Other manuals for Iconia A1-810
1
Table of contents
Other Acer Tablet manuals

Acer
Acer ICONIA W510-1620 User manual

Acer
Acer SOSPIRO-AS8W User manual

Acer
Acer A1401 Operating and safety instructions

Acer
Acer Iconia One 8 User manual

Acer
Acer A510 Original instructions

Acer
Acer Iconia Tab A700 User manual

Acer
Acer Chromebook Spin 714 User manual

Acer
Acer A5001 User manual

Acer
Acer B1-7A0 User manual

Acer
Acer Iconia A1 User manual

Acer
Acer A700 User manual

Acer
Acer Ducati 2 HD User manual

Acer
Acer ENDURO Urban T1 User manual

Acer
Acer TD070VA1 User manual

Acer
Acer Iconia B1-711 User manual

Acer
Acer Iconia One 7 User manual

Acer
Acer W701 User manual

Acer
Acer Picasso User manual

Acer
Acer Iconia A1-810 Original instructions

Acer
Acer Iconia One 8 User manual