AcoSound AcoMate 610RIC User manual
AcoMate
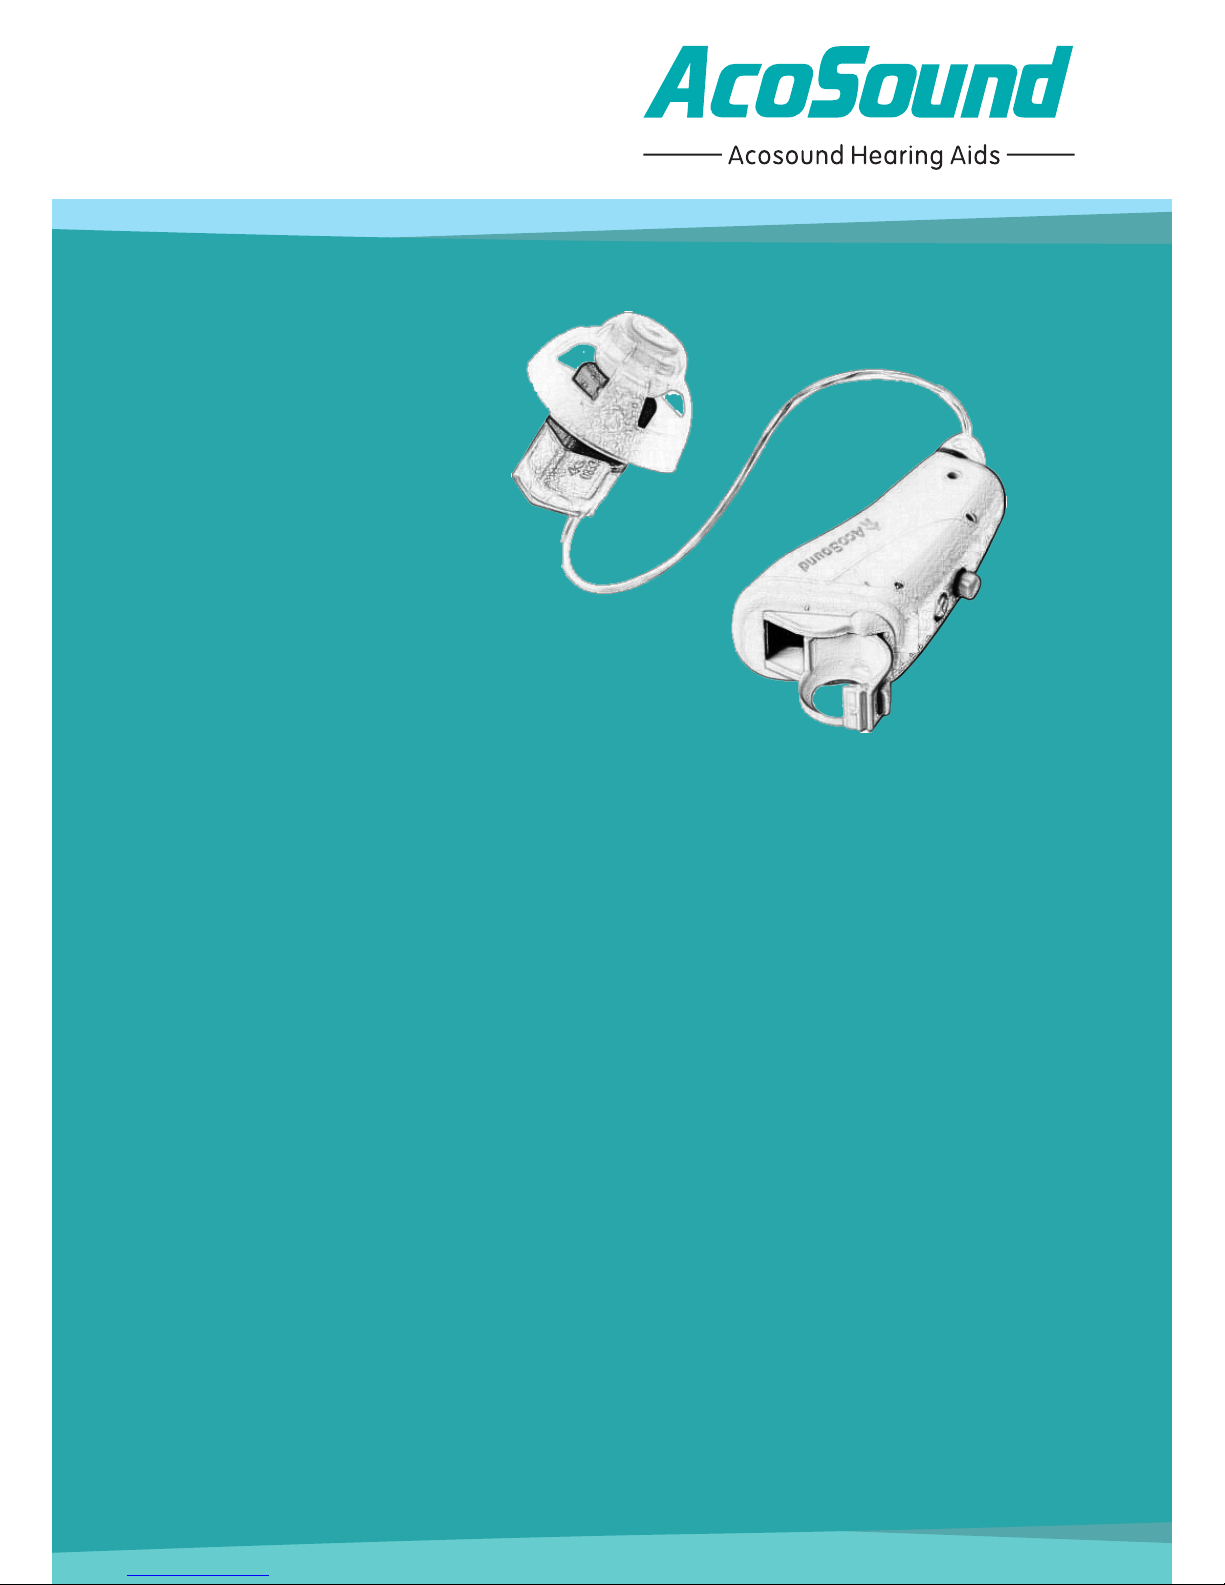
Receiver-in-the-canal hearing aids
INSTRUCTIONS
FOR USE
610RIC/821RIC/1210RIC

TABLE OF CONTENTS
Hearing Aid Description
Step-by-Step Instructions for Using Your Hearing Aid
Step 1: Inserting the battery
Step 2: Turning the Hearing Aid ON
Step 3: Inserting Your Hearing Aid
Step 4: Changing the Volume
Step 5: Changing the Programs
Step 6: Removing Your Hearing Aid
Step 7: Turning the Hearing Aid OFF
Step 8: Changing the battery
Features of Your Hearing Aid
Caring for Your Hearing Aid
Common Problems and Solutions
Technical Data
3
6
6
8
9
12
13
15
16
16
17
18
25
41

Congratulations on the purchase of your
new AcoSound hearing instruments. With
a litter practice, you will soon be on your
way to better hearing.
Please read the entire contents of this booklet
before using your hearing instruments.
It contains instructions and important
information about the use and handling
of your hearing instruments and batteries.
Indication for Use/ Intended Purpose
The hearing aids are intended to amplify
and transmit sound to the ear and thereby
compensate for impaired hearing. The
hearing aids are intended to be used by
children(>36 months) and adults.
FOREWORDS
1

The following instruments are covered in
these instrucons:
AcoMate 610 RIC
AcoMate 821 RIC
AcoMate 1210 RIC
2
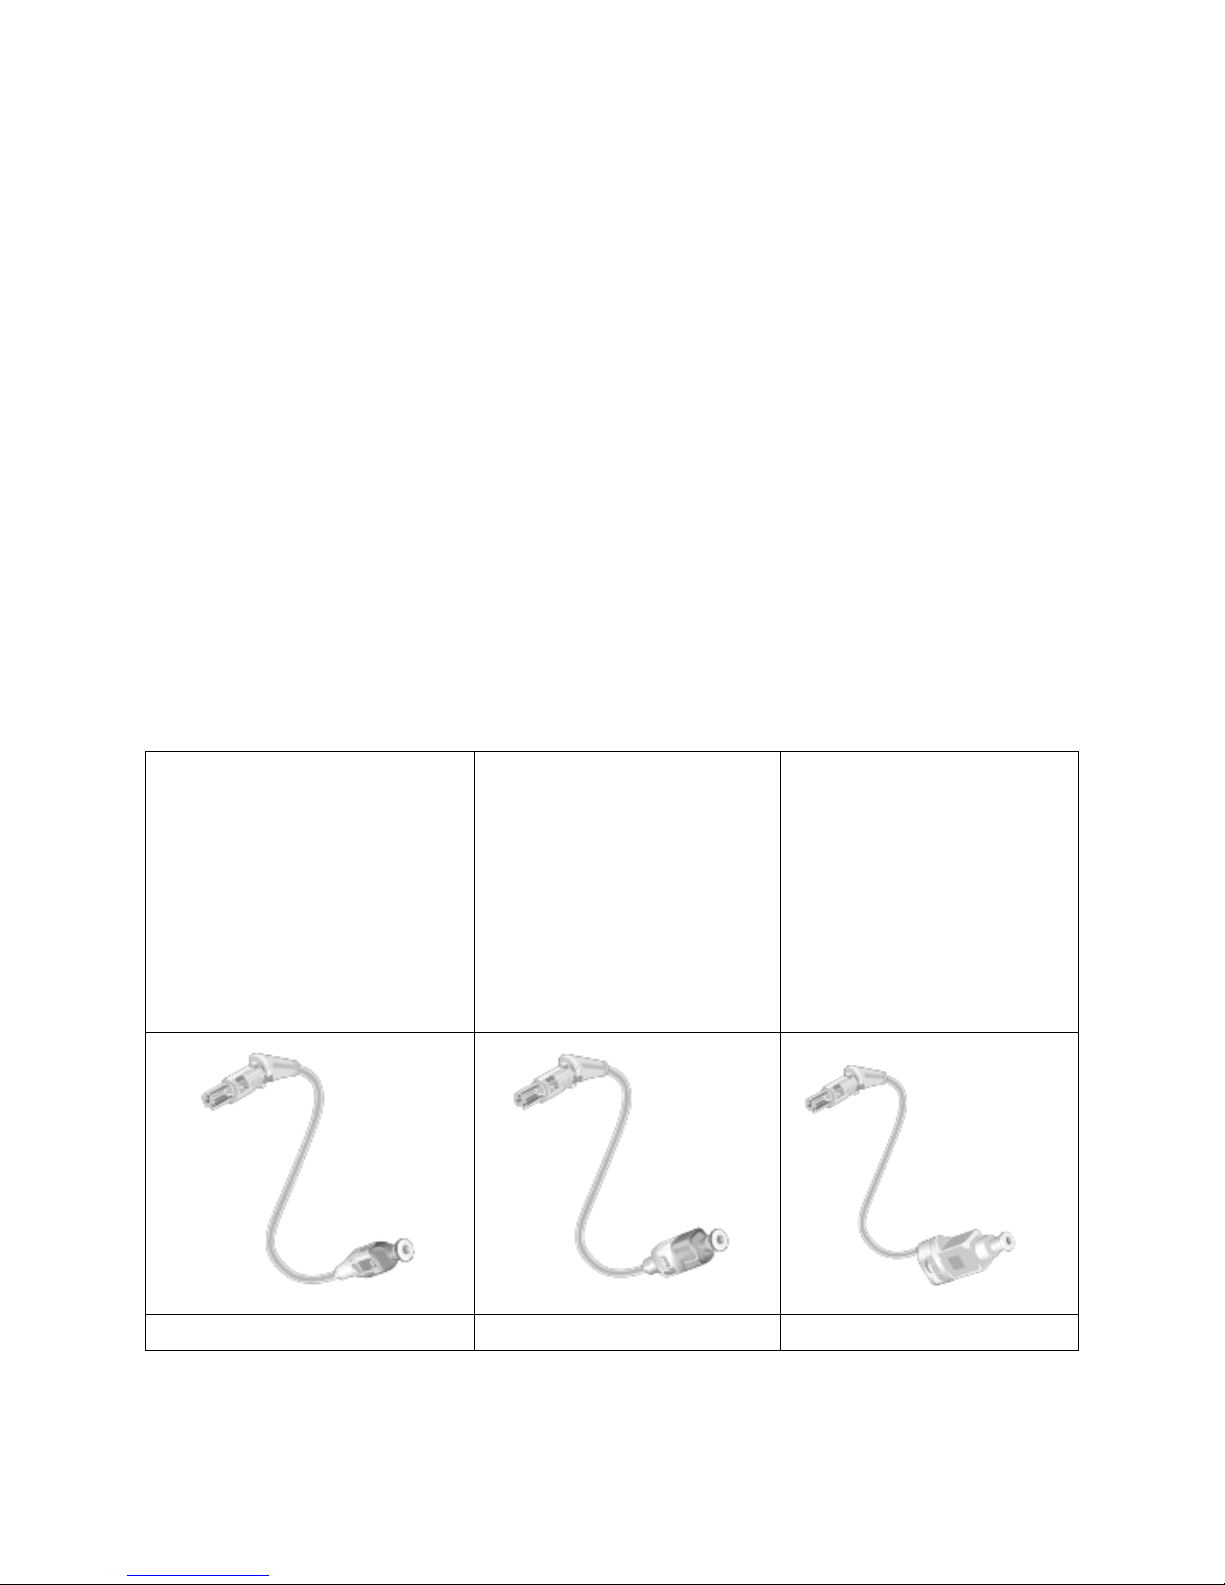
Color opons
· Hearing Aid Descripon
There are several earpieces that can be
aached to speaker unit on your hearing
aids. Please idenfy your earpiece. This
will make it easier for you to navigate
through this booklet.
A RIC model can come with a #1,#2,#3
speaker and different earpieces.
A dome or a
custom Mold can
be attached to #1
speaker
A dome or a
custom Mold
can be attached
to #2 speaker
A dome or a
Power Mold can
be attached to
#2 speaker
Length: 40 mm Length: 47.4 mm Length: 51.5 mm
3
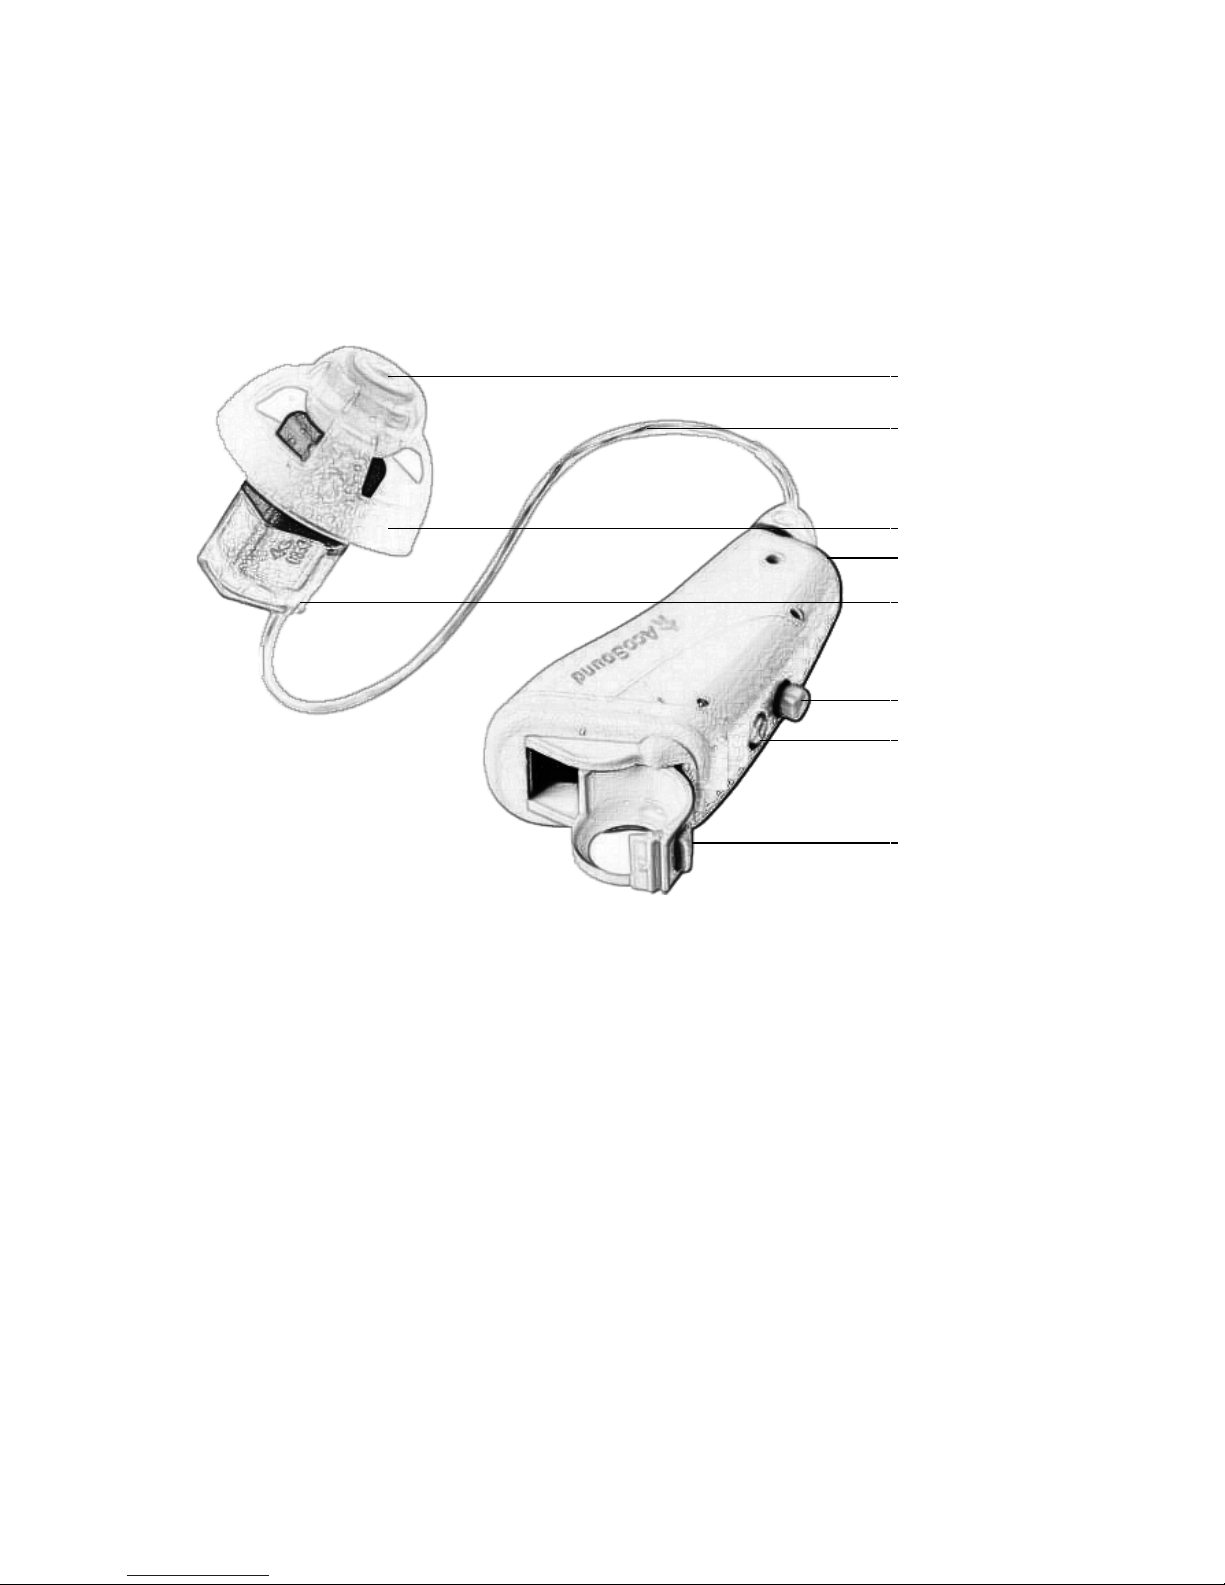
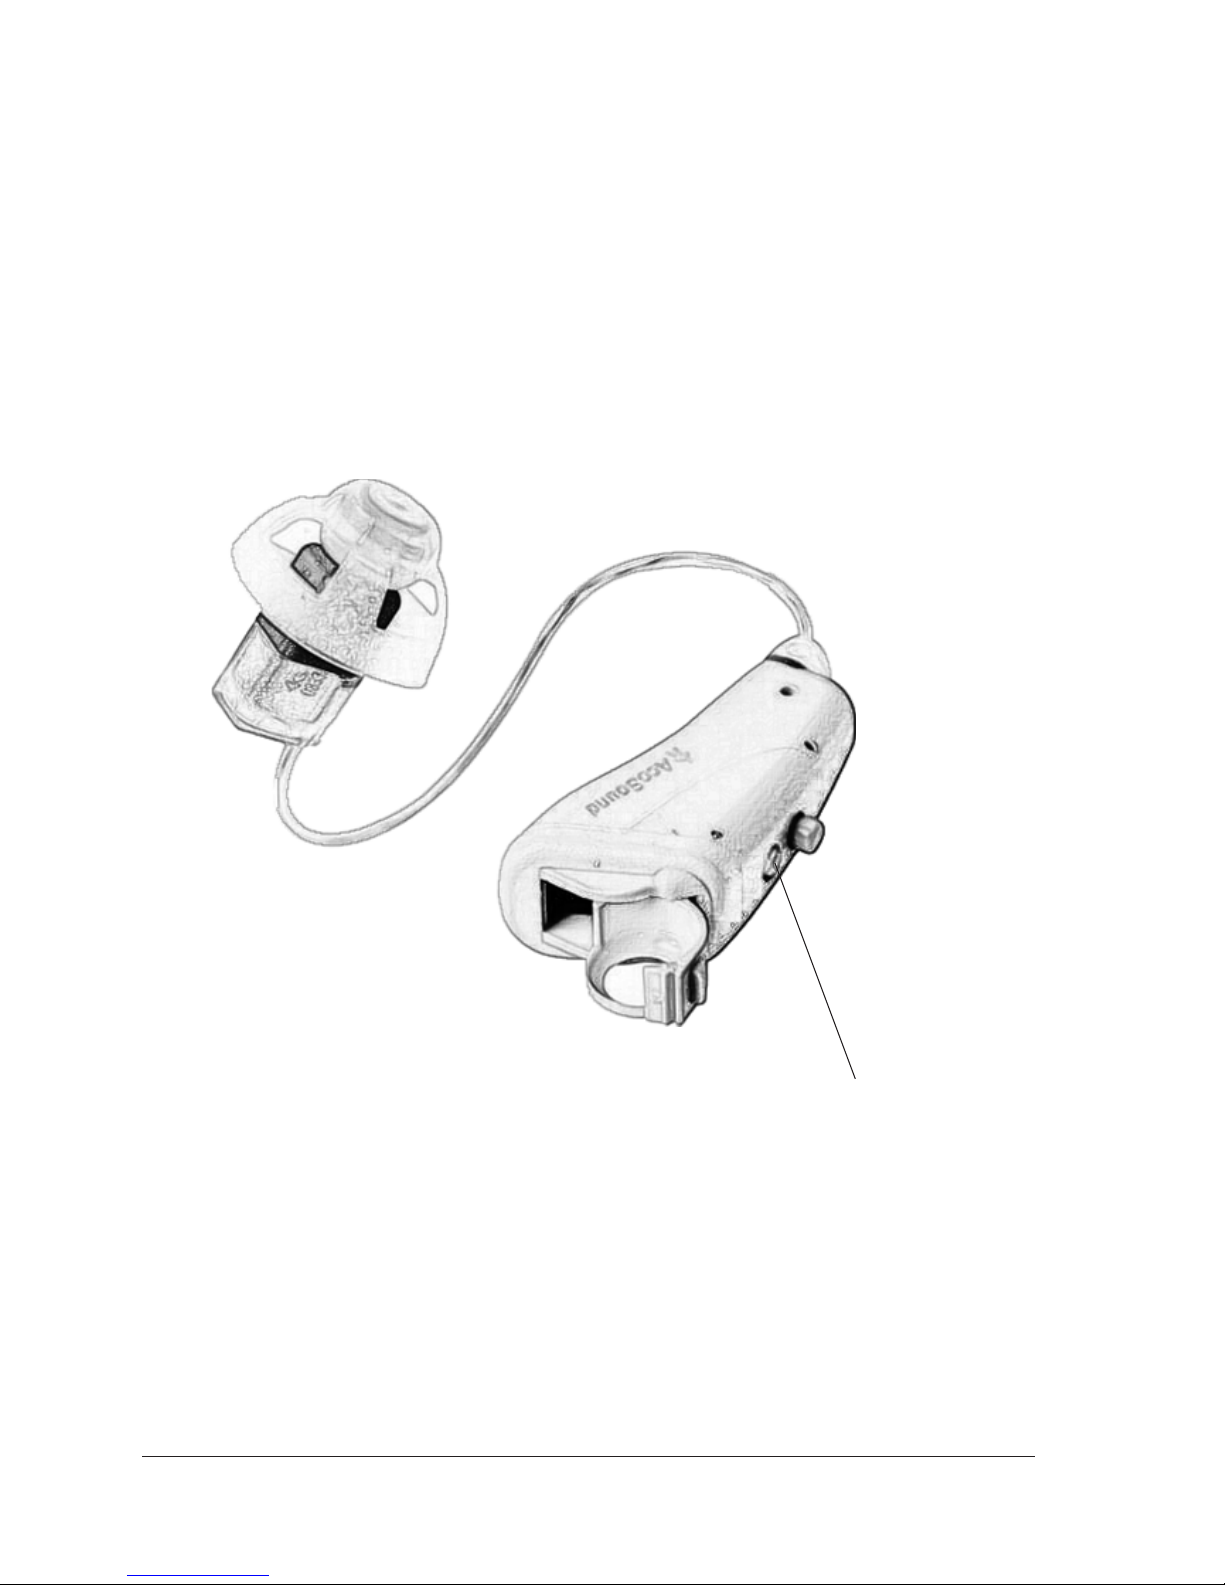
· Descripon of features
1
2
3
4
6
7
8
5
1, Sound Outlet
2, Wire
3, Ear Dome
4, Microphone
5, Receiver
6, Push Buon
7, Volume Control
8, Baery Door
Le/Right ear marking
The color of the receiver can help you
disnguish the le and right instruments.
Red=right; Blue=Le
4

· Step-by-Step Instrucons for
Using Your Hearing Aid
Step 1: Inserng the baery
Gently swing the baery door fully open,
but do not force it (A)
Remove the scker from the new baery (B)
Place the baery into the empty
compartment. The +sign on the baery
should face up (C)
A B C
------------------------※------------------------
For maximum power, allow the baery to
be aired for 30 seconds before placing it
into the empty compartment.
5

The cleaning tool can be used for baery
change. Use the magnec end to remove
and insert baeries. The cleaning tool is
provided by your hearing care professional.
-------------------------※------------------------
Your cleaning tool has a built-in magnet.
Keep the cleaning tool 30 cm away from
credit cards and other magnecally
sensive devices.
6
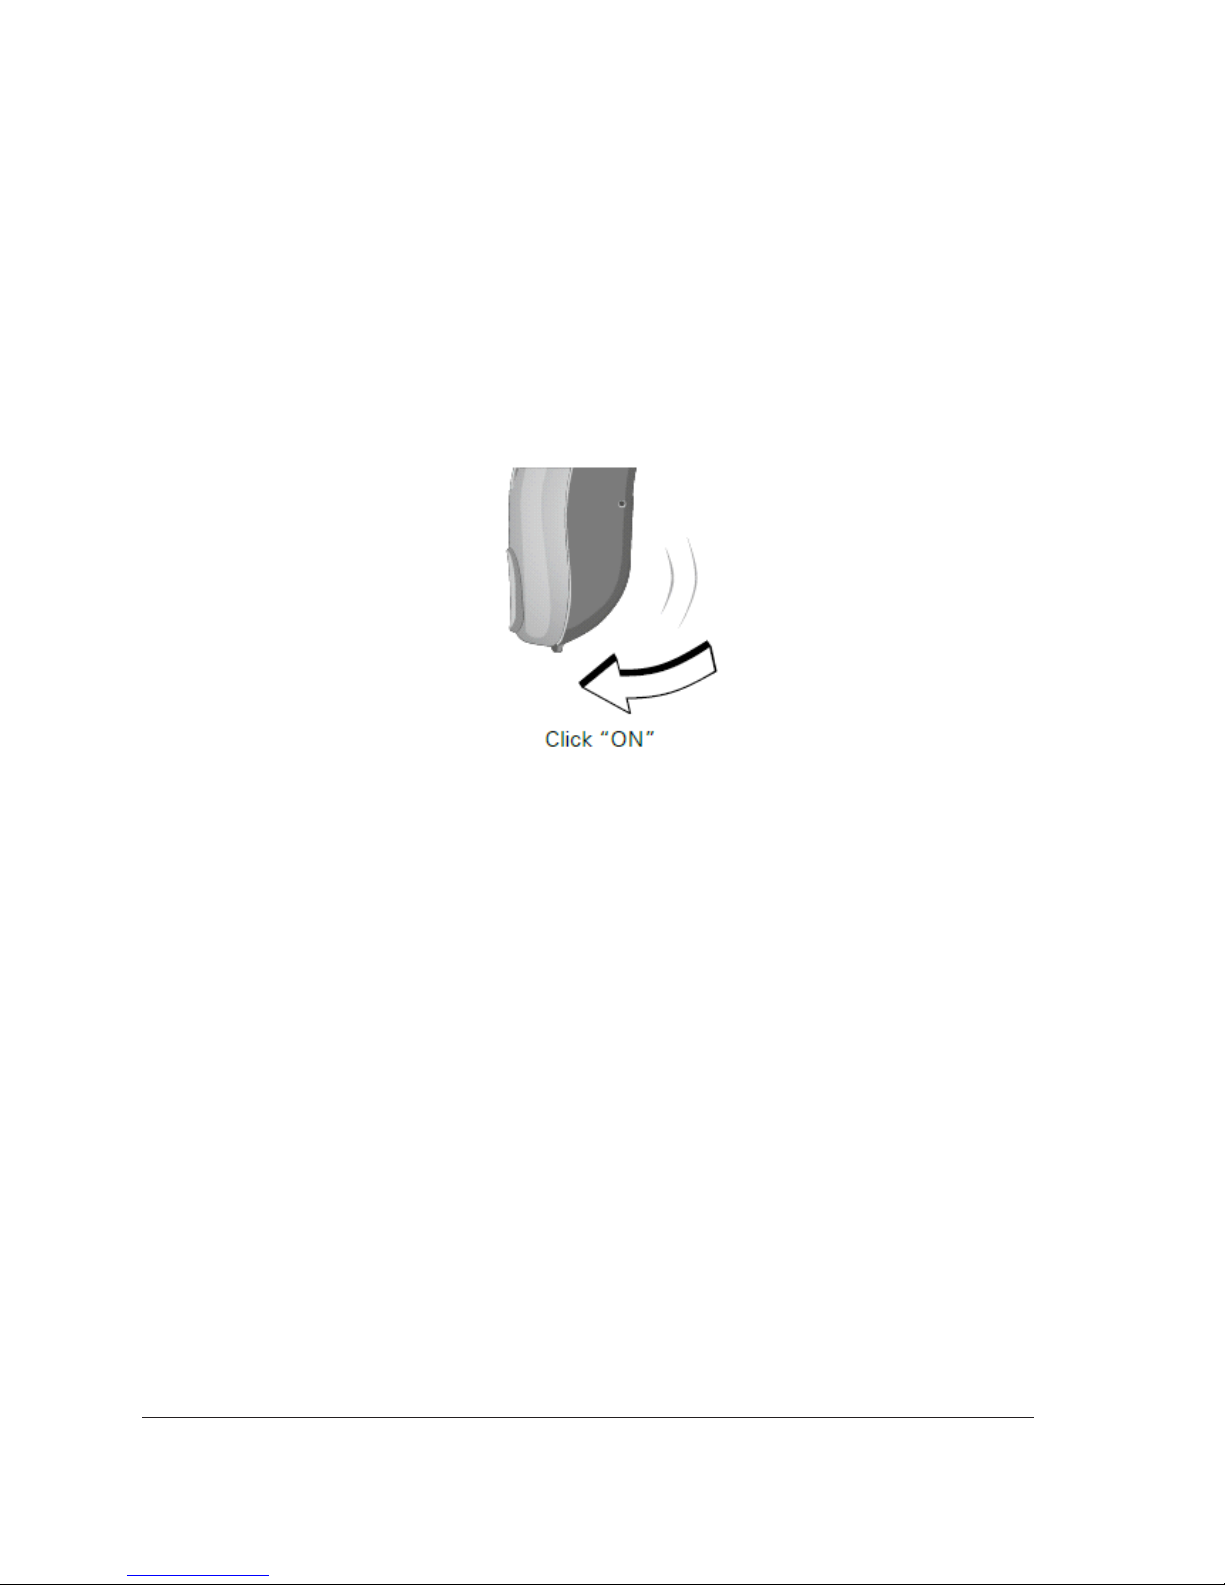
Step 2: Turning the Hearing Aid ON
Close the baery door completely. You
should noce a click. The hearing aid is
now ON.
-------------------------※------------------------
Never use excessive force to open or
close the baery door.
7

Step 3: Inserng Your Hearing Aid
Your hearing aid has been programmed
individually for your right or le ear.
You will see a color marking on the
receiver. This can help you to disnguish
between the le and right hearing aid.
Blue marking for le ear,
red for right ear
8
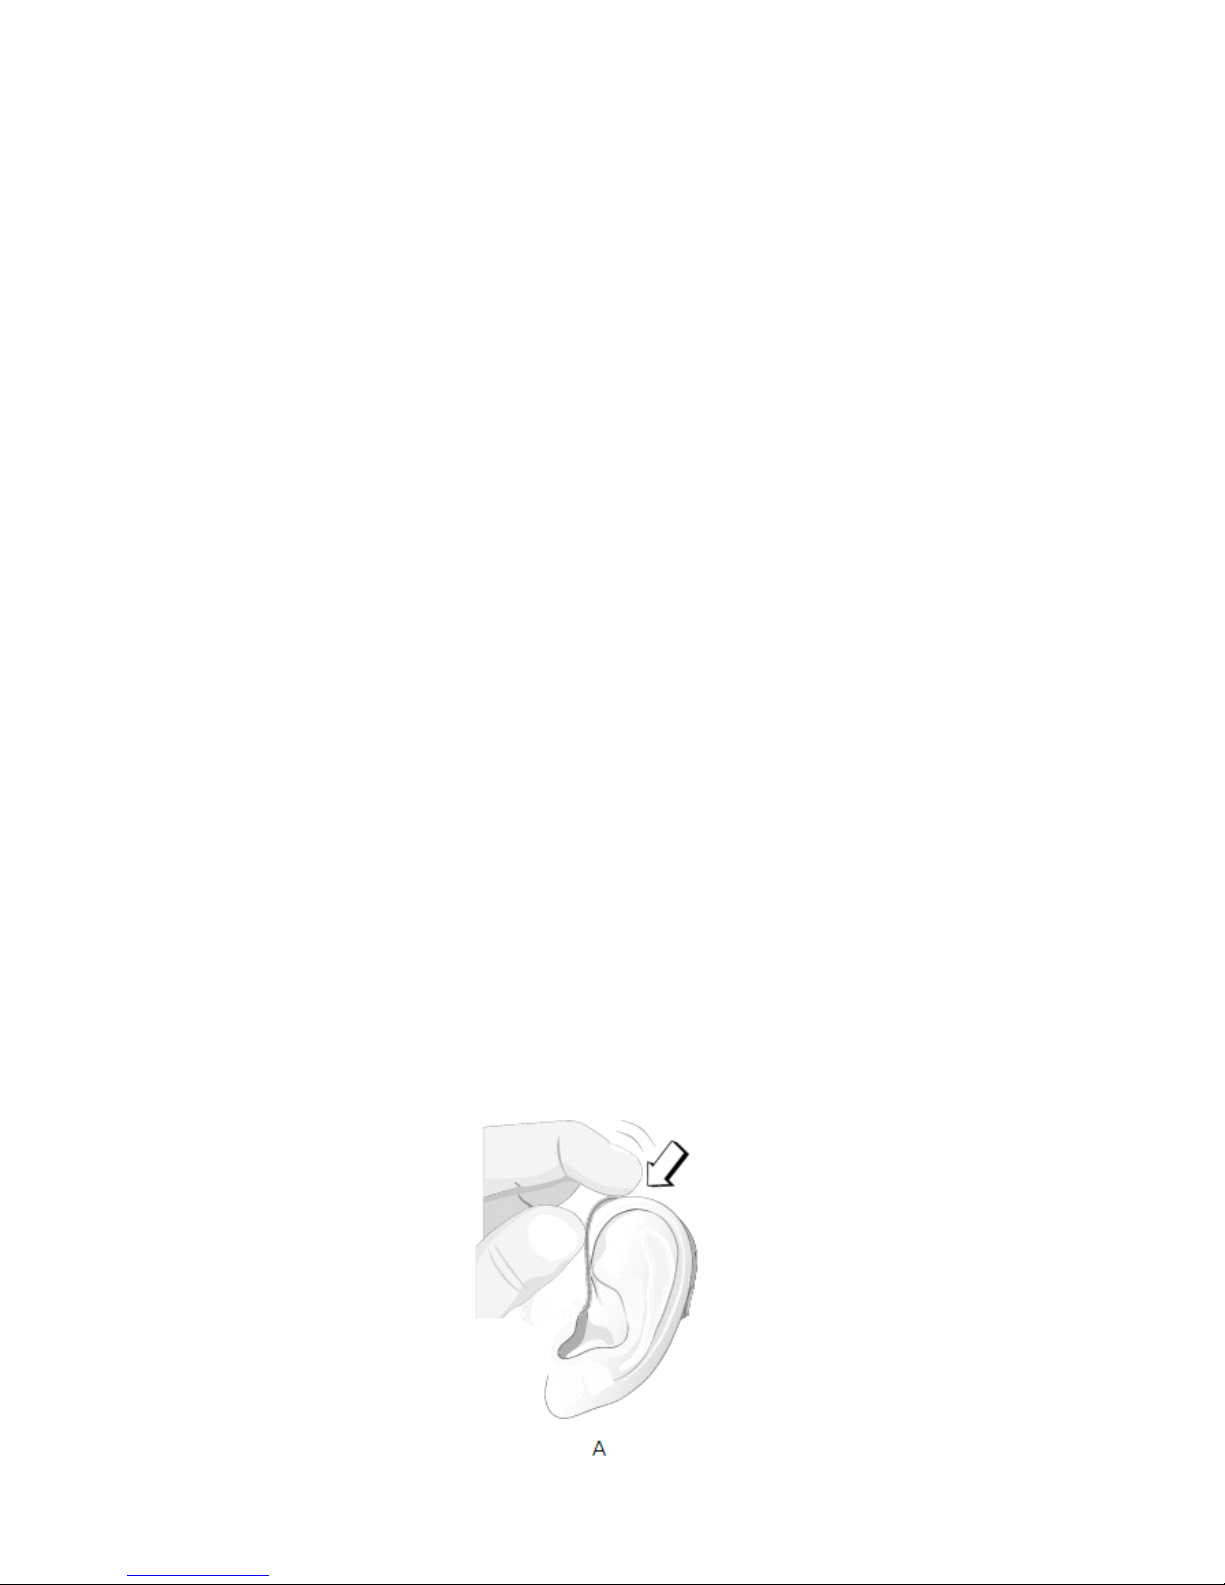
Make sure the dome is pushed firmly
onto the speaker.
Posion the hearing aid behind your ear (A).
Grasp the speaker between your thumb
and index finger. The dome or custom
mold should point towards the ear canal
opening.
Gently push the speaker into your ear canal,
unl the wire sits flush against the side of
your head (B).
If you have an ear grip aached to the speaker,
push the ear grip into the bowl of your ear.
If the ear grip is scking out, it has not
been posioned correctly. Try adjusng
it again.
When looking in the mirror, the speaker
should difficult to see.
9

-------------------------※------------------------
Never use excessive force to open or
close the baery door.
If the dome is not on the speaker when
removed from the ear, the dome might
sll be in the ear canal. Consult your
hearing care professional for further
instrucons.
10
Step 4: Changing the Volume
If you want to change the volume yourself,
your can switch the volume slot with the
pin end of the cleaning tool.
Volume Control
-------------------------※------------------------
If you find that the volume is not adequate,
your hearing care professional may need
to check your hearing and adjust your
hearing aid sengs.
11

Step 5: Changing the Programs
If you wear one hearing aid, a short press
on the push buon will change the program.
If you wear two hearing aids, you shall
switch program for both hearing aids.
It will take 1-2 seconds unl you hear the
program change. The number of beeps
you hear will tell you which program
you are in.
12

Up to 4 listening programs can be configured
by your hearing care professional depending
on your hearing aid. Please ask your
hearing care professional or sales person
about the programs that are available
with your hearing aid.
Available Programs
(to be filled in by your hearing care professional)
Program Beeps Funcon
1 1
2 2
3 3
4 4
13

Step 6: Removing Your Hearing Aid
Grasp the wire of the speaker unit between
your thumb and index finger. Do not pull
on the ear grip. Gently pull the speaker
out of your ear.
-------------------------※------------------------
Do not remove by pull on the hearing aid,
as the speaker may be damaged at the
connector.
14

Step 7: Turning the Hearing Aid OFF
Open the baery door slightly unl a click
is felt. The hearing aid is now OFF.
Step 8: Changing the baery
When the baery is running out, the hearing
aid will beep at regular intervals. You
should be prepared to replace the baery.
The me unl the hearing aid stops
working depends on the baery type and
manufacturer.
15

Features of Your Hearing Aid
The following feature may be acvated in
your hearing aid. Please consult your hearing
care professional to find out how your
hearing aid is configured.
Auto Telephone can automacally acvate
a phone program in the hearing aid, if your
telephone has a dedicated magnet.
The magnet needs to be placed on
your telephone next to the sound
outlet.
16

Caring for Your Hearing Aid
Hearing ears produce a waxy substance
that can clog your hearing aid. Please follow
these cleaning instrucons to prevent wax
build-up and ensure opmal performance
of your hearing aid.
For further informaon on the care of your
hearing aid, please consult your hearing
care professional.
General Care Instrucons
Treat your hearing aid like any other delicate
electronic device (check the safety guidelines
on page 37) and make sure that the hearing
aid and the speaker do not come in contact
with moisture or water.
Always clean and dry your hands thoroughly
before handling the hearing aid
Do not use your hearing aid without a dome or
17

mold
Should your hearing aid come in contact
with water and stop working, please
following these guidelines:
· Gently wipe off any water on the outside
of the hearing aid
· Open the baery door and remove
the baery
· Gently wipe off any water inbaery door
· Let the hearing aid dry with the baery
door open for approximately 30 minutes
· Insert a new fresh baery and close the
baery door. Your hearing aid should work
normally again.
---------------------------※-------------------------
IMPORTANT NOTICE
Do not wear your hearing aid while showering
or parcipang in water acvies. Do not
immerse your hearing aid in water or other
liquids.
18
This manual suits for next models
5
Table of contents
Other AcoSound Hearing Aid manuals


