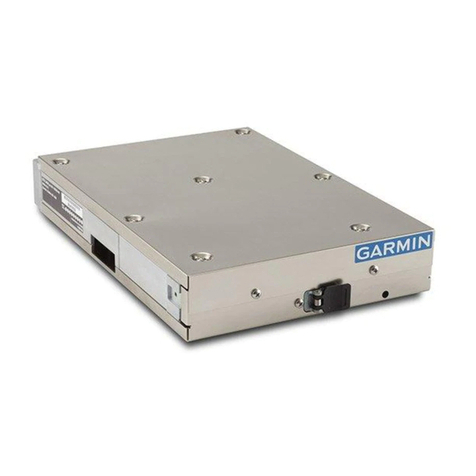
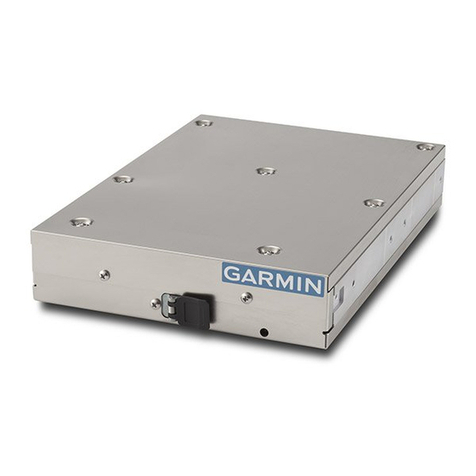
ACR Electronics Nauticast2 2609 User manual

Installation Manual
P/N 2609
AUTOMATIC IDENTIFICATION SYSTEM - WORKBOAT
ACR Electronics, Inc.
5757 Ravenswood Road
Fort Lauderdale, Fl 33312
+1(954) 981-3333
Fax +1 (954) 983-5087
www.acrelectronics.com
Email: [email protected]
Y1-03-0219

Installation Manual IY1-03-0219 Rev. A
Please read this first!
Warning:
Although ACR strives for accuracy in all its publications; this material may contain errors or
omissions, and is subject to change without prior notice. ACR shall not be made liable for any
specific, indirect, incidental or consequential damages as a result of its use. ACR components
may only be used in safety of life devices or systems, with the express written approval of ACR,
as the failure of such components could cause the failure of the ACR device or system. If these
fail, it is reasonable to assume that the safety of the user or other persons may be endangered.
Copying of this document, and giving it to others and the use or communication of the contents thereof, are
forbidden without express authority. Offenders are liable to the payment of damages.
Weitergabe sowie Vervielfältigung dieser Unterlage, Verwertung und Mitteilung ihres Inhaltes nicht
gestattet, soweit nicht ausdrücklich zugestanden. Zuwiderhandlungen verpflichten zu
Schadenersatz.
Toute communication ou reproduction de ce document, toute exploitation ou communication de
son contenu sont interdites, sauf autorisation expresse. Tout manquement à cette règle est illicite
et expose son auteur au versement de dommages et intérêts.
Sin nuestra expresa autorización, queda terminantemente prohibida la reproducción total o
parcial de este documento, así como su uso indebido y/o su exhibición o comunicación a
terceros. De los infractores se exigirá el correspondiente resarcimiento de daños y perjuicios.

Installation Manual II Y1-03-0219 Rev. A
1 GENERAL INTRODUCTION .......................................................................................................................................................... 1
1.1 Description of AIS ................................................................................................................................................................. 1
2 NAUTICAST2 ................................................................................................................................................................................. 2
2.1 System Overview.................................................................................................................................................................. 2
3 INSTALLATION .............................................................................................................................................................................. 3
3.1 Installation Requirements ..................................................................................................................................................... 3
3.2 Installation Overview............................................................................................................................................................. 3
3.3 Installation of VHF / GPS Antennas...................................................................................................................................... 6
4 STARTING THE NAUTICAST2 ...................................................................................................................................................... 8
4.1 MMSI Number:...................................................................................................................................................................... 8
4.2 Service and User Passwords:............................................................................................................................................... 9
4.3 Changing the MMSI / IMO Numbers................................................................................................................................... 13
4.4 Inputting Voyage Related Data – (User Password Protected)............................................................................................ 15
4.5 Setting Ship Related Data – (User Password Protected) ................................................................................................... 16
5 TROUBLESHOOTING.................................................................................................................................................................. 19
5.1 Reading and understanding Alarms: .................................................................................................................................. 19
5.2 Alarm Codes ....................................................................................................................................................................... 21
5.3 Text Messages................................................................................................................................................................... 23
6 ACCESSORIES............................................................................................................................................................................ 24
7 CONTACT AND SUPPORT INFORMATION ............................................................................................................................... 24
8 TECHNICAL INFORMATION ....................................................................................................................................................... 25
8.1 ANNEX................................................................................................................................................................................ 26
(1) MMSI Form
(2) Dimensional Drawings
(3) Connection Drawings
(4) Quick Replacement Guide
(5) Transponder Installation checklist
NAUTICAST2 Workboat AIS
Installation Manual
Index Page Number

Installation Manual III Y1-03-0219 Rev. A
History of Changes
Date Version Rev. Status Comments Responsible
2006-10-19 1.0.0 A Released Initial Release Team

Installation Manual 1Y1-03-0219 Rev. A
1 General Introduction
1.1 Description of AIS
What does the abbreviation AIS stand for?
AIS stand for: “Automatic Identification System”
What is AIS?
According to IALA regulations, AIS is defined as follows:
Very simply, the AIS is a broadcast Transponder system, operating in the VHF maritime mobile
Band. It is capable of sending ship information such as identification, position course, speed
and more, to other ships and to shore. It can handle multiple reports at rapid update rates
and uses Self-Organizing Time Division Multiple Access (SOTDMA) technology to meet
these high broadcast rates and ensure reliable and robust ship to ship operation.
What are the performance standards of AIS?
The IMO defines the performance standards as follows:
- Ship to Ship working
- Ship to Shore working, including Long Range Application
- Automatic and continuous operation
- Provision of information messaging
- Utilization of maritime VHF channels
Which modules make up an AIS-Transponder?
The Modules:
- GPS receiver
- VHF Radio
- Antenna
- Computer (CPU)
- Power Supply
Appropriate application software connects the individual modules.
In which modes does AIS function?
AIS is required to function flawlessly in a variety of modes. The relevant regulations require:
The system shall be capable of
- An "autonomous and continuous" mode for operation in all areas. This mode shall
be capable of being switched to/from one of the following alternate modes by a
competent authority;
- An "assigned" mode for operation in an area subject to a competent authority
responsible for traffic monitoring such that the data transmission interval and/or time
slots may be set remotely by that authority;
- A "polling or controlled" mode, where the data transfer occurs in response to
interrogation from a ship or competent authority.

Installation Manual 2Y1-03-0219 Rev. A
2 NAUTICAST2
2.1 System Overview
Unlike other AIS devices, the NAUTICAST2 combines all required functions into one cabinet.
Additionally, the NAUTICAST2 gives the operator a number of additional features (easy
mounting & installation, environmental protection, smallest dimensions).

Installation Manual 3Y1-03-0219 Rev. A
3 Installation
3.1 Installation Requirements
General Requirements
Please note that international conventions, regulations, instructions and guidelines have to be
adhered to when installing the NAUTICAST2.
The following points must be observed before installation can commence:
- Permission by the local authority to install such a device must be granted.
- Trained service personnel must undertake the installation.
- The NAUTICAST2 must be fitted in a suitable place on the bridge.
-The VHF and GPS Antennas must be installed in a suitable position, where excellent
reception conditions apply
(refer to Chapter 3.3 Installation of VHF antenna – page 6)
- All available interfaces must be installed.
- The vessels power supply must suffice, and the GMDSS power supply has to be used.
3.2 Installation Overview
Survey
AIS is considered part of the ship’s radio station and is surveyed together with radio installation.
Surveys on SOLAS Convention ships should be carried out in accordance with the rules laid
down in IMO Res. A 746(18) "Survey Guidelines under the harmonized system of survey and
certification" (R) 8, and "Protocol of 1988 relating to the International Convention for the Safety of
Life at Sea, 1974."
The NAUTICAST2 consists of one unit, which integrates all necessary modules.
Step-by-Step Installation Procedure:
xMount the NAUTICAST2 close to ships operator workstation for traffic surveillance and
maneuvering.
xUse the VHF adapter cable to connect the VHF and GPS antenna cables as well as the
antennas.
xThe sensor ECDIS can be connected to the NAUTICAST2 cabinet by the AIS cable.
The device is driven by a 24V DC 7A supply, which is connected to the power terminal at
the connection box. The AIS should be connected to an emergency power source. A
battery capacity calculation together with GMDSS-equipment is needed!
xAfter performing these steps, the NAUTICAST2 automatically starts operation.
xThe NAUTICAST2 has a ground terminal which has to be connected to ship ground.
xNow configure the required initial system parameters according to Chapter 4 “Starting the
Product”.

Installation Manual 4Y1-03-0219 Rev. A
NAUTICAST2 Connection Diagram
Note: The ACR connection box includes a fuse of 6,3A. If it is not used, then the unit has to be
protected against high current by an external slow blow fuse of 6,3A.

Installation Manual 5Y1-03-0219 Rev. A
Components and Interfaces
The diagram below illustrates which devices can be connected to the NAUTICAST2.
Interface Designation Speed Direction
ECDIS CH 4 38400bps Input/Output

Installation Manual 6Y1-03-0219 Rev. A
3.3 Installation of VHF / GPS Antennas
Interference to the Ship’s VHF Radiotelephone
The AIS ship borne equipment, like any other ship borne transceiver operating in the VHF
maritime band, may cause interference to a ship’s VHF radiotelephone. Because AIS is a digital
system, this interference may occur as a periodic (e.g. every 20 seconds) soft clicking sound on
the ship’s radiotelephone. This affect may become more noticeable if the VHF radiotelephone
antenna is located close to the AIS VHF antenna, and when the radiotelephone is operating on
channels near the AIS operating channels (e.g. channels 27, 28 and 86).
Attention should be paid to the location and installation of the various antennas, in order to
support the antenna characteristics in the best possible way.
VHF Antenna Installation
Antenna Location
Location of the mandatory AIS VHF-antenna should be carefully considered. Digital
communication is more sensitive than analogue/voice communication to interference created by
reflections caused by obstructions such as masts and booms. It may be necessary to relocate
the VHF radiotelephone antenna to minimize interference effects.
To minimize interference effects, the following guidelines apply:
xThe AIS VHF antenna should have Omni directional vertical polarization providing 3 to 5 dB
gain.
xThe AIS VHF antenna should be placed in an elevated position, as free standing as possible,
with a minimum of 2 meters in horizontal direction from constructions made of conductive
materials. The antenna should not be installed close to any large vertical obstruction. The AIS
VHF antenna should have a visible sky of 360°.
xThe AIS VHF antenna should be installed at least 3 meters away from interfering high-power
energy sources such as radar and other transmitting radio antennas, and out of the way of
the transmitting beam.
xThere should not be more than one antenna on each level. The AIS VHF antenna should be
mounted directly above or below the ship’s primary VHF radiotelephone antenna, with no
horizontal separation and a minimum of 2 meters vertical separation. If it is located on the
same level as other antennas, the distance apart should measure at least 10 meters.
See also sample for antenna layout in the Appendix.
Cabling
The cable should be kept as short as possible to minimize attenuation of the signal. Double
shielded coaxial cables equal to or better than RG214 are recommended.
RG214 at VHF attenuation per meter of app. 0,07 dB/m (45m = 3,15db)
VHF AIS frequency app. 162MHz


Installation Manual 7Y1-03-0219 Rev. A
All outdoor connectors on the coaxial cables should be fitted with preventive isolation, such as
shrink-stocking with silicone to protect the antenna cable against water penetration. Coaxial
cables should be installed in separate signal cable channels/tubes, and at least 10 cm away from
any power supply cables. Crossing of cables should take place at right angles (90°). Coaxial
cables should not be exposed to sharp bends, which may lead to changes to the characteristic
impedance of the cable. The minimum bend radius should be 5 times the cables outside
diameter.
Grounding
Coaxial down-leads must be used for all receiving antennas, and the coaxial screen should be
connected to the ground at one end.
GNSS Antenna installation
A Class A AIS must be connected to a GNSS antenna.
Location
The GNSS antenna must be installed where it has a clear view of the sky, so that it accesses the
horizon freely through 360°, with a vertical observation of 5 to 90 degrees above the horizon.
Small diameter obstructions, such as masts and booms, do not seriously impair signal reception,
but such objects must not eclipse more than a few degrees of any given bearing.
The antenna must be located at least three meters away from, and out of the transmitting beam
of high-power transmitters (S-Band Radar and/or Inmarsat systems). This includes the ship’s
own AIS VHF antenna, if it is designed and installed separately.
Cabling
To achieve optimum performance, the gain of the antenna pre-amplifier should match the cable
attenuation. The resulting installation gain:
pre-amplifier gain - cable attenuation = max 18dB.
Attention not to overload the GPS receiver! This could damage the internal GPS.
RG214 at GPS attenuation per meter of app. 0,35 dB/m (45m = 15,75dB)
GPS frequency app. 1,2GHz
The coaxial cable between the antenna and the AIS ship borne station connector should be
routed directly, in order to reduce electromagnetic interference. The cable should not be installed
close to high-power lines, such as radar or radio-transmitter lines, or near the AIS VHF antenna
cable. A space of one meter or more is recommended in order to avoid degradation due to RF-
coupling. Crossing of antenna cables should take place at 90 degrees, to minimize magnetic field
coupling.
Antenna Layout
The position of the VHF und GNSS – antennas must be added to the existing antenna layout of
the vessel.

Installation Manual 8Y1-03-0219 Rev. A
L
4 Starting the NAUTICAST2
After completing the hardware, antennas and external equipment installation, the initial system
start-up can commence. To start the system, connect the NAUTICAST2 with the power supply.
The next step is to enter the configuration like password and the MMSI number.
4.1 MMSI Number:
If you are not in possession of an MMSI-number yet, pls. contact the
Federal Communications Commission
http://www.fcc.gov
Phone: 1-888-CALL-FCC (1-888-225-5322)
for further information.

Installation Manual 9Y1-03-0219 Rev. A
4.2 Service and User Passwords:
The Transponder system is equipped with two separate Passwords.
1) The User Password, which is the lower security level allows access to all menus except Menu
6: Service Configuration - please refer to the User Manual for further details on password
protection.
2) The Service Password is required in order to enter the Service Configuration Menu. This is a
higher security level than can be accessed with the User Password and therefore ensures that
the Service Configuration is protected, and limited to authorized service personnel.
The master of the vessel has to ensure that only authorized persons are allowed to make
changes to the Service Configuration and ensures that the newly reset password is stored very
carefully, as it can not be reset from the default “NAUT” a second time.
A master key is not available.
Changing the Service Password
Select “Service Configuration” from the Main Menu with the cursor button [Up] & [Down] or press
Nr. 6 on the keyboard.
Note:
The User and Service Passwords are set to “NAUT” – please reconfigure them immediately after
Transponder initial operation. Store the new passwords very carefully.
The password query field appears. Input new Service Password and press [Enter].
N 1^19' E 0^13' |1>0.01|2>1.30|3>1.80nm
|----------------------------------
| Menu
-----| |
| +- 1. Messages
View | +- 2. AIS Status
| +- 3. Voyage Settings
-----| +- 4. Ship Settings
| +- 5. Transponder Configuration
Msg. | +- 6. Service Configuration
| +- 7. Display Settings
-----|
|
Displ|
----------------------------------------
NUM| Select->| | |<-Back

Installation Manual 10 Y1-03-0219 Rev. A
Select Submenu 1 “Change Service Password” with cursor button [Up] & [Down] by pressing Nr.
1 on the keyboard.
N 1^21' E 0^14' |1>0.01|2>1.30|3>1.80nm
|----------------------------------
| 6. Service Configuration
-----| |
| +- 1. Change Service Password
View | +- 2. User Password Settings
| +- 3. Change MMSI / IMO
-----| +- 4. Restore Factory Settings
|
Msg. |
|
-----|
|
Displ|
----------------------------------------
NUM| Select->| | |<-Back
N 1^24' E 0^17' |1>0.10|2>1.30|3>1.80nm
----------------------------------------
++++++++++++++++++++++++++++++++++++++++
Service password protected!
Please enter service password:
++++++++++++++++++++++++++++++++++++++++
----------------------------------------
| Enter | | | Exit

Installation Manual 11 Y1-03-0219 Rev. A
Enter the new Password:
Repeat the new Password:
A minimum of 4, a maximum of 8 characters are allowed. Should the new password include
numbers, use the shift key to generate them.
Press Save to store the change.
Changing the User Password
Select Submenu 2 “User Password Settings” with cursor button [Up] & [Down] by pressing Nr. 2
on the keyboard.
N 1^25' E 0^18' |1>0.10|2>1.30|3>1.80nm
******* Change Service Password ********
Enter new password :
Repeat new password:
{Length: 4..8 characters}
----------------------------------------
| Save | | | Back
N 1^21' E 0^14' |1>0.01|2>1.30|3>1.80nm
|----------------------------------
| 6. Service Configuration
-----| |
| +- 1. Change Service Password
View | +- 2. User Password Settings
| +- 3. Change MMSI / IMO
-----| +- 4. Restore Factory Settings
|
Msg. |
|
-----|
|
Displ|
----------------------------------------
NUM| Select->| | |<-Back

Installation Manual 12 Y1-03-0219 Rev. A
Select Submenu 1 “Change User Password” with cursor button [Up] & [Down] by pressing Nr. 1
on the keyboard.
Enter the new Password:
Repeat the new Password:
A minimum of 4, a maximum of 8 characters are allowed. Should the new password include
numbers, use the shift key to generate them.
Press Save to store the changes.
N 1^25' E 0^18' |1>0.10|2>1.30|3>1.80nm
******* Change User Password ***********
Enter new password :
Repeat new password:
{Length: 4..8 characters}
----------------------------------------
| Save | | | Back
N 1^21' E 0^14' |1>0.01|2>1.30|3>1.80nm
|----------------------------------
| 6-2. User Password Settings
-----| |
| +- 1. Change User Password
View | +- 2. Change Password Protection
|
-----|
|
Msg. |
|
-----|
|
Displ|
----------------------------------------
NUM| Select->| | |<-Back

Installation Manual 13 Y1-03-0219 Rev. A
4.3 Changing the MMSI / IMO Numbers
Select “Service Configuration” from the Main Menu with the cursor button [Up] & [Down] or press
Nr. 6 on the keyboard.
Input Service Password and press [Enter].
N 1^19' E 0^13' |1>0.01|2>1.30|3>1.80nm
|----------------------------------
| Menu
-----| |
| +- 1. Messages
View | +- 2. AIS Status
| +- 3. Voyage Settings
-----| +- 4. Ship Settings
| +- 5. Transponder Configuration
Msg. | +- 6. Service Configuration
| +- 7. Display Settings
-----|
|
Displ|
----------------------------------------
NUM| Select->| | |<-Back
N 1^23' E 0^16' |1>0.01|2>1.30|3>1.80nm
----------------------------------------
++++++++++++++++++++++++++++++++++++++++
Service password protected!
Please enter service password:
++++++++++++++++++++++++++++++++++++++++
----------------------------------------
| Enter | | | Exit

Installation Manual 14 Y1-03-0219 Rev. A
Select Submenu 3 “Change MMSI/IMO” with cursor button [Up] & [Down] by pressing Nr. 3 on
the keyboard.
Input new MMSI / IMO Numbers and press [Save] to store input data. Press [Back] to return to
the Submenu without saving.
Note:
The IMO number 303174162 has to be deleted. If the ship has no IMO registration, then use
number 0 or number 1. It is very important that a number with one digit has to be used!
N 1^21' E 0^14' |1>0.01|2>1.30|3>1.80nm
|----------------------------------
| 6. Service Configuration
-----| |
| +- 1. Change Service Password
View | +- 2. User Password Settings
| +- 3. Change MMSI / IMO
-----| +- 4. Restore Factory Settings
|
Msg. |
|
-----|
|
Displ|
----------------------------------------
NUM| Select->| | |<-Back
N 1^21' E 0^14' |1> N/A|2>0.00|3>0.10nm
********** Change MMSI / IMO ***********
MMSI :1193046
IMO No.:303174162
----------------------------------------
NUM| Save | | | Back

Installation Manual 15 Y1-03-0219 Rev. A
4.4 Inputting Voyage Related Data – (User Password Protected)
Select “Voyage Settings” from the Main Menu with the cursor button [Up] & [Down]
or press Nr. 3 on the keyboard
Note:
The default User Password is set to “NAUT” – please reconfigure it immediately after
Transponder initial operation
The password query field appears. Input new User Password and press [Enter].
N 1^20' E 0^13' |1> N/A|2>0.00|3>0.10nm
|----------------------------------
| Menu
-----| |
| +- 1. Messages
View | +- 2. AIS Status
| +- 3. Voyage Settings
-----| +- 4. Ship Settings
| +- 5. Transponder Configuration
Msg. | +- 6. Service Configuration
| +- 7. Display Settings
-----|
|
Displ|
----------------------------------------
NUM|Select->| | |<-Back
N 1^31' E 0^24' |1>0.01|2>1.30|3>1.80nm
----------------------------------------
++++++++++++++++++++++++++++++++++++++++
User password protected!
Please enter user password:
++++++++++++++++++++++++++++++++++++++++
----------------------------------------
| Enter | | | Exit

Installation Manual 16 Y1-03-0219 Rev. A
Scroll the Voyage Data Fields with [Enter] and input own vessel data. Select a default Cargo
Type and NavStat Setting with the cursor buttons [Left] & [Right].
Save the new settings by pressing [Save], and return to the Main Menu Screen by pressing
[Exit]. Press [Back] to return to the Main Menu without saving any changes.
4.5 Setting Ship Related Data – (User Password Protected)
Select “Ship Settings” with cursor button [Up] & [Down]
or press Nr. 4 on the keyboard.
Note:
The default User Password is set to “NAUT” – please reconfigure it immediately after
Transponder initial operation
Input new User Password and press [Enter].
N 1^18' E 0^12' |1>0.01|2>1.30|3>1.80nm
*********** Voyage Settings ************
Cargo :<N/A or harmless>
Draught :24.8m
PoB :1
Dest. :CASABLANCA
ETA :10/13 12:31
NavStat.:Engaged in fishing
----------------------------------------
| Save | | | Back
N 1^23' E 0^16' |1>0.01|2>1.30|3>1.80nm
|----------------------------------
| Menu
-----| |
| +- 1. Messages
View | +- 2. AIS Status
| +- 3. Voyage Settings
-----| +- 4. Ship Settings
| +- 5. Transponder Configuration
Msg. | +- 6. Service Configuration
| +- 7. Display Settings
-----|
|
Displ|
----------------------------------------
NUM| Select->| | |<-Back
Table of contents
Other ACR Electronics Marine Radio manuals

ACR Electronics
ACR Electronics Pathfinder 2 Installation instructions

ACR Electronics
ACR Electronics PATHFINDER 3 SART (SEARCH AND RESCUE... Installation instructions

ACR Electronics
ACR Electronics PathFinder3 SART-3 Installation instructions

ACR Electronics
ACR Electronics PATHFINDER 3 User manual

ACR Electronics
ACR Electronics AISLink CB2 User manual