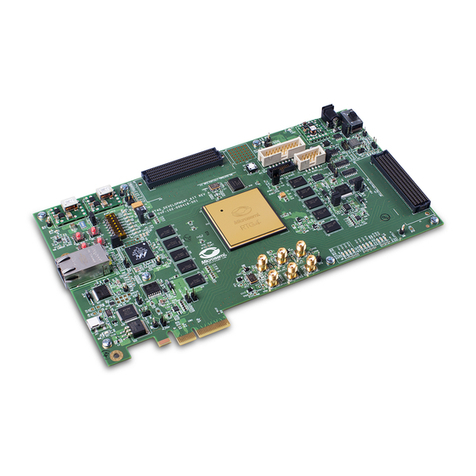
Actel Core1553BRT DevKit User manual

Core1553BRT DevKit
Quick Start Guide
core1553BRT_devkit.book Page 1 Friday, November 22, 2002 10:14 AM

For more information about Actel’s products, call 888-99-ACTEL
or visit our Web site at http://www.actel.com
Actel Corporation • 955 East Arques Avenue • Sunnyvale, CA USA 94086
U.S. Toll Free Line: 888-99-ACTEL • Customer Service: 408-739-1010 • Customer Service FAX: 408-522-8044
Customer Applications Center: 800-262-1060 • Customer Applications FAX: 408-739-1540
Actel Europe Ltd. • Maxfli Court, Riverside Way • Camberley, Surrey GU15 3YL • United Kingdom
Tel: +44 (0)1276 401450 • Fax: +44 (0)1276 401490
Actel Japan • EXOS Ebisu Bldg. 4F • 1-24-14 Ebisu Shibuya-ku • Toyko 150 • Japan
Tel: +81 (0)334-457-671 Fax: +81 (0)334-457-668 5172174-0
core1553BRT_devkit.book Page 2 Friday, November 22, 2002 10:14 AM

Core1553BRT DevKit
Quick Start Guide
core1553BRT_devkit.book Page 3 Friday, November 22, 2002 10:14 AM

4
Actel Corporation, Sunnyvale, CA 94086
© 2002 Actel Corporation. All rights reserved.
Printed in the United States of America
Part Number: 5172174-0
Release: November 2002
No part of this document may be copied or reproduced in any form or by
any means without prior written consent of Actel.
Actel makes no warranties with respect to this documentation and disclaims
any implied warranties of merchantability or fitness for a particular pur-
pose. Information in this document is subject to change without notice. Ac-
tel assumes no responsibility for any errors that may appear in this
document.
This document contains confidential proprietary information that is not to
be disclosed to any unauthorized person without prior written consent of
Actel Corporation.
Trademarks
Actel and the Actel logo are registered trademarks of
Actel Corporation.
Adobe and Acrobat Reader are registered trademarks of
Adobe Systems, Inc.
All other products or brand names mentioned are trademarks or registered
trademarks of their respective holders.
core1553BRT_devkit.book Page 4 Friday, November 22, 2002 10:14 AM

5
Table of Contents
Introduction . . . . . . . . . . . . . . . . . . . . . . . . . . . . . . .7
Core1553BRT DevKit Documentation . . . . . . . . . . . . . . . . . . 7
1 Core1553BRT DevKit Quick Start Guide. . . . . . . . . . . . .9
Overview . . . . . . . . . . . . . . . . . . . . . . . . . . . . . . . . . .9
What’s Included. . . . . . . . . . . . . . . . . . . . . . . . . . . . . . 10
Software Installation . . . . . . . . . . . . . . . . . . . . . . . . . . . 11
2 Using the Core1553BRT Demo Card . . . . . . . . . . . . . . 13
Exercising the 1553BRT Demo Card . . . . . . . . . . . . . . . . . . 13
3 Using the Remote Terminal . . . . . . . . . . . . . . . . . . . . 17
Board Description . . . . . . . . . . . . . . . . . . . . . . . . . . . . 17
1553BRT Demo Card Back Panel Connections . . . . . . . . . . . . . 19
Signals and Connections . . . . . . . . . . . . . . . . . . . . . . . . . 20
RT Address Jumpers . . . . . . . . . . . . . . . . . . . . . . . . . . . 25
1553BRT Bus Connections . . . . . . . . . . . . . . . . . . . . . . . . 26
1553BRT Demo Card Address Map . . . . . . . . . . . . . . . . . . . 26
Standard Address Map . . . . . . . . . . . . . . . . . . . . . . . . . . 26
Extended Address Map . . . . . . . . . . . . . . . . . . . . . . . . . . 27
Control Registers . . . . . . . . . . . . . . . . . . . . . . . . . . . . . 31
A Core1553BRT DevKit Contents . . . . . . . . . . . . . . . . . 37
B Product Support . . . . . . . . . . . . . . . . . . . . . . . . . . . 39
Actel U.S. Toll-Free Line . . . . . . . . . . . . . . . . . . . . . . . . . 39
Customer Service . . . . . . . . . . . . . . . . . . . . . . . . . . . . . 39
Customer Applications Center . . . . . . . . . . . . . . . . . . . . . . 40
Guru Automated Technical Support . . . . . . . . . . . . . . . . . . . 40
Web Site. . . . . . . . . . . . . . . . . . . . . . . . . . . . . . . . . . 40
FTP Site . . . . . . . . . . . . . . . . . . . . . . . . . . . . . . . . . . 41
Contacting the Customer Applications Center . . . . . . . . . . . . . . 41
Worldwide Sales Offices . . . . . . . . . . . . . . . . . . . . . . . . . 42
core1553BRT_devkit.book Page 5 Friday, November 22, 2002 10:14 AM

core1553BRT_devkit.book Page 6 Friday, November 22, 2002 10:14 AM

7
Introduction
The 1553BRT DevKit is a starter kit for working with Actel Core1553BRT
products and is intended to help you get your 1553BRT product to market
faster. The kit consists of a 1553BRT board, example design, and software
drivers to exercise the board.
Core1553BRT DevKit Documentation
The Core1553BRT DevKit includes a printed and online version of the
Core1553BRT DevKit Quick Start Guide, which contains information and
procedures for using the Core1553BRT. The guide is in PDF format on the
CD-ROM in the “\doc” directory. To view the online manual, you must have
Adobe®Acrobat Reader ®installed. Actel provides Reader on the Designer
CD-ROM.
core1553BRT_devkit.book Page 7 Friday, November 22, 2002 10:14 AM

core1553BRT_devkit.book Page 8 Friday, November 22, 2002 10:14 AM

9
1
Core1553BRT DevKit Quick Start Guide
The Core 1553BRT DevKit is a starter kit for working with Actel
Core1553BRT products and is intended to help you get your 1553BRT product
to market faster. Intended uses are as follows:
1. To provide a hardware platform for software driver development specific
to your system.
2. To provide hardware functionality to complement the simulation test
bench.
3. To provide the ability to test modifications and enhancements made to the
Core1553BRT core (IP and additional devices sold separately).
Overview
The 1553B RT development kit contains an Actel Core1553BRT
Demonstration Board, reference design and software to support the card.
The board implements a PCI to 1553B remote terminal function, the block
diagram is shown in Figure 1-1.
Figure 1-1. PCI to 1553B Remote Terminal Function Block Diagram
PCB
SSRAM
16K Bytes
Tranceiver
TX
TX
PCI
Bus
1553B
Buses
FPGA
PCI
Target
1553B
RT
Control
Registers
SSRAM
Interface
Jumpers
Address
Mapper
Bus B
Bus A
core1553BRT_devkit.book Page 9 Friday, November 22, 2002 10:14 AM

Chapter 1: Core1553BRT DevKit Quick Start Guide
10
The FPGA contains five main blocks: the PCI Target, Control registers, 1553B
RT, address mapper and the SSRAM interface.
The PCI target is a standard implementation of the Actel CorePCI Target IP
core (version 5.3). The Control registers control the operating mode inputs on
the 1553BRT core (see “Using the Remote Terminal” on page 17). The address
mapper allows the RT to operate with an enhanced memory map. Finally, the
SSRAM interface allows both the CorePCI and Core1553BRT to access the
same external memory.
What’s Included
The following is included with your new Core1553BRT Development Kit.
Core1553BRT
Demo Board
• 1553BRT card
• Socketed 54SX32A device implementing the Core1553BRT and CorePCI
function
• 1533B transceivers and transformers wired for direct coupling
• Header strips for backend observation
• Silicon Explorer connector for viewing internal nodes
CD with
Software
Drivers and
Design Files
• Actel 1553BRT Demo application software for either Win98, NT, XP, or
Windows 2000 systems
• VHDL source code for the chip-level wrapper, refer to Appendix A for more
information
IP Cores (CorePCI and Core1553BRT) are sold separately.
core1553BRT_devkit.book Page 10 Friday, November 22, 2002 10:14 AM

Software Installation
11
Software Installation
Note: You must install your software before you install the PCI
Demo Card.
To install the 1553BRT demonstration driver and software:
1. Log in as Administrator.
2. Insert the Core1553BRT software CD; installation starts
automatically. Follow the instructions on the screen. If installation does
not start automatically, run
<CDdrive>:\DEMO software\Setup.EXE
Installing the
1553BRT Demo
Card
Before installing the 1553BRT demo card, Make sure that the RT Address
jumpers are fitted correctly (“RT Address Jumpers” on page 25).
You can also set the RT address using the supplied software.
To install the hardware:
1. Turn the computer power off.
2. Install PCI Development Card using static-safe procedures.
3. Boot your PC and login as Administrator if required. When/if
the New Hardware Wizard pops up click “Next” and then select “Display
list of the known drivers”. Click “Next” again.
4. Select “Show compatible hardware drivers”.
5. Select “Actel Development Board”. Click “Next” and “Next” again.
6. Click “Finish”. Installation is now complete.
Refer to “Core1553BRT DevKit Contents” on page 37 for instructions on how
to remove the 1553B demo card.
WARNING:AnSDRAMmemorymustnotbefittedtothe SDRAM
DIMM socket.
core1553BRT_devkit.book Page 11 Friday, November 22, 2002 10:14 AM

core1553BRT_devkit.book Page 12 Friday, November 22, 2002 10:14 AM

13
2
Using the Core1553BRT Demo Card
The 1553BRT development PCB is supplied with a basic Windows utility that
enables you to peek, poke, fill, and display the PCI/RT memory.
Exercising the 1553BRT Demo Card
This development kit provides you a demo application to exercise basic PCI
access to the 1553BRT memory. The demo application allows basic reads and
writes to the SSRAM.
Run Demo
Software
To execute the demo application, select the ActelPCI program from the Start
menu (from the Start menu, select Programs -> Actel -> ActelPCI).
Demo
Application
Operations
Window
The Operations window of the demo application is shown in Figure 2-1.
Figure 2-1. Demo Program Operations Window
core1553BRT_devkit.book Page 13 Friday, November 22, 2002 10:14 AM

Chapter 2: Using the Core1553BRT Demo Card
14
PCI
Configuration
Space
To access the PCI configuration space click the PCI Registers button in the
Operations window (Figure 2-1). The PCI Configuration Register dialog box
appears, as shown in Figure 2-2. Click OK to continue.
Figure 2-2. PCI Configuration Register Dialog
BAR0 is used for the Core1553BRT memory space. If you click the Status or
Command registers the Demo displays the register settings.
Memory Test Click the Memory Test button in the Operations window to perform a memory
test (Figure 2-1). The Memory Test button opens a dialog box (Figure 2-3). Set
the Memory Device/Range to BAR0.
Figure 2-3. Memory Test Dialog Box
The memory test fails at addresses 4000 and upwards since these locations are
used by the control registers and do not return what was written.
core1553BRT_devkit.book Page 14 Friday, November 22, 2002 10:14 AM

Exercising the 1553BRT Demo Card
15
Warning: When you run the memory test it corrupts the 1553B registers. You
must set them back to their correct values after you run the memory test. For
more information, see “Setting Registers to Defaults” on page 34.
Poke To write a specific value to a specified location inside the memory, click the
Poke button in the in the Operations window (Figure 2-1). This displays the
Memory Value Dialog box, as shown in Figure 2-4.
Figure 2-4. Memory Value Dialog Box - Poke
Provide the addresses, value, and the address space, then click OK to perform a
memory write.
Peek Click the Peek button in the Operations window to read a specified memory
location (Figure 2-1). The Memory Value Dialog box appears.
Figure 2-5. Memory Value Dialog Box - Peek
Provide the read address and specify the address space, then click OK. The
message box appears to report the data for all the requested addresses.
core1553BRT_devkit.book Page 15 Friday, November 22, 2002 10:14 AM

Chapter 2: Using the Core1553BRT Demo Card
16
Memory Fill Use the Memory Fill button in the Operations window to write a specified
value to a consecutive memory location. Click the Memory Fill button to open
the Memory Fill Dialog box (Figure 2-6).
Figure 2-6. Memory Fill Dialog Box
Provide a starting address, location numbers, value and address space, and then
click OK to write the specified value.
Memory Dump Click the Memory Dump button in the Operations window to dump
consecutive memory locations. The Memory Dialog box appears (Figure 2-7).
Figure 2-7. Memory Value Dialog Box - Memory Dump
To read out the serial memory (dump memory), provide the starting address,
the length, and the address space, then click OK.
core1553BRT_devkit.book Page 16 Friday, November 22, 2002 10:14 AM

17
3
Using the Remote Terminal
The Core1553BRT DevKit can be used to test modifications you made to the
core or can be used to test custom backends using a daughter card strategy. For
either case, a new device can be programmed and inserted into the socket.
For the daughter card strategy, it is essential to ensure that the synchronous
SSRAMs are configured so that they will not drive data. The simplest
mechanism for doing this is to ensure that the signal “RAM_CEn” be held high
by the macro. A daughter card can then be connected through the backend
header pins and will not be affected by the SSRAM devices.
Board Description
The 1553BRT demo board is illustrated in Figure 3-1. The main components
on the board are the socketed FPGA 1553B transceivers and transformers, the
backend SSRAM, the Silicon Explorer connector, and the backend header
strips. The RS-232 translator and SDRAM DIMM interface are not used in the
1553BRT design. The board includes the 64-bit PCI extension; however, the
extension is not used.
Figure 3-1. 1553BRT Demo Board
core1553BRT_devkit.book Page 17 Friday, November 22, 2002 10:14 AM

Chapter 3: Using the Remote Terminal
18
The following table describes the 1553BRT demo board components.
Table 3-1. 1553BRT Demo Board Legend
J2 SDRAM DIMM INTERFACE -
DO NOT FIT AN SDRAM!
J3 Header strip
J4 Header strip
J5 Header strip
U4 Actel 54SX32A FPGA
U2 SSRAM
U3 SSRAM
U6 1553B Transceiver
T1/T2 1553B Transformers
U7 RS-232 Transceiver
J6 Silicon Explorer Connection
core1553BRT_devkit.book Page 18 Friday, November 22, 2002 10:14 AM

1553BRT Demo Card Back Panel Connections
19
1553BRT Demo Card Back Panel Connections
Four LEDs on the 1553BRT demo card are shown in Figure 3-2.
Figure 3-2. LEDs on the PCI Demo Card
See Table 3-2 for a summary.
Table 3-2. LED Function Summary
LED Function Description
1ACTIVE Indicates that the 1553BRT is responding to a 1553B
message
2AUTOLOOP Indicates that the AUTOLOOP function is enabled
(bit 17 of the control register)
3Memory fail Indicates that the 1553BRT core failed to access the
memory
4RT address error
Indicates that the RT address and parity bit are set
incorrectly. This represents the RTADDER output
from the Core1553BRT
L
ED 1 LED
2
L
ED 3 LED
4
Bus
A
Bus
B
core1553BRT_devkit.book Page 19 Friday, November 22, 2002 10:14 AM

Chapter 3: Using the Remote Terminal
20
Signals and Connections
The tables on the following pages provide connection information among the
FPGA, the 1553BRT bus, and the backend header strips. When applicable,
SSRAM signals are included.
This is the PCI Bus Signal Connections table.
Table 3-3. PCI Bus Signal Connection Table
PCI Signal SX32A Pin
Number PCI Signal SX32A Pin
Number
CLK AB13 AD23 C15
RST D18 AD24 B16
AD0 B4 AD25 C16
AD1 B5 AD26 D16
AD2 A5 AD27 A17
AD3 D6 AD28 B17
AD4 C6 AD29 C17
AD5 B6 AD30 D17
AD6 A6 AD31 A18
AD7 D7 CBE0 C7
AD8 B7 CBE1 D10
AD9 D8 CBE2 C13
AD10 C8 CBE3 A16
AD11 B8 DEVSELN B11
AD12 D9 FRAMEN A12
AD13 C9 GNTN C18
core1553BRT_devkit.book Page 20 Friday, November 22, 2002 10:14 AM
Table of contents
Other Actel Microcontroller manuals
