Actev Arrow User manual

7100-0009_RevE
BODY KIT ASSEMBLY
INSTRUCTIONS
Please check for the latest version of these instructions at actevmotors.com/support/

BODY KIT ASSEMBLY - SAFETY WARNINGS | 1
BODY KIT ASSEMBLY - SAFETY WARNINGS
ACTEVMOTORS.COM
IMPORTANT WARNINGS
The information in this document affects safety and your legal rights and
responsibilities. Failure to carefully read and follow the assembly instructions
and warnings may result in serious injury to you, your child or bystanders,
and result in damage to your Formula Racecar Body Kit™.
Failure to assemble and install the Formula Racecar Body Kit correctly and
use this product in a safe and responsible manner could result in injury or
damage to the product, or other property.
By using the Formula Racecar Body Kit you hereby agree to this disclaimer
and signify that you have read it fully. Actev Motors assumes no liability for
damages or injuries incurred directly or indirectly from misuse of this product.
Misuse includes, but is not limited to, using unapproved hardware, altering
the Formula Racecar Body Kit, failing to properly install Formula Racecar
Body Kit and using the product without adult supervision.
The Formula Racecar Body Kit is to be used with the Arrow Smart-Kart as an
aesthetic accessory only and does not provide any additional structural
support to the Arrow Smart-Kart.
LIMITED WARRANTY
Actev Motors provides a 120-day limited warranty from the delivery date of
your Formula Racecar Body Kit.
This warranty covers normal use but does not cover the product if damaged
by improper use, neglect, accident, abuse, misuse, improper service or other
causes not arising out of defects in materials or workmanship. Improper use
includes driving on unpaved surfaces, on hills or in wet conditions. Evidence
of any attempt at consumer repair will void this warranty.
THIS WARRANTY DOES NOT COVER, AND IS INTENDED TO
EXCLUDE, ANY LIABILITY ON THE PART OF ACTEV MOTORS,
WHETHER UNDER THIS WARRANTY OR IMPLIED BY LAW FOR
ANY INDIRECT OR CONSEQUENTIAL DAMAGES FOR BREACH
OF WARRANTY. SOME STATES DO NOT ALLOW THE EXCLUSION
OR LIMITATION SO THIS LIMITATION MAY NOT APPLY TO YOU.
If this product has a manufacturing defect within 120 days of receipt, contact
does not cover return shipping damage resulting from insufficient packaging.
FORMULA RACECAR BODY KIT WARNINGS
• Follow all assembly and installation instructions, including attaching front
wing cable to Arrow Smart-Kart module. (Front Wing - Step 3).
• The Formula Racecar Body Kit does not add any structural support to the
Arrow Smart-Kart.
• Do not use Formula Racecar Body Kit as a bumper or shield. Formula
Racecar Body Kit will not absorb shock from an impact.
• Do not stand, kneel, or lean on any of the Formula Racecar Body Kit
components. They will not support body weight.
• Make sure all Formula Racecar Body Kit components are secure before
driving the Arrow Smart-Kart.
• Do not allow Formula Racecar Body Kit components to drag on ground
while driving
• When removing Formula Racecar Body Kit components make sure Arrow
Smart-Kart’s original hardware components are properly re-installed.
FORMULA RACECAR BODY KIT MAINTENANCE
To maintain safe and reliable operation of your Formula Racecar Body Kit,
occasionally do the following:
• Check nuts and bolts and tighten if necessary.
• Check Front Wing cable is plugged into Arrow module.
CLEANING THE FORMULA RACECAR BODY KIT:
Use a damp cloth to wipe the down the Formula Racecar Body Kit
components.
• Do not spray the Formula Racecar Body Kit with hose or submerge.
• Do not use any soap, detergent or solvents to clean the Formula Racecar
Body Kit.
Formula Racecar Body Kit is a trademark of Actev Motors, Inc. Names of
products, brands, etc., appearing in this manual are trademarks or registered
trademarks of their respective owner companies. This manual is copyrighted
by Actev Motors, Inc. with all rights reserved. No part of this product or
document shall be reproduced in any form without the prior written consent
or authorization of Actev Motors, Inc.
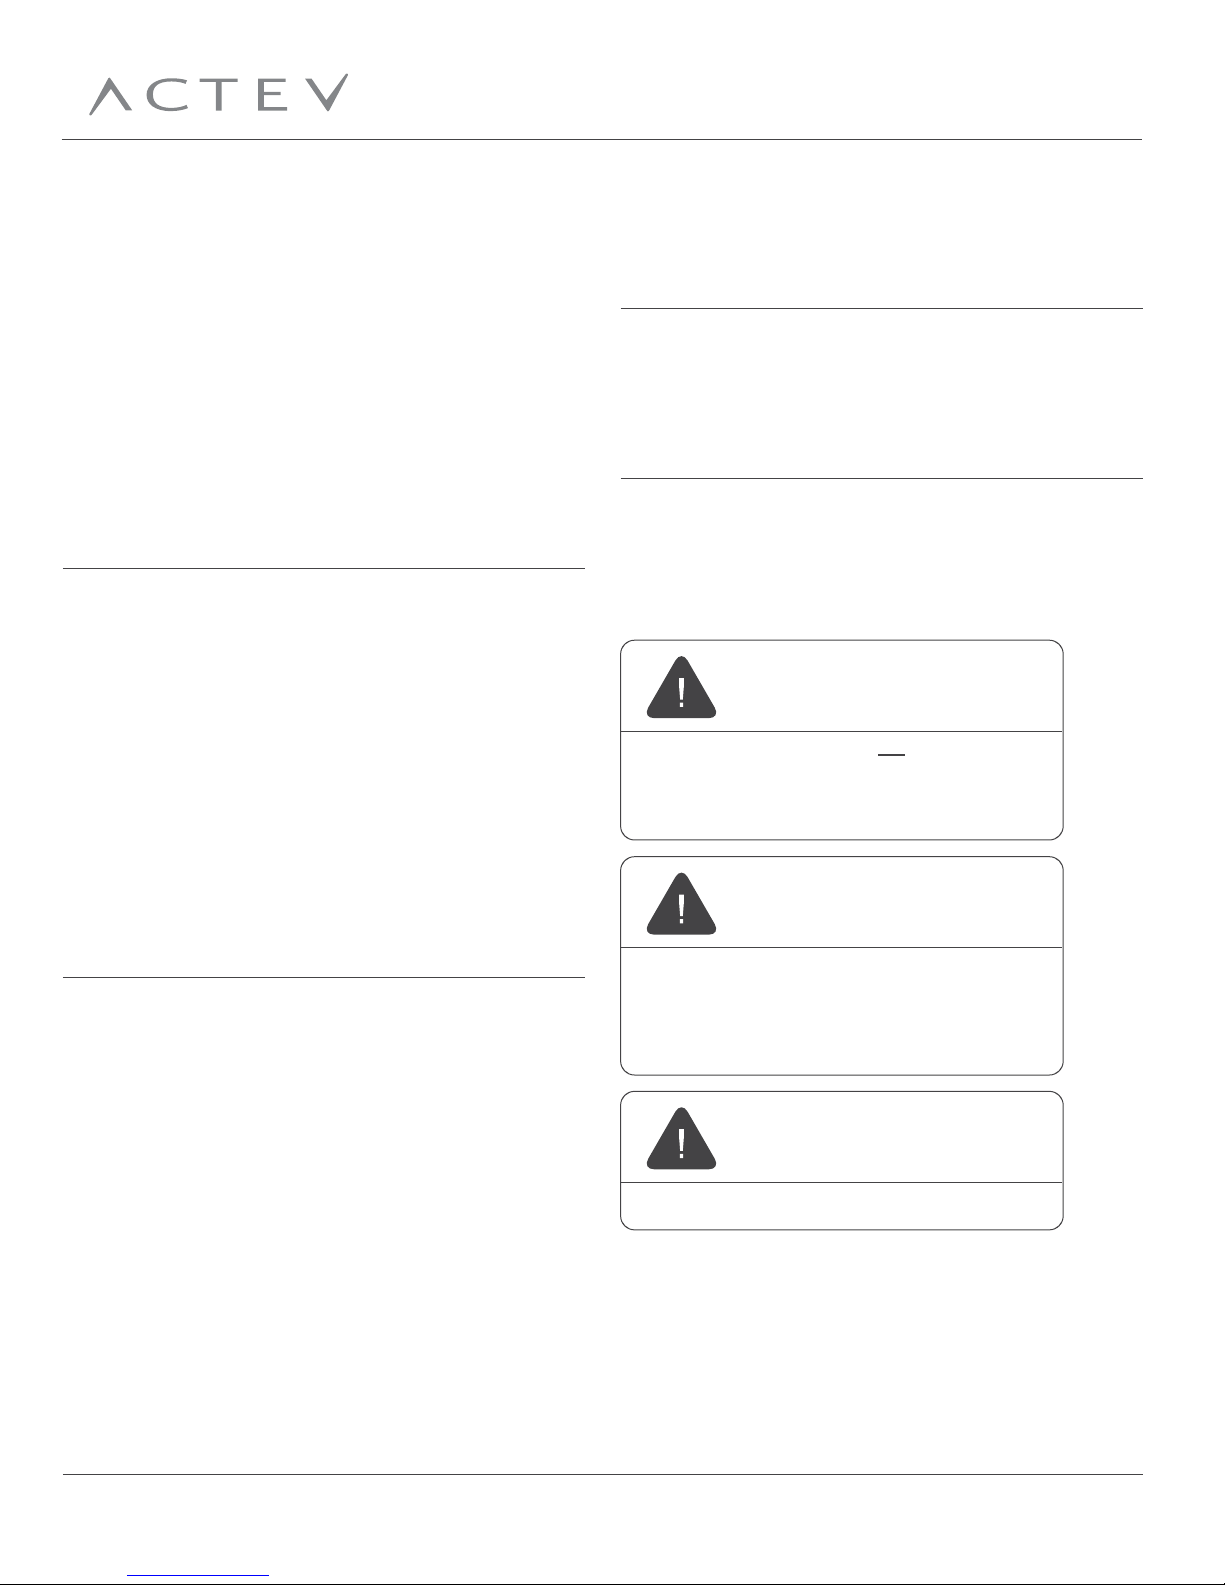
CHOKING HAZARD
This product contains small parts.
Not for children under 3 years old.
To reduce the risk of injury, adult supervision is
required. Never use in roadways, near motor
vehicles, on or near steep inclines or steps,
swimming pools or other bodies of water; always
wear shoes, and never allow more than one rider.
Recommended Age: 5-9 years old
Weight Limit: 130lbs (59kg)
WARNING
WARNING
This product to be assembled by an adult.
WARNING

BODY KIT ASSEMBLY - PROVIDED PARTS | 2
BODY KIT ASSEMBLY - PROVIDED PARTS
ACTEVMOTORS.COM
Front Nose
Right Pod
Left Pod
You will need:
Phillips Screwdriver x1
Bolt A x1
Nut A x1
(already installed in Arrow
upper steering clamp)
Nut B x4
Screw B x4
Screw D x6
Screw C x4
Allen Wrench x1
Open-End Wrench x1
13mm
10mm
19mm
Rear Wing
Right Wing
Support
Left Wing
Support
Front Wing
A
R
R
O
W
A
R
R
O
W
Decal Sheets x4
Provided Parts
BODY KIT ASSEMBLY - SIDE PODS | 3
BODY KIT ASSEMBLY - SIDE PODS
ACTEVMOTORS.COM
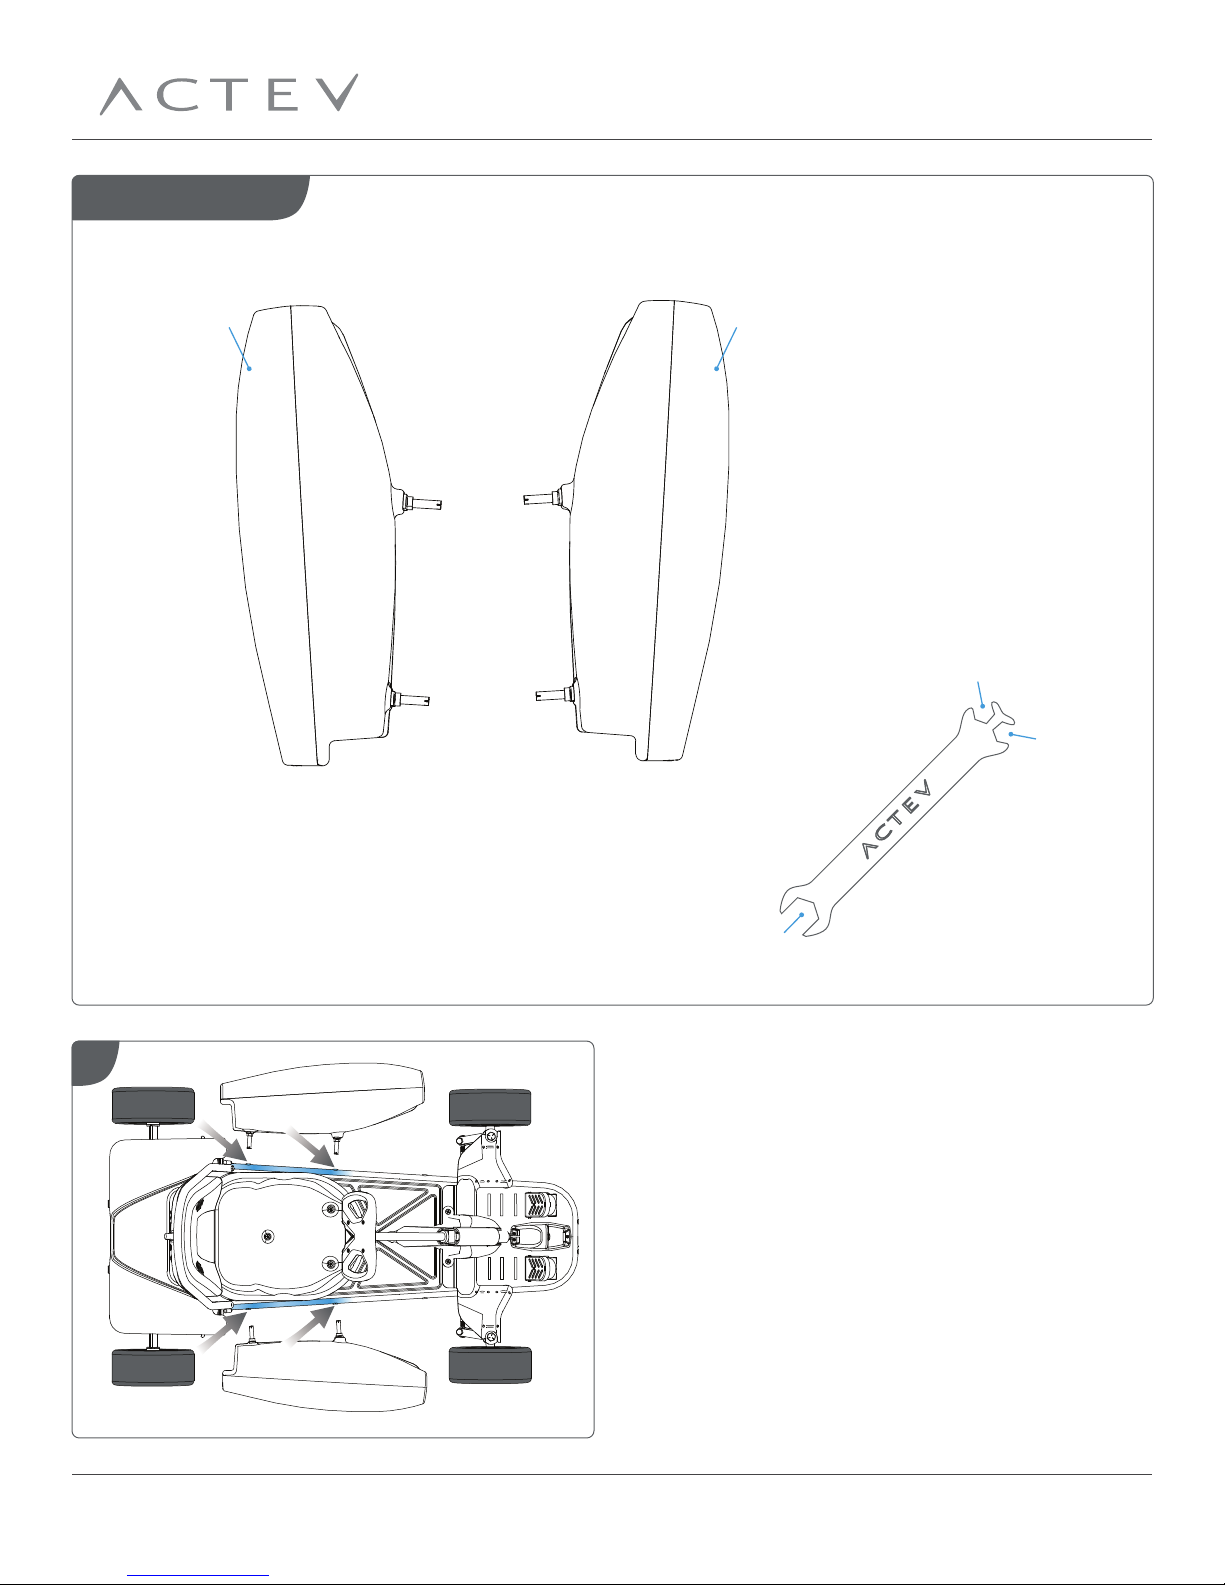
Right Pod x1Left Pod x1
Open-End Wrench x1
13mm
10mm
19mm
On each side of the Arrow locate the two frame
holes closest to the rear wheels.
Provided Parts
1
BODY KIT ASSEMBLY - SIDE PODS | 4ACTEVMOTORS.COM
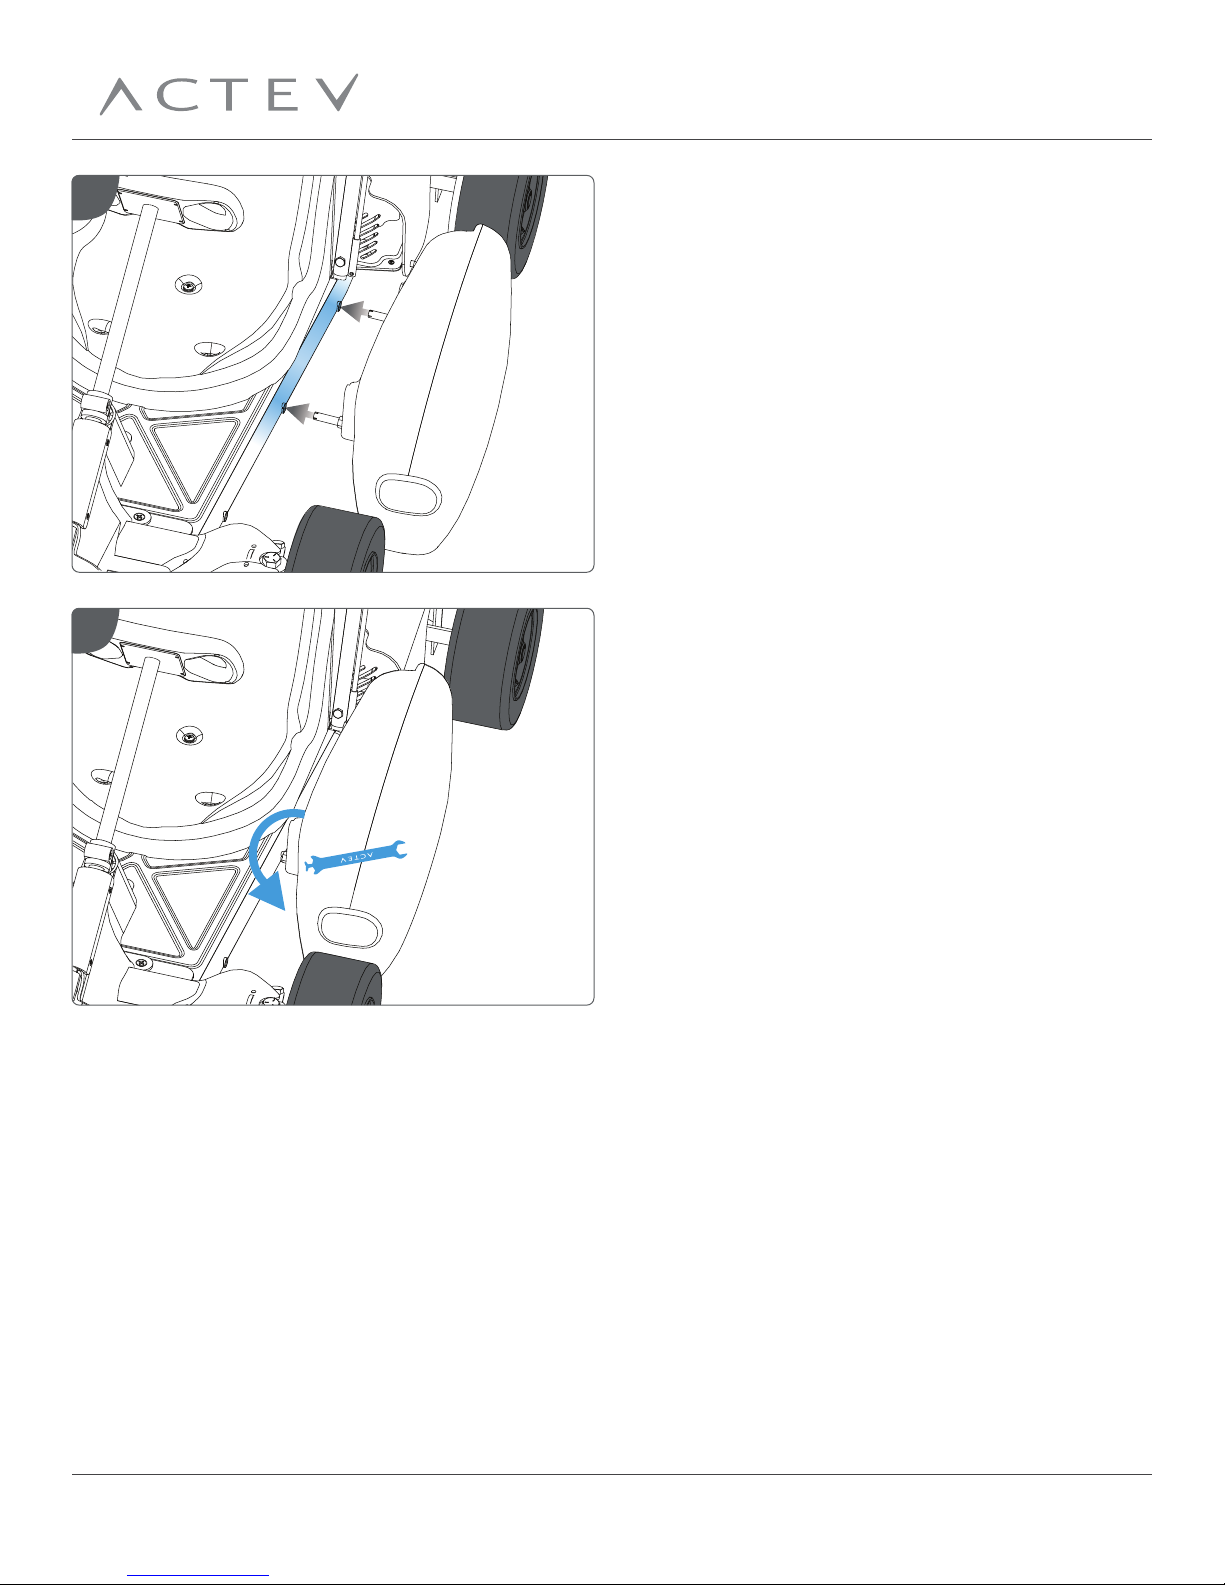
Insert the side pod studs into the rear two
frame holes.
Facing the outside of the pod, tighten the pod
studs in a counterclockwise direction. Use the
13mm side of the open-end wrench.
Tighten studs until they touch the pod “L”
brackets. Do not overtighten.
Helpful tip: It might take over 10 half-turns to
tighten each stud. Push pod toward the Arrow
while tightening. You may also carefully tilt the
Arrow to rest sideways on two wheels. This
position may provide easier access to tighten the
pod studs.
3
2
BODY KIT ASSEMBLY - FRONT WING | 5
BODY KIT ASSEMBLY - FRONT WING
ACTEVMOTORS.COM
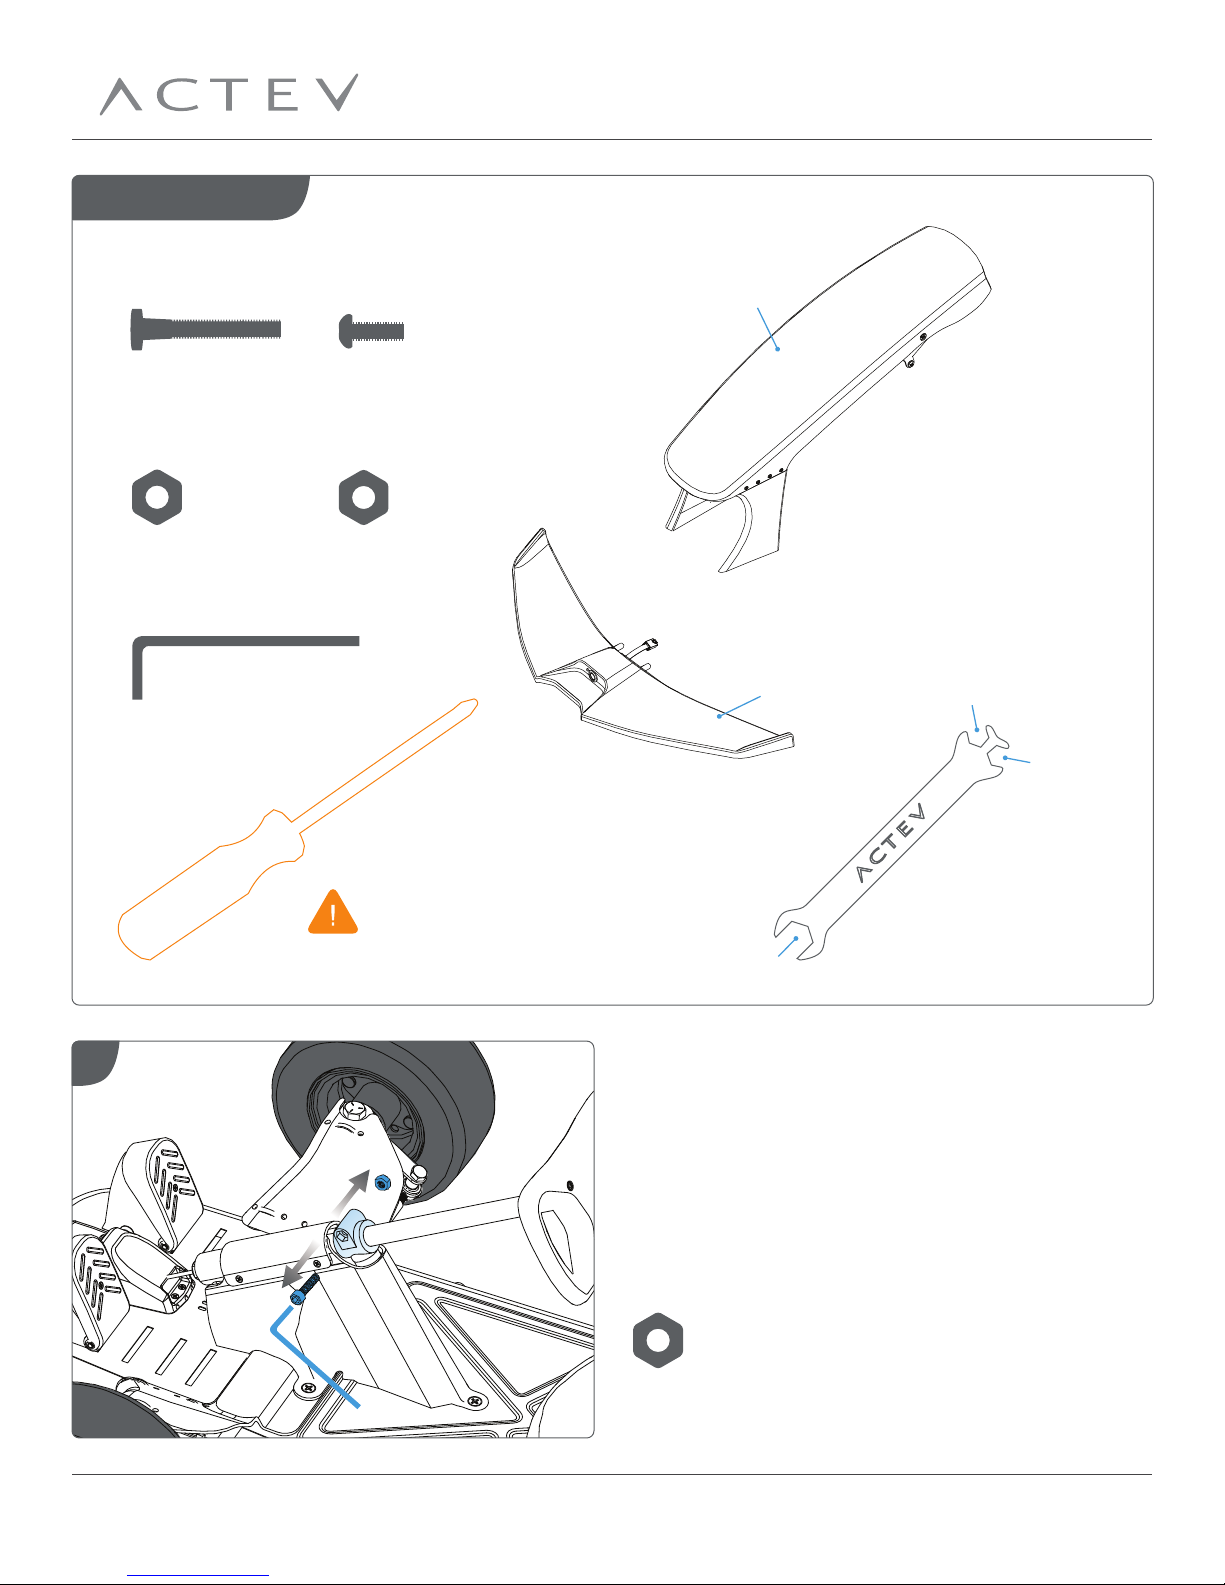
Front Nose x1
You will need:
Phillips Screwdriver x1
Nut A x1
(already installed in Arrow
upper steering clamp)
Nut A x1
(already installed in Arrow upper steering clamp)
Open-End Wrench x1
Allen Wrench x1
13mm
10mm
19mm
Front Wing x1
Nut B x4
Screw B x4
Bolt A x1
Remove the bolt and Nut A from the upper
steering clamp using the Allen wrench.
Keep Nut A close by since it will be used again in
an upcoming step.
We recommend that you retain the bolt in case
you remove the front wing sometime in the future.
Provided Parts
1

Assemble front wing and front nose using a
Phillips screwdriver and 10mm side of the
open-end wrench.
Use a large towel spread on a table during
assembly to prevent scratches.
Leave two tape straps in place during assembly.
Nut B x4Screw B x4
Remove two tape straps after all four screws
have been tightened.
Align the front wing support with the upper
steering clamp.
Align the front wing studs with the holes on the
front of the frame.
Align the front wing support with the upper
steering clamp.
Align the front wing studs with the holes on the
front of the frame.
BODY KIT ASSEMBLY - FRONT WING | 6ACTEVMOTORS.COM
Nut B
3
2
4

Face the front wing as if you were driving the
Arrow and tighten the front wing studs in a
clockwise direction. Use the 13mm side of the
open-end wrench.
Tighten studs until they touch the metal
washers on the wing. Do not overtighten.
Helpful tip: It might take over 10 half-turns to
tighten each stud.
Push studs into the front frame holes.
Make sure the front wing cable is resting on top of
the frame.
BODY KIT ASSEMBLY - FRONT WING | 7ACTEVMOTORS.COM
Remove and discard the rubber plug in the pedal
module and snap the cable into the pedal module.
Pedal
Module
5
6
7
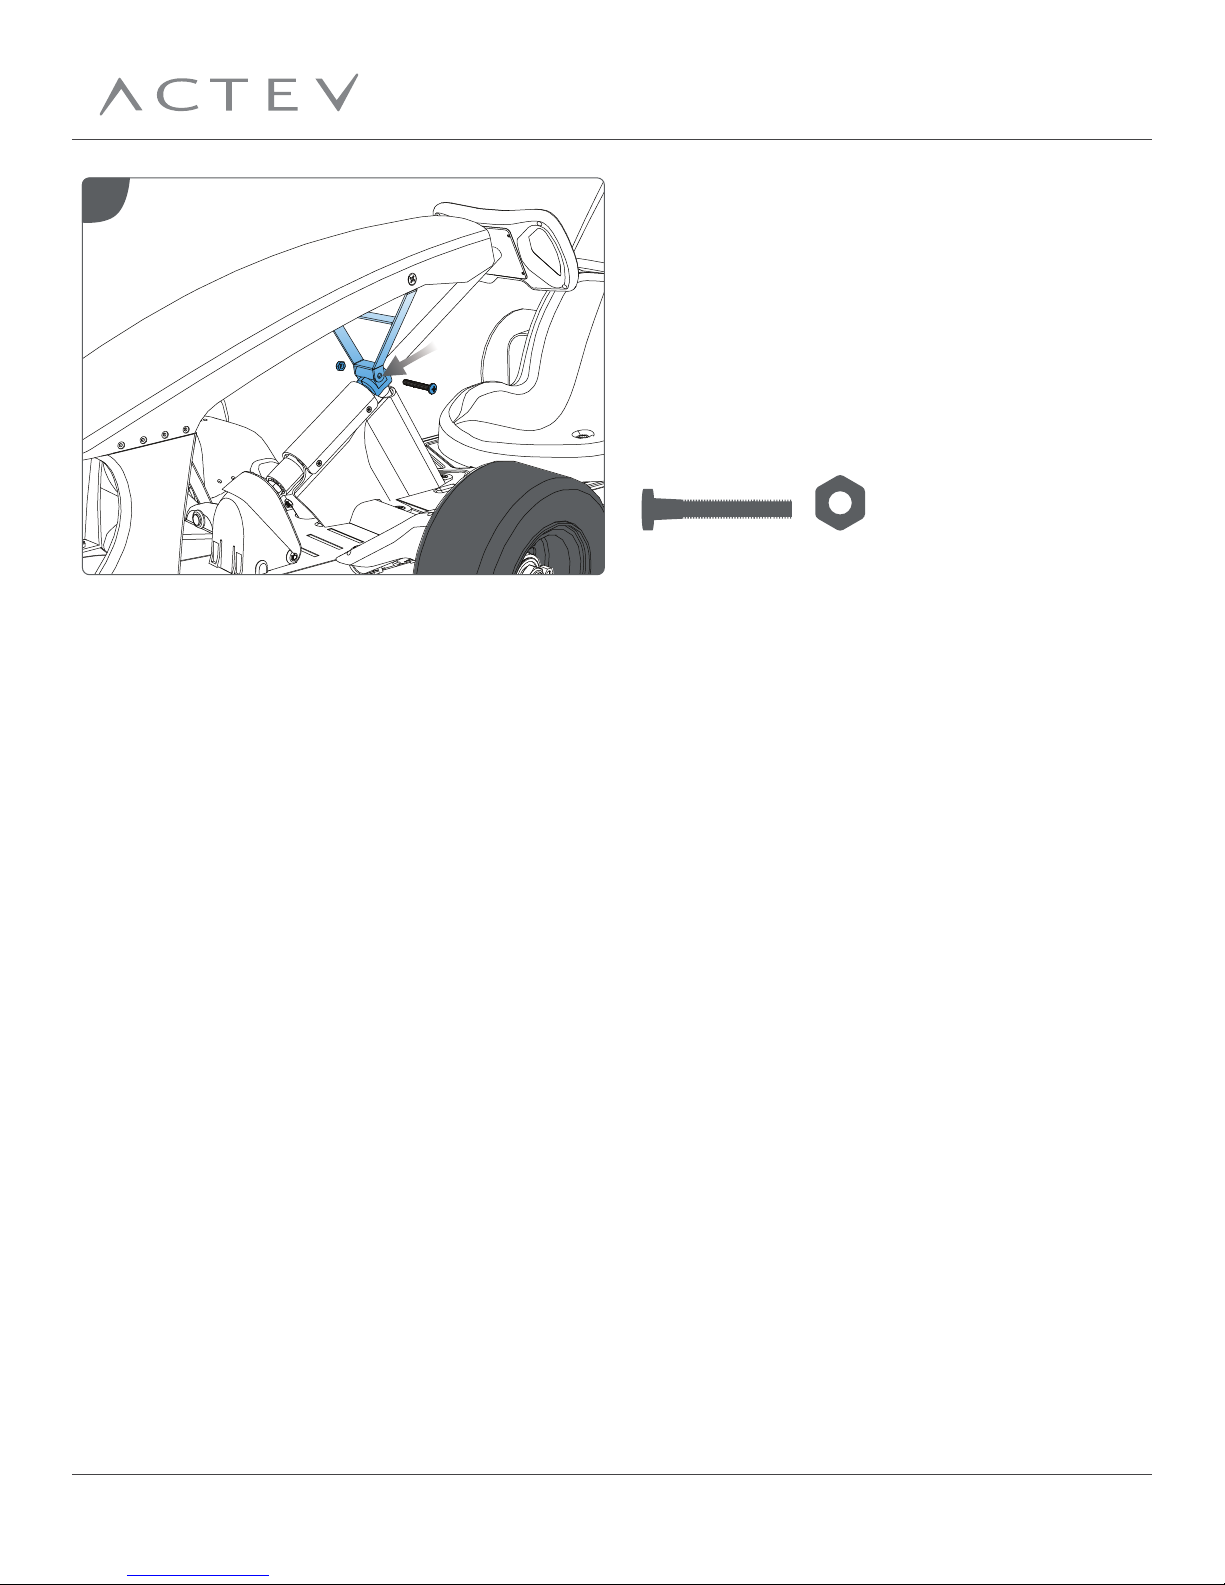
Nut A x1
Insert Bolt A through the front wing support and
upper steering clamp.
Locate Nut A that was removed in step 1. Thread
Nut A on the other side and tighten with the
open-end wrench and screwdriver.
Note: Nut will not fit into the steering clamp but
rest outside on the metal bracket.
BODY KIT ASSEMBLY - FRONT WING | 8ACTEVMOTORS.COM
Bolt A x1
8
Table of contents


