Step 7: Operate the Device
www.ac.com
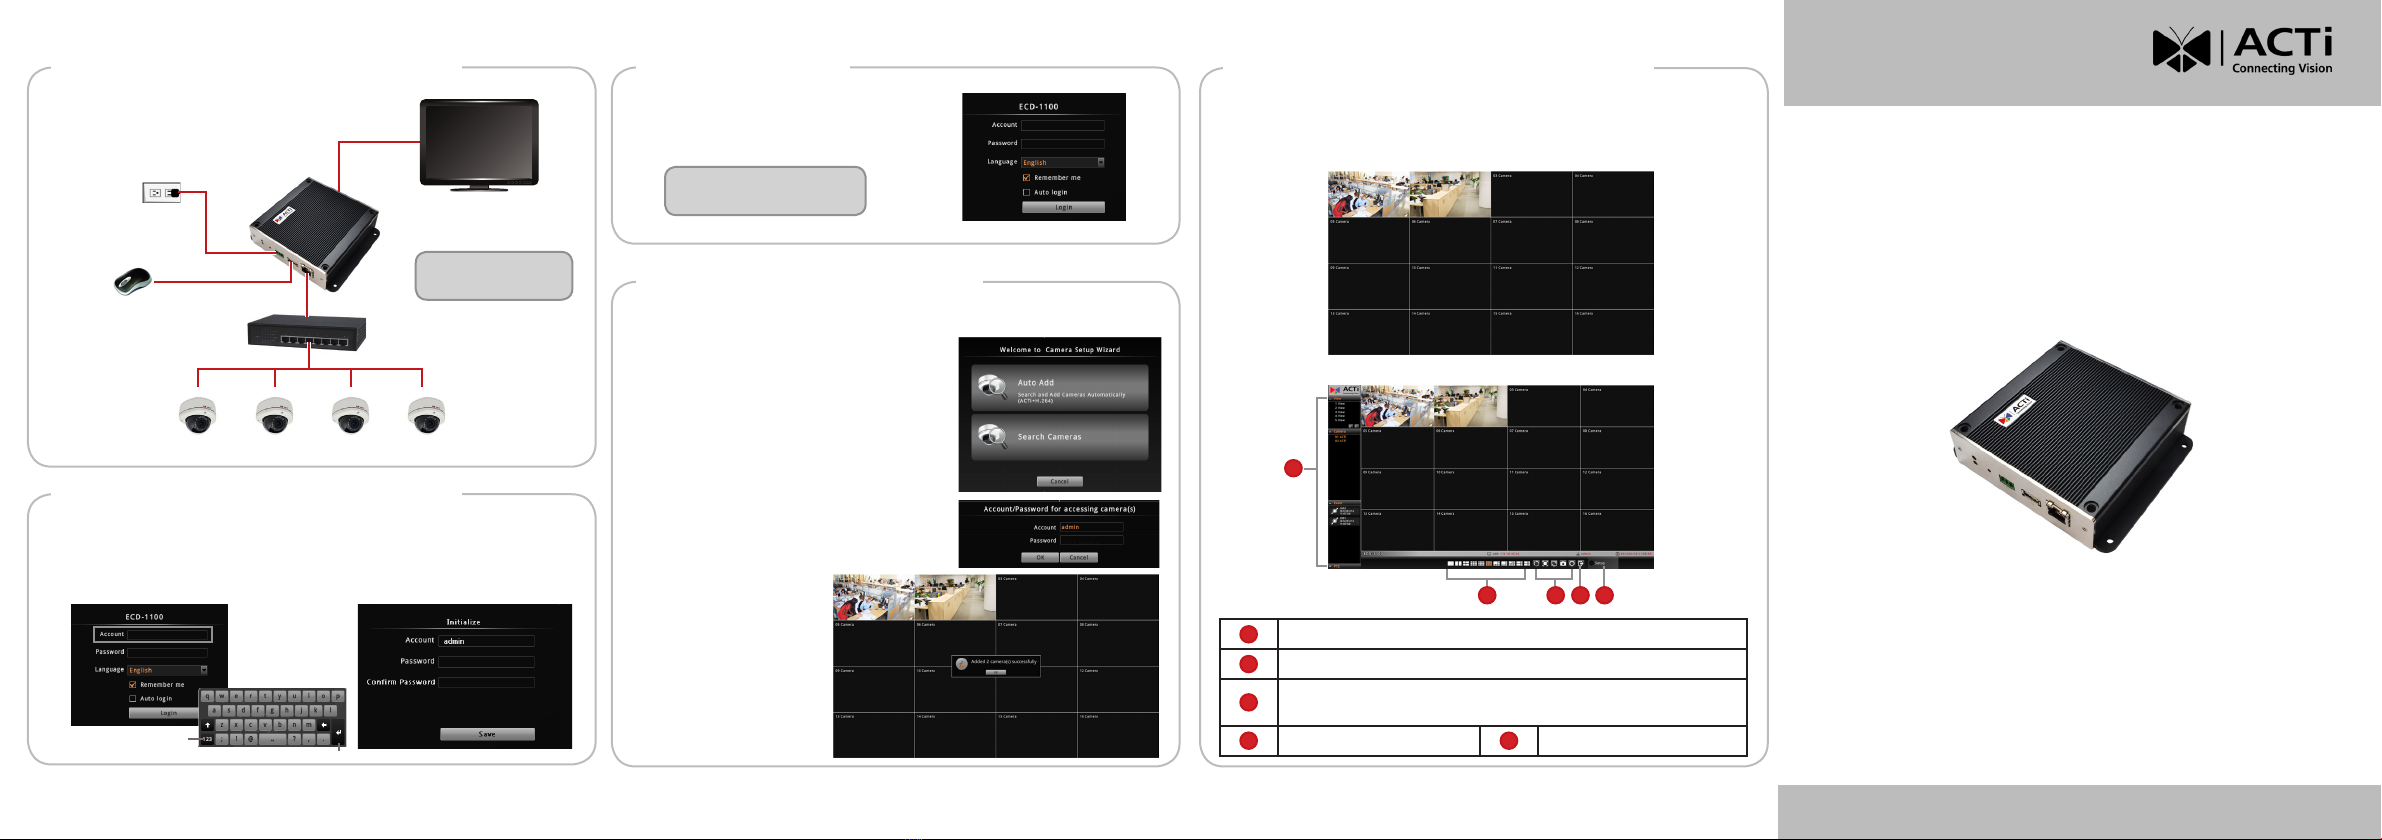
Step 3: Connect the Device Step 5: Login
192.168.0.100 192.168.0.101 192.168.0.102 192.168.0.103
HDMI Monitor
Default IP Address:
192.168.0.200
Power Source
(optional)
USB Mouse
Once all devices are connected, turn on the monitor to see Login screen.
1. Forrsttimelogin,typethedefaultaccount,“admin”, then click Login.
2. Then,congurethedesiredadministratorPassword.
Step 4: Initialize the Device
When prompted, enter the Account
and Password, then click Login.
ECD-1100
NOTE: A USB hub can be
used to connect more USB
devices such as a keyboard.
PoE Switch
The diagram below demonstrates a
connection setting example within a
local network.
V20230823
Step 6: Add Cameras
Enter
Numeric Keypad
Default Account: admin
Password: user-dened
1. Follow the setup wizard to add cameras.
• Auto Add: Search and automatically add
cameras with the provided account and
password.
• Search Cameras: Cameras in the
network will be listed. Then, manually
select the cameras to be added.
After the initial login, a setup wizard will appear.
2. A camera Account/Password prompt
may appear; enter the corresponding
account and password to add the camera.
3. The added camera(s)
will be shown on the
Live View window.
LIVE VIEW Full Screen
MAIN Screen
By default, the screen is in full screen mode. To view the main screen with
controls, right-click on the mouse then, click EXIT FULL SCREEN.
1 Layout View / Camera List / Event Panel / PTZ Panel
2 Display Layout Mode
3 Sequence Patrol / Stretch Video / Full Screen / Snapshot /
Reset Channel Position
4 Logout 5 Setup Menu
1
2 3 4 5
Double-click on
channel to view
full screen
Quick Installation Guide


