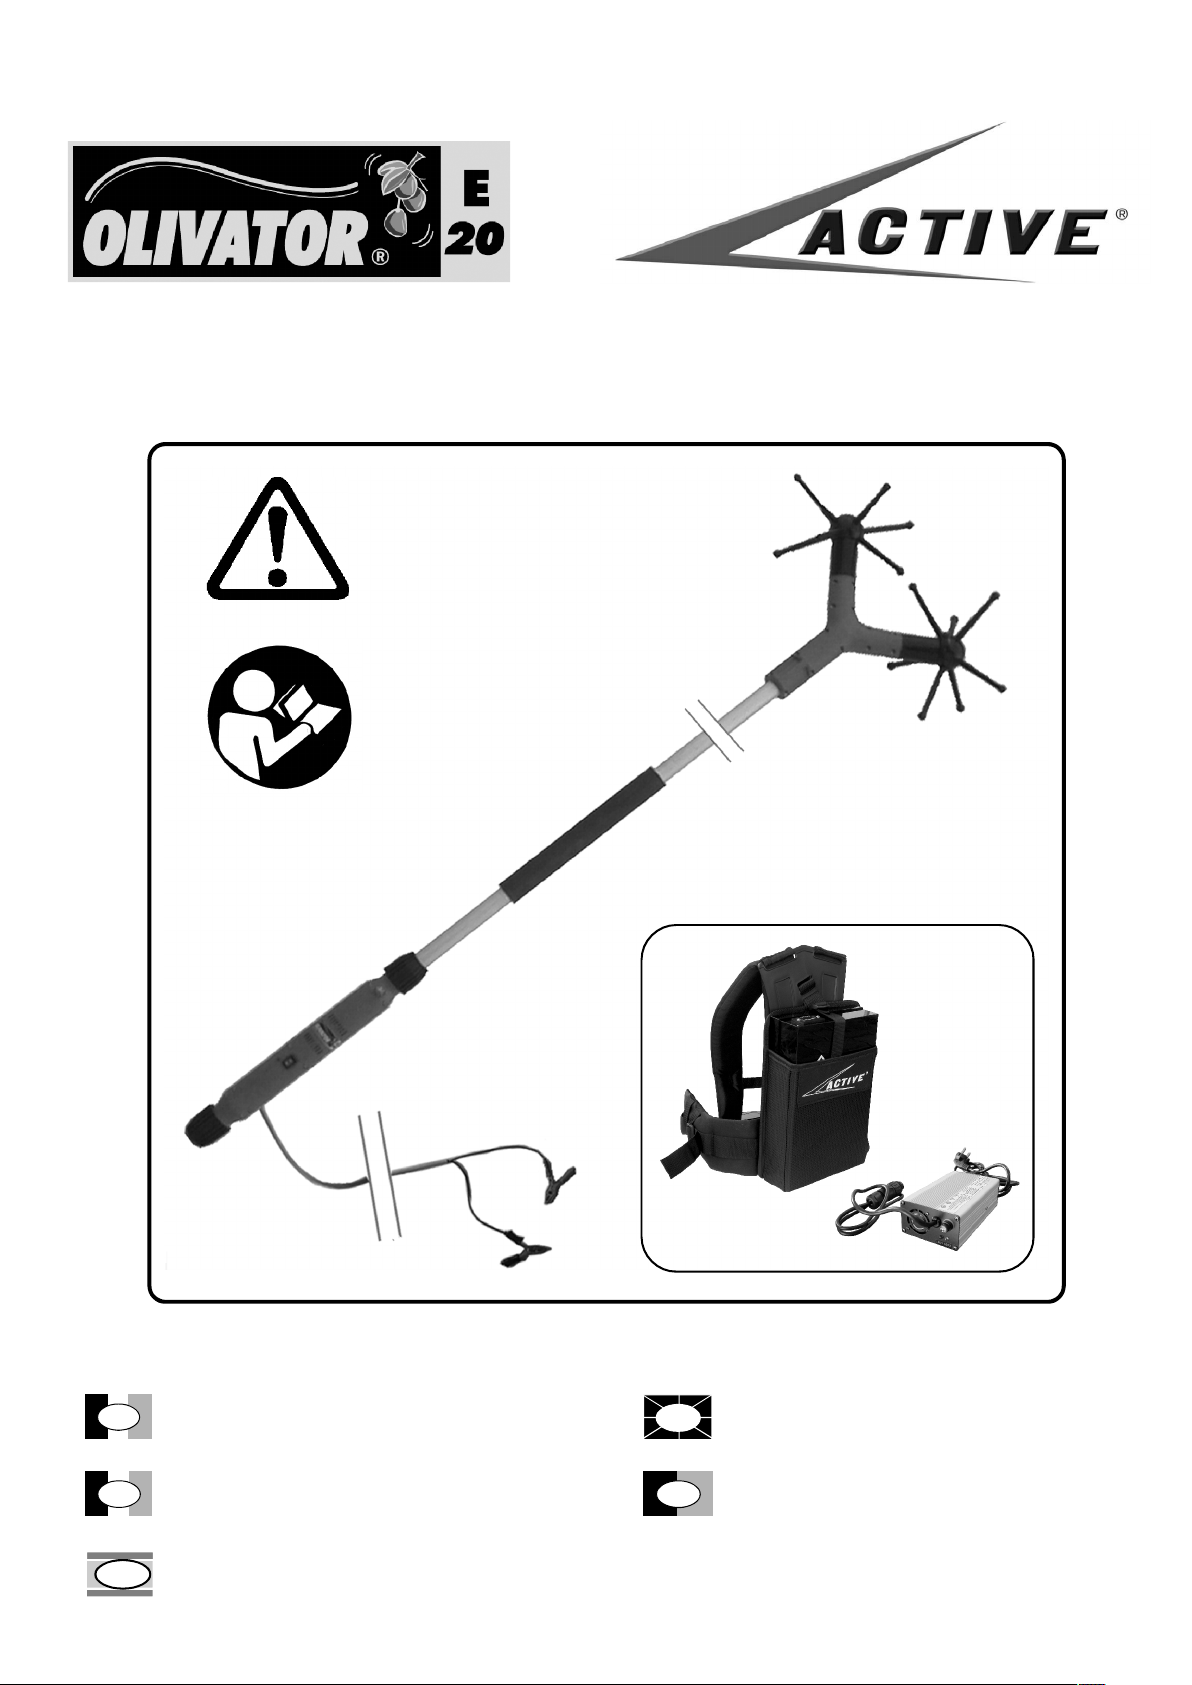
Active OLIVATOR E20 User manual
OWNER’S MANUALMANUALE D’ISTRUZIONE
IGB
MANUEL D'INSTRUCTIONS MANUAL DE INSTRUÇÕES
FP
MANUAL DE INSTRUCCIONES
E

FOTO B
FOTO D FOTO E
FOTO F
4
3
3
3
13
13
6
12
5
4
4
FOTO A
11
5
77
1
16
11
FOTO C
FOTO G
14
9

FOTO I
FOTO H
1
15
14
FOTO L
FOTO M FOTO N
FOTO O
FOTO P
1
2
3
3
2
4
6
5
7
89
10
4
Caro cliente, la ringraziamo vivamente per aver scelto un
prodotto di qualità della ditta ACTIVE.
Per un corretto impiego dello scuotitore elettrico e per evitare
incidenti, non iniziate il lavoro senza aver letto questo manuale
con attenzione. Troverete su questo manuale le spiegazioni di
funzionamento dei vari componenti e le istruzioni per i necessa-
ri controlli e per la manutenzione.
N.B. : La casa produttrice si riserva la possibilità di apportare
eventuali modifiche in qualsiasi momento e senza preavviso.
(INDICE PAG. 5)
INTRODUZIONE IINTRODUCTION
Dear Customer, Thank you very much for having chosen a
quality product of the company ACTIVE.
For proper use of scoutitore electricity supply and avoid
accidents, do not start work without having read this manual
carefully.You’ll find this guide on the explanations of operation
of various components and instructions for the necessary
inspections and maintenance.
N.B. : The manufacturer reserves the right to make changes at
any time without notice
(CONTENTS PAG . 12)
GB
Cher client, nous vous remercions vivement d'avoir choisi un
produit de qualité de la firme ACTIVE.
Pour un emploi correcte du secoueur électrique et pour éviter
des accidents, ne commencez pas le travail sans avoir lu
attentivement ce manuel. Dans ce manuel vous trouverez les
explications du fonctionnement des différents composants et
les instructions pour les contrôles nécessaires et pour
l'entretien.
Remarque: Le Fabricant se réserve le droit d'apporter
d'éventuelles modifications à tout moment et sans préavis.
(INDEX PAG . 19)
INTRODUCTION PINTRODUÇÃO
Caro cliente, agradecemo-lhe muito ter escolhido um produto de
qualidade da firma ACTIVE.
Para um uso correcto da màquina de mato e para evitar
acidentes, não comece o trabalho sem ter lido este manual com
atenção. Neste manual vai encontrar as explicações do
funcionamento dos vários componentes e as instruções para os
controlos necessários e para a manutenção.
N.B. : o fabricante reserva-se a possibilidade de aportar
eventuais modificações em qualquer momento e sem pré-aviso.
(ÍNDICE PÁGINA 26)
F
I
E
Estimado cliente, le agradecemos en modo especial por haber
escogido un producto de calidad de la empresa ACTIVE. Para
un correcto empleo del sacudidor eléctrico y evitar accidentes,
no comenzar el trabajo sin haber leído con atención el presente
manual. En este manual podrán encontrar las explicaciones de
funcionamiento de los varios componentes y las
instrucciones para los necesarios controles y el
mantenimiento.
N.B. : La casa productora se reserva la posibilidad de aportar
eventuales modificaciones en cualquier momento y sin aviso
previo.
(ÍNDICE PÁG . 33)
INTRODUCCIÓN

I
ITALIANO
5
1. EXPLANATION OF SYMBOLS
2.FOR SAFE OPERATION
INDICE
1. Spiegazione simboli.......................................................................................................................................................................................Pag. 5
2. Per la vostra sicurezza............................................................................................................................................................................................5
3. Dati tecnici e Dichiarazione di conformità..........................................................................................................................................................6
4. Descrizione delle parti............................................................................................................................................................................................7
5. Assemblaggio.........................................................................................................................................................................................................7
6. Operazioni preliminari............................................................................................................................................................................................8
7. Manutenzione periodica........................................................................................................................................................................................8
8. Norme d’uso............................................................................................................................................................................................................9
9. Rimesaggio e trasporto..........................................................................................................................................................................................9
10. Smaltimento componenti...................................................................................................................................................................................10
11. Guida ai possibili problemi tecnici..................................................................................................................................................................10
12. Smantellamento della Macchina.......................................................................................................................................................................11
13. Certificato di garanzia........................................................................................................................................................................................12
1. SPIEGAZIONE SIMBOLI
Avvertenza, pericolo ed attenzione.
Leggere il manuale di uso e manutenzione
prima di utilizzare questa macchina.
Indossare dispositivi di protezione durante il funzionamento di
questa macchina.
2. PER LA VOSTRA SICUREZZA
1-NON COLLEGARE A FONTI ELETTRICHE SUPERIORI A 12 VOLT
2-Leggere attentamente queste istruzioni ed accertarsi di comprenderle prima di far funzionare lo scuotitore.
Attenersi a tutte le avvertenze ed alle istruzioni di sicurezza.Conservare questo manuale a titolo di futuro riferimento.
3-Ispezionare la macchina prima di ogni impiego. Mantenerla pulita. Se necessario,sostituire le parti danneggiate.Usare
solamente ricambi originali. Pezzi di ricambio prodotti da altri fabbricanti potrebbero adattarsi male e causare lesioni .
4-Quando si usa la macchina si raccomanda di indossare abiti adatti ed articoli di sicurezza quali:
a) Stivali,
b) Pantaloni robusti,
c) Guanti,
d) Visiera o occhiali protettivi,
e) Casco protettivo.
Non indossare articoli d'abbigliamento poco aderenti o slacciati.
5-Non permettere ad altre persone,bambini o animali di restare nel raggio di 3 mt. durante I’uso dello scuotitore.
6-Non operare con l’attrezzo quando si è stanchi, malati o sotto I’effetto di alcool, droghe o farmaci.
7-Usare lo scuotitore solamente per compiti indicati dal presente manuale.
8-Controllare che il cavo di alimentazione sia collegato correttamente
(PINZA ROSSA polo positivo + / PINZA NERA polo negativo -) e che non strisci su parti taglienti o calde.
Evitare in ogni modo di avvolgere parti del corpo al cavo di alimentazione.
9-Accertarsi che le sfere vibranti siano libere di girare , e che la eventuale prolunga sia ben serrata.
10-Prima dell’uso dello scuotitore verificare che i rami delle piante che si intende scuotere siano raggiungibili con la configu-
razione prevista. Applicare altrimenti la prolunga.
11-Onde evitare il rischio di lesioni,spegnere sempre il motore prima di rimuovere qualsiasi oggetto avvolto attorno alle sfere
o all’asta principale.Trasportare lo scuotitore solo a motore fermo.
12-Accertarsi che nell’area di lavoro non ci siano cavi elettrici o/e di alta tensione.Il contatto con gli stessi potrebbe provoca-
re la morte o gravi danni alla persona.
Il logo con il cassonetto barrato indica l’obbligo di smaltimento separato dei rifiuti di apparecchiature
elettriche ed elettroniche (RAEE). Apparecchiature elettriche ed elettroniche potrebbero contenere
sostanze pericolose e rischiose. Non smaltire questo apparecchio come rifiuto urbano indifferenziato.
Riconsegnare il prodotto presso un punto di raccolta autorizzato per il riciclo RAEE.
N° iscrizione ACTIVE registro AEE : IT14100000008614
IITALIANO
6
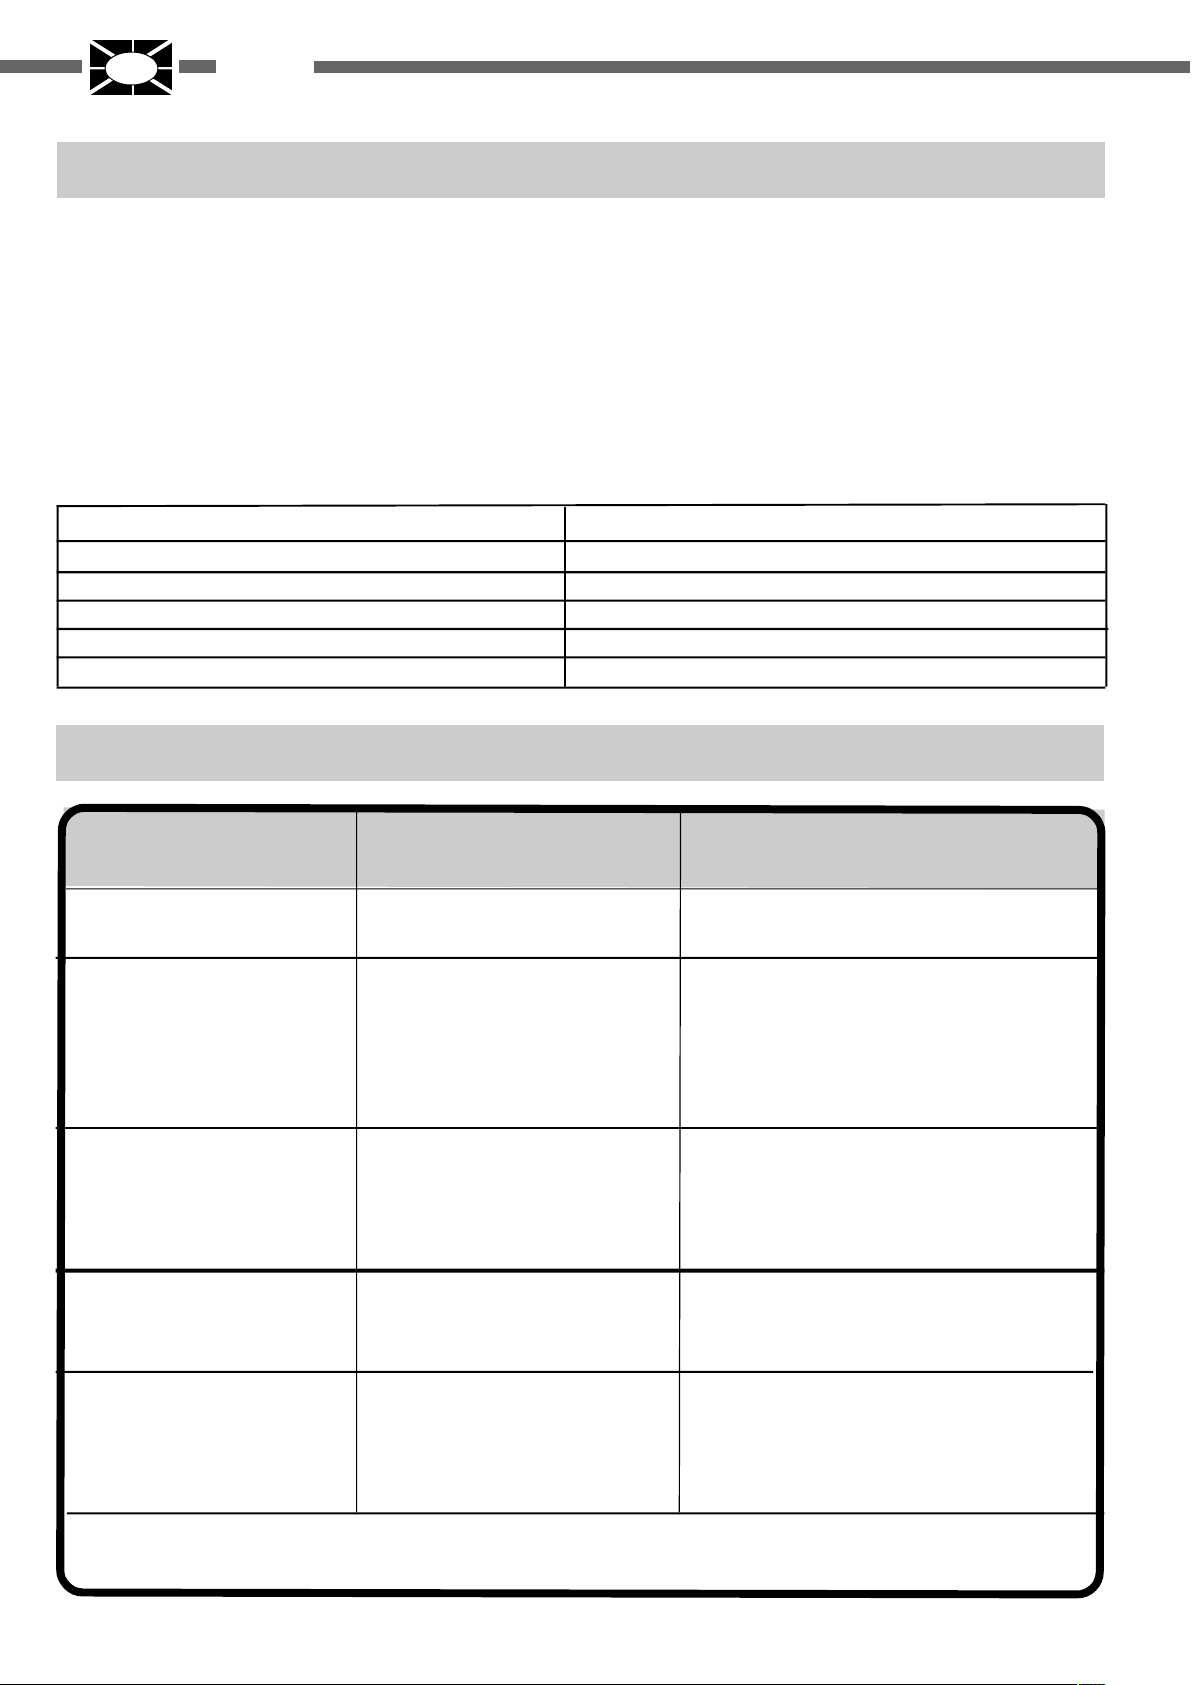
3. DATI TECNICI E DICHIARAZIONE DI CONFORMITA’
Lo scuotitore elettrico ACTIVE serve per agevolare il distacco di olive e simili dai rami delle piante.
Il funzionamento silenzioso e confortevole,consente un’alta resa di raccolta.
La rotazione eccentrica delle sfere (roto-vibranti) grazie alle 5 velocità possibili,
permette di adeguare la forza di scuotimento al grado di maturazione dei frutti da raccogliere,senza danneggiare la pianta:
“H” + Veloce per FRUTTI GIOVANI
“L” + Lenta per FRUTTI MATURI
E’ SCONSIGLIATO l’utilizzo nelle giornate di pioggia e in ogni caso quando le piante sono bagnate.
ACTIVE s.r.l. Zona Artigianale - 26037 S. Giovanni in Croce (CR)
dichiara sotto la propria responsabilità che la macchina:
MODELLO
POTENZA Watt
TENSIONE Volt
ASSORBIMENTO Ampere
ALIMENTAZIONE
AREA VIBRANTE
CONTROLLO VEL.
ROTO-VIBRAZIONI MAX.SFERE
LUNGH.MAX.
LUNGH.PER TRASPORTO
PESO TOTALE
PESO IN PUNTA
IMPUGNATURA DELTA
PROLUNGA 1mt.
OLIVATOR E20
150 WATT
12 V
4 - 10 A
BATTERIA 12V
550 x 275 mm2
ELETTRONICO 5 VEL.
2000 giri
2700mm
2300mm
3 Kg
950gr
A RICHIESTA COD. 22570
A RICHIESTA COD. 22632
E’ conforme ai requisiti stabiliti dalle seguenti direttive:
2006/42/CE, 2004/108/CE, 2000/14/CE, 2002/44/CE, 98/37/CEE
Direttiva Europea per le EMC: 89/336/EEC
Organismo Notificato incaricato della valutazione di conformità: C.R.F.S.c.p.a.
Norme armonizzate applicate alla progettazione ed alla costruzione: EN1175-1/1998
Eventuali altre Direttive Europee applicate all’attrezzatura: 73/23/CE
ALBERTO GRIFFINI
PRESIDENTE
ACTIVE S.r.l.
Via Delmoncello, 12
26037 San Giovanni in Croce (CR) - ITALY
10/10/2008
I
ITALIANO
7
5. ASSEMBLAGGIO
ISTRUZIONI DI MONTAGGIO - FOTO PAG. 2 - 3
- Aprire l’imballo;
- Per il montaggio dello scuotitore occorre una chiave a brugola
del 3 in dotazione.
- Accertarsi che le 4 viti (13) della scatola rinvio a “Y” (7)
siano allentate - foto B -
- Innestare il tubo di trasmissione (5), dal lato dei 2 fori nella
scatola rinvio a “Y” (7) mantenendo i fori (11) in posizione
verticale - foto A -
Ruotare alternativamente in senso orario e antiorario sino a
sentire uno scatto, cioè il centraggio dei 2 riscontri in plasti-
ca (16) nei 2 rispettivi fori (11) del tubo (6); ciò signignifica
che l’innesto è avvenuto correttamente - foto C -
Serrare ora,con la chiavetta a brugola, le 4 viti (13) - foto B -
Passiamo ora al lato motore riconoscibile anche per la vici-
nanza dell’impugnatura in gomma nera (6) - foto D -
Allentare la ghiera di bloccaggio (4) e ripetere l’operazione
d’innesto e rotazione simultanei, tenendo contemporanea-
mente sollevato il perno aggancio tubo (3) - foto E -
Anche in questo caso manovrare sino ad ottenere lo scatto
del perno (3) nel foro (12) previsto sul tubo - foto D -
Ora serrare bene, ma solo manualmente, la ghiera di
bloccaggio (4) - foto F -
Prestare attenzione alla corrispondenza dei settori piani pre-
senti sull’asta interna al tubo e sui giunti solidali al motore e
al rinvio a “Y” - foto I -
MONTAGGIO PROLUNGA (Foto G - H )
-Togliere il tappo (15), dopo aver allentato la ghiera (14) infe-
riore del gruppo motore.
-Inserire la prolunga (9) e tornare a serrare con forza la ghiera
(14).Conservare il tappo per il successivo riutilizzo.
ATTENZIONE: con questa configurazione la
manovrabilità dell’apparecchio peggiora
e lo sforzo per sostenerlo aumenta.
Quindi si consiglia l’uso solo dove strettamente necessario.
COLLEGAMENTO ELETTRICO OLIVATOR E20
- Collegare i 2 morsetti ad una batteria 12V.
- Controllare la corretta polarità del collegamento
- Pinza Rossa + POSITIVO
- Pinza Nera - NEGATIVO
- Ogni volta che si collega l’apparecchio è bene accertarsi
dell’integrità dei cavi.
- Nel caso si notino tagli,abrasioni o deformazioni sia del
cavo che dei morsetti o del carter motore,
non usare lo scuotitore, ma rivolgersi immediatamente ad un
Centro Autorizzato per un controllo e l’eventuale riparazione.
4. DESCRIZIONE DELLE PARTI
56
7
8
1. Carter motore
2. Interruttore / Regolatore velocità
3. Perno aggancio tubo
4. Ghiera di bloccaggio
5. Tubo di trasmissione
6. Impugnatura
7. Carter rinvio a “Y”
9
A RICHIESTA
10
A RICHIESTA
1
23
4
11
12
13
A RICHIESTA
8. Sfere roto-vibranti
9. Prolunga (1 mt)
10 . Impugnatura delta
11. Batteria
12. Zaino
13. Carica batteria
IITALIANO
8
6. OPERAZIONI PRELIMINARI
ATTENZIONE
Prima di usare lo scuotitore leggere attentamente le norme
di sicurezza.
Ispezionare sempre attentamente la macchina prima dell’uso.
Verificare che non vi siano viti allentate, parti danneggiate e
cavi danneggiati.
Assicurarsi che il tubo di trasmissione (5) sia stato installa-
to correttamente e che sia ben stretto.
Controllate periodicamente le condizioni delle parti rotanti.
Verificare sempre che le sfere roto-vibranti non presentino
rotture o danni e che ruotino liberamente.
In caso contrario è consigliabile la loro sostituzione o la so-
stituzione dei loro cuscinetti prima della definitiva rottura,
per non causare danni al gruppo trasmissione.
EVITARE UN USO IMPROPRIO DELLO SCUOTITORE
Per un corretto funzionamento,le parti rotanti vanno appog-
giate contro i rami ,ottenendo una vibrazione morbida e gra-
duale.
Si consiglia di iniziare a velocità moderata,aumentando
gradatamente ,se necessario.
Verificare, durante l’utilizzo,che non ci siano corpi estranei
che potrebbero aggrovigliarsi sulle parti rotanti o essere pro-
iettati pericolosamente a distanza.
Tenere sempre con entrambe le mani lo scuotitore per evita-
re strattoni o attorcigliamenti indesiderati.
MANTERE SEMPRE PULITE E NON OSTRUITE
LE ASOLE DI RAFFREDDAMENTO SUL
CORPO MOTORE.
NON USARLO DURANTE I TEMPORALI
Lo scuotitore non è impermeabile,esso è dotato di un moto-
re elettrico e di un circuito elettronico quindi non immergere
mai l’apparecchio in acqua o liquidi.Evitarne l’uso durante
temporali e giornate di pioggia.La forma della macchina può
attirare i fulmini che potrebbero provocare la morte o gravi
danni alla persona.
ATTENZIONE
Accertarsi che nell’area di lavoro non ci siano cavi
elettrici o/e di alta tensione.
Il contatto con gli stessi potrebbe provocare la morte o gravi
danni alla persona.
COLLEGAMENTO ELETTRICO OLIVATOR E20 E
CARICA BATTERIA - Foto L,M,N,O,P -
- Collegare il connettore (10), alla presa (1);
- Per controllare il livello della batteria, tenere premuto il pul-
sante laterale (2) e verificare i led sullo schermo (3);
- Per caricare la batteria bisogna scollegare il connettore
(10) e collegare il connettore (4) alla presa (1), la spina (7)
alla presa (9) e la spina (8) alla presa di corrente. Quando
tutto questo sarà collegato, il led (5) si accenderà e sarà di
colore rosso, quando diventerà verde, la batteria sarà carica
e si potranno staccare tutte le spine e ricollegare il connettore
(10) alla presa (1).
7. MANUTENZIONE PERIODICA
Pulire periodicamente le sfere roto-vibranti da eventuali
rametti,fogliame o altro che possa impedire la loro libera ro-
tazione.
Non lubrificare esternamente le zone in movimento per evi-
tare inutili e dannosi imbrattamenti di polvere.(Il movimento
interno è sigillato e già lubrificato al montaggio).
Non utilizzare solventi per la pulizia.
Le asole di raffreddamento del Gr.motore devono essere li-
bere e pulite per evitare surriscaldamento del motore o della
scheda elettronica.Si consiglia di pulirle con aria compressa
a motore fermo.
Tutte le operazioni di manutenzione non riportate
sul presente manuale devono essere effettuate
da una officina autorizzata.

I
ITALIANO
9
8. NORME D’USO
La macchina è dotata di un motore elettrico a 12Volt con 5
velocità.
Al momento del collegamento elettrico mediante il cavo in
dotazione, lo scuotitore è fermo.
Le lampadine spia (verde e rossa) poste a fianco dell’inter-
ruttore, si accendono entrambe per breve tempo. Se ciò non
succede, la batteria è completamente scarica o probabil-
mente i cavi sono collegati alle polarità errate.
Questo non comporta alcun danno al circuito elettronico,
che è protetto.
Controllare quindi il corretto collegamento.
RICORDA:
PINZA ROSSA + POSITIVO
PINZA NERA - NEGATIVO
Se la batteria è carica ,rimane accesa solo la luce verde, .
PER PARTIRE premere il pulsante-accelleratore 1 volta nel-
la parte contrassegnata con la lettera “H”.
Per aumentare la velocià premere e rilasciare ancora sino
all’ottenimento della velocità desiderata.
Per diminuire o spegnere premere nel verso “L” opposto .
ATTENZIONE.
Mantenendo sempre premuto il pulsante-accelleratore, la
velocità non varia.
ARRESTO MOTORE
Premere ripetutamente il pusante accelleratore nel verso “L”
sino ad ottenere l’arresto dell’apparecchio.Staccare ora i cavi
dalla batteria.
E’ consigliabile procedere in questo modo prima di staccare
i cavi ,per evitare possibili scintille o sbalzi di carico.
INDICATORE LIVELLO DI CARICA DELLA BATTERIA
Se la batteria è carica tra il 60 e il 100%, la luce verde è
accesa e fissa.
Se la batteria è carica tra il 40 e il 60%,la luce verde lam-
peggia.
Se tutte e due le lampadine restano accese la batteria è
quasi scarica (20-40%)
Se la spia rossa rimane accesa la batteria è completa-
mente scarica.
Per ottenere la massima resa è bene che la spia verde sia
fissa al momento dell’inizio lavoro.
Per quanto riguarda la durata della carica di una
batteria,tenete conto che lo scuotitore ha un’assorbimento
medio di 8-10 A.
In ogni caso,la durata della batteria dipende dalla ca-
pacità in Ampere e dal grado di carica della stessa.
E’ possibile collegare l’apparecchio direttamente ad
un carica batteria ,ai morsetti di un mezzo a motore o
ad un generatore!
SEMPRE E COMUNQUE CON TENSIONE DI 12 VOLT-
Si consiglia comunque l’utilizzo con batteria.
SURRISCALDAMENTO
La scheda elettronica che controlla la velocità, ha una prote-
zione termica contro il surriscaldamento.
In questo caso la spia rossa lampeggia 4 volte e il motore
si ferma autonomamente.
Quando una volta raffreddatosi, cessa la segnalazione, pre-
mere nuovamente il pulsante-accelleratore per riprendere il
lavoro.
9. RIMESSAGGIO E TRASPORTO
RIMESSAGGIO
Scollegare sempre i cavi dalla batteria.
Pulire perfettamente lo scuotitotore e tenerlo in un luogo
asciutto e al riparo da polvere e intemperie.
Riporre lo scuotitore con l’estremità delle 2 sfere sollevate
per evitare una loro deformazione permanente
TRASPORTO O SMONTAGGIO - FOTO PAG. 2
In caso di smontaggio per trasporto o manutenzione
straordinaria procedere come segue:
1. Allentare la ghiera di serraggio (4) foto E, posta sul
gr.motore.
2. Sfilare il tubo di trasmissione (5) mantenendo sollevato il
perno aggancio tubo (3).
(Per sfilare il tubo di trasmissione (5) anche dalla scatola a
rinvio a “Y” (7), occorre allentare bene le 4 viti (13) all’estre-
mità del supporto stesso).
IITALIANO
10
10. SMALTIMENTO COMPONENTI
CONSIGLI
Dopo l’implementazione della Direttiva Europea 2002/96/EU nel sistema legale nazionale, ci sono le seguenti applicazioni:
I dispositivi elettrici ed elettronici non devono essere considerati rifiuti domestici.
I consumatori sono obbligati dalla legge a restituire i dispositivi elettrici ed elettronici alla fine della loro vita utile ai punti di
raccolta pubblici preposti per questo scopo o nei punti vendita. Dettagli di quanto riportato sono definiti dalle leggi nazionali
di ogni stato.
Nel caso di rottamazione dello scuotitore “OLIVATOR” è compito del cliente seguire le procedure e le norme per un corretto
smaltimento
Si possono facilmente smontare e smaltire separatamente i principali componenti.
Ne diamo un’indicazione generale nella tabella qui sotto.
GRUPPO MATERIALE
Imballaggio cartone
Motoriduttore elettrico alluminio,plastica,acciaio,rame
Trasmissione alluminio,plastica,acciaio
Rinvio a “Y” alluminio,plastica,acciaio
Cavo elettrico + scheda elettronica pvc,rame,plastica
11. GUIDA AI POSSIBILI POBLEMI TECNICI
1- IL MOTORE NON
FUNZIONA
2- IL MOTORE FUNZIONA
MA SOLO A VELOCITA’
RIDOTTA
3- IL MOTORE FUNZIONA
MA LE SFERE NON
RUOTANO
*4- RUOTA SOLO UNA
SFERA
*5- VIBRAZIONI ECCESSIVE
DELLA MACCHINA
INTEGRITA’ E COLLEGAMENTO
CAVI
CARICA BATTERIA O POSSIBILE
SURRISCALDAMENTO
CORRETTO INNESTO TUBO
TRASMISSIONE (Vedi pag. 9)
INTEGRITA’ INGRANAGGI SCA-
TOLA RINVIO “Y”
SFERE CON “TENTACOLI” MAN-
CANTI
INTEGRITA’ TRASMISSIONE E
FASATURA SFERE
RIPRISTINARE UN CORRETTO COLLEGA-
MENTO ELETTRICO
RICARICARE LA BATTERIA -
IN CASO DI SURRISCALDAMENTO
RIPORRE, SE POSSIBILE ALL’OMBRA,
LA MACCHINA E ATTENDERE IL SUO
RAFFREDDAMENTO.
VEDI SPIA ROSSA PAG. 6
SFILARE IL TUBO DI TRASMISSIONE E
RIMETTERLO CONTROLLANDO
L’INTEGRITA’ DEL GIUNTO E IL COMPLE-
TO INSERIMENTO DEL TUBO (5) NEL
GRUPPO MOTORE E NELLA SCATOLA
RINVIO A “Y” (7)
APRIRE SCATOLA RINVIO “Y” E SOSTI-
TUIRE L’EVENTUALE INGRANAGGIO RO-
VINATO
SOSTITUIRE LE SFERE ROTTE
APRIRE SCATOLA RINVIO “Y” ,CONTROL-
LARE L’INTEGRITA’ DEGLI INGRANAGGI
,RIMONTARLI IN “FASE” FACENDO COM-
BACIARE LE RISPETTIVE TACCHE
ATTENZIONE :
I PUNTI 4 e 5 NECESSITANO DI INTERVENTO DEL RIVENDITORE O DELL’ASSISTENZA AUTORIZZATA
INCONVENIENTI VERIFICARE POSSIBILI RIMEDI

I
ITALIANO
11
12. SMANTELLAMENTO DELLA MACCHINA
Ai sensi dell’art. 26 del Decreto Legislativo 14 marzo 2014, n. 49 “Attuazione della Direttiva 2012/19/UE sui
Rifiuti di Apparecchiature Elettriche ed Elettroniche (RAEE)” e del Decreto Legislativo 188 del 20 novembre
2008.
Il logo con il cassonetto barrato indica l’obbligo di smaltimento separato dei rifiuti di apparecchiature
elettriche ed elettroniche (RAEE). Apparecchiature elettriche ed elettroniche potrebbero contenere
sostanze pericolose e rischiose. Non smaltire questo apparecchio come rifiuto urbano indifferenziato.
Riconsegnare il prodotto presso un punto di raccolta autorizzato per il riciclo RAEE. Facendo ciò si aiuterà a
conservare le risorse e proteggere l’ambien
te. Contattare il proprio rivenditore o le autorità locali per
maggiori informazioni.
N° iscrizione ACTIVE registro AEE : IT14100000008614
Si ricorda che le pile/accumulatori eventualmente presenti, laddove possibile, debbono essere rimosse
dall’apparecchiatura prima che questa sia conferita come rifiuto.
L’utente potrà, pertanto, conferire gratuitamente l’apparecchiatura e l’eventual
e batteria giunta a fine vita
agli idonei centri commerciali di raccolta differenziata dei rifiuti elettrici ed elettronici. In alternativa
l’utente potrà riconsegnarle al rivenditore secondo le seguenti modalità :
Per pile portatili e apparecchiature di
piccole dimensioni, ovvero con almeno un lato esterno non
superiore a 25 cm, è prevista la consegna gratuita senza obbligo di acquisto presso i negozi con una
superficie di vendita delle apparecchiature elettriche ed elettroniche superiore ai 400 mq. Per
negozi con dimensioni inferiori, tale modalità è facoltativa ;
Per apparecchiature con dimensioni superiori a 25 cm, è prevista la consegna in tutti i punti di
vendita in modalità 1 contro 1, ovvero la consegna al rivenditore potrà avvenire solo all’atto
dell’acquisto di un nuovo prodotto equivalente, in ragione di uno a uno.
L’adeguata raccolta differenziata per l’avvio successivo dell’apparecchiatura e delle pile/accumulatori
dismessi al riciclaggio, al trattamento ed allo smaltimento ambientalmente compatibile,
contribuisce ad
evitare possibili effetti negativi sull’ambiente e sulla salute e favorisce il reimpiego e/o riciclo dei materiali
di cui essi sono composti.
Lo smaltimento abusivo di apparecchiature, pile ed accumulatori da parte dell’utilizzatore
comporta
l’applicazione delle sanzioni di cui alla corrente normativa di legge.
AEE immessa sul mercato successivamente al 13 Agosto 2005
IITALIANO
12
13. CERTIFICATO DI GARANZIA
Questa macchina è stata concepita e realizzata attraverso le più moderne tecniche produttive; la Ditta costruttrice
garantisce i propri prodotti per un periodo di 24 mesi dalla data di acquisto, ad eccezzione dei prodotti per
servizio professionale, adibiti a lavori per conto terzi, per i quali la garanzia è di 12 mesi dalla data di acquisto.
CONDIZIONI DI GARANZIA
1) La garanzia viene riconosciuta a partire dalla data di acquisto. La Ditta costruttrice sostituisce gratuitamen-
te le parti difettose nel materiale, nelle lavorazioni, nella produzione. La garanzia non contempla la sostituzio-
ne della macchina.
2) Il personale tecnico interverrà nei limiti di tempo concessi da esigenze organizzative e in ogni caso il più
presto possibile, e l'eventuale ritardo non potrà determinare richieste di risarcimento dei danni nè prolunga-
mento del periodo di garanzia.
3) Per richiedere l'assistenza in garanzia è necessario esibire al personale autorizzato il certificato di garanzia
timbrato dal rivenditore, compilato in tutte le sue parti e corredato di fattura d'acquisto o scontrino fiscale o
altro documento reso fiscalmente obbligatorio comprovante la data di acquisto.
4) La garanzia decade in caso di:
- Assenza palese di manutenzione;
- Utilizzo non corretto del prodotto o manomissione;
- Utilizzo di parti di ricambio o accessori non originali;
- Interventi effettuati da personale non autorizzato.
5) La Ditta costruttrice esclude dalla garanzia le parti soggette ad un normale logorio di funzionamento:
sfere roto-vibranti,cuscinetti,ingranaggi ecc.
6) Eventuali danni causati durante il trasporto, devono essere immediatamente segnalati al trasportatore pena
il decadere della garanzia.
7) Se guasti o rotture dovessero accadere nel periodo di garanzia o dopo di esso il cliente non ha diritto di
sospendere il pagamento nè ad alcuno sconto sul prezzo.
N° DI SERIE RIVENDITORE : ACQUISTATO DAL SIG.
DATA: ..........................
MOD.
OLIVATOR E20

ENGLISH GB
13
CONTENTS
1. Explanation of symbols...............................................................................................................................................................................Pag. 13
2. For safe operation................................................................................................................................................................................................13
3. Specificaions and Declaration of conformity...................................................................................................................................................14
4. Description............................................................................................................................................................................................................15
5. Assembly...............................................................................................................................................................................................................15
6. Preliminary operations.........................................................................................................................................................................................16
7. Periodic maintenance...........................................................................................................................................................................................16
8. Rules of use...........................................................................................................................................................................................................17
9. Remissage and transport.....................................................................................................................................................................................17
10. Disposal components........................................................................................................................................................................................18
11. Guide to technical problems.............................................................................................................................................................................18
12. Warranty certificate............................................................................................................................................................................................19
1. EXPLANATION OF SYMBOLS
Warning, danger and caution
Read operator’s instruction book before operating.
2.FOR SAFE OPERATION
2-Read these instructions carefully and make sure you understand them before you run the vibramotor.
Follow all warnings and safety instructions. Keep this manual for future reference.
3-Inspect the car before each use.Keep it clean.If necessary, replace the damaged parts.Use only original parts.
Spare parts produced by other manufacturers could adapt evil and cause injury.
4-Wear appropriate clothing and safety items such as boots, sturdy trousers, gloves, visor or goggles and protective
helmet. Do not wear items of clothing just members or unschackled
5-Do not allow other people, children or animals to remain within 3 meters. during the use of vibramotor.
6-Do not operate tool when you are tired, sick or under I’effetto alcohol, drugs or medicines
7-Use the vibramotor only for tasks mentioned in this manual.
8-When using the machine is recommended :
a) Wear gloves;
b) Wear eye protection;
c) Avoid smoking;
d) Limiting the duration of your effort is that the vibramotor.
9-Make sure the power cord is plugged in correctly
(RED PLIERS positive + / BLACK PLIERS negative -) and not smears on cutting parts or hot
Avoid in any way to wrap parts of the body to the power cable.
10-Make sure the balls are vibrant free to run, and that any extension is very tight.
11-Before the ‘use of scuotitore verify that the branches of trees that means shaking are attainable with the planned
configuration. Apply an extension otherwise.
12-To avoid the risk of injury, always switch off the engine before removing any object wrapped around the ball or auction
principale.Trasportare the scuotitore only engine stopped.
13-Make sure the work area there are electrical cables and / or high tensione.Il contact with them could cause death or
serious injury
Wear protective devices during the operation of this machine.
1-NOT CONNECT TO A HIGHER POWER SOURCES 12 VOLT

GB ENGLISH
14
3. SPECIFICATION AND DECLARATION OF CONFORMITY ‘
The electric vibramotor ACTIVE serve to facilitate the posting of olive branches and the like from plants.
The operation quiet and comfortable, allows a high yield of harvest.
The eccentric rotation of the ball (roto-vibrating) through 5-speed possible,
allows you to adjust the strength of shaking the degree of ripeness of the fruit to be collected:
“H” for Fast + YOUNG FRUIT
”L” + Slow to mature fruit
E‘ INADVISABLE use on days of rain and in any case when the plants are wet.
ACTIVE s.r.l. Zona Artigianale - 26037 S. Giovanni in Croce (CR)
declares its own responsibility that the machine :
MODEL
POWER Watt
VOLTAGE Volt
ABSORPTION Ampere
FEED
AREA VIBRANT
SPEED CONTROL
ROTO-VIBRATION MAX.SFERE
MAXIMUM LENGTH
LENGTH FOR TRANSPORT
TOTAL WEIGHT
WEIGHT IN HIGH
DELTA GRIP
EXTENTION 1mt.
E’ meets the requirements established by the following directives:
2006/42/CE, 2004/108/CE, 2000/14/CE, 2002/44/CE, 98/37/CEE
European Directive on EMC: 89/336/EEC
Body responsible for the assessment of conformity: C.R.F.S.c.p.a.
Harmonized standards applied to the design and construction:EN1175-1/1998
Any other European Directives, to the applied: 73/23/CE
ALBERTO GRIFFINI
PRESIDENT
ACTIVE S.r.l.
RUE Delmoncello, 12
26037 San Giovanni in Croce (CR) - ITALY
10/10/2008
OLIVATOR E20
150 WATT
12 V
4 - 10 A
BATTERY 12V
550 x 275 mm2
ELECTRONIC 5 SPEED
2000 giri
2700mm
2300mm
3 Kg
950 gr
ON DEMAND COD. 22570
ON DEMAND COD. 22632

ENGLISH GB
15
4. DESCRIPTION
56
7
8
1. Carter engine
2. Switch / speed regulator
3. Perno pipe coupling
4. Clamping ring-14
5. Transmission pipe
6. Grip
7. Carter referring to “Y”
9
10
1
23
4
11
12
13
8. Balls vibrating rotor
9. Extension (1 mt)
10. Grip delta
11. Battery
12. Backpack
13. Battery charger
ON DEMAND
ON DEMAND
ON DEMAND
5. ASSEMBLY
INSTRUCTIONS FOR ASSEMBLY - PHOTO PAG. 2 - 3
- Open the box;
- For mounting of scuotitore need a Allen key 3 in the
envelope.
- Make sure the 4 screws (13) of the box referring to “Y”
(7) are relaxed - photo B -
- Engage the transmission pipe (5), on the other side
all’impugnatura Black (6), in indictment box “Y” (7)
maintaining the holes (11) in a vertical position
- photo A -
Alternatively rotate clockwise and counterclockwise until
you hear a click, the two plastic pivots (16) must be fixed
in the center of the two respective holes (11) of the tube
(6); this means that the graft was successful - photo C -
Tighten now, with the key Allen, the 4 screws (13)
-Photos B -
We now move to the side engine recognizable even to the
proximity dell’impugnatura in black rubber (6) - photos D -
Loosen the locking ring (4) and repeat the clutch and
simultaneous rotation, having raised the same pipe
coupling pin (3) - photos E -
Again handle up to get the click of the pin (3) in the hole
(12) provided on the tube - photo D -
Now tighten well, but only manually, the clamping ring (4)
- Photos F -
Be careful to match the sectors sull’asta present plans
within the pipe joints and solidarity to the engine and the
postponement to “Y” - photos I -
MOUNT EXTENSION (Photo G - H)
-Take off the cap (15), after having loosened the ring (14)
below the power plant.
Fill-extender (9) and return to firmly tighten the ring (14).
Keep the cap for subsequent reuse.
WARNING: This configuration maneuverability of
the deteriorating and the effort to sustain
increases.Then you should use only where strictly
necessary.
ELECTRICAL CONNECTION
- Connect the 2 terminals to a 12V battery.
- Check the correct polarity of the connection
- Red Fork + POSITIVE
- Black Tree - NEGATIVE
- Every time you connect the unit is well ensure the
integrity of the cables.
- If you notice cuts, abrasions or deformation of the cable
that is terminal or engine housings,
scuotitore not use it, but go immediately to a
Authorized Center for monitoring and possible repair.
GB ENGLISH
16
6. PRELIMINARY OPERATIONS
WARNING
Before using the scuotitore read carefully the safety rules.
Always carefully inspect the car before use. Verify that
there are no screws loose, damaged cables and
damaged. Make sure the transmission pipe (5) has been
installed and that it is tight. Check periodically the
condition of rotating parts. Always check that the ball roto-
vibrant present no breakage or damage and which rotate
freely. Otherwise we recommend their replacement or
replacement of their bearings before the final break, not to
cause damage to the transmission.
AVOID USE OR MISUSE OF SCUOTITORE
For proper operation, rotating parts are supported against
the branches, resulting in a gradual and soft vibration.
We recommend you start to moderate speed, increasing
gradually, if necessary.
Check, during use, that there are foreign bodies that could
tangle on rotating parts or be projected dangerously
remote.
Always keep both hands with the scuotitore to avoid
strattoni or attorcigliamenti side
MANTA CLEAN AND NOT ALWAY OBSTRUCTED
THE EYELETS COOLING ON BODY ENGINE.
WARNING
Make sure the work area there are electrical cables and / or
high voltage
Contact with them could cause death or serious injury.
DO NOT USE DURING THE TIME
The scuotitore is not water, it is equipped with an electric
motor and an electronic circuit and then not ever immerse
it in or liquidi.Evitarne water use during storms and days
of pioggia.La form of the machine can attract lightning that
could cause death or serious injury.
STOP ENGINE
Press the pusante accelerated towards the “L” buttons to
obtain the arrest of the unit. Detach hours cables from the
battery.
E ‘advisable to proceed in this way before unplugging the
cables, to prevent sparks or sudden changes in load.
7. PERIODIC MAINTENANCE
Clean the ball roto-vibrating from any twigs, leaves or other
things that might impede their free rotation.
Do not lubricate the outside of the areas moving to avoid
unnecessary and harmful imbrattamenti dust. (The internal
movement is already sealed and lubricated for mounting
The eyelets cooling Gr.motore must be free and clean to
avoid overheating the engine or tab elettronica.Si advised
to clean with compressed air to the engine stopped.
All servicing not given in this manual should be
performed by a factory authorized.
ELECTRICAL CONNECTION BETWEEN OLIVATOR E20
AND BATTERY CHARGER (PHOTOS ….)
- Connect the connector (10) to the socket (1)
- Push the side button (2) and check light signals on the
screen (3), in order to test the level of the battery
- To charge the battery:
Disconnect the connector (10)
Connect the connector (4) to the socket (1)
Connect the plug (7) to the socket (9)
Connect the plug (8) to the socket
Now the led (5) will be in red colour. When it becomes
green, the battery will be charged. Now it’s possible to
disconnect all plugs and to connect the connector (10) to
the socket (1).

ENGLISH GB
17
8. RULES OF USE
The machine is equipped with an electric motor to 12Volt
with 5-speed.
When electrical connection using the cable supplied, the
scuotitore is stopped.
The light bulbs (red and green) placed next to the switch,
turn both for a short time. If this does not happen, the
battery is completely discharged or probably the cables
are connected to the wrong polarity.
This does not imply any damage to the electronic circuit,
which is protected.
Make the setup.
REMEMBER:
PINZA RED + POSITIVE cable brown
PINZA BLACK - NEGATIVE cable blue
If the battery is charged, remains only the light turned
green.
To press the start button-1 accelerated at the time marked
with the letter “H”.
To increase speed press and release sino still obtaining
the desired speed.
To reduce or turn off the press to “L” opposite.
WARNING
Keeping always pressed the button-speed, speed does
not vary.
9. REMISSAGE AND TRANSPORT
REMISSAGE TRANSPORT OR DISMANTLING
LEVEL INDICATOR OF CHARGE THE BATTERY
If the battery is charging between 60 and 100%, the
green light is on and fix.
If the battery is charging between 40 and 60%, the light
blinks green.
If both lights are lit the battery is low (20-40%)
If the red light is on the battery is completely
discharged.
For maximum yield is good that the green light is fixed at
the time of work.
Regarding the duration of charging a battery, note that the
scuotitore has un’assorbimento average of 8-10 A.
In any case, the battery life depends primarily on the
ability and the degree of the same charge.
E ‘can connect it directly to a charged battery or a
generator!
We recommend the use with battery.
SUPER HEATERS
The electronic board that controls the speed, has a
thermal protection against overheating.
In this case the red light flashes 4 times and the motor
stops themselves.
Where once raffreddatosi no longer the alert, press the
button-accelerate to resume work.
Always disconnect the battery cables.
Scuotitotore the perfectly clean and keep it in a dry place
and away from dust and weather.
Place the scuotitore with the end of the 2 balls raised to
avoid their permanent deformation
In the case of disassembly for transport or maintenance
proceed as follows:
1. Loosen the clamping ring placed on gr.motore.
2. Pull off the transmission pipe maintaining raised the
pivot solutions.
(To remove the tube from support to “Y” must loosen up
the 4 screws on the end of the medium itself).
GB ENGLISH
18
10. DISPOSAL COMPONENTS
GROUP
11. GUIDE TO TECHNICAL PROBLEMS
1- THE ENGINE NOT WORK
2- THE ENGINE WORK BUT
ONLY A REDUCED SPEED
3- THE ENGINE WORK BUT
THE BALL NOT ROTATE
*4- WHEEL ONLY ONE BALL
*5- VIBRATIONS OF
EXCESSIVE MACHINE
INTEGRITY CABLES AND
CONNECTION
BATTERY CHARGE OR
POSSIBLE SUPER HEATERS
CORRECTED GRAFT TUBE
TRANSMISSION
INTEGRITY ‘GEARS BOX
REFERENCE “Y”
TRANSMISSION AND
INTEGRITY TIMING BALLS
RESTORE CORRECT AN ELECTRICAL
CONNECTION
RECHARGE THE BATTERY —
IN THE CASE OF OVERHEATING STORE,
IF POSSIBLE SHADE, THE CAR AND
AWAIT THE COOLING. SEE P. 6
PULL OFF THE TUBE AND REFIT
TRANSMISSION CHECKING INTEGRITY
‘OF THE JOINT AND EFFECTIVE STEP
BUTTON OF BOARDING. SEE PHOTO P. 2
OPEN BOX REFERENCE “Y” AND
REPLACE THE RUINS ANY GEARS
DISADVANTAGES
ADVICE
After the implementation of the European Directive 2002/96/EU in the national legal system, the following applies:
Electrical and electronic devices may not be disposed of with domestic waste.
Consumers are obliged by law to return electrical and electronic devices at the end of their service lives to the public
collecting points set up for this purpose or point of sale. Details to this are defined by the national law of the respective
country. By recycling, reusing the materials or other forms of utilising old devices, you are making an important
contribution to protecting our environment.
In the case of destruction of scuotitore “OLIVATOR” it is for the client to follow the procedures and rules for proper
disposal.
You can easily dismantle and dispose of the main components separately.
It let a general in the table below.
MATERIAL
PACKAGING
ALUMINUM, PLASTIC, STEEL, COPPER
ALUMINUM, PLASTIC, STEEL
ALUMINUM, PLASTIC, STEEL
ELECTRIC REDUCER
TRANSMISSION
REFERENCE TO “Y”
CARTON
ELECTRIC CABLE, ELECTRONIC CARD PVC, COPPER, PLASTIC
CHECK POSSIBLE REMEDIES
OPEN BOX REFERENCE “Y” AND AFTER
CHECKING INTEGRITY ‘GEARS OF
WARNING :
The 4 and 5 POINTS IN NEED OF ASSISTANCE FOR COMMUNITY OR AUTHORIZED DEALER
ENGLISH GB
19
12. WARRANTY CERTIFICATE
This machine was designed and carried out through the most modern production techniques, the Company
manufacturer guarantees its products for a period of 24 months from date of purchase, except for products
for professional service to be used for contractual work for which the guarantee is 12 months from date of
purchase.
CONDITIONS OF GUARANTEE
1)The guarantee is recognized from the date of purchase. The Company free builder replace the defective
parts in the material, processing, production. The warranty does not cover the replacement of the machine
2) The technical staff will act within the limits of time granted by operational requirements and in any case as
soon as possible, and any delay can not determine claims for compensation for damage or extension of the
warranty period
3) To request warranty service is required to produce authorized personnel guarantee certificate stamped by
the retailer, completed in its entirety and accompanied by the purchase invoice or receipt tax or other document
made mandatory for tax compliance date of purchase.
4)The security lapses in the event of:
- No obvious maintenance;
- Using the incorrect product or tampering;
- Use of spare parts or accessories not original;
- Speeches made by unauthorized personnel.
5)The company excludes from manufacturer warranty parts subject to normal wear of operation:
roto-ball vibrant, bearings, gears and so on.
6) Any damage caused during transit, must be immediately reported to the transporter penalty invalidate the
warranty.
7) If faults or cracks may occur during the warranty period or after it, the customer has no right to suspend
payment nor any discount on the price.
SERIAL N° DEALER : BOUGHT BY Mr .
DATE : ..........................
MOD.
OLIVATOR E20
20
FFRANCE
TABLE DES MATIÉRES
1. Explications des symboles........................................................................................................................................................................Page 20
2. Pour votre sécurité...............................................................................................................................................................................................21
3. Données techniques et Déclaration de conformité.........................................................................................................................................22
4. Descriptions des pièces......................................................................................................................................................................................22
5. Assemblage...........................................................................................................................................................................................................22
6. Opérations préliminaires......................................................................................................................................................................................23
7. Entretien périodique.............................................................................................................................................................................................23
8. Mode d'emploi......................................................................................................................................................................................................24
9. Stockage et transport...........................................................................................................................................................................................24
10. Elimination des composants.............................................................................................................................................................................25
11. Guide de dépannage..........................................................................................................................................................................................25
12. Certificat de garantie..........................................................................................................................................................................................26
1. EXPLICATION DES SYMBOLES
Avertissement, danger et attention.
Lire le manuel d'emploi et d'entretien avant d'utiliser cette machine.
Porter des équipements de protection pendant le
fonctionnement de cette machine.
2. POUR VOTRE SECURITE
2-Lire attentivement ces instructions et s'assurer de les comprendre avant de mettre en marche le secoueur.
Respecter tous les avertissements et les normes de sécurité. Conserver ce manuel pour consultations futures.
3-Inspecter la machine avant de toute utilisation. La maintenir propre. Remplacer les parties endommagées, si nécessaire.
N'utiliser que
que des pièces de rechanges originales. Des pièces de rechange produites par d'autres fabricants pourraient mal s'adapter
et causer des blessures.
4-Quand l'on utilise la machine, on recommande de portes des vêtements appropriés et des équipements de
protection tels que:
a) Bottes;
b) Pantalons robustes;
c) Gants;
d) Visière ou lunettes de protection;
e) Casque de protection.
Ne pas porter de vêtements lâches ou déboutonnés.
5-Ne pas permettre à d'autres personnes, aux enfants ou aux animaux de rester dans la rayon de 3 m pendant l'emploi du
secoueur.
6-Ne pas travailler avec l'outil lorsque l'on est fatigué, malade ou sous l'effet d'alcool, de drogues ou de médicaments.
7-N'utiiser le secoueur que pour les tâches décrites dans le présent manuel.
8-Contrôler si le câble d'alimentation est branché correctement
(PINCE ROUGE pôle positif + / PINCE NOIRE pôle négatif -) et qu'il ne traîne pas sur des parties aiguës ou chaudes.
En tout cas, éviter d'envelopper des parties du corps dans le câble d'alimentation.
9-S'assurer que les sphères vibrantes sont libres de tourner et que l'éventuelle rallonge est bien serrée.
10-Avant l'emploi du secoueur, vérifier que les branches des plantes que l'on souhaite secouer sont atteignables avec la
configuration prévue. En cas contraire, appliquer la rallonge.
11-Pour éviter le risque de blessures, éteindre toujours le moteur avant de détacher tout objet enroulé autour des sphères ou
de la tige principale. Ne transporter le secoueur qu'avec le moteur arrêté.
12-S'assurer que il n'y a pas de câbles électriques et/ou de haute tension dans la zone de travail. Le contact avec les
mêmes pourrait provoquer la mort ou de graves blessures personnelles.
1-NE PAS BRANCHER A DES SOURCES D'ALIMENTATION ELECTRIQUE SUPERIEURES A 12 VOLTS.
Table of contents
Languages:
Other Active Lawn And Garden Equipment manuals

Popular Lawn And Garden Equipment manuals by other brands


TOURNUS EQUIPEMENT
TOURNUS EQUIPEMENT 806 941 manual

Fimco
Fimco TC-12-P Assembly / Parts

New England Arbors
New England Arbors Bloomsbury Assembly instructions

Ariens
Ariens 926502 - PB936 Owner's/operator's manual

Venture Products
Venture Products Ventrac KP540 Owner/operator's manual & parts list

EINHELL
EINHELL GC-EC 750 T Original operating instructions


