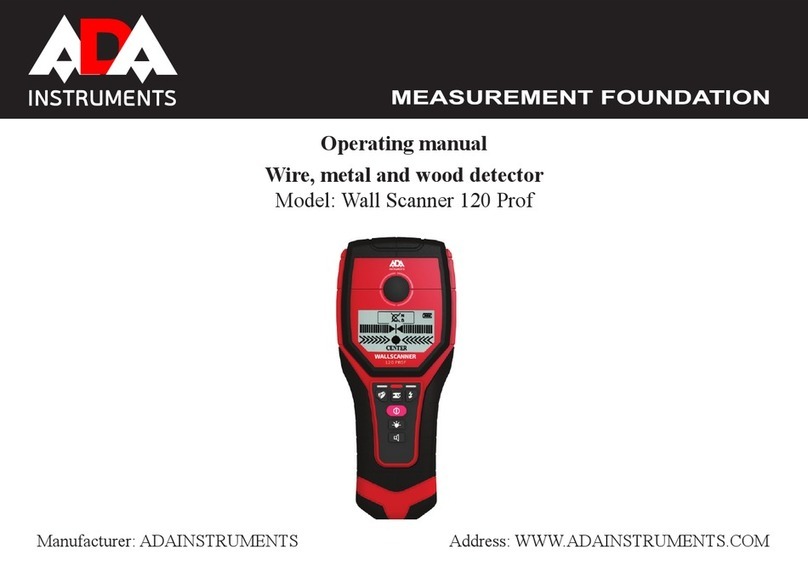
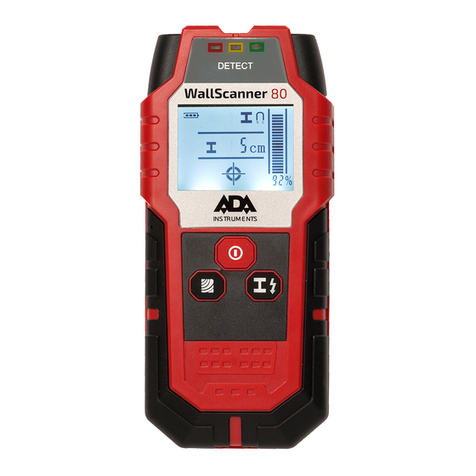
ADA INSTRUMENTS Wall Scanner 120 Prof User manual

Wire, metal and wood detector
OPERATING MANUAL
WALLSCANNER 120 PROF
adainstruments.com

2English
THE MANUFACTURE RESERVES THE RIGHT TO MAKE CHANGES (NOT
HAVING AN IMPACT ON THE SPECIFICATIONS) TO THE DESIGN, COMPLETE
SET WITHOUT GIVING PRIOR WARNING.
INTENDED USE
The measuring tool is intended for the detection of metals (ferrous and
non-ferrous metals, e.g., rebar), joists and ‘live’ wires/conductors in walls,
ceilings and oors.
1
2
3 9
10
11
12
10
10
13
14
15
16
8
16
4
5
6
7

3English
FEATURES
1. Illuminated ring
2. Display
3. Illumination button
4. ON/OFF button
5. Wood mode
6. Metal mode
7. Charged wire mode
8. Connector for charger
9. Sound button
10. Contact pads
11. Sensor area
12. Sticker
13. Battery compartment
14. Battery compartment clamp
15. Hand strip

4English
DISPLAY ELEMENTS
a) Switch O audio signal
b) Charged wire
c) Fine scale
d) Metal
e) Object detection depth in inches
f) Battery indication
g) Charged wire indication
h) Metal mode indication
i) Depth indication
a
b
c
d
e
h
g
f
i
j
k
l

5English
120 mm
80 mm
50 mm
38 mm
5 min
-10 °C…+50°C
-20 °C…+70°C
3.7V 1100 mA Li-ion
battery
270 g
IP54
j) Object detection depth in mm
k) Wood mode indication
l) Wood mode
SPECIFICATIONS
Maximum scanning depth*:
Ferrous metals .........................................................
Non-ferrous metals (Copper) ................................
Copper conductors(live)** .....................................
Wood ...........................................................................
Automatic switch o after approx. ..........................
Operating temperature ..............................................
Storage temperature ...................................................
Battery ............................................................................
Weight .............................................................................
Protection .......................................................................
* Depends on material and size of objects as material and condition of structure.
** Scanning depth will be smaller if wires/conductors are not “live”.
OPERATION
INSERTING/REPLACING THE BATTERY
Use only Li-battery that comes with the tool. Insert Li-battery into the bat-
tery compartment (13). Obsurve the polarity. Remove the battery if the tool
will not be used for a long period.
If the battery indication (f) shows lower power, charge the Li-battery.
The battery can be charged by connecting the charger to the connector (8)
on the side of the device.

6English
WARNING: Never use charger for ordinary batteries. Do not leave the
instrument unattended while using charger. Parameters of the char-
ger must correspond to the parameters of domestic electricity.
SWITCHING ON AND OFF
Protect the measuring tool against moisture and direct sun irradiation. Be-
fore switching the measuring tool on, make sure that the sensor area (12)
is dry. If required, wipe the measuring tool dry using a cloth.
If the measuring tool was subject to an extreme temperature change, allow
it to the adjust to the ambient temperature before switching on. Press ON/
OFF button to switch on the instrument.
After a short test the detector is ready for operation. The detector will au-
tomatically switch o after 5 minutes of inactivity or no button is pressed.
Button switch On/O the backlight of the display.
Button switch On/O the sound alarm.
SCANNING
Place the measuring tool onto the surface
to be scanned. Select the detection mode
and move it straight line as shown in the
picture. When the detector is on the surface
of the object, the illuminated ring lights up
green and audible signal sounds. The signal
strength is also shown on the display.
The place of the object is shown on the dis-
play during detection. If the signal strength
is not zero when working in metal mode,
you must press and hold the button
to do the calibration. During calibration,
the metal calibration icon will appear on
the display. Calibration is completed when

7English
the icon disappears.
FINE POSITION OF DETECTED MATERIAL
When the object to be detected is to the left of the target, move the device
slowly to the left until the exact location is determined. At this time, the
depth will be displayed in the lower left/right corner of the display. The unit
of measurement inches/meters is also shown on the display.
the exact position of the object
Move to the right Move to the left
When you drill a hole in a wall, saw or cut, you must have complete infor-
mation about the object in order to avoid danger. Because the measure-
ment results are inuenced by environmental factors. Even if the device
does not show hidden objects in the measuring range (the device does not
emit a beep and illuminated ring 1 lights up green), this can be dangerous.
DETECTION MODES
The device has three detection modes:
• wooden objects
• metal
• live wires
Every mode has it’s own detection requirement.
In metal mode, the device determines the maximum depth of metal detec-

8English
tion. In live wires mode, the device determines the maximum depth of the
live wires. The illuminated indicator above the button indicates selected
detection mode.
MULTIFUNCTION SEARCH MODE
(FOR WOODEN BEAMS)
In this mode, the detector can signal the detection in a wall except wooden
beams:
magnetic metal objects
non-magnetic objects, for example plastic tubes with water.
non-magnetic metal objects, for example copper tubes.
live objects, for example, live wires.
non-magnetic metal objects, for example, copper tubes.
Press button . Illuminated ring (1) and indivcator over the button
light up green. When detecting metal objects, nails, screws, the detector
may detect wooden beam as a metal object by mistake. In this case, place
the detector in another place of the object and start the measurement
again. In rare cases, the detector cannot detect the object because the
sensor zone and the surface of proximity sensor are dirty. In that case,
clean the device with dry cloth and restart the detection.
Some environmental conditions can inuence the measurement results.
The following factors can inuence the detection accuracy:
Environment: strong magnetic or electromagnetic eld, moisture, metal
objects, foil insulation materials or conductive wallpaper or tiles.
• Material or the size of the object.
• Material or it’s composition.
• Incorrect detection mode.
• Before drilling, sawing, laying in the wall, oor and ceiling, study the
structural plan.
• Small scanning depth of wires that are not under voltage.
• That’s why, before you start drilling, sawing or milling in walls,

9
English
• ceiling or oor, take other sources of information (eg construction
drawings) into account as well.
DETECTION OF METAL OBJECTS
To detect metal objects press button (6). Indication over the button
lights up green. Place the device on the surface to be detected and move
it. icon d (metal) is shown on the display. Illuminated ring lights up red.
WARNING: If the test objects are very small or are very deep, move the
detector horizontally and vertically. For ne detection pay attention to the
indication i and j. When the detector detects a live wire, the b icon will
appear on the display.
SCANNING FOR “LIVE” WIRES
This mode is available for the live wire (110-230V) detection. Press button
(7) to activate the live wire mode. Illuminated ring and indication over
button (7) lights up green. When the detector detects a live wire, the b icon
will appear on the display. Move the detector over the area to be measured
several times to detect live wires. When the detector is very close to a live
wire, a beep will sound and the illumination ring lights up red. It is dicult
for the detector to detect live wires that are behind a metal surface or
behind a surface that contains moisture. Static electricity can lead to false
detection of live wires. In this case, place your free hand against the wall
next to the detector.
RECOMMENDATIONS
Object marking
If necessary, the detected object can be marked. Use a pencil or highlighter
to mark the area or center of the object detection.
TEMPERATURE INDICATION
Detector is equipped with the temperature indication . If the indicator

10 English
lits up, the detector is out of temperature range. Swtiched o the detector
and wait until the tool reaches the ambient temperature. Then switch it
on again. Ambient temperature must correspond to the working tem-
perature of the detector.
IMPORTANT WARNING
When the icon lights up on the display and the indicator above
the button (5) ashes, it is necessary to re-measure. Remove the
tool from the wall or the place over the object to be measured and
place it in another place.
MAINTENANCE AND SERVICE
Wipe away debris or contamination with a dry, soft cloth. Do not use clean-
ing agents or solvents. In order not to aect the measuring function, de-
cals/stickers or name plates, especially metal ones, may not be attached
in the sensor area on the front or back side of the measuring tool. Do not
remove contact pads (10) on the back side of the measuring tool.
WARRANTY
This product is warranted by the manufacturer to the original purchaser to
be free from defects in material and workmanship under normal use for a
period of two (2) years from the date of purchase. During the warranty pe-
riod, and upon proof of purchase, the product will be repaired or replaced
(with the same or similar model at manufactures option), without charge
for either parts of labour. In case of a defect please contact the dealer
where you originally purchased this product. The warranty will not apply
to this product if it has been misused, abused or altered. Without limiting
the foregoing, leakage of the battery, bending or dropping the unit are
presumed to be defects resulting from misuse or abuse.
EXCEPTIONS FROM RESPONSIBILITY
The user of this product is expected to follow the instructions given in op-
erators’ manual. Although all instruments left our warehouse in perfect

11English
condition and adjustment the user is expected to carry out periodic checks
of the product’s accuracy and general performance. The manufacturer,
or its representatives, assumes no responsibility of results of a faulty or
intentional usage or misuse including any direct, indirect, consequential
damage, and loss of prots. The manufacturer, or its representatives, as-
sumes no responsibility for consequential damage, and loss of prots by
any disaster (earthquake, storm, ood ...), re, accident, or an act of a third
party and/or a usage in other than usual conditions. The manufacturer, or
its representatives, assumes no responsibility for any damage, and loss of
prots due to a change of data, loss of data and interruption of business
etc., caused by using the product or an unusable product. The manufactur-
er, or its representatives, assumes no responsibility for any damage, and
loss of prots caused by usage other thsn explained in the users’ manual.
The manufacturer, or its representatives, assumes no responsibility for
damage caused by wrong movement or action due to connecting with oth-
er products.
DOESN’T EXTEND TO FOLLOWING CASES:
1. If the standard or serial product number will be changed, erased, re-
moved or wil be unreadable.
2. Periodic maintenance, repair or changing parts as a result of their nor-
mal runout.
3. All adaptations and modications with the purpose of improvement
and expansion of normal sphere of product application, mentioned in the
service instruction, without tentative written agreement of the expert pro-
vider.
4. Service by anyone other than an authorized service center.
5. Damage to products or parts caused by misuse, including, without lim-
itation, misapplication or nrgligence of the terms of service instruction.
6. Power supply units, chargers, accessories, wearing parts.
7. Products, damaged from mishandling, faulty adjustment, maintenance
with low-quality and non-standard materials, presence of any liquids and
foreign objects inside the product.
8. Acts of God and/or actions of third persons.
9. In case of unwarranted repair till the end of warranty period because
of damages during the operation of the product, it’s transportation and
storing, warranty doesn’t resume.

12 English
WARRANTY CARD
Name and model of the product __________________________________________
Serial number___________________________Date of sale______________________
Name of commercial organization ________________________________________
stamp of commercial organization
Warranty period for the instrument explotation is 24 months after the
date of original retail purchase.
During this warranty period the owner of the product has the right for
free repair of his instrument in case of manufacturing defects.
Warranty is valid only with original warranty card, fully and clear lled
(stamp or mark of thr seller is obligatory).
Technical examination of instruments for fault identication which is
under the warranty, is made only in the authorized service center.
In no event shall manufacturer be liable before the client for direct or
consequential damages, loss of prot or any other damage which occur
in the result of the instrument outage.
The product is received in the state of operability, without any visible
damages, in full completeness. It is tested in my presence. I have no
complaints to the product quality. I am familiar with the conditions of
qarranty service and i agree.
purchaser signature _______________________________
Before operating you should read service instruction!
If you have any questions about the warranty service and technical support contact
seller of this product

13
Russian
ПРОИЗВОДИТЕЛЬ ОСТАВЛЯЕТ ЗА СОБОЙ ПРАВО ВНОСИТЬ ИЗМЕ-
НЕНИЯ, НЕ ВЛИЯЮЩИЕ НА ТЕХНИЧЕСКИЕ ХАРАКТЕРИСТИКИ В
КОНСТРУКЦИЮ, ВНЕШНИЙ ВИД И КОМПЛЕКТАЦИЮ БЕЗ УВЕДОМ-
ЛЕНИЯ
ПРИМЕНЕНИЕ
Настоящий измерительный инструмент предназначен для поиска
в стенах, потолках и полах металлов (черных и цветных металлов,
например, арматурной стали), деревянных балок, а также электрокабелей
под напряжением.
1
2
3 9
10
11
12
10
10
13
14
15
16
8
16
4
5
6
7

14 Russian
СВОЙСТВА
1. Светодиодная сигнализация
2. Дисплей
3. Подсветка дисплея
4. Кнопка Вкл/Выкл
5. Режим поиска деревянных объектов
6. Режим поиска метала
7. Режим поиска проводов под напряжением
8. Разъем для подключения зарядного устройства
9. Кнопка включения/выключения звукового сигнала
10. Подкладка скольжения
11. Сенсорная зона
12. Наклейка
13. Батарейный отсек
14. Защелка батарейного отсека
15. Отверстия для ремешка
16. Ремешок

15Russian
ЭЛЕМЕНТЫ ИНДИКАЦИИ
a) Индикатор отключения звукового сигнала
b) Обнаруженный объект электропровод под напряжением
с) Интенсивность левого и правого сигналов
d) Обнаруженный объект металл
е) Глубина обнаружения объекта в дюймах
f) Индикатор заряда батареи
g) Индикатор режима работы- электропровод под напряжением
a
b
c
d
e
h
g
f
i
j
k
l

16 Russian
h) Индикатор режима работы – металлические объекты
i) Индикатор глубины обнаружения
j) Глубина обнаружения объекта в миллиметрах
k) Индикатор режима работы - деревянные объекты
l) Обнаруженный объект деревянная балка
ТЕХНИЧЕСКИЕ ДАННЫЕ
Глубина обнаружения, макс.*:
черные металлы ........................................
цветные металлы (медная труба) .......
кабели (под напряжением)** ................
древесина .....................................................
Автоматическое выкл. ≈ через .................
Рабочая температура ...................................
Температура хранения ...............................
Тип батареи .....................................................
Вес .......................................................................
Класс защиты .................................................
* в зависимости от материала и размера объекта, а так же материала и состояния
основания
** глубина обнаружения будет меньше, если электрокабель не находится под
напряжением
120 мм
80 мм
50 мм
38 мм
5 мин
-10 °C…+50°C
-20°C…+70°C
3.7В 1100 мА Li-ion акк.
270 гр
IP 54

17Russian
РАБОТА С ИНСТРУМЕНТОМ
УСТАНОВКА/СМЕНА АККУМУЛЯТОРА
Используйте только литиевый аккумулятор из комплекта прибора.
Вставьте аккумулятор в батарейный отсек (13). Соблюдайте полярность.
Если Вы продолжительное время не пользуйтесь измерительным
инструментом, то аккумулятор должен быть вынут из инструмента.
Если индикатор (f) показывает разряженное состояние, зарядите его.
Аккумулятор можно заряжать подключив зарядное устройство к разъему
(8) на боковой части прибора.
Внимание! ЗАРЯДНОЕ УСТРОЙСТВО В КОМПЛЕКТ НЕ ВХОДИТ.
Используйте зарядное устройство для литиевых аккумуляторов
с выходным напряжением не более 5 В. При подключении зарядного
устройства не оставляйте прибор без присмотра.
ВКЛЮЧЕНИЕ И ВЫКЛЮЧЕНИЕ
Защищайте измерительный инструмент от влаги и прямых солнечных
лучей. Перед включением измерительного инструмента убедитесь в
сухом состоянии сенсорной зоны (12). При необходимости вытрите
измерительный инструмент насухо тряпкой. При больших колебаниях
температуры перед включением следует выдержать инструмент до
выравнивания температуры.
Для включения измерительного инструмента нажмите кнопку включения.
Прибор включится. После короткого самотестирования измерительный
инструмент готов к работе. Прибор автоматически выключится через 5
мин, если не нажата ни одна кнопка или не проводится сканирование
объекта.
Кнопка включает/выключает подсветку дисплея.
Кнопка включает/выключает звуковой сигнал.

18 Russian
СКАНИРОВАНИЕ
Положите прибор на поверхность объекта.
Двигайте прибор по прямой линии (как
показано на картинке) после того, как
выбран правильный режим обнаружения.
Когда прибор на поверхности объекта,
кольцо подсветки загорается зеленым и
раздается звуковой сигнал.
Во время обнаружения на дисплее
отображается место объекта. Сила
сигнала так же отображается на дисплее.
Если при работе в режиме металла сила
сигнала не нулевая, необходимо нажать и
удерживать кнопку , чтобы сделать
калибровку. Во время калибровки на
дисплее отобразится иконка калибровки
металла. Калибровка завершится, когда
иконка исчезнет.
ТОЧНОЕ ПОЛОЖЕНИЕ ОБНАРУЖИВАЕМОГО МАТЕРИАЛА
Когда обнаруживаемый объект находится слева от мишени, двигайте
прибор медленно влево до определения точного местоположения. В это
время глубина будет отображаться в левом/правом нижнем углу дисплея.
Единица измерения дюймы/метры также отображается на дисплее.
точное положение объекта поиска
двигайте вправо двигайте влево

19Russian
Когда вы сверлите дырку в стене, пилите или фрезеруете, вы должны
получить полную информацию об объекте, чтобы избежать опасности.
Так как на результаты измерения влияют окружающие факторы. Даже
если прибор не показывает скрытых объектов в диапазоне измерения
(прибор не издает звукового сигнала и световое кольцо 1 горит зеленым
светом), это может быть опасным.
РЕЖИМЫ ОБНАРУЖЕНИЯ
Прибор имеет три режима обнаружения:
• деревянные объекты
• металл
• провод под напряжением
Для каждого режима свое требование обнаружения.
В режиме металла, прибор определяет максимальную глубину
обнаружения металла. В режиме провода под напряжением, прибор
определяет максимальную глубину обнаружения провода под
напряжением. Светящийся индикатор над кнопкой указывает на
выбранный режим обнаружения.
РЕЖИМ МНОГОФУНКЦИОНАЛЬНОГО ПОИСКА
(ДЛЯ ДЕРЕВЯННЫХ БАЛОК)
В этом режиме детектор может сигнализировать о обнаружении в стене
кроме деревянных балок:
• магнитные металлические предметы
•
не металлические предметы, например, пластиковые трубы с водой.
•
не магнитные металлические предметы, например, медные трубы,
•
предметы под напряжением, например, провода под напряжением.
•
не магнитные металлические предметы, например, медные трубы,
Нажмите на кнопку . Кольцо подсветки (1) и индикатор над
кнопкой загорятся зеленым светом. При обнаружении металлических
объектов, гвоздей, винтов, детектор может принять деревянную балку
за металлический предмет. В этом случае поместите детектор на другое

20 Russian
место исследуемого объекта и начните измерение заново.
В редких случаях детектор не может обнаружить исследуемый предмет,
так как сенсорная зона и датчик приближения к поверхности загрязнены.
В этом случае протрите прибор мягкой сухой тряпкой и возобновите
обнаружение.
В силу принципа работы измерительного инструмента некоторые
условия окружающей среды могут влиять на результаты измерения.
На точность обнаружения могут влиять следующие факторы:
•
Окружающая среда: сильное магнитное или электромагнитное
поле, влажность, металлические объекты, фольгированные
изоляционные материалы или проводниковые обои или кафель.
• Материал или размер объекта.
• Материал или состав материала.
• Режим обнаружения выбран неправильно.
•
Перед тем, как сверлить, пилить, прокладывать в стене, полу и
потолке, изучите конструкционный план.
•
Маленькая глубина сканирования проводов, которые не под
напряжением.
Поэтому, прежде чем начать сверлить, пилить или фрезеровать в стенах,
потолке или полу, примите во внимание также и другие источники
информации (например строительные чертежи).
ОБНАРУЖЕНИЕ МЕТАЛЛИЧЕСКИХ ОБЪЕКТОВ
Для обнаружения металлических объектов нажмите клавишу (6). Над
кнопкой загорится индикатор зеленого света. Установите измерительный
инструмент на обследуемую поверхность и передвигайте его. На дисплее
отобразится значок d (металл). Кольцо подсветки загорается красным
светом. ВНИМАНИЕ: Если исследуемые объекты очень маленькие
или находятся очень глубоко, двигайте детектор в горизонтальном и
вертикальном положении. Обращайте внимание на индикацию i и j
для точного обнаружения.
Other manuals for Wall Scanner 120 Prof
1
Table of contents
Languages:
Other ADA INSTRUMENTS Security Sensor manuals
Popular Security Sensor manuals by other brands
NightSearcher
NightSearcher PULSAR-PRO5 user manual

DSC
DSC COMMUNIQUE VPM4580 installation manual
Draminski
Draminski Dog Ovulation Detector Operation manual
Digital Monitoring Products
Digital Monitoring Products 1128 installation guide
Pfeiffer Vacuum
Pfeiffer Vacuum ASM 380 MEMO user manual
Bosch
Bosch D300A-HV installation guide
