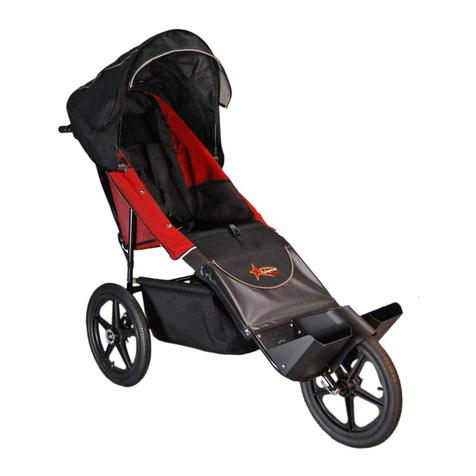
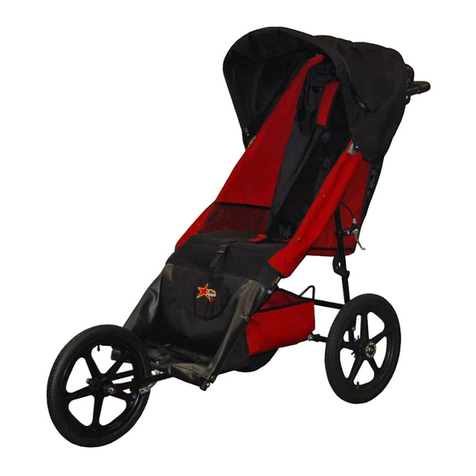
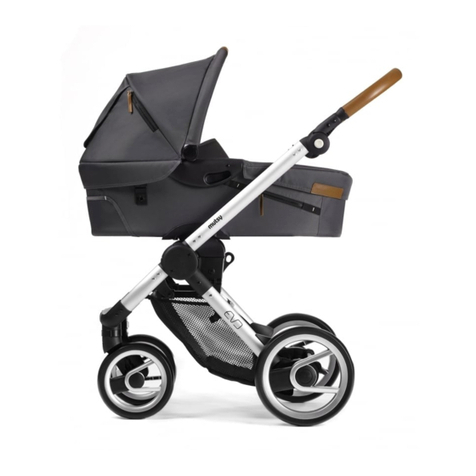
Adaptive Star AXIOM ENDEAVOUR User manual

AXIOM
INDOOR / OUTDOOR MOBILITY PUSHCHAIR
Assembly and Care Manual
Size 1.5, 2, & 3

Frequently Asked Questions
Can I roller blade with my Axiom Push Chair?
We do not recommend this, it is just too easy to lose control and cause possible harm to
your passenger or yourself
Is the fabric on my Axiom Pushchair washable?
Yes! The seat, canopy and basket are removable and machine washable in cold water with
mild detergent. After washing, place the seat back onto the Pushchair for drying. Machine
drying in not recommended. Remember to remove the seat panels before washing and to
replace them when you’re finished.
Reminders
ALWAYS use your safety wrist strap any time a passenger is in the Pushchair.
ALWAYS engage rear food brake when loading and unloading a passenger.
NEVER leave a passenger unattended in or around the Pushchair.
NEVER overload the Pushchair. Overloading the Pushchair may cause it to become unstable and tip over.
DO NOT allow your passenger to stand in the Pushchair. This may cause the Pushchair to tip and
cause injury to the passenger, yourself or others.

Remove the Axiom from the box and unwrap all the component pieces.
Now unfold the Axiom into its upright use position
Your Axiom is equipped with a primary and secondary folding lockout. When the Axiom is folded into its use position, the
primary folding lockout will engage (you may hear a “click” when it engages) The secondary folding lockout is located on the
side of the Axiom (the left side as you are standing behind it) as shown in the photo. Insert the release pin to secure the folding
latch. It is HIGHLY recommended that you never use the Axiom without this secondary folding lockout pinned into place.
Now find the front wheel fender and install it onto the four bolt studs as shown in the photo. Note: the retaining nuts for
these bolts have been installed for shipping. Please remove them before installing the fender. Once the fender is installed,
tighten the nuts onto the bolts with a wrench. Tighten “snuggly” being cautious to not over tighten them.
Now locate the footwells. Each footwell has the mounting nuts and bolts installed for shipping. Please remove them now and
set them aside to be used when the footwell is installed. Each footwell is universal, meaning the there is no rightside/leftside
designation. Mount each footwell by bolting it to the AXIOM as shown in the photo. On the AXIOM is a set of holes that
will allow you to adjust the height and side to side angle of each footwell. You will need to determine the correct height and angle
for your application. Please allow at least 1 empty hole between mounting bolts for strength and security.
Latch Open:
Latch Closed:
Mounting bolt
location at RED
arrows
Mounting bolt
location at RED
arrows

To fold your AXIOM remove the pin from the secondary folding lockout.
Installed:
Removed:
Now locate the Primary folding lockout release lever located on the left side upright of the AXIOM.
Primary
Release
Latch
Lever
Squeeze the primary folding lockout release lever one time. Now push down on the handle to start the AXIOM folding.
Folded with
wheels on

To fold the AXIOM smaller, remove the wheels To install or remove the rear wheels simple push the button on
the outside of the wheel and hold it in while either installing it
into the AXIOM axle assembly or removing it.
Adjustable Height Handle
Your pushchair is equipped with a height adjustable handle. To adjust
the handle to best suit your comfort, simply press the buttons located
on the inside of the handle near the end of the foam handle grip. While
holding the buttons in, adjust the handle up or down to the height that
is correct for you. Once there, release the buttons and the handle will
lock into place.
Wrist Strap
Your Axiom pushchair is equipped with a safety wrist strap which you
should always use when there is a passenger loaded. The wrist strap is the
link between you and the pushchair and keeps the pushchair from rolling
away from your control by accident. Never leave a passenger unattended in
the pushchair. The wrist strap is constructed with loops on each end, one
large and one small. The wrist strap should be attached to the pushchair at
the frame member that runs between the rear wheels, by looping around it,
and inserting the large looped end through the small loop and pulling it tight.
The large loop may now be wrapped around your wrist attaching you to the
pushchair.

Position the silver lever straight out from the
frame as shown. Now tighten the black knob on
the opposite
side of the lever
until it just starts
to become snug.
Now swing the lever closed as shown here. If you
are unable to swing
the lever completely
into the locked po-
sition, open it back
straight out, loosen
the black knob
slightly, and close the lever again.
Rear Wheel Installation
First unlock the rear foot brake by
pulling the black loop upward
Next, push the black
button and while
holding it in...
...insert the wheel axle
all the way into the
pushchair frame and
release the button.
Now repeat to install
the other wheel. Check to make sure
your wheels are
locked in before
each use.
The front wheel is the same as a bicycles. Place the tire be-
tween the brake pads and orient your wheel so that the flat
sections of the wheel axle align with the slotted metal fork
tips and push the
wheel so that it seats all
the way in the back of
the fork tip.
Start by tipping the
push chair backward
so the fork assembly
is pointing upward.
This will make it easier
to install the wheel.
Be sure to dispose of the packaging
from the wheels, they can be a
choking hazard to young children.
Front Wheel Installation

Seat Recline
Adjustments
Foot Well
Your Axiom pushchair features footwells that are independently adjustable to
passenger comfort. Each footwell has the ability to adjust up and down in 1”
increments and 1/2” to the right or left, from center. Additionally, each footwell
may be angled 10 degrees to the right or left or mounted upside down for
passengers with shorter legs, allowing you to easily attain a customized fit.
Front Brake Adjustment
The front brake on your Axiom pushchair may require periodic adjustment.
By turning the silver ring, indicated by the red arrow, outward it will cause the
brake pads to move closer to the front wheel. There is a similar adjuster
located underneath the pushchair, near the front wheel, on the brake caliper
itself. This caliper style brake system is the same as used on a bicycle, and if
you require more detailed assistance, a local bicycle shop will be able to
provide it for you.
Tracking
If your pushchair is pulling to the left or right while using the fix front
wheel, check to see if it is one of the following:
Tire pressure, check to see if all 3 tires are fully inflated.
Be sure that the front wheel hasn’t been installed
too
tight. Release the
QR lever, push the front wheel all the way back into the forktips and when
closing the lever, make sure that it is only snug, not
He-man
tight. If it is,
loosen the thumb nut on the other side and close the lever. You may have
to make several small adjustments until the lever closes snuggly.
Inspect the wheels for bent spokes or axles.
To recline the seat, simply slide the two straps behind the seat. To put
the seat back to the upright position, pull the webbing taut until in the
upright position.
Silver adjusting ring

Harness Adjustment
You will want to do a one time general positioning of the harness before placing the passenger in
the seat. Once the passenger is in the seat then do the final harness adjustments as follows:
Undo both the
buckles from the
padded center
strap.
Push down on the silver center
button located between the
passengers knees and pull the
webbing out to the end.
Pull up the webbing through the seat and up on the shoulder harness area.
Place the passenger in the seat.
Adjust the padded center strap forward or backward to fit your passenger.
Adjust the padded shoulder harness up or down on the Velcro strips to fit your passenger.
Buckle the two buckles to the padded center strap.
Pull the adjustment strap until the padded center strap and the padded shoulder harness are both snug.
Adjust the chest strap to a comfortable length and connect the buckles.
If the harness is too small for the passenger harness extensions are available for purchase.
Avoid serious injury from falling or sliding out; Always us the seat harness system
Always check that the seat anchor straps are attached properly before each use.

Maintenance
We recommend that you have an experienced dealer perform these maintenance check at least once each
year. Lubrication of these following items is necessary:
Pivot point and cable of hand brake
Pivot point and cable of brake caliper
Front wheel axle
Front wheel quick release lever
Insert in frame for rear wheels
Wheel hub and bearings of rear wheels
Locking bars of folding mechanism
All folding joints of pushchair
Check to make sure all of the bolts are tight and that springs are secure on the rear foot brake.
Check fabric seams and straps for fraying and tearing.
Keep pushchair our of the sun and in a dry place when not in use, to prevent mold and mildew.
Check the frame for loose rivets, cracks and wear.
Check to make sure all nuts and bolts are tight on the frame.
We recommend that you put a rust preventative type coating on your wheels, nuts, bolts, brake springs
and brake caliper on your pushchair. These parts can also be maintained by cleaning with a damp clothe
and keeping these parts dry and free from debris.
The tires on your pushchair are a standard bicycle size and have an inner tube. In the event that one of
your tires will not hold air, the inner tube can be replaced and both tires and inner tubes can be found at
professional bicycle stores and most major retailers.
The front brake uses a standard bicycle style caliper and brake pad. If replacement brake pads are
needed, they can be found at professional bicycle stores and most major retailers.

WARRANTY CARD
Thank you for purchasing an Adaptive Star Indoor/Outdoor Mobility Push Chair. We have created a warranty that will keep your unit in
top condition and headache free. The following warranty is on workmanship and materials from the date of original consumer purchase:
•
A 5-year warranty on the frame.
•
A 1-year warranty on parts and soft goods. Exclusions include:
•
Parts that require replacement under normal use.
•
Damage or malfunction caused by negligence or abuse.
•
Foam grips, inner tubes, tires and brake pads are specifically excluded.
Adaptive Star will, at its option, repair or replace defective parts upon delivery to our service center accompanied by proof of date of first
consumer purchase, such as a copy of a sales receipt. Please refer to the store where you made your purchase for returns and refunds as
Adaptive Star does not give direct refunds. Purchaser is responsible for initial shipping charges required to ship the product for warranty
service. Purchaser is also responsible for all applicable duties and/or custom charges. The return charges will be at Adaptive Star’s
expense. Please include your name, address, telephone number, email address and a brief description of the problem, Adaptive Star does
not accept delivery of any product without a Return Authorization # clearly marked on the return shipment box and shipping label.
All implied warranties, including warranties of merchantability and fitness for a particular purpose are limited in duration to the length of this
warranty. Adaptive Star will not be liable for any incidental, consequential, or other damages, including, without limitation, damages resulting
from loss of use. Some states do not allow limitations on how long an implied warranty last and/or do not allow the exclusion or limitation of
incidental or consequential damages, so the above limitation may not apply to you. This limited warranty gives you specific legal rights, and
you may also have other rights, which vary from state to state.
Your complete satisfaction is our goal. Please let us know if you are dissatisfied with any of our products. We will do our very best to
correct the situation and make you happy. Feel free to contact us and send photos. We love to hear from you!
Name
Address
City State Zip Phone
E-Mail
Model Date of Purchase
Where did you purchase your unit?
Do you have suggestions for improvements to products?
Are you interested in accessories? Can we send you some information?
Other manuals for AXIOM ENDEAVOUR
1
Table of contents
Other Adaptive Star Stroller manuals
