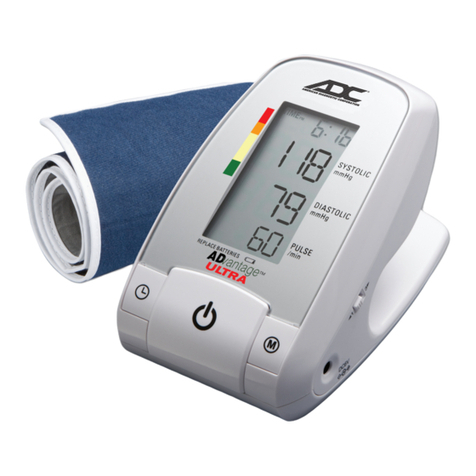
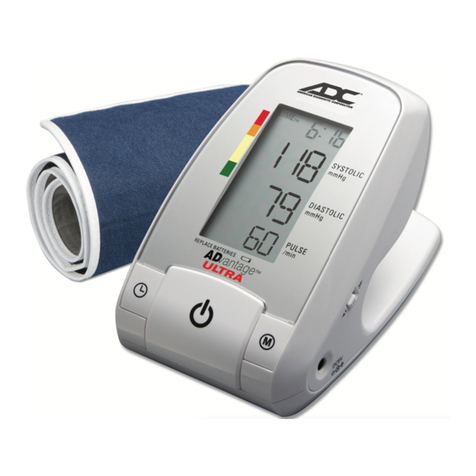
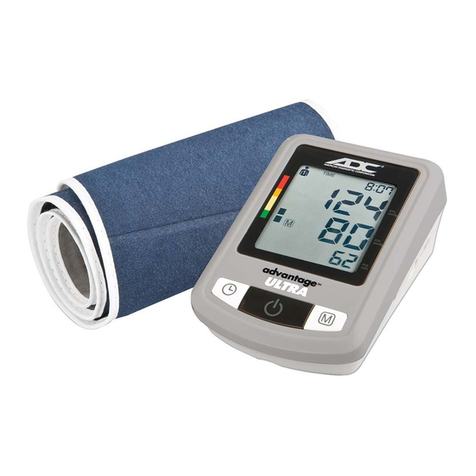
ADC Advantage 6021N User manual

PLEASE NOTE:
THIS MEDICAL INSTRUMENT MUST BE
USED ACCORDING TO INSTRUCTIONS
TO ENSURE ACCURATE READINGS.
Quest ons?
Call ADC toll free
at 1-800-232-2670
Automatic
Blood Pressure
Monitor
6021N, 6022N, 6023N
Instruction Manual
6023N

2
Automatic Blood Pr ssur Monitor
Tabl of Cont nts
A Special Thank You 4
1. INTRODUCTION AND INTENDED USE 4
2. WARNINGS AND PRECAUTIONS 5
3. ABOUT BLOOD PRESSURE 6
3.1. What is Bloo Pressure? 6
3.2. What is a Normal Bloo Pressure? 7
3.3. What Influences Bloo Pressure? 7
3.4. Does Bloo Pressure Vary? 8
3.5. What is Hypertension? 8
3.6. Can Hypertension be Controlle ? 9
3.7. Why Measure Bloo Pressure at Home? 9
3.8. How is Bloo Pressure Measure ? 10
3.9. How Shoul I Recor My Bloo Pressure? 10
4. COMPONENTS OF YOUR BLOOD PRESSURE MONITOR 11
5. SETTING UP YOUR BLOOD PRESSURE MONITOR 12
5.1. Inserting the Batteries 12
5.2. Using the AC Power A apter 13
5.3. Cuff Connection 13
5.4. Setting the Time an Date 13
5.5. Select the User 14
5.6. Selecting Measurement Mo e (6022N, 6023N only) 15
5.7. Using MAM A vantage™ Averaging Mo e (6022N, 6023N only) 15
6. MEASUREMENT PROCEDURE 16
6.1. Before Measurement 16
6.2. Common Sources of Error 16

6.3. Fitting the Rigi Cuff (6023N only) 17
6.4. Fitting the D-Bar Cuff (6021N, 6022N only) 18
6.5. Measurement Proce ure 19
6.6. Rea ing Measurement Results 20
6.7 Using the Morning/Evening Hypertension
Function (6022N, 6023N only) 20
7. SOFTWARE FUNCTIONS (6022N, 6023N MODELS ONLY) 21
7.1. PC Link Software Installation an Data Transmission 21
7.2 Installing an Using Microsoft® Healthvault™ 22
8. IRREGULAR HEARTBEAT DETECTOR 23
8.1. Traffic Light In icator (6023N only) 24
9. MEMORY FUNCTION 24
9.1. Recall an Storage of Measurements 24
9.2. Discontinuing a Measurement 25
9.3. Delete Memory 25
10. ERROR MESSAGES/TROUBLESHOOTING 26
11. CARE AND MAINTENANCE 28
12. TECHNICAL SPECIFICATIONS 29
13. WARRANTY 30
14. QUALITY STANDARDS 30
15. SYMBOL DEFINITIONS 30
16. HOW TO CONTACT US 31
3

4
A SPECIAL THANK YOU
Congratulations on your purchase of an ADC®A vantage™Automatic
Bloo Pressure Monitor.
In hospitals an physician's offices throughout the worl , where accuracy an
epen ability are critical, ADC®professional iagnostic pro ucts are the
instruments of choice.
Now you, too, can enjoy the benefits of ADC®engineering an quality in the
home. This feature rich instrument was esigne to simplify the measurement
of bloo pressure an pulse rate at home an eliver consistent, epen able
results.
Rea this booklet thoroughly before attempting to use your new ADC®
A vantage™Automatic Bloo Pressure Monitor.
1. INTRODUCTION AND INTENDED USE
This manual is for A vantage™(6021N), A vantage™PLUS (6022N), an
A vantage™ULTRA (6023N) mo els. To fin the mo el number of your evice,
look on the rating label locate on the un ersi e of the unit.
Your bloo pressure monitor with ADC®Averaging Mo e, Irregular Heartbeat
Detection, an PC Link Bloo Pressure Analyzer Software (6023N mo el only) is
a fully automatic igital bloo pressure measuring evice for use by a ults on
the upper arm at home or in your octor’s/nurse’s office. It enables very fast
an reliable measurement of systolic an iastolic bloo pressure as well as
pulse through the oscillometric metho . This evice offers clinically proven
accuracy an has been esigne to be user frien ly.
Before using, please rea this instruction manual carefully an then keep it in a
safe place. Please contact your octor for further questions on the subject of
bloo pressure an its measurement.
R m mb r…
Only a healthcare professional is qualifie to interpret bloo pressure•
measurements. This evice is NOT inten e to replace regular me ical
checkups.

5
It is recommen e that your physician review your proce ure for using•
this evice.
Bloo pressure rea ings obtaine by this evice shoul be verifie before•
prescribing or making a justments to any me ications use to control
hypertension. Un er no circumstances shoul YOU alter the osages of
any rugs prescribe by your octor.
This monitor is inten e for use by a ults only. Consult with a physician•
before using this instrument on a chil .
In cases of irregular heartbeat (Arrhythmia), measurements ma e with•
this instrument shoul only be evaluate after consultation with your
octor.
Familiarize yourself with the section title "About Bloo Pressure". It•
contains important information on the ynamics of bloo pressure
rea ings an will help you to obtain the best results.
2. WARNINGS AND PRECAUTIONS
Warning: The evice contains sensitive electronic components.
Avoi strong electrical or electromagnetic fiel s in the irect vicinity of
the evice (e.g., mobile telephones, microwave ovens). These can lea to
temporary impairment of the measuring accuracy.
Warning: Use of this instrument on patients un er ialysis therapy or on
anticoagulant, antiplatelets, or steroi s coul cause internal blee ing.
Warning: Do not use cuffs, AC a apters or batteries other than those
inclu e with this pro uct or replacement parts supplie by the
manufacturer.
Warning: This system may fail to yiel specifie measurement accuracy
if operate or store in temperature or humi ity con itions outsi e the
limits state in the specifications section of this manual.
Warning: This pro uct may contain a chemical known to the state of
California to cause cancer, birth efects, or other repro uctive harm.
Caution: The stan ar material use is latex-free.

6
Att ntion: Self-measurement means control, not iagnosis or treatment.
Unusual values must always be iscusse with your octor. Un er no
circumstances shoul you alter the osages of any rugs prescribe by your
octor.
Att ntion: The pulse isplay is not suitable for checking the frequency of
heart pacemakers!
Att ntion: In cases of irregular heartbeat, measurements ma e with this
instrument shoul only be evaluate after consultation with your octor.
NOTE: To obtain the greatest accuracy from your bloo pressure instrument,
it is recommen e that the instrument be use within a temperature range
of 50°F (10°C) to 104°F (40°C), with a 15-90% relative humi ity.
3. ABOUT BLOOD PRESSURE
3.1. What is Blood Pr ssur ?
Simply put, arterial bloo pressure is the force of bloo exerte against the walls of
the arteries. There are two components to bloo pressure — systolic an iastolic
pressure. Systolic, the higher pressure, occurs uring contraction of the heart.
Diastolic, the lower pressure, occurs when the heart is at "rest."
Your level of bloo pressure is etermine in the circulatory center of the brain
an a justs to a variety of situations through fee back from the nervous system.
To a just bloo pressure, the strength an frequency of the heart (Pulse), as well
as the wi th of circulatory bloo vessels is altere . Bloo vessel wi th is affecte
by fine muscles in the bloo vessel walls. Bloo pressure is tra itionally measure
in millimeters of mercury (mmHg).
It is recor e as systolic/ iastolic. For example a systolic of 120 an
iastolic of 80 woul be recor e 120/80.
Bloo pressure is a ynamic vital sign — one that changes constantly
throughout the ay. A person's "resting" bloo pressure is the pressure that
exists first thing in the morning while a person is still at rest an before
consumption of foo or rink.

7
3.2. What is a Normal Blood Pr ssur ?
A systolic pressure of less than 120mmHg an a iastolic pressure of un er
80mmHg are recognize as normal by the Joint National Committee on
Prevention, Detection, Evaluation, an Treatment of High Bloo Pressure,
2003.
NOTE: Bloo pressure oes increase with age, so you must check with
your octor to fin out what is “normal” for you! Even with normal bloo
pressure values, a regular self-check with your bloo pressure monitor is
recommen e . You can etect possible changes in your values early an
react appropriately. If you are un ergoing me ical treatment to control your
bloo pressure, keep a recor of values along with time of ay an ate.
Show these values to your octor. Never use the results of your
measurements to in epen ently alter the rug oses prescribe by your
octor.
3.3. What Influ nc s Blood Pr ssur ?
Bloo pressure is influence by many factors inclu ing age, weight,
physical con itioning, past illness, time of ay, altitu e, activity, an
climate, to name just a few. In general, bloo pressure is lower in the
morning an increases throughout the ay. It is lower in warm weather,
an higher in col weather.
Physical activity can have a significant short term impact on bloo
pressure. Work, exercise, smoking, eating, rinking - even talking,
laughing, or crying will all affect a person's bloo pressure.
Your iet, inclu ing beverages containing caffeine or alcohol, may
affect bloo pressure. Emotional stress can have a ramatic impact on your
bloo pressure.
Even repeate bloo pressure measurements taken without a equate rest
between rea ings will alter your bloo pressure as the vessels in your arm
engorge with bloo . Many of these influences are only temporary or short
term, though chronic (long term) exposure to some factors may result in
permanently elevate bloo pressure levels.

8
3.4. Do s Blood Pr ssur Vary?
Constantly. An in ivi ual's bloo pressure varies greatly on a aily an seasonal
basis. It changes throughout one's lifetime. It is not uncommon for systolic
pressure to vary by 40mmHg or more throughout the course of a single ay!
While generally not as volatile, iastolic pressure can still vary significantly. In
hypertensive in ivi uals,
variations are even more
pronounce . Normally,
bloo pressure is at its
lowest uring sleep an
rises in the morning an
throughout the ay. The
chart (left) illustrates the
fluctuations that coul
occur in a typical ay.
3.5. What is Hyp rt nsion?
Hypertension (high bloo pressure) is elevate systolic or iastolic levels. In 90
to 95 percent of the iagnose cases, the specific causes are unknown,
although the con ition is often linke with family history, an lifestyle. This is
referre to as essential hypertension. In the remaining cases, high bloo
pressure is a symptom of an un erlying, often treatable con ition, which if
correcte , may normalize bloo pressure. This less common type is known as
secon ary hypertension. Hypertension, if left untreate , may contribute to ki ney
isease, heart attack, stroke, or other ebilitating illnesses. The following
stan ar s for assessment of high bloo pressure in a ults have been establishe
by the Joint National Committee, 2003.
Range Systol c D astol c Precaut on
Class f cat ons Blood Pressure Blood Pressure Measures
Normal <120 <80 Monitor regularly
Prehypertension 120 139 80 89 Contact your phys c an
–– HYPERTENSION ––
Stage 1 140 159 90 99 Contact your
(Moderate) phys c an Immed ately
Stage 2 ≥160 ≥100 Contact your
(Severe) phys c an URGENTLY
(JNC 7 report: Joint National Committee on Prevention, Detection, Evaluation and Treatment of High Blood Pressure / 2003)

Remember, only a physician is qualifie to interpret the rea ings obtaine
from your bloo pressure monitor. No attempt shoul ever be ma e at
self- iagnosis or treatment.
3.6. Can Hyp rt nsion b Controll d?
Although essential hypertension cannot be cure , it can usually be
controlle by altering lifestyle (inclu ing iet), a opting a program of
exercise, stress management an , where necessary, with me ication
un er a octor's supervision.
To help re uce the risk of hypertension, or keep it un er control, the
American Heart Association (AHA) recommen s the following:
Don't smoke•
Re uce salt an fat intake•
Maintain proper weight•
Exercise regularly•
Have regular physical checkups•
3.7. Why M asur Blood Pr ssur at Hom ?
Clinical stu ies have shown improve etection an treatment of
hypertension when regular home bloo pressure monitoring is one
in consultation with a physician.
Bloo pressure measure in a octor's office or hospital setting may
cause anxiety an lea to an elevate rea ing - a con ition referre
to as "white coat hypertension."
Home measurements generally re uce the "outsi e" influences on
bloo pressure rea ings, an can provi e a more comprehensive an
meaningful bloo pressure history.
Not : While it is important to keep an accurate recor of your bloo pressure
measurements, on't be overly concerne by the results of any one
measurement. In ivi ual results may be influence by spiking of your pressure
ue to iet, anxiety, or mis-measurement resulting from excessive arm
movement, or misapplication of the cuff. Many rea ings taken at the same time
each ay give a more comprehensive bloo pressure history.
9

10
Always be sure to note the ate an time when recor ing bloo pressure
an pulse measurements. For best results, an with time permitting, 3
successive measurements may be taken aily. Make sure to allow at least
5 minute intervals between measurements. Discar any rea ing that
appears suspect an recor the average of the remaining rea ings.
3.8. How is Blood Pr ssur M asur d?
Healthcare professionals tra itionally use a evice known as a
sphygmomanometer along with a stethoscope - essentially a professional
version of the very same instrument you have purchase . The
sphygmomanometer is a system consisting of an inflatable bla er containe
within a cuff, inflation bulb with air control valve, an pressure measuring
manometer (gauge). The gauge may be mechanical or mercurial. The cuff is
wrappe aroun the limb an inflate to constrict bloo flow to the artery. As
pressure is release from the cuff through the eflation valve, bloo flow
returns to the artery pro ucing pulse beats known as Korotkoff soun s, which
are etecte with the stethoscope. Systolic pressure is recor e at the onset
of these soun s. Diastolic pressure is generally recor e when the soun s
isappear (when bloo flow to the artery returns to normal).
3.9. How should I r cord my blood pr ssur ?
Recor your bloo pressure by setting up a simple chart in a spiral-boun
notebook as shown below, or use the inclu e recor book.
Dat Tim R ading Puls
4/24 7:50AM 128/83 72
4/25 8:00AM 135/77 77
4/26 7:45AM 130/75 71
4/27 2:00PM 153/89 80
If you like you can a a column for comments about your con ition at the time of
measurement, or a listing of any factors that may have influence your rea ings
(such as "ha a col ", or "just returne from vacation").
For best results, an with time permitting, 3 successive measurements

11
may be taken aily. Make sure to allow at least 5 minute intervals
between measurements. Discar any rea ing that appears suspect an
recor the average of the remaining rea ings. If this metho is use , be
sure to note that the rea ings are average .
On the A vantage™ Ultra (6023N) mo el, PC Link software is available.
Recor s can be automatically transferre to your Win ows computer. Many
smart phone an tablet apps allow you to recor , cart, an share your BP
measurements. ADC®recommen s Microsoft®Healthvault™.
4. COMPONENTS OF YOUR BLOOD PRESSURE MONITOR
The illustration shows your bloo pressure monitor, consisting of:
Automatic Bloo Pressure Monitor, Cuff, Instruction Book, Recor Book,
an Carry Case.
Each mo el has its own specific cuff:

12
Mod l It m No D scription
6021N, 6022N 850-6022N Wi e Range Soft Cuff
For arm circumference: 8.7−16.5” (22−42 cm)
6021NX 850-6022NX Large A ult Soft Cuff
For arm circumference: 12.5−20.4” (32−52 cm)
6021NSA 850-6021NSA Small A ult Soft Cuff
For arm circumference: 6.7−8.7” (17−22 cm)
6023N 850-6023N Wi e Range Rigi Cuff
For arm circumference: 8.7−18.1” (22−46 cm)
NOTE: Arm circumference shoul be measure with a measuring tape in the
mi le of the relaxe upper arm. Do not force cuff connection into the
opening. Make sure the cuff connection is not pushe into the AC a apter
port. If the cuff is too small, call 1-800-232-2670 for further information. You
may prefer to use one of our wrist-type monitors.
NOTE: If you ever nee to buy a replacement cuff, use only ADC®bran .
5. SETTING UP YOUR BLOOD PRESSURE MONITOR
5.1. Ins rting th Batt ri s
After you have unpacke your evice,
insert the batteries. The battery
compartment is locate on the un ersi e
of the evice (see illustration).
Remove cover as illustrate .a)
Insert the batteries (4 x AA, 1.5V), observing the in icate polarity.b)
Att ntion!
If a battery warning appears in the isplay, the •
batteries are almost ischarge an must be replace .
After battery warning appears, the evice will not •
work until batteries have been replace .

13
If the bloo pressure monitor is not use for long perio s, remove the•
batteries from the evice.
Use “AA” Long-Life or Alkaline 1.5V batteries. Do not use rechargeable•
batteries.
Functional check: Press the «MEMORY» button own to test all the•
isplay elements. When functioning correctly many icons will appear.
5.2. Using th AC Pow r Adapt r
It is possible to operate the Automatic Bloo
Pressure Monitor with an AC a apter.
Push the plug into the port on the right si e 1.
of the evice.
Plug the AC a apter into a 120V power socket.2.
The evice is rea y for measurement.
Test that power is available by pressing the 3.
«ON/OFF» button.
NOTE:
Use only the AC a apter provi e with your evice. ADC®is not•
responsible for the warranty servicing/repair of the monitor if any other
a apter is use .
No power is taken from the batteries while the AC•
a apter is connecte to the evice.
Consult ADC®if you have any questions relating to•
the AC a apter.
5.3. Cuff Conn ction
Insert the cuff tube into the opening provi e on•
the left si e of the evice as shown in the picture.
5.4. S tting th Tim and Dat
This bloo pressure monitor incorporates an integrate clock with ate
isplay. The evice will also store the ate an time of each measurement in
its memory. After new batteries have been inserte , the evice will request
the ate an time to be reset.

14
To set the ate, begin with the year. The 4 characters1.
(2014) on the screen will blink. You can change the year
by pressing the «MEMORY» button. To confirm an set
the year, press the «TIME» button.
The evice will automatically a vance to the month. 2.
To change the month, use the «MEMORY»
button. To confirm an set the month, press
the «TIME» button.
To set the ay, hour, an minutes, use the same3.
steps. Push the «MEMORY» button to change the
isplay value. Press the «TIME» button to confirm
an set the value.
Once you have set the minutes an presse the «TIME» button,4.
the ate an time are set an the time is isplaye .
NOTE
If you want to change ate an time, press an hol the «TIME» button•
own for approx. 5 secon s until the user icon flashes. Press the
«TIME» button again, an then you can enter the new values as
escribe above.
A single press of the «MEMORY» button or «TIME» button a vances•
one operation.
Hol ing the button own spee s up the proce ure.•
5.5. S l ct th Us r
This bloo pressure monitor is esigne to store
99 measurements for each of two users. Before
taking a measurement, be certain that the correct
user has been selecte .
With the unit off, press an hol the «TIME»a)
button until the user icon starts blinking.
Press the «MEMORY» button to toggle between users.b)
Press the «ON/OFF» button to make your selection.c)

15
5.6. S l cting M asur m nt Mod (6022N, 6023N only)
This instrument enables you to select either stan ar (single
measurement) or measurement averaging mo e (automatic triple
measurement).
To select Stan ar mo e, push the switch on the si ea)
of the instrument towar s position "1."
To select Averaging mo e, push the switch towar position "3." b)
Note the MAM A vantage™Averaging mo e icon will
illuminate on the isplay.
If you select 1, then only one measurement will be taken. If you
select 3, the unit will inflate an eflate three times resulting in
one final average.
5.7. Using MAM Advantag ™ Av raging Mod (6022N,
6023N only)
In MAM A vantage™Averaging mo e, three measurements are1.
automatically taken in succession an the result then
automatically analyze an isplaye . Because your bloo
pressure constantly fluctuates, a result etermine in this way is
more reliable than one pro uce by a single measurement.
After pressing the «ON/OFF» button, the MAM A vantage™
2.
Averaging mo e icon appears in the isplay.
The bottom right han section of the isplay shows a 1, 2, or 3 to3.
in icate which of the 3 measurements is currently being taken.
There is a break of 15 secon s between the measurements (154.
secon s are a equate accor ing to “Bloo Pressure Monitoring,
2001, 6:145-147” for oscillometric instruments). A count own
in icates the remaining time an a beep will soun 5 secon s
before the 2n an 3r rea ings will begin.
The in ivi ual results from measurements 1, 2 an 3 are not5.
initially isplaye .
6
0
2
2
N
6
0
2
3
N
M
o
d
e
l
s
O
n
l
y
1 3

16
NOTE: If you want to s ach of th individual r adings making
up a triplicat r ading, turn th unit off, th n pr ss and hold th
M mory button for 3 s conds imm diat ly aft r a MAM
Advantag ™Av raging Mod m asur m nt. Not : You can only
s th individual r adings on tim imm diat ly following an
Av raging Mod m asur m nt. S s ction 5.6.
Do not remove the cuff between measurements.
6. MEASUREMENT PROCEDURE
6.1. B for M asur m nt:
Avoi eating an smoking as well as all forms of exertion irectly before•
measurement. These factors influence the measurement result. Fin time
to relax by sitting in an armchair in a quiet atmosphere for about ten
minutes before taking a measurement.
Remove any garment that fits closely to your upper arm.•
Always measure on the same arm (normally left).•
Always compare measurements taken at the same time of ay, since bloo•
pressure changes uring the course of the ay, as much as 20-40 mmHg.
6.2. Common Sourc s of Error:
NOTE: Comparable bloo pressure measurements always require the same
con itions! Con itions shoul always be quiet.
All efforts by the user to support the arm can increase bloo pressure.•
Make sure you are in a comfortable, relaxe position an o not flex any of
the muscles in the measurement arm uring the measurement. Use a
cushion for support if necessary.
If the arm artery lies consi erably lower or higher than the heart, an•
erroneously high or low bloo pressure will be measure ! Each 15cm (6
inch) ifference in height between your heart an the cuff results in a
measurement error of 10 mmHg!
Cuffs that are too narrow or too short result in false measurement values.•
Selecting the correct cuff is extremely important. Cuff size is epen ent
upon the circumference of the arm (measure in the center).
The permissible range is printe on the cuff. If this is not suitable for your

17
The permissible range is printe on the cuff. If this is not suitable for your•
use, please call 1-800-232-2670.
NOTE: Only use approve ADC®cuffs!
A loose cuff or a si eways protru ing air pocket causes false measurement•
values.
With repeate measurements, bloo accumulates in the arm, which can•
lea to false results. Consecutive bloo pressure measurements shoul be
repeate after a 1 minute pause or after your arm has been hel up in or er
to allow the accumulate bloo to flow away. If you eci e to take your
Averaging Mo e measurement again, be sure to wait at least one minute
beforehan .
6.3. Fitting th Rigid Cuff (6023N only)
The cuff is pre-forme for easier use. Remove tight a)
or bulky clothing from your upper arm.
Wrap the cuff aroun your upper left arm.b)
The rubber tube shoul be on the insi e of
your arm exten ing ownwar to your
han . Make certain the cuff lies
approximately 1/2−3/4” (1−2 cm) above the elbow.
Important! The re strip on the e ge of the cuff (Artery
Mark) must lie over the artery which runs own the inner
si e of the arm.
To secure the cuff, wrap it aroun your arm an pressc)
the hook an loop closure together.
There shoul be little free space between your arm)
an the cuff. You shoul be able to fit 2 fingers
between your arm an the cuff. Cuffs that on’t fit
properly result in false measurement values. Measure
your arm circumference if you are not sure of proper fit.
Lay your arm on a table (palm upwar ) so the cuff is at thee)
same height as your heart. Make sure the tube is not kinke .
Remain seate quietly for at least two minutes before f)
you begin the measurement.
Left Arm
tube

18
6.4 Fitting th D-Bar Cuff (6021N, 6022N mod ls)
a) Pass the en of the cuff through the flat metal
ring so that a loop is forme . The hook an loop
closure must be facing outwar .
b) Place the cuff over the left upper arm so that
the tube is closer to your lower arm.
c) Lay the cuff on the arm as illustrate . Make certain
that the lower e ge of the cuff lies approximately
3/4” to 1” (2 to 3cm) above the elbow an that the
tube is closer to the inner si e of the arm.
Important! The small re strip (Artery Mark) on the
cuff must lie exactly over the artery which runs own the inner
si e of the arm.
) Tighten the cuff by pulling the en an close
the cuff by affixing the hook an loop closure.
To verify a correct fit, the small white triangle
on the outsi e of the cuff shoul fall between
the 2 range lines.
e) There shoul be little free space between the arm
an the cuff. You shoul be able to fit 2 fingers between your arm an the
cuff. Clothing must not restrict the arm. Any piece of clothing which oes,
must be remove . Cuffs that on’t fit properly result in false measurement
values. Measure your arm circumference if you are not sure of proper fit.
Other size cuffs are available (Page 12).
f) Lay your arm on a table (palm upwar ) so the cuff is at the same height as
your heart. Make sure the tube is not kinke .
g) Remain seate quietly for at least two minutes before you begin the
measurement.
Comm nt: If it is not possible to fit the cuff to your left arm, it can also be
place on your right arm. However, all measurements shoul be ma e using
the same arm. Comparable bloo pressure measurements always require the
same con itions (Relax for several minutes before taking a measurement).
Left Arm
tube
Artery
Mark
Range
Triangle

6.5. M asur m nt Proc dur
After the cuff has been appropriately positione an
connecte to the monitor, the measurement can begin:
Press the «ON/OFF» button. The built-in pump begins to1.
inflate the cuff. In the isplay, the increasing cuff pressure
is continually isplaye .
After a suitable inflation pressure has been reache , the2.
pump stops an the pressure gra ually falls, with cuff
pressures being isplaye . If that inflation pressure is not
sufficient, the monitor automatically re-starts.
When the instrument etects a pulse, the heart symbol in the3.
isplay starts to flash an a beep is hear for every heartbeat.
When the measurement has conclu e , a long beep tone soun s. The4.
systolic, an iastolic bloo pressures an pulse rate now appear in the
isplay.
The appearance of this symbol signifies that an irregular5.
heartbeat was etecte . This in icator is only a caution. It
is important that you be relaxe , remain still an o not talk
uring measurements.
NOTE: We recommen contacting your physician if you see
this in icator frequently. See Section 8 (page 23) for more
information.
The measurement rea ings remain on the isplay until you switch off the6.
instrument. If no button is presse for a perio of 1 minute the instrument
switches itself off in or er to preserve the batteries.
When the unit is set to the MAM setting, 3 separate measurements7.
will take place in succession after which your result is calculate an
isplaye as a single, average measurement. There is a 15 secon
resting time in-between each measurement. A count own in icates the
remaining time an a beep will soun 5 secon s before the 2n an
3r rea ings will begin.
19

20
NOTE: If one of the measurements causes an error message, it will be repeate
one more time. If any a itional error occurs, the measurement will be
iscontinue an an error co e will be isplaye .
Expanding th av rag d m asur m nt to s th thr individual
r adings: This function allows you to vi w th thr individual
m asur m nts us d to calculat th ADC®Av raging Mod
T chnology™m asur m nt. Aft r taking an av raging mod
m asur m nt turn unit off, hold th M mory button for 3 s conds until
you h ar a short b p. (Do not hold th button long r than 7 s conds or
you will d l t all th r adings in th m mory!) L t go of th button and
watch th scr n. It will automatically scroll through th thr
m asur m nts us d in th m asur m nt.
6.6. R ading M asur m nt R sults:
When the measurement has been conclu e , a long
beep tone soun s. The measure systolic
an iastolic bloo pressure values, as well as
the pulse are now isplaye .
The appearance of this symbol signifies
that an irregular heartbeat was etecte .
This in icator is only a caution.
NOTE: We recommen contacting your physician if you see this in icator
frequently. See Section 8 (page 23) for more information.
To prolong the batteries’ life the evice switches off automatically if no
button is presse for 1 minute. Otherwise you can switch it off by pressing
the «ON/OFF» button.
6.7. Using th Morning/Ev ning Hyp rt nsion Function (6022N, 6023N
mod ls)
Morning Hypertension usually occurs as a surge in bloo pressure upon waking
up; this BP monitor will average rea ings taken between 4:00am an 11:59am.
Systolic
bloo
pressure
Diastolic
Bloo
Pressure
Pulse
Other manuals for Advantage 6021N
1
This manual suits for next models
2
Table of contents
Other ADC Blood Pressure Monitor manuals

ADC
ADC Advantage 6021 User manual

ADC
ADC Diagnostix E-sphyg 7002 User manual

ADC
ADC Diagnostix 700 Series Maintenance manual

ADC
ADC ADvantage 6013 User manual

ADC
ADC e-sphyg 3 User manual

ADC
ADC Advantage 6021N Manual

ADC
ADC Prosphyg 760 Series User manual

ADC
ADC 6012 User manual

ADC
ADC 6012 User manual

ADC
ADC e-sphyg 2 User manual